background image

- 69 -

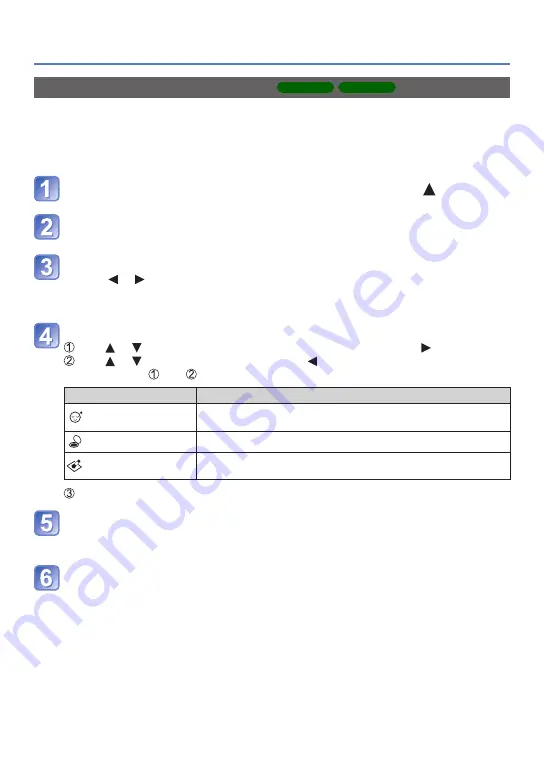
Retouching pictures

[Beauty Retouch] 

DMC-FS40


DMC-FS41

Still pictures taken by the camera that recognise the subject as a face can be retouched 

using the makeup effect etc., to enhance the portrait.

 •New pictures are created after editing pictures with [Beauty Retouch]. Before starting to 

edit, make sure that there is enough free space in the built-in memory or memory card.

Select a still picture that has a face in it and press 
Use cursor button to select [Beauty Retouch] and press 

[MENU/SET]
Use cursor button to select a face and press [MENU/SET]

 •Press   or   to move the cursor to select a face. If the cursor does not move to 

a face, it means that the camera cannot detect this face and thus it cannot be 

selected.

Set the effects

  Use   or   to select the effect that you want to apply and press 

  Use   or   to select the setting and press 

 •Repeat steps   and   to set another effect.

Menu item

Settings

[Aesthetic Retouch]

Creates smooth, clear skin or enhances the whiteness of eyes 

and teeth.

[Foundation]

Adjusts the skin colour.

[Make Up Retouch]

Enhances the colour of lips, renders faces with a three-

dimensional look, or creates a sharper outline of the eyes.

  Press [MENU/SET] to end the retouching operation

Use cursor button to select [Yes] and press [MENU/SET]

 •A screen comparing the original picture to the picture with effects applied is 

displayed.

Press [MENU/SET]

 •A confirmation screen is displayed. If you select [Yes], the new retouched still 

picture is saved.

Summary of Contents for Lumix DMC-S2

Page 1: ...1211KZ0 Operating Instructions for advanced features Digital Camera Model No DMC FS40 DMC FS41 DMC FS28 DMC S5 DMC S2 DMC FS40 DMC FS41 DMC FS28 DMC S5 DMC S2 Before use please read these instructions completely ...

Page 2: ...nt Auto Mode 22 Automatic Scene Detection 23 About flash 23 About the Happy colour setting 23 Notes on setting items 24 Taking motion pictures Motion Picture Mode 25 Viewing your pictures Normal Play 26 Viewing motion pictures 27 Zooming in and viewing Playback Zoom 28 Viewing a list of pictures Multi Playback 29 Viewing pictures by their recording date Calendar Playback 30 Deleting pictures 31 To...

Page 3: ... S2 61 Color Mode 62 AF Assist Lamp 62 Red Eye Removal 62 Stabilizer 63 Date Stamp 63 Clock Set 63 Application View Different playback methods Playback Mode 64 Slide Show 65 Filtering Play 66 Calendar 67 Retouching pictures 68 Auto Retouch 68 Beauty Retouch DMC FS40 DMC FS41 69 Using the Playback menu 71 Upload Set 71 Resize 72 Cropping DMC FS40 DMC FS41 73 Favorite 74 Print Set DMC FS40 DMC FS41 ...

Page 4: ...e into contact with the camera Avoid using the camera under the following conditions which present a risk that sand water or foreign material may enter the camera through the lens or openings around buttons Be especially careful because these conditions may damage the camera and such damage may not be repairable In extremely dusty or sandy places In the rain or by the shore where the camera may be...

Page 5: ...ing of certain material may be restricted even for the purpose of personal use Also refer to Usage cautions and notes 98 Please note that the actual controls and components menu items and other information for your digital camera may differ from those in the illustrations and screens provided in this manual When operation or other information is more or less the same between models DMC FS40 DMC FS...

Page 6: ...xt Battery Charger is indicated as battery charger or charger in the text SD Memory Card SDHC Memory Card and SDXC Memory Card are indicated as card in the text Please dispose of all packaging appropriately Keep small parts in a safe place out of the reach of children Optional accessories Cards are optional You can record or play back pictures on the built in memory when you are not using a card 1...

Page 7: ...unctions of Main Parts 1 2 3 4 5 6 7 8 9 10 11 12 13 14 15 16 18 17 19 20 1 2 3 4 5 6 7 8 9 10 11 12 13 14 15 16 18 17 19 20 1 2 3 4 5 6 7 8 9 10 11 12 13 14 15 16 18 17 19 20 DMC FS40 DMC FS28 DMC S5 DMC S2 DMC FS41 ...

Page 8: ...on 18 11 Hand strap eyelet 12 AV OUT DIGITAL socket 78 82 85 13 Delete Return button 31 14 MENU SET button 15 Playback button 20 16 Cursor button 17 Tripod receptacle 18 Speaker 19 DC coupler cover For shop display purpose only When using an AC adaptor ensure that the Panasonic DC coupler for shop display purpose only and AC adaptor for shop display purpose only are used 20 Card Battery door 12 We...

Page 9: ...posure Compensation 48 Right cursor button Flash 45 In this manual the button that is used is shaded or indicated by The illustrations and screens in this manual may differ from the actual product Do not block the microphone when recording motion pictures Some tripods or unipods and some methods of holding the camera may block the speaker making it difficult to hear the beep etc ...

Page 10: ...ttery pack is used Use the dedicated charger and battery Insert the battery terminals and attach the battery to the charger Connect the charger to the electrical outlet Plug in type Inlet type Battery Charger model specific The AC cable does not fit entirely into the AC input terminal A gap will remain Charging light CHARGE On Charging in progress approx 120 min if fully depleted Off Charging comp...

Page 11: ... function is set to ON Recording once every 30 seconds with full flash every second recording Perform a zoom operation every recording W end T end or T end W end Turning the camera off every 10 recordings and leaving it until the temperature of the battery decreases Number reduced if intervals are longer e g to approx one quarter for 2 minute intervals under the above conditions Playback time Appr...

Page 12: ... sure that their orientation is correct Battery Insert all the way firmly until a locking sound is heard and check that the lever is hooked over the battery Card Insert all the way firmly until it clicks Card check orientation terminals face LCD Charged battery check orientation Do not touch the terminal Close the card battery door and slide the door in until you hear a locking sound ...

Page 13: ...tee the quality of this product Remove battery from camera after use Keep the battery in a plastic bag making sure that it is kept away from metallic objects such as clips when carrying or storing the battery To remove the card or battery turn the camera off and wait until the LCD monitor display is completely blank Failure to wait may cause the camera to malfunction and may damage the card or rec...

Page 14: ...er devices support this type of card http panasonic net avc sdcard information SDXC html Only the cards listed on the left with the given capacities are supported SDHC Memory Cards 4 GB 32 GB SDXC Memory Cards 48 GB 64 GB SD speed class refers to a specification for sustained write speeds Confirm the SD speed by checking the card label or other card related materials Example Please reformat the ca...

Page 15: ...ording time The number of pictures you can take and the recording time vary in proportion to card capacity and depending on recording conditions and type of card If you make Web upload settings the recording picture capacity and the recording time capacity of the card may be reduced Recording picture capacity still pictures Picture Size Built in memory 2 GB 32 GB 64 GB 16M 1 11 300 4910 9880 14M 2...

Page 16: ...ear month day hour minute display order or time display format and press to set To cancel Press button Press MENU SET Press MENU SET To return to the previous screen press button The clock is not set when the camera is shipped If the clock is not set the correct date cannot be printed when you order a photo studio to print the picture or when you stamp the date on the pictures with Date Stamp If t...

Page 17: ...d for approx 3 months even after battery is removed provided a fully charged battery was installed in the camera for 24 hours beforehand Select Clock Set from the Setup menu or Rec menu 35 Set the date and time Press to select the items year month day hour minute display order or time display format and press to set To cancel Press button ...

Page 18: ...g mode Intelligent Auto Mode 22 Take pictures with automatic settings Normal Picture Mode 40 Take pictures with your own settings Scene Mode 49 Take pictures according to scene Motion Picture Mode 25 Take motion pictures Set Rec menu 55 or Setup menu 35 as required Press MENU SET Use cursor button and MENU SET to select the menu Press button ...

Page 19: ...mera steady when you press the shutter button Be careful not to block the microphone or the speaker Zoom In Out DMC FS40 DMC FS41 Capture a wider area wide angle Enlarge the subject telephoto DMC FS28 DMC S5 DMC S2 Capture a wider area wide angle Enlarge the subject telephoto Flash self timer and other functions Self timer Changing information display Exposure Compensation Flash Flash Microphone S...

Page 20: ...k button Press MODE button Use cursor button to select playback mode and press MENU SET Playback mode Normal Play Mode 26 Displays all pictures that can be played back Slide Show Mode 65 Automatically plays back the still pictures in order in parallel with music Filtering Play Mode 66 Only pictures in selected categories and pictures set as favourite are displayed Calendar Mode 30 67 Pictures reco...

Page 21: ...a picture to be played back Play back motion pictures or panorama pictures Auto Retouch Beauty Retouch DMC FS40 DMC FS41 Previous Changing information display Next Editing or performing settings for pictures using the Playback menu 71 Press the Power button ...

Page 22: ...ointing the camera at the subject meaning that clear pictures can be taken without the need to make settings manually Display the screen for recording mode selection Select Intelligent Auto Mode Take pictures Press halfway press lightly to focus Press fully press the button all the way to record Shutter button Focus display When focus is aligned illuminated When focus is not aligned flashing ...

Page 23: ...r is detected Face Detection is activated and the focus and exposure are adjusted for the recognised faces About Backlight Compensation Backlight is a condition where a light shines from behind a subject When there is a backlight a subject appears darker and the camera automatically corrects the exposure by increasing the brightness of an entire image When the camera detects backlight is displayed...

Page 24: ...the following items are different from other recording modes Picture Size Color Mode and Burst DMC FS40 DMC FS41 on the Rec menu The settings for the following functions are fixed Auto Review 2 SEC DMC FS40 DMC FS41 ON DMC FS28 DMC S5 DMC S2 Stabilizer ON AF Assist Lamp ON i Resolution i ZOOM Auto Power Off 5 MIN White Balance AWB Sensitivity AF Mode Face Detection i Exposure ON Red Eye Removal ON...

Page 25: ...utomatically ends Additionally recording in progress may be stopped depending on the card used Display the screen for recording mode selection Select Motion Picture Mode Start recording Press halfway adjust the focus Press fully start recording Immediately release the shutter button after pressing it all the way The focus and zoom will remain as they were at the beginning of recording End recordin...

Page 26: ... 15 seconds This camera is compliant with the unified DCF Design rule for Camera File system standard formulated by the Japan Electronics and Information Technology Industries Association JEITA and with Exif Exchangeable image file format Files that are not DCF compliant cannot be played back Changing recording information display Press Press the Playback button Press again to enter the recording ...

Page 27: ...30 seconds 3m30s Motion picture icon Operations during motion picture playback Fast rewind 2 steps Single frame rewind while paused Stop Pause play Fast forward 2 steps Single frame forward while paused Volume can be adjusted with the zoom lever or the zoom button It may not be possible to properly play back motion pictures recorded using other cameras Motion pictures can be viewed on your compute...

Page 28: ...nt zoom position displayed for 1 sec 1x 2x 4x 8x 16x DMC FS40 DMC FS41 Turn the zoom lever to T side DMC FS28 DMC S5 DMC S2 Press the T side of the zoom button DMC FS40 DMC FS41 Turn the zoom lever to W side DMC FS28 DMC S5 DMC S2 Press the W side of the zoom button Move zoom position Use cursor button to move the zoom position Playback zoom cannot be used during motion picture playback ...

Page 29: ...n 30 picture screen Calendar Playback DMC FS40 DMC FS41 Turn the zoom lever to W side DMC FS28 DMC S5 DMC S2 Press the W side of the zoom button DMC FS40 DMC FS41 Turn the zoom lever to T side DMC FS28 DMC S5 DMC S2 Press the T side of the zoom button When you select a picture using the cursor button and press MENU SET on the 12 picture or 30 picture screen the selected picture is displayed on the...

Page 30: ...28 DMC S5 DMC S2 Press the W side of the zoom button DMC FS40 DMC FS41 Turn the zoom lever to T side DMC FS28 DMC S5 DMC S2 Press the T side of the zoom button When you select a recording date using the cursor button and press MENU SET the display method changes to the 12 picture screen Only months when pictures were taken are shown on the calendar screen Pictures taken without clock settings are ...

Page 31: ...cted pictures Card switch is in LOCK position Pictures not of DCF standard 26 Press to delete displayed picture A confirmation screen is displayed Select Yes with cursor button and then press MENU SET Pictures will be deleted from the card if the card is inserted or from the built in memory if the card is not inserted Deleted pictures cannot be recovered ...

Page 32: ... picture and press MENU SET To cancel Press MENU SET again Use cursor button to select OK and press MENU SET Picture selected You can select All Delete Except Favorite in Delete All if there are pictures that have been set as Favorite 74 A confirmation screen is displayed Select Yes with cursor button and then press MENU SET May take time depending on number of pictures deleted ...

Page 33: ...screen is displayed Select Rec menu and press MENU SET Press to select AF Mode and press MENU SET Pages The pages can also be selected with the zoom lever or the zoom button Press to select a setting and then press MENU SET The selected setting is set To cancel Press button Settings Selected setting Press button several times The menu closes and the monitor returns to the previous screen ...

Page 34: ... screen can also be exited by pressing the shutter button halfway Menu type Rec menu In recording mode only Changing picture preferences 55 Enables you to set the colouring picture size and other items Setup menu Making the camera more convenient to use 35 Enables you to specify clock settings sound volume and so on to make the camera easier to use Playback menu In playback mode only Using your pi...

Page 35: ...a name When Destination has been selected To set summer time Press in step Press again to release the setting If you cannot find your destination in the area displayed on the screen set based on difference with home time is displayed on the screen for pictures recorded at the destination when they are played back When summer time is set the current time is advanced by 1 hour If the setting is canc...

Page 36: ... beep sounds Low High Mute Volume Adjust volume of sound from speakers 7 levels 0 1 2 3 4 5 6 Cannot be used to adjust TV speaker volume when connected to TV LCD Display Adjust brightness and colour of the LCD monitor Press to select the setting item and press to make adjustments Press MENU SET Some subjects may look different from their actual appearance but the recorded picture will not be affec...

Page 37: ...HOLD Auto review screen remains until a button other than is pressed OFF DMC FS28 DMC S5 DMC S2 ON OFF Settings fixed to 2 SEC in Intelligent Auto Mode DMC FS40 DMC FS41 Settings fixed to ON in Intelligent Auto Mode DMC FS28 DMC S5 DMC S2 In Panorama Shot and Photo Frame Scene Modes or in Burst Mode Auto Review performed regardless of setting Motion pictures cannot be automatically reviewed Reset ...

Page 38: ... portrait orientation Rotate and display only pictures displayed on a TV screen in portrait orientation OFF Rotate Disp cannot be used with motion pictures Still pictures taken with the lens surface facing up or down or still pictures taken on other cameras may not rotate Pictures cannot be rotated during Multi Playback Will only be displayed rotated on computer if in Exif compatible 26 environmen...

Page 39: ...res and other picture data will be deleted Do not turn off power or perform other operations during formatting Formatting the built in memory may take several minutes Consult the dealer or your nearest Service Centre if format cannot be successfully completed Language Change display language Set the language displayed on the screen Demo Mode View demonstration of functions Stabilizer Demo Extent o...

Page 40: ...osure Either use the flash or change the ISO Sensitivity settings Jitter alert display Aperture value Shutter speed Using the Rec menu to change settings and set up your own recording environment Changing recording information display Press Shutter button Display the screen for recording mode selection Select Normal Picture Mode Take a picture Press halfway press lightly to focus Press fully press...

Page 41: ...aligned green When focus is not aligned red Return to desired composition Press fully AF area Subjects environments which may make focusing difficult Fast moving or extremely bright objects or objects with no colour contrast Taking pictures through glass or near objects emitting light In dark or with significant jitter When too close to object or when taking pictures of both distant and close obje...

Page 42: ...d the shortest focusing distance changes in stages The focus display flashes and beep sounds when focus is not aligned Use the focus range displayed in red as a reference Even if the focus display is lit the camera may be unable to bring the subject into focus if it is out of range The AF area display size may increase when adjusting the focus when it is dark and depending on the zoom ratio used F...

Page 43: ...vibrate when the zoom lever or the zoom button is operated this is not a fault You can adjust the area of a picture to be taken using zoom DMC FS40 DMC FS41 Capture a wider area wide angle Enlarge the subject telephoto DMC FS28 DMC S5 DMC S2 Capture a wider area wide angle Enlarge the subject telephoto 1 m 1 m 5X When Extra Optical Zoom is set Optical Zoom range Zoom bar Digital Zoom range i Zoom ...

Page 44: ...oom ratio further the following zoom can be used in combination i Zoom You can use the camera s super resolution technology to increase the zoom ratio up to 2 times higher than the original zoom ratio while preventing deterioration of picture quality Select i ZOOM on i Resolution in the Rec menu 59 When i Resolution is set to i ZOOM super resolution technology is applied to the picture i ZOOM cann...

Page 45: ...d eye is automatically detected and still picture data is corrected Only when AF Mode is Face Detection The effect of red eye reduction varies depending on the subject and is affected by factors such as distance to the subject whether the subject is looking at the camera during preliminary flash and so on In some cases the effect of red eye reduction may be negligible Do not put your hands over th...

Page 46: ...nsitivity setting is DMC FS40 DMC FS41 Max W Approx 40 cm 4 1 m 1 3 feet 13 feet Max T Approx 1 0 m 1 6 m 3 3 feet 5 2 feet DMC FS28 DMC S5 DMC S2 Max W Approx 40 cm 3 3 m 1 3 feet 11 feet Max T Approx 1 0 m 1 6 m 3 3 feet 5 2 feet Shutter speeds for each flash mode 1 60 1 1600th 1 8 2 1 1600th 2 Max 1 4 sec when in Sensitivity is set max 1 sec when Stabilizer is set to OFF or when blur is insigni...

Page 47: ... Use cursor button to select time duration and press MENU SET Take a picture Press the shutter button fully to start recording after the preset time Self timer indicator Flashes for set duration To cancel while in operation Press MENU SET Focus will be automatically adjusted immediately before recording if shutter button is pressed fully here After Self timer indicator stops flashing it may then b...

Page 48: ... value and press MENU SET No compensation 0 If the picture is too dark adjust the exposure to the direction If the picture is too bright adjust the exposure to the direction After exposure adjustment the adjustment value for example is displayed in the bottom left corner of the screen The Exposure Compensation value you set is retained even after the camera is turned off Depending on the brightnes...

Page 49: ...enes Selecting a Scene Mode inappropriate for the actual scene may affect the colouring of your picture Following Rec menu settings will be automatically adjusted and cannot be selected manually Sensitivity i Exposure i Resolution Color Mode Using flash in Scene Modes 46 Display the screen for recording mode selection Select Scene Mode Select and set the scene Scene menu ...

Page 50: ...closer the camera is brought to the subject the greater the effect will be Soft Skin Smooths skin colours in bright outdoor daylight conditions portraits from chest upwards Tips The closer the zoom is positioned to the T telephoto edge and the closer the camera is brought to the subject the greater the effect will be Scenery Takes clear pictures of wide distant subjects How to select a scene 49 Us...

Page 51: ...m left to right Pan the camera in a small circular motion Pan the camera at a speed that turning halfway around in approx 4 seconds Pan the camera at a constant speed You may not be able to take pictures successfully if you move the camera too quickly or too slowly 1 sec 2 sec 3 sec Press the shutter button fully again to end recording You can also end the recording when you stop panning the camer...

Page 52: ...3200 Panorama pictures may not be created or pictures may not be recorded properly when taking pictures of the following subjects or when taking pictures in the following recording conditions Subjects that have a continuous monotone or pattern sky beach etc Moving subjects person pet vehicle waves or flowers swaying in the wind etc Subjects whose colours or patterns change quickly large displays e...

Page 53: ...Tripod self timer recommended Notes Shutter speed may slow down up to 8 seconds After recording the shutter may stay closed up to 8 seconds to process the signal This is not a malfunction Night Scenery Takes clear pictures of night scenes Tips Tripod self timer recommended Notes Shutter speed may slow down up to 8 seconds After recording the shutter may stay closed up to 8 seconds to process the s...

Page 54: ...otes Sunset Takes clear pictures of scenes such as sunsets High Sens Prevents blurring of subject in dark indoor conditions Select the aspect ratio and the picture size with cursor button and press MENU SET Glass Through Most suitable for taking pictures such as a landscapes through the transparent glass of a train vehicle or building Notes If there are stains such as dust or a reflection on the g...

Page 55: ...8 1536 0 3 M 640 480 12 5 M 4320 2880 10 5 M 4320 2432 10 5 M 3232 3232 Recording pixel level type 16 M 4608 3456 10 M 3648 2736 5 M 2560 1920 3 M 2048 1536 0 3 M 640 480 14 M 4608 3027 12 M 4608 2592 12 M 3456 3456 This setting is not available in Intelligent Auto Mode represent the aspect ratios of the still pictures Mosaic effect may appear depending on subject and recording conditions Setting ...

Page 56: ...entarily or noise to be recorded If you attempt to play motion pictures recorded with the camera on other devices playback may not be possible or the picture or sound quality may be poor Additionally incorrect recording information may be indicated Sensitivity For Rec menu setting procedures 33 Set ISO Sensitivity sensitivity to lighting manually We recommend higher settings to take clear pictures...

Page 57: ...Balance you set is retained even after the power is turned off White Balance setting may not be possible if the subject is too bright or too dark In such cases adjust the subject to an appropriate brightness and then set the White Balance again Only takes picture of white objects within frame step A picture may appear reddish or bluish when the White Balance is outside the AWB operational range Ev...

Page 58: ... distance away as faces within the yellow AF area are also focused Subject not centred in picture 23 area focusing Focuses on up to 23 points in each AF area AF area not displayed until focused Determined position for focus 1 area focusing Focuses on AF area in centre of picture Recommended when focus is difficult to align Cannot set to Face Detection in the following cases Panorama Shot Night Sce...

Page 59: ...ctures with sharper outlines and clearer resolution Also when i ZOOM is set the zoom ratio can be increased two times higher than the original zoom ratio while preventing deterioration of picture quality Recording mode Settings ON i ZOOM OFF About i ZOOM 44 The setting is fixed to i ZOOM in Intelligent Auto Mode The setting is fixed to ON in High Sens Scene Mode OFF in Panorama Shot Scene Mode and...

Page 60: ...umber of pictures taken using burst Built in memory Approx 15 pictures or more Card Approx from 15 pictures to maximum of 100 pictures The number of pictures that can be taken using burst varies depending on the recording conditions and the type of card The camera fixes its focus along with both exposure and White Balance with the first picture to be taken Sensitivity is automatically adjusted The...

Page 61: ... of still pictures taken while shutter button is held down Recording mode Settings OFF Maximum burst speed Approx 1 5 fps DMC FS28 DMC S2 Maximum burst speed Approx 1 4 fps DMC S5 You can record a series of still pictures successively until the card or built in memory is full but at some point the burst speed drops The timing at which the burst speed drops varies depending on the type of card and ...

Page 62: ... Lamp has an effective distance of approx 1 m 3 3 feet Do not block the lamp with your fingers or look at it from close range The AF Assist Lamp s effective distance becomes shorter when using the zoom and depending on subject conditions The setting is fixed to OFF in the following Scene Modes Scenery Night Scenery Sunset and Glass Through Scene Modes Red Eye Removal For Rec menu setting procedure...

Page 63: ...be taken with the recording date and time stamped on the still picture Recording mode Settings W O TIME WITH TIME OFF Date stamps on still pictures cannot be erased The date cannot be stamped when Burst is set The setting is fixed to OFF in Panorama Shot Scene Mode Do not request date printing in store or make date printing on printer for still pictures with date stamps Date printing may be overla...

Page 64: ...ety of ways When no card is inserted pictures are played back from the built in memory The Playback Mode automatically becomes Normal Play when switching from recording mode to playback mode Press the Playback button Display the screen for Playback Mode selection Select the method of playback ...

Page 65: ...SET 66 Favorite Play back pictures set as Favorite Use cursor button to set playback effects and press MENU SET Effect Select music and effects according to picture atmosphere AUTO only available with Category Selection setting NATURAL SLOW SWING URBAN OFF Setup Duration 1 SEC 2 SEC 3 SEC 5 SEC Only available when Effect is OFF Repeat ON OFF Music ON OFF Select Start with cursor button and press M...

Page 66: ...he Slide Show Filtering Play For switching Playback Mode 64 You can refine the selection of pictures to be viewed by narrowing them down to pictures in selected categories or to favourite pictures and then view those pictures Select the method to narrow down the displayed pictures Category Selection Display only pictures in the selected category Favorite Display pictures set as Favorite When Categ...

Page 67: ... 67 Different playback methods Playback Mode Calendar For switching Playback Mode 64 Select the date from the calendar screen to view only the pictures taken on that day 30 ...

Page 68: ... saved When OFF is selected you can restore a picture to its original condition before retouching DMC FS28 DMC S5 DMC S2 Select a still picture to retouch during playback and press A still picture retouched with colours and brightness is displayed Press MENU SET A confirmation screen is displayed If you select Yes the new retouched still picture is saved The retouch effect may be less apparent in ...

Page 69: ...e to a face it means that the camera cannot detect this face and thus it cannot be selected Set the effects Use or to select the effect that you want to apply and press Use or to select the setting and press Repeat steps and to set another effect Menu item Settings Aesthetic Retouch Creates smooth clear skin or enhances the whiteness of eyes and teeth Foundation Adjusts the skin colour Make Up Ret...

Page 70: ...ent It may not be possible to retouch still pictures taken with other cameras You cannot retouch motion pictures and still pictures recorded in Panorama Shot Scene Mode If the face is not detected properly it may not be possible to retouch the face as desired To take a still picture suitable for Beauty Retouch Take a picture of the face from the front Avoid taking a picture under very low lighting...

Page 71: ... pictures can be uploaded to Facebook and only motion pictures can be uploaded to YouTube Pictures on the built in memory cannot be set Copy pictures to a card 77 before making Upload Set settings Use cursor button to select SINGLE or MULTI and then press MENU SET Select picture and make setting SINGLE Use cursor button to select picture and press MENU SET MULTI Use cursor button to select picture...

Page 72: ...tate e mail attachment and use in web pages etc Still pictures recorded at the smallest recording pixel level cannot be further reduced SINGLE Use cursor button to select SINGLE and press MENU SET Use cursor button to select a still picture and press MENU SET Use cursor button to select size and press MENU SET Current size Size after change Confirmation screen is displayed If you select Yes the op...

Page 73: ...ity is reduced after resizing Cannot resize the following pictures Motion pictures Still pictures already stamped with the date and time Panorama pictures Cropping DMC FS40 DMC FS41 For Playback menu display and operation methods 33 Enlarge your still pictures and crop unwanted areas Use cursor button to select a still picture and then press MENU SET Select area to crop and press MENU SET Expand C...

Page 74: ...back your favourite pictures only or you can delete all pictures except your favourites Use cursor button to select SINGLE or MULTI and press MENU SET Use cursor button to select picture and press MENU SET SINGLE MULTI Favourite picture setting Favourite picture setting To cancel Press MENU SET again To clear all Select CANCEL in step and select Yes ...

Page 75: ...t steps and when using MULTI up to 999 pictures SINGLE MULTI Date print set No to print Date print set No to print Date print setting release Press To clear all Select CANCEL in step and select Yes Depending on the type of printer the printer settings may take priority over camera settings Cannot be set for files that are not compliant with the DCF standard Some DPOF information set by other equip...

Page 76: ...portant pictures Use cursor button to select SINGLE or MULTI and press MENU SET Use cursor button to select picture and press MENU SET SINGLE MULTI Picture protected Picture protected To cancel Press MENU SET again To clear all Select CANCEL in step and select Yes To cancel while releasing all Press MENU SET May not be effective when using other devices ...

Page 77: ...NU SET After all the pictures are copied from the built in memory to the memory card the display returns automatically to the playback screen Copying pictures may take several minutes Do not turn off power or perform other operations during copying If identical names folder file numbers are present in the copy destination a new folder for copying will be created when copying from built in memory t...

Page 78: ... socket shape can lead to faulty operation AV cable Optional White To audio socket When TVs or DVD recorders have an SD card slot Insert the SD Memory Card into the SD card slot You can play back only still pictures You cannot play back motion pictures You may not be able to play back panorama pictures Also you cannot perform automatic scrolling playback of panorama pictures When using both SDHC a...

Page 79: ...You can play back pictures on TVs in other countries regions which use the NTSC or PAL system when you set Video Out in Setup menu Pictures rotated to portrait may be blurred slightly Change picture mode settings on TV if aspect ratios are not displayed correctly on widescreen or high definition televisions ...

Page 80: ...e on your computer before using PHOTOfunSTUDIO 8 0 LE Windows XP Vista 7 This software allows you to copy still pictures or motion pictures to a computer and sort the copied pictures by their recording date and time model name of the digital camera used or other attributes You can write pictures to a DVD create a Slide Show using your preferred music or effects and so on before saving it to a DVD ...

Page 81: ... Windows 7 1 GHz or higher Display 1024 768 pixels or more 1920 1080 pixels or more recommended RAM Windows XP 512 MB or more Windows Vista Windows 7 1 GB or more 32 bit 2 GB or more 64 bit Free hard disk space 450 MB or more for installing software Refer to the Operating Instructions of PHOTOfunSTUDIO PDF for further information about the operating environment Insert the CD ROM with the supplied ...

Page 82: ...ccess is displayed USB connection cable always use cable supplied Connect camera to computer Please make sure you use the supplied USB connection cable Use of cables other than the supplied USB connection cable may cause malfunction Use cursor button on the camera to select PC and press MENU SET Use PHOTOfunSTUDIO to copy pictures to your computer For details on how to use PHOTOfunSTUDIO see the P...

Page 83: ...nly picture output can be performed It may not be possible to import if there are 1000 or more pictures on the card Folder and file names on computer Do not use any other USB connection cables except the supplied one Turn off power before inserting or removing memory cards When the battery begins to run out during communication a warning beep sounds Cancel communication via your computer immediate...

Page 84: ...UP EXE to start it If you have installed PHOTOfunSTUDIO from the CD ROM supplied Uploading tool LUMIX Image Uploader may start automatically Select the upload destination Do the further steps in accordance with the instructions displayed on the computer screen Because YouTube and Facebook services and specifications are subject to change operation of online services cannot be guaranteed in the fut...

Page 85: ...cancel print Press MENU SET Do not use any other USB connection cables except the supplied one Disconnect USB connection cable after printing Turn off power before inserting or removing memory cards When the battery begins to run out during communication a warning beep sounds Cancel printing and disconnect USB connection cable Use a sufficiently charged battery Check socket direction and insert st...

Page 86: ...elect pictures to print with MENU SET Press MENU SET again to release selection Use cursor button to select OK and press MENU SET Select All Print all pictures Print Set DPOF DMC FS40 DMC FS41 Print pictures selected in Print Set Favorite Print pictures selected as Favorite Use cursor button to select Print start and press MENU SET Print settings 87 Select Yes if print confirmation screen is displ...

Page 87: ...et to and make settings on the printer Consult your printer s operating manual Print with Date and Num of prints are not shown when you have selected Print Set settings DMC FS40 DMC FS41 Even with completed Print Set settings dates may not be printed depending on the shop or printer used DMC FS40 DMC FS41 When setting Print with Date to ON check the date printing settings on the printer printer se...

Page 88: ...area 41 8 Self timer Mode 47 Focus range Zoom 43 1 m 1 m 5X 9 ISO Sensitivity 56 Aperture value Shutter speed 40 Exposure Compensation 48 AF Assist Lamp 62 10 Current date time Age in years months 54 11 Elapsed recording time 25 12 Date Stamp 63 13 Save destination 14 Recording state 14 Number of recordable pictures 15 Remaining recording time 15 25 RXXhXXmXXs h m and s indicate hour minute and se...

Page 89: ...40 DMC FS41 3 Battery capacity 15 4 Picture number Total pictures 26 Elapsed playback time 27 5 Print settings 75 DMC FS40 DMC FS41 6 Recorded date and time World time setting 35 Age in years months 54 Aperture value Shutter speed 40 ISO Sensitivity 56 7 Recording Mode 18 Flash Mode 45 White Balance 57 Exposure Compensation 48 8 Recording quality 56 Motion picture recording time 27 XXhXXmXXs 9 Fol...

Page 90: ...ce Centre if display still remains Some pictures cannot be copied Copy could not be completed Pictures cannot be copied in following cases Picture of same name already exists in built in memory when copying from card File is not of DCF standard 26 Picture taken or edited on a different device Not enough space on built in memory Not enough memory on the card There is no space left on the built in m...

Page 91: ...e card If recording stops even when using a card of the recommended speed class 14 the data writing speed has dropped If this happens we recommend backing up the data on the memory card and formatting it 39 Motion picture recording may be automatically terminated with certain cards A folder cannot be created Folder numbers in use have reached 999 Save needed data on a computer or other device and ...

Page 92: ...y cloth Lens is foggy 4 Recorded pictures are too bright too dark Adjust the exposure 48 2 3 pictures are taken when I press the shutter button just once Camera is set to use Burst 60 Focus not aligned correctly Not set to mode appropriate for distance to subject Focus range varies according to recording mode Subject outside of focus range Caused by jitter or subject movement 40 Recorded pictures ...

Page 93: ...s low We recommend backing up the data on the memory card and reformatting it 39 Panorama picture recording stops before finishing If the pan motion of the camera is too slow the camera assumes that the operation has been aborted and stops recording If the pan motion of the camera is too shaky when it is moved toward the recording direction the camera stops recording To record panorama pictures pa...

Page 94: ...edited on computer or taken with a different device Battery removed immediately after picture taken or picture taken with low battery Use Format to delete 39 The Playback volume and beep volume are low The speaker is blocked Incorrect date displayed in Calendar Playback Picture edited on computer or taken with a different device Clock Set is incorrect 16 Incorrect date may be displayed in Calendar...

Page 95: ...s Additionally motion pictures recorded with this camera cannot be played on Panasonic LUMIX digital cameras sold before July 2008 However motion pictures recorded with LUMIX digital cameras sold before this date can be played on this camera TV computer printer No image appear on TV Image blurred or not coloured Not connected correctly 78 The television has not been switched to auxiliary input Che...

Page 96: ...rect Confirm that the PC is connected to the Internet Confirm that the resident software such as anti virus software and the firewall etc is not blocking access to YouTube or Facebook Check the YouTube or Facebook site Cannot print when connecting to printer Printer is not compatible with PictBridge Select PictBridge PTP when connecting the camera to your computer 85 Cannot print the date Make dat...

Page 97: ...and the monitor brightness may also change but this is due to aperture settings being made Does not affect recording Clock is incorrect Camera has been left for a long period Reset the clock 16 When using zoom picture becomes slightly warped and the edges of the subject become coloured Pictures may be slightly warped or coloured around the edges depending on the zoom ratio but this is not a fault ...

Page 98: ...objects that may be influenced magnetically close to the speaker Magnetised objects such as bank cards commuter passes watches may be adversely affected by the magnetic influence of the speaker Do not extend the supplied cord or cable Do not allow camera to come into contact with pesticides or volatile substances can cause surface damage or coating to peel Never leave the camera and the battery in...

Page 99: ...unction The LCD monitor screen has more than 99 99 effective pixels with a mere 0 01 of the pixels inactive or always lit The spots will not be recorded on pictures on the built in memory or a card About charging the battery The time required for charging varies depending on conditions of battery usage Charging takes longer at high or low temperatures and when the battery has not been used in some...

Page 100: ...contain personal information Disclaimer Data containing personal information can be altered or lost due to malfunction static electricity accidents breakdowns repairs or other operations Panasonic will not be liable for any damage that occurs direct or indirect as a result of the alteration or loss of data containing personal information When ordering repairs or transferring disposing of the camer...

Page 101: ...s Windows and Windows Vista are either registered trademarks or trademarks of Microsoft Corporation in the United States and or other countries YouTube is a trademark of Google Inc This product uses DynaFont from DynaComware Corporation DynaFont is a registered trademark of DynaComware Taiwan Inc Other names company names and product names printed in these instructions are trademarks or registered...

Reviews: