background image

EB

SQT0962

M0715KZ0

Basic Operating Instructions
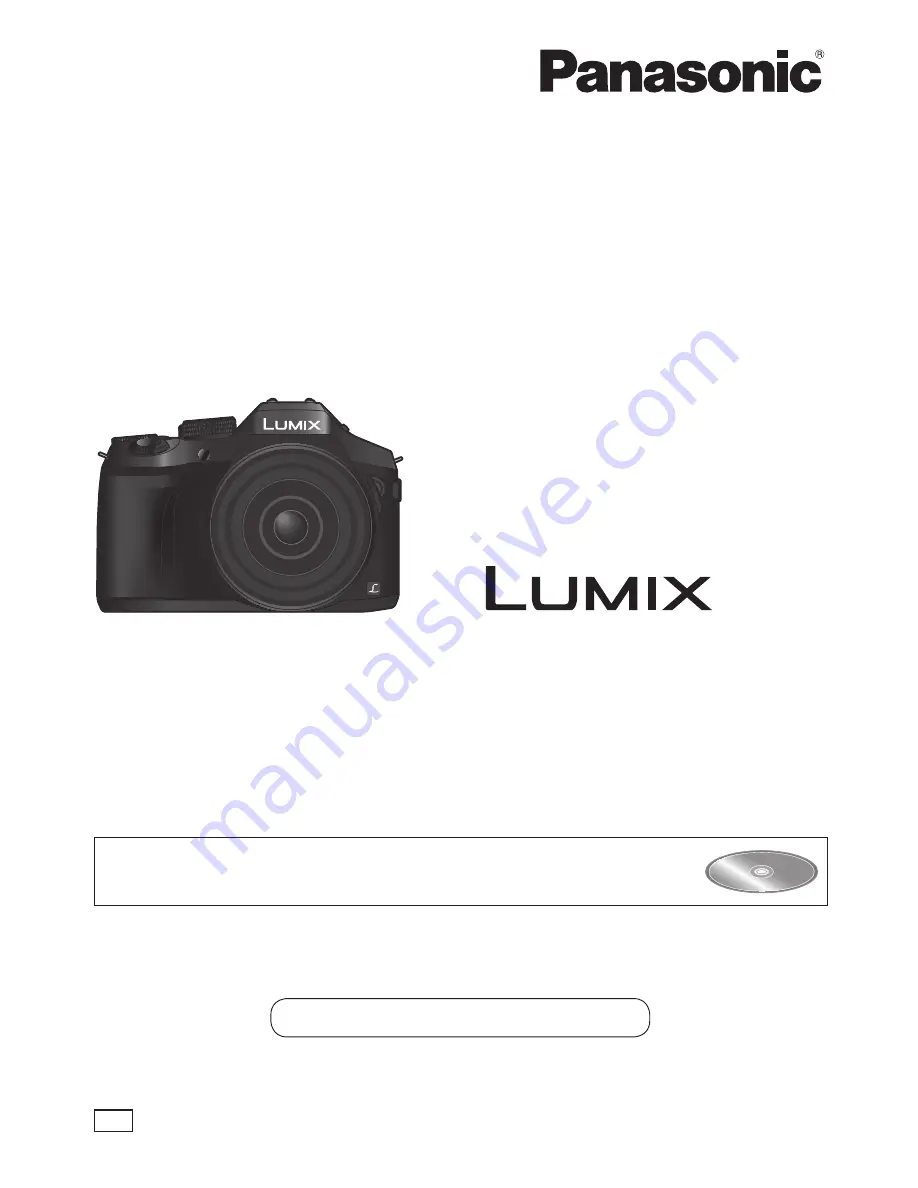
Digital Camera

Model No.

DMC-FZ330

Please read these instructions carefully before using this product, and save this manual 
for future use.

More detailed instructions on the operation of this camera are 
contained in “Operating Instructions for advanced features (PDF 
format)” in the supplied disc.

Web Site: http://www.panasonic.com

Model number suffix “EB” denotes UK model.

Summary of Contents for Lumix DMC-FZ330

Page 1: ...tructions carefully before using this product and save this manual for future use More detailed instructions on the operation of this camera are contained in Operating Instructions for advanced features PDF format in the supplied disc Web Site http www panasonic com Model number suffix EB denotes UK model ...

Page 2: ...tion for Your Safety WARNING To reduce the risk of fire electric shock or product damage Do not expose this unit to rain moisture dripping or splashing Use only the recommended accessories Do not remove covers Do not repair this unit by yourself Refer servicing to qualified service personnel The socket outlet shall be installed near the equipment and shall be easily accessible Product identificati...

Page 3: ...eet long Always use a genuine Panasonic shutter remote control DMW RSL1 optional Keep this unit as far away as possible from electromagnetic equipment such as microwave ovens TVs video games etc If you use this unit on top of or near a TV the pictures and or sound on this unit may be disrupted by electromagnetic wave radiation Do not use this unit near cell phones because doing so may result in no...

Page 4: ...rver http www doc panasonic de Contact to Authorized Representative Panasonic Marketing Europe GmbH Panasonic Testing Centre Winsbergring 15 22525 Hamburg Germany This product is intended for general consumer Category 3 This product on purpose to connect to access point of 2 4 GHz WLAN These symbols indicate separate collection of waste electrical and electronic equipment or waste batteries More d...

Page 5: ...ovable fuse cover you must ensure that it is refitted when the fuse is replaced If you lose the fuse cover the plug must not be used until a replacement cover is obtained A replacement fuse cover can be purchased from your local dealer Before use Remove the connector cover How to replace the fuse The location of the fuse differ according to the type of AC mains plug figures A and B Confirm the AC ...

Page 6: ...tons Function buttons 24 Recording Taking pictures with automatic settings Intelligent Auto Mode 25 Switching between Intelligent Auto Plus Mode and Intelligent Auto Mode 25 Taking pictures using a handheld camera iHandheld Night Shot 25 Combining pictures into a single still picture with rich gradation iHDR 26 Defocusing the background Defocus control function 26 Recording images by changing the ...

Page 7: ...ic Image App 42 Connecting to a smartphone 43 Taking pictures via a smartphone remote recording 44 Playing back pictures in the camera on a smartphone 44 Saving pictures in the camera to a smartphone 44 Sending pictures in the camera to social networking services 44 Adding location information to pictures in the camera from a smartphone 45 Combining motion pictures recorded with Snap Movie accordi...

Page 8: ...camera wipe them off with a dry soft cloth Not doing so may result in incorrect recognition of touch operations or erroneous flash display If the monitor is closed when such liquids are present malfunction may result Condensation Condensation may occur on the lens monitor or in the viewfinder when the room temperature or humidity changes rapidly This may cause the image to temporarily become hazy ...

Page 9: ... and SDXC Memory Card are indicated as card in the text Consult the dealer or your nearest Service Centre if you lose the supplied accessories You can purchase the accessories separately Please dispose of all packaging appropriately Keep small parts in a safe place out of the reach of children The illustrations and screens in this manual may differ from the actual product While the camera is acces...

Page 10: ... mode 13 Flash 14 Stereo microphone Be careful not to cover the microphone with your finger Doing so may make sound difficult to record 15 Hot shoe 16 Flash open lever The flash opens and recording with the flash becomes possible 17 Diopter adjustment dial 22 18 LVF button 22 Fn4 button 24 19 MIC socket An external microphone optional can record higher quality audio than the built in microphone 20...

Page 11: ... 24 38 Fn3 button 24 37 REMOTE socket 38 HDMI socket 39 AV OUT DIGITAL socket 40 DC coupler cover 15 Always use a genuine Panasonic AC adaptor DMW AC10E optional When using an AC adaptor ensure that the Panasonic DC coupler DMW DCC8 optional and AC adaptor DMW AC10E optional are used When using an AC adaptor use the AC mains lead supplied with the AC adaptor 41 Card Battery door 15 42 Release leve...

Page 12: ...nd align the mounting mark on the lens hood with the mark at the bottom of the camera Make sure the lens hood is secured properly and its reflection does not fall on images Mounting mark on the lens hood Mark at the bottom of the camera When temporarily detaching and carrying the lens hood we recommend attaching with the orientation reversed Return it to the normal direction when taking pictures I...

Page 13: ...string through the lens cap and then pass the lens cap through the loop formed by the string 3 Fasten the string 4 Attach the lens cap Attaching the Shoulder Strap We recommend attaching the shoulder strap when using the camera to prevent it from dropping 1 2 3 Pull the shoulder strap 2 cm 0 066 feet or more 4 Make sure the strap does not come off Perform steps 1 to 4 and then attach the other sid...

Page 14: ...in a location where the ambient temperature is between 10 C and 30 C 50 F to 86 F Battery charger connector is dirty Clean with a dry cloth The AC mains lead does not fit entirely into the AC input terminal A gap will remain Charge the battery with the charger indoors 3 Detach the battery after charging is completed Notes on charging time Charging time Approx 140 min The charging time indicated ab...

Page 15: ...til it clicks To remove the card push the centre of the card until it clicks then pull the card out upright DC coupler cover Make sure the DC coupler cover is securely closed and then close the card battery door About the Card The following SD standard based cards Panasonic brand recommended can be used Type of Card Capacity Notes SD Memory Cards 512 MB 2 GB Operation of the cards on the left has ...

Page 16: ...ng Confirm the SD speed by checking the card label or other card related materials Rec Format Rec Quality Speed class Label example AVCHD All Class 4 or higher MP4 FHD HD VGA MP4 4K High Speed Video UHS Speed Class 3 When recording 4K photos UHS Speed Class 3 Latest information http panasonic jp support global cs dsc This site is available in English only Formatting the card initialisation Format ...

Page 17: ... cause damage to this unit When not using the monitor it is recommended that you close it with the screen facing inward to prevent dirt and scratches Setting the clock The clock is not set when the camera is shipped 1 Turn the camera on The status indicator lights up when you turn this unit on 2 Press MENU SET 3 Press to select the items year month day hour minute and press to set 4 Press MENU SET...

Page 18: ...ve mode to Single 1 Press the shutter button halfway press lightly to focus on the subject The aperture value and shutter speed are displayed If the aperture value and shutter speed are shown in red and flashing you do not have the appropriate exposure unless you are using the flash Focus display When focus is aligned illuminated When focus is not aligned flashing Shutter speed Aperture value 2 Pr...

Page 19: ... Video Mode 27 Determine aperture and shutter speed then record motion pictures You cannot take still pictures Custom Mode Record pictures using pre registered settings Panorama Shot Mode Record panorama pictures Scene Guide Mode Take pictures using Scene modes Creative Control Mode Take pictures by selecting your preferred picture effect Set the focusing operation to be performed when the shutter...

Page 20: ...ial You can set the aperture value shutter speed and other settings when in following recording modes Mode dial Rear dial 1 Programme Shift Aperture value Shutter speed Shutter speed Aperture value 2 1 You can make the settings with the side dial as well 21 2 You can switch between the shutter speed setting operation and the aperture value setting operation each time the button Fn1 button is press...

Page 21: ...n Auto Focus If you press the side button the selection screen for the case when focus is on a nearby subject macro recording is displayed In the Intelligent Auto Mode or the AF Tracking function is applicable In Manual Focus If you press the side button the Auto Focus starts working temporarily One shot AF Switching the operation of the side dial Set the menu 23 Custom Side Button Setting F SS Pr...

Page 22: ...tomatically switches the display to viewfinder when your eye or an object moves close to the viewfinder About diopter adjustment Rotate the diopter adjustment dial to adjust until you are able to clearly see the characters displayed in the viewfinder Touch screen Touch operations Touch screen of this unit is capacitive Touch the panel directly with your bare finger Touch To touch and release the t...

Page 23: ...ring up the menu 2 Press to select the menu item and press MENU SET 3 Press to select the setting and press MENU SET Selected setting Settings 4 Press the Q MENU button repeatedly until the recording or playback screen reappears During recording the menu screen can also be exited by pressing the shutter button halfway Switching menu type Press Menu type Press to select a menu switch icon such as I...

Page 24: ...ing frequently used functions to the buttons Function buttons You can assign frequently used functions to particular buttons Fn1 Fn4 or icons displayed on the screen Fn5 Fn9 1 Set the menu Custom Fn Button Set 2 Use to select Setting in REC mode or Setting in PLAY mode and press MENU SET 3 Press to select the function button you want to assign a function to and press MENU SET 4 Press to select the...

Page 25: ...timal scene the icon for each scene turns blue for 2 seconds and then changes to the normal red indication Switching between Intelligent Auto Plus Mode and Intelligent Auto Mode 1 Press MENU SET 2 Press 3 Press to select the or tab Items can also be selected by rotating the side dial 4 Use to select or and press MENU SET If DISP button is pressed the description of the selected mode will be displa...

Page 26: ...setting screen 2 Rotate the rear dial to adjust the background defocusing condition Press MENU SET to return to the recording screen Pressing Fn2 button on the blurriness setting screen will cancel the setting Recording images by changing the brightness exposure or colour tone Recording mode This mode enables you to change the brightness exposure and colour tone to your preferred settings from the...

Page 27: ...etting the mode dial to or 4 Press the motion picture button or shutter button to start recording Still pictures cannot be taken 5 Press the motion picture button or shutter button to stop recording Setting the picture quality and size Changing the aspect ratio of the still pictures Recording mode This allows you to select the aspect ratio of the pictures to suit printing or the playback method Re...

Page 28: ...etting is useful when you want to increase the number of recordable pictures without changing the number of pixels RAW JPEG Saves pictures in JPEG file format or in addition to the RAW file format 1 RAW Saves pictures in the RAW file format 2 images are recorded with a smaller data volume than or 1 If you delete a RAW file from the camera the corresponding JPEG file is also deleted 2 Regardless of...

Page 29: ... can check whether the point of focus is to the near side or the far side MF Guide Recording mode 1 Set the focus mode lever to AFS AFF or AFC 2 Press the side button If you cannot select the macro recording mode set the Side Button Setting under the Custom menu to AF FOCUS and then press the side button 3 Press to select the item and press MENU SET AF Macro You can take pictures of a subject as c...

Page 30: ...ed with different exposure settings based on the Exposure Compensation range Self Timer When the shutter button is pressed recording takes place after the set time has elapsed Cannot be set when using Intelligent Auto Mode To cancel drive mode select Single or Selecting a Drive Mode Button operation Touch operation Description Drag Moves the enlarged area Pinch in Pinch out Enlarges reduces the AF...

Page 31: ...ring the best shot of a fast moving subject Burst recording is performed while the shutter button is pressed and held The shutter sound will be heard repeatedly Press and hold Recording is performed Recording will start approximately 0 5 seconds after you press the shutter button fully Continuous recording length Up to 29 minutes and 59 seconds 4K Burst S S S S is an abbreviation of Start Stop For...

Page 32: ...oximately 2 seconds 4 Press the shutter button to perform recording 4K Burst Press the shutter button halfway Press and hold the shutter button fully for as long as you want to perform recording 4K Burst S S Press the shutter button fully Press the shutter button fully again 4K Pre Burst Press the shutter button fully When you perform 4K burst photo recording a 4K burst file will be saved in the M...

Page 33: ...e Creative Video Mode is displayed on the screen at all times The angle of view may become narrower as compared to that during recording Optical Zoom 1 You can zoom in without degrading the picture quality Maximum magnification 24x Extra optical zoom 1 This function works when picture sizes with have been selected in Picture Size 28 Extra optical zoom allows you to zoom in using a higher zoom rati...

Page 34: ...ress the shutter button down fully you can take still pictures while recording motion pictures Recording state indicator Elapsed recording time Remaining recording time 2 Press the motion picture button again to end recording If the surrounding temperature is high or a motion picture is recorded continuously is displayed and recording may be stopped halfway through to protect the camera Wait until...

Page 35: ...t rate approx 4K 100M 25p 3840 2160 25p 100 Mbps 4K 100M 24p 3840 2160 24p 100 Mbps FHD 28M 50p 1920 1080 50p 28 Mbps FHD 20M 25p 1920 1080 25p 20 Mbps HD 10M 25p 1280 720 25p 10 Mbps VGA 4M 25p 640 480 25p 4 Mbps Recording 4K motion pictures Recording mode You can record high resolution 4K motion pictures by setting Rec Quality to 4K To record 4K motion pictures use a UHS Speed Class 3 card 16 Wh...

Page 36: ...e scrolled The pictures are displayed in a reduced size The playback speed of pictures varies depending on the playback conditions Sending pictures to the WEB services If you press while a single picture is being displayed you can send the picture to the WEB service quickly For details refer to Operating Instructions for advanced features PDF format Ending Playback Press the Playback button again ...

Page 37: ...g time Example 29 minutes and 30 seconds 29m30s Operations during motion picture playback Button operation Touch operation Description Play pause Fast rewind 1 Single frame rewind 2 while paused Volume down Stop Fast forward 1 Single frame forward while paused Volume up 1 The fast forward or rewind speed increases if you press again 2 Motion pictures recorded in AVCHD are rewound frame by frame ap...

Page 38: ...ected picture group are deleted 1 Press Q MENU button while viewing a picture Step 1 above 2 Use to select Delete Multi Delete All and press MENU SET When Delete All is selected A confirmation screen is displayed If you select Yes the operation is executed You can select All Delete Except Favorite in Delete All if there are pictures that have been set as Favorite 3 When Delete Multi is selected Us...

Page 39: ... Reinstate Adjustments Color Space Picture Size Only when Monochrome is selected for Photo Style 4 Press MENU SET to set The setting methods vary depending on the item 5 Press MENU SET The screen in step 3 reappears To set another item repeat steps 3 to 5 6 Press to select Begin Processing and press MENU SET A confirmation screen is displayed If you select Yes the operation is executed When Setup ...

Page 40: ...cation ratio The following operating methods are available to make adjustments on the comparison screen Button operation Touch operation Description Drag Used to make adjustments DISP DISP Used to return to the setting screen MENU SET Set Used to finalise an adjustment you just made and to return to the item selection screen If you touch the picture at the centre it will be enlarged If you touch t...

Page 41: ...et up a direct connection to your smartphone without entering a password Displaying still pictures on a TV Wireless printing Sending pictures to AV device Sending pictures to a PC Using WEB services Hereafter this manual uses the term smartphone for both smartphones and tablets unless it is necessary to distinguish between them For details refer to Operating Instructions for advanced features PDF ...

Page 42: ...rted OS versions as of July 2015 Supported OS versions may be changed without prior notice For details about the operating procedure etc refer to Help in the Image App menu If you connect the camera and smartphone over a Wi Fi connection and run Image App Help may not be displayed in the Image App menu for some smartphones In such a case disconnect the Wi Fi connection with the camera connect the ...

Page 43: ... camera 4 On the smartphone start Image App When the connection confirmation screen appears on the camera select Yes and press MENU SET Only when making a connection for the first time Wi Fi Password is set to OFF at the time of purchase In OFF state a third party can tap into the Wi Fi transmission and steal transmitted data Set Wi Fi Password to ON For details refer to Operating Instructions for...

Page 44: ...ent you may notice degradation in the picture quality or skipping of sound when playing back motion pictures and still pictures Saving pictures in the camera to a smartphone 1 Connect to a smartphone 43 2 Operate the smartphone Select Press and hold the picture and drag it to save it on the smartphone Functions can be assigned to the top bottom left and right as you wish Pictures in RAW format AVC...

Page 45: ...information written to it Combining motion pictures recorded with Snap Movie according to your preference on a smartphone Using a smartphone you can combine motion pictures recorded with the camera s Snap Movie function 52 Music can be added to motion pictures to be combined In addition you can save the combined motion picture or upload it on a web service 1 Connect to a smartphone 43 2 Operate th...

Page 46: ... Click the language of the Operating Instructions you want to open The Operating Instructions for advanced features PDF format will open You can save the Operating Instructions for advanced features on the PC You will need Adobe Reader to browse or print the Operating Instructions PDF format You can download and install a version of Adobe Reader that you can use with your OS from the following web...

Page 47: ...loilo tv product 20 Installing supplied software The software compatible with your PC will be installed Preparations Check your PC s specifications and operating environment for each software Before inserting the DVD supplied close all running applications 1 Insert the DVD with the supplied software If the automatic playback screen is displayed you can display the menu by selecting and executing L...

Page 48: ...nt display EXPS Types of picture effects Filter Card displayed only during recording XXmXXs Elapsed recording time 1 34 Simultaneous recording indicator Automatic switching between viewfinder and monitor 22 Peaking 29 Highlight Shadow HDR iHDR 26 Multi Exp Conversion Electronic shutter Picture Mode Photo Priority Overheat indicator 34 55 The following images are examples of when the display screen...

Page 49: ... low illumination Focus Starlight AF Wi Fi connection status Histogram Name 2 Travel elapsed days 3 Age in years months 2 Location 3 Current date time 3 Travel destination setting 3 Exposure meter Zoom AF area Spot metering target Centre marker display Self Timer 4 30 Zoom Mic Mic Level Disp Mic Level Limiter OFF Silent Mode External Microphone AEL AE Lock Metering Mode Programme Shift 2 8 Apertur...

Page 50: ...he number of recordable pictures and available recording time with the Remaining Disp setting in the Custom menu Touch tab Touch zoom Touch Shutter Touch AE Peaking Function buttons 24 41 Colouring 26 Defocus control function 26 Brightness exposure 26 Type of defocus Miniature Effect One Point Color Sunshine Picture effect Filter adjustment display Picture effects Filter Aperture value 18 Shutter ...

Page 51: ...t Flash Mode Flash Single 30 Burst 30 4K PHOTO 31 Auto Bracket 30 Self Timer 30 AFS AFF AFC MF Focus Mode 19 29 AF Mode Quality 28 Aspect Ratio 27 Picture Size 28 Wi Fi Wi Fi 41 Function button setting 24 Photo Style AWB White Balance i Dynamic Metering Mode 98 Number of recordable pictures RXXmXXs Available recording time On monitor recording information m and s indicate minute and second ...

Page 52: ...uality AFS AFF Metering Mode Burst Rate 4K PHOTO Auto Bracket Self Timer Highlight Shadow i Dynamic i Resolution iHandheld Night Shot iHDR HDR Multi Exp Time Lapse Shot Stop Motion Animation Panorama Settings Shutter Type Flash Red Eye Removal ISO Limit Set ISO Increments Diffraction Compensation i Zoom Digital Zoom Conversion Color Space Stabilizer Face Recog Profile Setup Motion Picture Snap Mov...

Page 53: ...n Button Set Side Button Setting Zoom lever Side Lever Zoom Resume Q MENU Dial Set Video Button Eye Sensor Touch Settings Touch Scroll Menu Guide Setup Clock Set World Time Travel Date Wi Fi Beep Live View Mode Monitor Display Viewfinder Monitor Luminance Economy USB Mode TV Connection Menu Resume Menu Background Menu Information Language Playback Slide Show Playback Mode Location Logging RAW Proc...

Page 54: ... drive mode is set to 4K PHOTO and 4K PHOTO in the Rec menu is set to 4K Pre Burst the camera temperature rises In some cases the camera may display switch to 4K Burst and stop the recording to protect itself Wait until the camera cools down Focus not aligned correctly Subject outside of focus range Caused by jitter or subject movement Focus Release Priority is set to RELEASE 53 Shutter AF is set ...

Page 55: ...change or horizontal striping may appear on the screen 4K photo recording stops before finishing When the ambient temperature is high or recording with 4K Burst or 4K Burst S S of the 4K Photo function is performed continuously the camera may display and stop the recording to protect itself Wait until the camera cools down Cannot record motion pictures When a large capacity card is used you may no...

Page 56: ...mera 16 Thumbnail is displayed is shown on the screen The pictures may have been recorded on another device If so they may be displayed with poor picture quality Motion pictures taken with this camera cannot be played in other cameras Even if a motion picture is played back on a compatible device it may have bad picture quality or sound quality upon playback or it may not be played back Also the r...

Page 57: ...z switchable wireless access point connected to other equipment using the 5 GHz band The use of a wireless access point that can use 5 GHz 2 4 GHz simultaneously is recommended It cannot be used simultaneously with this camera if it is not compatible The camera cannot be connected to Mac computer Windows PC via Wi Fi connection When the system time of Mac computer or Windows PC connected to a came...

Page 58: ...ON The input setting may not be able to be changed automatically with certain television HDMI sockets In this case please change the input setting with your television s remote control consult your television s operating instructions for details Check the VIERA Link HDMI settings on the device you are connecting to Turn the camera off and on again Turn the VIERA Link control HDMI device control se...

Page 59: ...ele F2 8 to F8 0 When recording motion pictures F2 8 to F11 Filter diameter Φ52 mm Image Stabiliser Optical method Focus range AF 30 cm 0 98 feet Max Wide 2 m 6 6 feet Max Tele to AF Macro MF Intelligent Auto Motion picture 1 cm 0 033 feet Max Wide 1 m 3 3 feet Max Tele to Shutter system Electronic shutter Mechanical shutter Minimum Illumination Approx 9 lx when i Low light is used the shutter spe...

Page 60: ...d Eye Reduction Forced ON Forced ON Red Eye Reduction Slow Sync Slow Sync Red Eye Reduction Forced OFF Microphones Stereo Speaker Monaural Recording media SD Memory Card SDHC Memory Card SDXC Memory Card UHS UHS Speed Class 3 Recording file format Still picture RAW JPEG based on Design rule for Camera File system based on Exif 2 3 standard DPOF corresponding Motion picture AVCHD Progressive AVCHD ...

Page 61: ... splash proof Yes Wi Fi Compliance standard IEEE 802 11b g n standard wireless LAN protocol Frequency range used central frequency 2412 MHz to 2462 MHz 1 to 11 ch Encryption method Wi Fi compliant WPA WPA2 Access method Infrastructure mode Battery Charger Panasonic DE A80A Information for your safety Input AC 110 V to 240 V 50 60 Hz 0 2 A Output DC 8 4 V 0 65 A Battery Pack lithium ion Panasonic D...

Page 62: ... optional accessories may not be available in some countries Digital Camera Accessory System Sales and Support Information Customer Communications Centre For customers within the U K 0344 844 3899 For customers within Ireland 01 289 8333 Monday Friday 9 00am 5 00pm Excluding public holidays For further support on your product please visit our website www panasonic co uk Direct Sales at Panasonic U...

Page 63: ...e Inc registered in the U S and other countries iPad iPhone iPod and iPod touch are trademarks of Apple Inc registered in the U S and other countries App Store is a service mark of Apple Inc Android and Google Play are trademarks or registered trademarks of Google Inc The Wi Fi CERTIFIED Logo is a certification mark of Wi Fi Alliance The Wi Fi Protected Setup Identifier mark is a certification mar...

Page 64: ... www panasonic com Panasonic Corporation 2015 Manufactured by Panasonic Corporation Kadoma Osaka Japan Importer for Europe Panasonic Marketing Europe GmbH Panasonic Testing Centre Winsbergring 15 22525 Hamburg Germany ...

Reviews: