background image

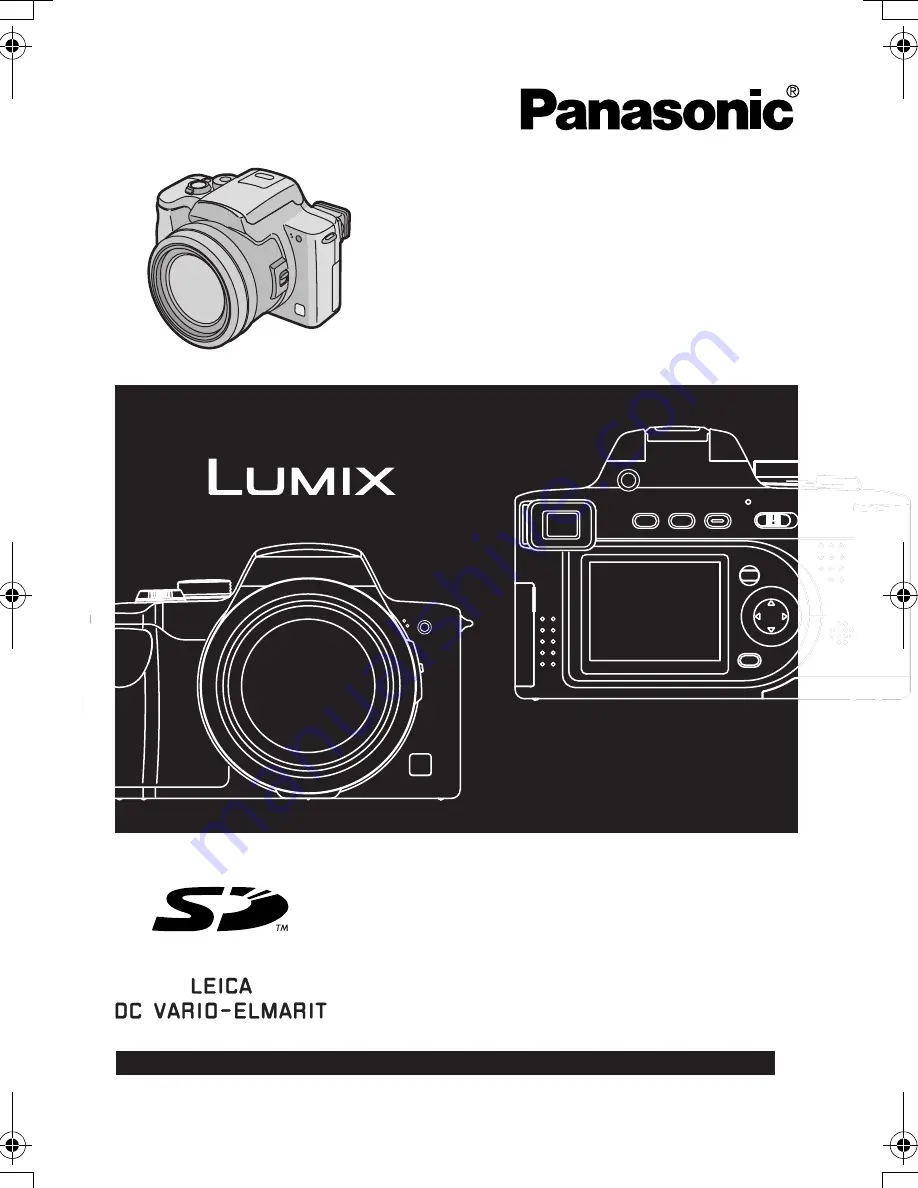
Operating Instructions

Digital Camera

Model No.

DMC-FZ15P

Before use, please read these

instructions completely.

VQT0N03

For USA assistance, please call: 1-800-272-7033 or send e-mail to : [email protected]         


FZ15-PP.book  1 ページ  2004年7月20日 火曜日 午後9時27分

Summary of Contents for Lumix DMC-FZ15

Page 1: ...ting Instructions Digital Camera Model No DMC FZ15P Before use please read these instructions completely VQT0N03 For USA assistance please call 1 800 272 7033 or send e mail to digitalstillcam panasonic com ...

Page 2: ...E THE RISK OF FIRE OR SHOCK HAZARD AND ANNOYING INTERFERENCE USE ONLY THE RECOMMENDED ACCESSORIES AND DO NOT EXPOSE THIS EQUIPMENT TO RAIN OR MOISTURE DO NOT REMOVE THE COVER OR BACK THERE ARE NO USER SERVICEABLE PARTS INSIDE REFER SERVICING TO QUALIFIED SERVICE PERSONNEL Notice This product has parts that contain a small amount of mercury It also contains lead in some components Disposal of these...

Page 3: ...rease the separation between the equipment and receiver Connect the equipment into an outlet on a circuit different from that to which the receiver is connected Consult the dealer or an experienced radio TV technician for help FCC Caution To assure continued compliance follow the attached installation instructions and use only shielded interface cables with ferrite core when connecting to computer...

Page 4: ... a malfunction Be careful when you put the camera outside or near a window About Condensation Condensation takes place when the ambient temperature or humidity is changed as follows Be careful of condensation since it causes stains on the lens fungus or malfunction P105 When the camera is brought inside from the cold to a warm room When the camera is moved from outside to an air conditioned car Wh...

Page 5: ...rsor button are described as illustrated below e g When you press the 4 button Modes indicated here allow you to use the functions or settings described on this page Set the Mode dial to any of the modes to use the functions or settings Compensating the Exposure Use this function when you cannot achieve appropriate exposure due to the difference of brightness between the subject and the background...

Page 6: ... using Auto Bracket 44 Taking Pictures using Burst Mode 45 Playback basic Playing Back Pictures 46 9 Pictures Multi Playback 47 Using the Playback Zoom 48 Deleting Pictures 49 Recording pictures advanced Using the Mode Dial 51 Aperture priority AE 51 Shutter priority AE 52 Manual exposure 53 Macro mode 56 Motion image mode 56 Scene mode 58 Portrait mode 59 Sports Mode 59 Scenery mode 60 Night scen...

Page 7: ...es with a TV Screen 92 Connecting to a PC or Printer Before Connecting with USB Connection Cable USB MODE 93 Connecting to a PC 95 Connecting to a PictBridge compliant Printer 97 Others Using the MC Protector ND Filter 101 Screen Display 102 Cautions for Use 104 Message Display 107 Troubleshooting 108 Specifications 111 Digital Camera Accessory System 113 Digital Camera Accessory Order Form For US...

Page 8: ...heck the contents SD Memory Card 8 MB RP SD008B In the text it is indicated as Card Battery Pack CGA S002A In the text it is indicated as Battery Battery Charger DE 993B In the text it is indicated as Charger Video Cable K1HA08CD0003 USB Connection Cable K1HA08CD0001 CD ROM ...

Page 9: ...Preparation 9 Lens Cap VYK0W96 Strap VFC4078 Lens Hood VYQ3234 Lens Hood Adaptor VYQ3213 ...

Page 10: ...PLAY Button P28 9 EXPOSURE Button P35 51 52 53 10 Power Indicator P32 11 Camera Switch P12 12 LCD Monitor P28 102 13 MENU Button P24 14 Delete Button P49 15 Cursor buttons 2 Self timer Button P42 4 REVIEW Button P37 1 Flash Mode Button P39 3 Flash Output Adjustment P41 Exposure Compensation P43 Auto Bracket P44 White Balance Fine Adjustment P69 Button 16 Speaker P26 1 2 3 7 12 10 11 13 14 15 9 8 4...

Page 11: ... Mode Button P45 22 Focus Switch P62 65 23 Strap Eyelet P19 24 V OUT DIGITAL Socket P92 95 97 25 DC IN Socket P95 97 Please be sure to use genuine Panasonic AC adaptor DMW CAC1 optional 26 Terminal Door 27 Card Battery Door P15 16 28 Tripod Receptacle M S A SC 1 S C 2 P 19 20 18 17 21 24 25 26 23 22 27 28 ...

Page 12: ...ed the battery is not charged Charge the battery before use 2 Insert the battery and the card P15 16 3 Turn the camera on to take pictures Set the clock P22 1 Set the mode dial to 2 Open the flash When using the flash P39 3 Press the shutter button to take pictures P32 4 Play back the pictures 1 Set the mode dial to 2 Select the picture you want to view P46 OPEN OFF ON M S A S C N 1 SC N 2 P M S A...

Page 13: ...en charging starts When the CHARGE indicator A turns off in about 120 minutes charging is completed 3 Detach the battery After charging is completed be sure to disconnect the charger from the electrical outlet The battery becomes warm after use charge or during charge The camera also becomes warm during use However it is not a malfunction Use the dedicated charger and battery Charge the battery wi...

Page 14: ...ition of the battery Charging Charging time and the number of recordable pictures with the optional battery pack CGA S002A are the same as above When charging starts the CHARGE indicator lights Charging error If a charging error occurs the CHARGE indicator blinks in 1 second cycles In this case disconnect the charger from the electrical outlet remove the battery and make sure that both room and ba...

Page 15: ... it firmly If you will not be using the camera for a long time remove the battery When a fully charged battery has been inserted for more than 24 hours the clock setting is stored in the camera for at least 3 months even if the battery is removed The storing may be shorter if the battery is not charged sufficiently If more than 3 months has passed the clock setting will be lost In this case set th...

Page 16: ...nuine SD card with SD Logo 2 Insert Insert the card with the label facing the front of the camera until it clicks Remove Push the card until it clicks then pull the card out upright Check the direction of the card Do not touch the connection terminals on the back side of the card The card may be damaged if it is not fully inserted 3 1 Close the card battery door 2 Slide the card battery door to th...

Page 17: ... and MultiMediaCard are small lightweight removable external memory cards The reading writing speed of an SD Memory Card is fast The SD Memory Card is equipped with a Write Protect switch A that can inhibit writing and formatting a card When the switch is slid to the LOCK side it is not possible to write or delete data on the card and format it When the switch is unlocked these functions become av...

Page 18: ...200 1280k960 Quality 8 MB 0 3 7 1 6 13 1 10 19 16 MB 1 8 16 2 14 28 3 22 41 32 MB 2 17 33 4 31 59 7 47 86 64 MB 4 35 69 10 63 121 15 96 176 128 MB 9 71 139 20 128 244 31 195 356 256 MB 19 143 278 40 255 487 62 390 709 512 MB 39 288 561 81 515 982 126 785 1429 1 GB 76 554 1079 157 991 1889 243 1511 2748 Picture size 640k480 1920k1080 HDTV Quality 8 MB 6 32 58 0 6 12 16 MB 13 69 113 2 13 25 32 MB 28...

Page 19: ...more Attach the strap to the other side of the camera being careful not to twist it Check that the strap is firmly attached to the camera Attach the strap so that you can see LUMIX logo When you turn the camera off carry the camera or play back the pictures attach the lens cap to protect the surface of the lens Detach the lens cap before turning on the camera in the recording mode Be careful not t...

Page 20: ...hat the camera is turned off and that the lens is retracted Close the flash 1 1 Detach the lens ring 2 Attach the lens hood adaptor 2 Attach the lens hood 1 Place the camera upside down 2 Catch the hook on the lens hood adaptor 3 Push the lens hood 4 Align the marks as illustrated 5 Tighten the screw Check if the screw is loose and then attach the lens hood Do not tighten the screw too much 4 1 3 ...

Page 21: ... is temporarily stored Ensure that the lens cap is firmly attached When taking pictures with flash with the lens hood attached the lower portion of the photo may turn dark vignetting effect and the control of the flash may be disabled because the photo flash may be obscured by the lens hood We recommend detaching the lens hood When using the AF assist lamp in the dark detach the lens hood For deta...

Page 22: ...OCK SET from the SETUP menu P24 2 Set date and time 2 1 Select the desired item 3 4 Set date and time 3 Select M D Y D M Y or Y M D Close the menu by pressing the MENU button 2 times after finishing the setting Check if the clock setting is correct after turning the camera off and on PLEASE SET THE CLOCK CLOCK SET MENU SETUP 2 3 SELECT CLOCK SET NO RESET SHUTTER EXIT MENU MENU BEEP RESET M D Y DEC...

Page 23: ...The storing time may be shorter if the battery is not charged sufficiently If more than 3 months has passed the clock setting will be lost In this case set the clock again You can set the year from 2000 to 2099 The 24 hour system is used If you do not set the date the date cannot be printed when you go to a photo studio for digital printing For the date print setting refer to P84 ...

Page 24: ...inishing the setting M S A S C N 1 SC N 2 P OFF ON AUTO 2304 AUTO SENSITIVITY QUALITY W BALANCE PICT SIZE SETUP SELECT MENU REC 1 3 EXIT MENU METERING MODE OFF n0 OFF ON 2MIN AUTO REVIEW POWER SAVE MF ASSIST MONITOR PLAY ON LCD REC SELECT MENU EXIT SETUP 1 3 Be sure to press 1 at the end to determine the setting n0 POWER SAVE MF ASSIST MONITOR PLAY ON LCD AUTO REVIEW OFF 1SEC 3SEC ZOOM SELECT EXIT...

Page 25: ...ictures are recorded in burst mode or auto bracket the time for the auto review function is fixed to 1 second regardless of the setting on the SETUP menu When the quality is set to TIFF the auto review function works until the end of recording onto the card The picture is not enlarged PLAY ON LCD When Viewfinder is selected in the recording mode while setting PLAY ON LCD to ON the picture automati...

Page 26: ...100 to 999 When the folder number reaches 999 it cannot be reset We recommend formatting the card after saving the data on a PC or elsewhere When you insert a formatted card or a new card and select this item the file number is reset and the confirmation screen for reset of folder number appears If you select YES on the screen the folder number is reset to 100 RESET The settings on the recording o...

Page 27: ...scene mode AUTO Scene menu appears automatically when setting the mode dial to or Select the desired scene mode LANGUAGE Set to the language on the menu screen from the following 7 languages Set to the desired language with 3 4 and determine it with 1 ENGLISH English DEUTSCH German FRANÇAIS French ESPAÑOL Spanish ITALIANO Italian Chinese Simplified Japanese When you set to other language by mistak...

Page 28: ... to be used When the menu screen appears the DISPLAY button is not activated During 9 pictures multi playback P47 or playback zoom P48 the indications on the screen can be turned on and off In recording mode P32 C Display D Display with histogram E Out of frame display F Non display Recording guide line G Non display Histogram In playback mode P46 H Display I Display with recorded information and ...

Page 29: ...r in recording When the recording mode is switched to playback mode When reviewing pictures P37 When turning the camera on in playback mode Recording guide line When you align the subject on the horizontal and vertical guide lines or the cross point of these lines you can take pictures with well designed composition by viewing the size the slope and the balance of the subject Highlight display Whe...

Page 30: ...ecorded picture and the histogram do not match each other under the following conditions the histogram is displayed in orange When the flash is activated When the flash is closed 1 Aperture priority AE Shutter priority AE When the brightness of the screen is not correct or when the exposure is not adequately adjusted in dark places 2 Manual exposure When the shutter speed is slower than 1 13th 3 I...

Page 31: ...ual exposure P53 The exposure is adjusted by the aperture value and the shutter speed which are manually adjusted Macro mode P56 This mode allows you to take a picture closely focusing on to the subject Motion image mode P56 This mode allows you to record motion images without audio Scene mode 1 Scene mode 2 P58 This mode allows you to take pictures depending on the recording scenes This mode also...

Page 32: ... low Insert a fully charged battery 2 Aim the AF area 1 to the point you want to focus and then press the shutter button halfway A Press the shutter button halfway to focus The focus indication 2 is lit and then the aperture value 3 and the shutter speed 4 are displayed 3 Take a picture B Press the shutter button fully to take the picture OFF ON OPEN FOCUS AF MF M S A S C N 1 SC N 2 P When the sub...

Page 33: ...r taking good pictures To take pictures without blurring Hold the camera gently with both hands keep arms stationary at your side and stand with your feet slightly apart Make sure that camera shake does not occur when pressing the shutter button halfway After pressing the shutter button keep the camera stationary until the picture appears on the screen In the following cases keep the camera statio...

Page 34: ...e AF assist lamp P74 may turn on to focus on the subject Even if the focus indication appears and the subject is focused it is canceled when you release the shutter button Press the shutter button halfway again Jitter camera shake Be careful of jittering when pressing the shutter button When jitter could occur the jitter alert 1 appears When the jitter alert appears we recommend using a tripod If ...

Page 35: ...amera the picture may not be properly focused even if the focus indication is lit Program shift In Program AE mode you can change the preset aperture value and the shutter speed under the same exposure This is called Program shift By this function you can make the background more blurred by decreasing the aperture value or record the moving subject more dynamically by setting to slow shutter speed...

Page 36: ...timer Press the EXPOSURE button to cancel When 10 or more seconds have passed after the Program shift becomes effective the status to activate the Program shift is canceled and returned to the Program AE mode However the setting on the Program shift is memorized Program shift is canceled when turning the camera off The Program shift may not be activated depending on the brightness of the subject 2...

Page 37: ...ure P43 2 Enlarge and shift the picture 1k 4k 8k 8k 4k 1k When you change the magnification or the position to be displayed the zoom position indication A appears for about 1 second to check where is enlarged Recorded pictures can be deleted during the review Quick Deletion Once deleted pictures cannot be recovered Multi pictures or all pictures can be deleted Read P49 or P50 to operate them SCN1 ...

Page 38: ...lens aberration which is common to some extent with all photographic lenses Distortion may be more visible when using a wider area of the zoom lens as you get closer to the subject When using the zoom lens at high magnification the quality of the picture can be enhanced if a tripod is used At high magnification even small movements can cause a slight decrease in picture sharpness If you use the zo...

Page 39: ...e flash at 1 second before actually recording the picture Use this when you take pictures of people in low lighting conditions Forced ON The flash is activated every time regardless of the recording condition Use this when your subject is back lit or under fluorescent light Forced ON Red eye reduction When you set to PARTY in scene mode P58 the flash mode is set to Forced ON Red eye reduction Slow...

Page 40: ... Refer to P55 for the Aperture priority AE Shutter priority AE or Manual exposure mode ISO sensitivity Available flash control range AUTO 0 98 feet 30 cm 23 0 feet 7 m also applicable in Macro mode ISO64 0 98 feet 30 cm 9 19 feet 2 8 m ISO100 0 98 feet 30 cm 11 5 feet 3 5 m ISO200 1 31 feet 40 cm 16 4 feet 5 m ISO400 1 97 feet 60 cm 23 0 feet 7 m Flash mode Shutter speed AUTO 1 60 1 2000 AUTO Red ...

Page 41: ...beyond the flash control range the exposure may not be adjusted properly and the picture may become bright or dark When you repeat taking a picture recording may be disabled even if the flash is activated Take a picture after the card access lamp disappears When the jitter alert appears we recommend using the flash When you set to burst mode or auto bracket only 1 picture is recorded for every fla...

Page 42: ... the shutter button The self timer indicator 1 blinks and the shutter is activated after 10 seconds or 2 seconds When you press the button fully with one stroke the subject is automatically focused just before the recording In dark places the self timer indicator blinks and then it may turn on brightly to work as the AF assist lamp P74 for focusing on the subject When you set the self timer in the...

Page 43: ...3 EV EV is an abbreviation of Exposure Value and it is the amount of light given to the CCD by the aperture value and the shutter speed The compensation range of the exposure will be limited depending on the brightness of the subject The exposure compensation value appears on the lower left of the screen The exposure value is memorized even if the camera is turned off Under exposed Compensate the ...

Page 44: ... OFF When setting the auto bracket the auto bracket icon appears on the lower left of the screen When taking pictures using auto bracket after the exposure compensation the pictures are based on the compensated exposure When the exposure is compensated the compensated exposure value appears on the lower left of the screen When the flash is activated you can take only 1 picture When setting auto br...

Page 45: ...s fixed to 3 You cannot take pictures in the burst mode when the quality is set to TIFF When setting auto bracket and the burst mode simultaneously auto bracket will be performed by default When the burst mode setting is set to no limit the speed of taking pictures becomes slow during a recording in burst mode Burst mode will not perform as described if a MultiMediaCard is used in place of an SD M...

Page 46: ...ou forward or rewind a large number of pictures release 2 1 once before reaching the picture to be played back then press 2 1 to forward rewind pictures little by little This camera is based on the DCF standards Design rule for Camera File system which was established by the Japan Electronics and Information Technology Industries Association JEITA When changing the folder name or file name on a PC...

Page 47: ...h the number colored in orange appears To delete a picture during a 9 pictures multi playback Press the button When the confirmation screen appears press 4 to select YES and press 1 P49 Rotated pictures are displayed in the direction oriented when they are recorded P82 1 2 3 4 7 9 5 6 8 10 00 DEC 1 2004 100_0001 1 19 CANCEL SELECT 2304 T W 1 2 3 4 7 5 6 10 11 8 9 12 CANCEL SELECT CANCEL SELECT ...

Page 48: ... the button When the confirmation screen appears press 4 to select YES and press 1 P49 The more the picture is enlarged the more its quality deteriorates The playback zoom may not operate if pictures have been recorded with other equipment Even if the indication on the LCD monitor are turned off in normal playback mode P28 the magnification and enabled operations appear on the LCD monitor when the...

Page 49: ...s 1 Select MULTI DELETE 2 Select the pictures to be deleted The selected pictures appear with When 4 is pressed again the setting is canceled The icon blinks red if the selected picture cannot be deleted Cancel the protect setting P85 100_0001 1 19 10 00 DEC 1 2004 2304 DELETE THIS PICTURE DELETE SINGLE MULTI ALL SELECT SET YES NO MULTI ALL DELETE CANCEL MULTI DELETE ALL DELETE SELECT 2 times 7 12...

Page 50: ...ing pictures Do not turn off the camera while deleting Pictures that are protected P85 or that do not conform to DCF standards P46 will not be deleted When you delete pictures use a battery with sufficient battery power P14 or use with the AC adaptor DMW CAC1 optional MULTI DELETE DELETE THE PICTURES YOU MARKED SELECT SET YES NO MULTI ALL DELETE CANCEL SELECT MULTI DELETE ALL DELETE 2 times ALL DE...

Page 51: ...56 feet 200 cm Tele If the subject is too bright set to a larger aperture value if too dim set to a smaller aperture value The brightness of the screen may differ from that of the actual pictures Check it using review function or setting to the playback mode The ISO sensitivity cannot be set to AUTO P70 When the recording mode is switched to Aperture priority AE the ISO sensitivity is automaticall...

Page 52: ...heck it using review function or setting to the playback mode You cannot set the following items in Shutter priority AE Slow sync Red eye reduction P39 AUTO in ISO sensitivity P70 When the recording mode is switched to Shutter priority AE the ISO sensitivity is automatically set to ISO100 even though it was set to AUTO beforehand Even though the ISO mode is set to ISO100 automatically you can also...

Page 53: ...sistance appears for about 10 seconds When the exposure is not adequate set the aperture value and the shutter speed again 3 Take the picture Manual Exposure Assistance The manual exposure assistance is an approximation We recommend taking pictures and then checking them using the review function Manual exposure 1 30 F2 8 19 2304 EXPOSURE 1 125 F4 0 The exposure is adequate Set to faster shutter s...

Page 54: ... You cannot set the following items in manual exposure Slow sync Red eye reduction P39 AUTO in ISO sensitivity P70 When the recording mode is switched to Manual exposure the ISO sensitivity is automatically set to ISO100 even though it was set to AUTO beforehand Exposure compensation P43 Please set HIGHLIGHT to ON on the SETUP menu P24 Any white saturated area on the picture will appear blinking i...

Page 55: ...1 1 1000 Available Shutter Speed Sec Per 1 3 EV Aperture Value 8 6 5 4 F2 8 F8 0 3 2 2 5 2 1 6 1 3 1 1 1 3 1 1 6 1 2 1 2 5 1 3 2 1 4 1 5 1 6 1 8 1 10 1 13 1 15 1 20 1 25 1 30 1 40 1 50 1 60 1 80 1 100 1 125 1 160 1 200 1 250 1 320 1 400 1 500 1 640 1 800 1 1000 1 1300 F4 0 F8 0 1 1600 F5 6 F8 0 1 2000 F8 0 Available Aperture Value Per 1 3 EV Available Shutter Speed Sec Per 1 3 EV F2 8 F3 7 8 1 100...

Page 56: ... flash mode should be set to the mode except Slow sync Red eye reduction You can record motion images without audio 1 Select MOTION RATE 10fps Recording motion images for a longer time is available though the quality will be less than the quality recorded at 30fps The file size is smaller so the files are suitable to be attached to e mails 30fps The motion of the recorded image is smooth but the f...

Page 57: ... are fixed to what they are when recording starts in the first frame If you use a card with little capacity recording may stop while you are recording motion images When motion images recorded with this camera are played back on other equipment the quality of pictures may be deteriorated or it may not be possible to play them back The motion images recorded with setting MOTION RATE to 30fps cannot...

Page 58: ...he MENU button while the scene menu is displayed you can set the SETUP menu P24 and the REC mode menu P67 PORTRAIT P59 SPORTS P59 SCENERY P60 NIGHT SCENERY P60 NIGHT PORTRAIT P61 PANNING P61 FIREWORKS P62 PARTY P63 SNOW P64 The following functions cannot be set in scene mode White balance P68 ISO sensitivity P70 Metering mode P72 Color effect P75 Picture adjustment P75 Scene mode SCN1 SCN2 SCN1 SC...

Page 59: ...e hue may change The ISO sensitivity is fixed to AUTO When you want to change the exposure or the hue compensate the exposure P43 This mode allows you to take pictures of a fast moving subject e g When taking pictures of outdoor sports Technique for Sports mode To record actions of the subject as if it were still the shutter speed becomes faster than usual This mode is more effective when taking p...

Page 60: ...an be recorded vividly by using the slow shutter speed Technique for Night scenery mode Since the shutter speed becomes slow max about 8 sec use a tripod The focus range is 16 4 feet 5 m The shutter may be kept closed max about 8 seconds after taking a picture with slow shutter speed but it is not a malfunction When you take pictures in dark places noise may become visible The ISO sensitivity is f...

Page 61: ...s in dark places noises may become visible Flash setting is fixed to Slow sync Red eye reduction The ISO sensitivity is fixed to AUTO The setting on the continuous AF is disabled When you take a picture following the motion of a subject which moves to a certain direction as a runner or a car the background will show some motion blur This special effect is called panning This mode allows you to obt...

Page 62: ...nuous AF are disabled This mode allows you to take beautiful pictures of fireworks exploding in the night sky The shutter speed or the exposure is automatically adjusted for taking pictures of fireworks Technique for Fireworks mode We recommend following the prefocus procedure below to ensure that you do not miss the chance to take pictures 1 Set the focus mode to MF mode P65 2 Aim the camera at a...

Page 63: ...ash setting is fixed to Forced OFF This mode allows you to take a picture in a dim room e g a wedding reception a party a banquet in a bar etc clearly The shutter speed or the exposure is automatically adjusted according to the brightness of the room Technique for Party mode The shutter speed is slowed down Hold the camera firmly to take a picture The flash mode of the built in flash can be set to...

Page 64: ...ows you to take a picture in locations such as skiing resorts and locations near snowy mountains The exposure and the white balance are adjusted to make the white color of the snow stand out The ISO sensitivity is fixed to AUTO Snow mode 2304 19 ...

Page 65: ...ssing the MENU button after finishing the setting 2 Slide the focus switch to MF and rotate the MF ring 1 to focus on the subject AF Auto focus MF Manual focus 4 One shot AF 3 The MF assistance appears on the center of the screen You can also set MF ASSIST to OFF on the SETUP menu in the recording mode When you stop rotating the MF ring the MF assistance disappears about 2 seconds after SCN1 SCN2 ...

Page 66: ...s on the point to take pictures in advance when it is difficult to focus on the subject with auto focus due to its quick motion e g PANNING in scene mode P61 This function is suitable when the distance between the camera and the subject is certain You can also record with manual focus in motion image mode When starting the recording the focus is fixed When you focus on the subject in Wide the focu...

Page 67: ...the menu screen can be forwarded vice versa Close the menu by pressing the shutter button halfway or the MENU button after finishing the setting W BALANCE P68 SENSITIVITY P70 PICT SIZE P70 QUALITY P71 METERING MODE P72 AF MODE P72 CONT AF P73 AF ASSIST LAMP P74 D ZOOM P74 COL EFFECT P75 PICT ADJ P75 STABILIZER P76 FLIP ANIM P76 CONVERSION P79 SCN1 SCN2 EXITMENU SENSITIVITY QUALITY PICT SIZE W BALA...

Page 68: ...e adjustment may not operate properly In this case set the white balance to a mode except AUTO manually 1 The range that is controlled by the auto white balance adjustment mode of this camera 2 Blue sky 3 Cloudy sky Rain 4 TV screen 5 Sunlight 6 White fluorescent light 7 Incandescent light bulb 8 Sunrise and sunset 9 Candlelight KlKelvin Color Temperature White Balance W BALANCE AUTO for auto sett...

Page 69: ...en the hue is reddish 2 RED Press when the hue is bluish About the white balance When taking a picture with the flash the white balance will be automatically adjusted except for Daylight and Flash but the white balance may not be properly adjusted if the photo flash is insufficient About the white balance fine adjustment The white balance icon on the screen turns red or blue You can set the value ...

Page 70: ...cture size 640k480 pixels you can store more pictures on a card In addition it is convenient to attach the picture to an e mail or post it on a website because the file size is small If you select a larger picture size 2304k1728 pixels you can print pictures clearly For details on how to playback pictures recorded using HDTV mode on a High Definition TV HDTV has a 16 9 aspect refer to P92 Both end...

Page 71: ...t The number of remaining pictures may not correspond with recorded frames The following functions cannot be used for pictures recorded in TIFF Auto bracket Burst mode ROTATE RESIZE TRIMMING Refer to P18 for the number of recordable pictures Quality QUALITY TIFF Uncompressed This type is suitable when editing and processing pictures with retouch software Fine Low compression This type gives priori...

Page 72: ...he whole screen evenly Spot This is the method to measure the subject in the spot metering target A AF Mode AF MODE 9 area focusing The camera focuses on any of 9 focus areas You can record a picture in free composition without limiting the position of the subject 3 area focusing The camera focuses on any of the left center and right of the screen This mode allows you to focus on the subject faste...

Page 73: ...etermine the focus position to take pictures switch the AF mode to 1 area focusing mode This mode allows you to compose a picture more easily by always focusing on the subject When the AF mode is set to 1 area focusing or spot focusing the time required for focusing when pressing the shutter button halfway will be reduced When it is set to ON the indication appears When setting the manual focus yo...

Page 74: ...scured by the lens however this does not cause a problem with the performance of the camera It is possible to further magnify a subject already magnified 12 times with the optical zoom 4 more times with the digital zoom thereby reaching a maximum of 48 times Entering the digital zoom range When you rotate the zoom lever to the extreme Tele position the on screen zoom indication may momentarily pau...

Page 75: ...becomes reddish B W The picture becomes black and white SEPIA The picture becomes sepia Picture Adjustment PICT ADJ CONTRAST HIGH Increases the difference between the brightness and the darkness in the picture LOW Decreases the difference between the brightness and the darkness in the picture SHARPNESS HIGH The picture is sharply defined LOW The picture is softly focused SATURATION HIGH The colors...

Page 76: ...mode Example When capturing images of the subject in sequence moving the camera little by little and aligning the images the subject looks as if it is moving You can play back created flip animations with the same method used to play back motion images P81 Optical Image Stabilizer STABILIZER OFF When image stabilization is not desired or when using the camera with a tripod MODE1 The stabilizer ope...

Page 77: ...orded image with 4 and the previous or following image with 2 1 Delete unnecessary images with button You can record up to 100 pictures The number of recordable pictures displayed is an approximation 4 Select CREATE MOTION IMAGE EXITMENU SELECT REC 3 3 MODE1 OFF STABILIZER PICT ADJ CONVERSION FLIP ANIM MENU CREATE MOTION IMAGE DELETE STILL IMAGES IMAGE CAPTURE EXITMENU SELECT FLIP ANIM 8 92 REMAIN...

Page 78: ...4 and then press 1 You cannot use burst mode and auto bracket The images in each frame do not appear in normal review P37 If you execute CREATE MOTION IMAGE flip animation is made from all pictures recorded for flip animation Delete unnecessary pictures Flip animations may not be played back by other equipment 5fps 5 frames sec 10fps 10 frames sec The motion images become smoother CREATE MOTION IM...

Page 79: ...e lens is retracted 2 Attach the tele conversion lens 1 or wide conversion lens 2 Rotate the lens slowly and carefully 3 Turn the camera on and select CONVERSION 4 Set to or OFF When you do not attach the conversion lens When you attach the wide conversion lens When you attach the tele conversion lens Close the menu by pressing the shutter button halfway or the MENU button after finishing the sett...

Page 80: ...onversion lens The built in flash cannot be activated If you use a tripod use the tripod adaptor supplied with the conversion lens and then attach the tripod to the tripod adaptor If you set CONVERSION to OFF the performance of the conversion lens will not be optimal When using the tele conversion lens We recommend using a tripod The stabilizer function may not work sufficiently The focus indicati...

Page 81: ...ge playback To pause Press 3 during motion image playback Press 3 again to cancel pause You cannot use the zoom function while playing back or pausing motion images The file format that can be played back with this camera is QuickTime Motion JPEG Some QuickTime Motion JPEG files recorded by a PC or other equipment may not be played back with this camera When playing back motion images that have be...

Page 82: ...ture 1 Select ROTATE 2 Select the picture to be rotated and set it 3 Select the direction to rotate the picture Rotating the Picture ROTATE PLAY 1 2 PROTECT SLIDE SHOW ROTATE DPOF PRINT EXITMENU SELECT MENU RESIZE The picture rotates clockwise in increments of 90 The picture rotates counter clockwise in increments of 90 EXITMENU 100_0001 1 19 ROTATE SET SELECT 2304 ROTATE EXITMENU SELECT SET MENU ...

Page 83: ... can be added established by JEITA Japan Electronics and Information Technology Industries Association DPOF Digital Print Order Format is a system that allows the user to select which pictures are to be printed on compatible photo printers DPOF also allows the user to set how many copies of each picture will be printed Many commercial photo printing services now use DPOF For more information pleas...

Page 84: ... printing with the recorded date with each press of the DISPLAY button when setting the number of prints The date print icon appears When you go to a photo studio for digital printing be sure to order the printing of the date additionally if required The date may not be printed depending on photo studios or printers even if you set the date print For further information ask the photo studio for de...

Page 85: ...esign rule for Camera File system stipulated by JEITA Japan Electronics and Information Technology Industries Association When setting the DPOF print delete any previous DPOF print settings made by other equipment You can set the protection on the pictures which you do not want to delete to prevent them from accidental erasure 1 Select PROTECT then select SINGLE MULTI or CANCEL Single setting Sele...

Page 86: ...ata P91 The protect setting may not be effective in other equipment Sliding the Card Write Protect switch A to LOCK prevents the picture from deletion even if the protection is not set 1 Select SLIDE SHOW then select ALL or DPOF 2 Set the items of the Slide Show Playing Back with Slide Show SLIDE SHOW ALL for playing back all pictures DPOF for playing back the pictures for which DPOF Slide Show wa...

Page 87: ...inting DPOF Slide Show cannot be performed without the DPOF setting for Slide Show When setting the DPOF Slide Show to a picture with DPOF printing both the DPOF icon and the number of prints appear on the picture in green When only the DPOF printing is set on the picture the DPOF icon and the number of prints appear in white They do not appear on the DPOF Slide Show When setting the DPOF Slide Sh...

Page 88: ...e picture size to HDTV Pictures recorded after setting the quality to TIFF Motion images Flip animation Rotated pictures You can resize them if you rotate them back to their original position 3 Select the size and set it Sizes smaller than the recorded picture are displayed 1600 1600k1200 pixels 1280 1280k960 pixels 640 640k480 pixels Resizing the Pictures RESIZE MENU PLAY 1 2 PROTECT SLIDE SHOW R...

Page 89: ...re It may not be possible to resize pictures recorded with other equipment When resized pictures are overwritten they cannot be restored Use this function when you trim necessary parts of the recorded picture 1 Select TRIMMING MENU RESIZE CANCEL MENU DELETE ORIGINAL PICTURE SELECT SET YES NO 2 times Trimming the Pictures TRIMMING EXITMENU SELECT PLAY 2 2 FORMAT TRIMMING MENU ...

Page 90: ... you select YES the picture is overwritten When the original picture is protected you cannot overwrite the resized picture It may not be possible to trim pictures recorded with other equipment The picture size of the trimmed pictures may become smaller than that of the original one depending on the cut size The picture quality of the trimmed picture may be deteriorated When trimmed pictures are ov...

Page 91: ...erred to your PC before proceeding with format function During formatting do not turn the camera off When you format the card use a battery with sufficient battery power P14 or AC adapter DMW CAC1 optional When the SD Memory Card Write Protect switch is slid to LOCK you cannot format the card If the card cannot be formatted consult your nearest servicenter Initializing the Card FORMAT EXITMENU SEL...

Page 92: ... camera on and then set the mode dial to playback mode Viewing pictures in other countries When setting VIDEO OUT on the menu you can view pictures on a TV in other countries regions which use the NTSC or PAL system Even if you set menu selection for VIDEO OUT to PAL the output signal is still NTSC in the recording mode Playback pictures on TV with SD Memory Card slot A recorded SD Memory Card can...

Page 93: ...amera is connected via USB Mass Storage communication system When PictBridge PTP is selected the camera is connected via the PTP Picture Transfer Protocol communication system PC HIGHLIGHT OFF EXITMENU USB MODE SELECT SETUP 3 3 VIDEO OUT NTSC SCENE MENU AUTO MENU LANGUAGE ENG USB MODE SELECT SET PictBridge PTP PC Devices to be connected Setting on the USB mode PC OS Windows 2000 Professional Windo...

Page 94: ...ridge PTP When the camera is shipped PC is selected When connecting to a PC which includes the above mentioned OS and setting the USB MODE to PictBridge PTP the messages shown on the right appear on the LCD monitor of the camera The following messages appear for each OS on the display of the PC Select Cancel to close the window and disconnect the USB connection cable OS Message Windows 2000 Profes...

Page 95: ...and set the USB MODE according to the OS you use Set to PC or PictBridge PTP Refer to Before Connecting with USB Connection Cable on page 93 If USB MODE is set to PictBridge PTP while Windows XP or Mac OS X is used it is connected as PTP 2 Connect the camera to a PC via the USB connection cable A supplied Connect the USB connection cable with the mark facing you Hold C and then insert or pull the ...

Page 96: ...ficient battery power P14 or the AC adaptor DMW CAC1 optional If the remaining battery power becomes low during communication the power indicator blinks and the alarm beeps In this case stop the communication Then turn the camera off and charge or replace the battery Refer to P94 when connecting to the OS except for Windows XP and Mac OS X when setting USB MODE to PictBridge PTP While ACCESS is be...

Page 97: ...mes low during communication the power indicator blinks and the alarm beeps In this case stop the communication at once Then turn the camera off and replace the battery with a charged one or charge the battery Or use the AC adaptor DMW CAC1 optional Set the print settings such as print quality on the printer beforehand Ask the manufacturer of the printer about the corresponding models Read the pri...

Page 98: ...rinter does not support date printing the date cannot be printed on the picture NUM OF PRINTS Set the number of prints PAPER SIZE Possible paper sizes on the camera The items are listed on 1 2 and 2 2 Press 4 to select the desired item These items cannot be displayed when the printer does not support the paper sizes PLEASE SELECT THE PICTURE TO PRINT 100_0001 1 19 2304 PictBridge PRINT SELECT CANC...

Page 99: ...t to the printer again You can change the DPOF print setting by pressing the MENU button P83 2 Select PRINT START and then print out the picture Refer to P98 for print setting Press the MENU button to cancel printing Settings on the printer are prioritized 1 page with no frame print 1 page with frame print 2 pages print 4 pages print CANCELMENU PAPER SIZE PAGE LAYOUT NUM OF PRINTS PRINT START SELE...

Page 100: ...and then set the number of prints to 4 for the picture on NUM OF PRINTS When printing different pictures on 1 sheet of paper only in DPOF printing For example if you want to print 4 different pictures on 1 sheet of paper set PAGE LAYOUT to and then set the number of prints to 1 on COUNT in DPOF print setting P83 for each of the 4 pictures When printing with PictBridge Do not disconnect the USB con...

Page 101: ...e lens ring 2 Attach the lens hood adaptor P20 3 Attach the MC protector A or the ND filter B Cap C supplied with MC protector The lens cap supplied with the camera cannot be attached to the MC protector or the ND filter You cannot attach the MC protector and the ND filter at the same time When taking pictures with the flash using the MC protector or ND filter vignetting effect may occur If the MC...

Page 102: ...Program shift setting indication P35 21 Exposure compensation P43 22 Auto bracket P44 23 Metering mode P72 24 Spot metering target P72 25 AF area P32 26 Spot AF area P72 27 AF assist lamp P74 28 Self timer P42 29 Flash output adjustment P41 30 Zoom Digital zoom P38 74 31 Optical image stabilizer P76 32 MF indication P65 Current date and time is displayed on the bottom of the screen for about 5 sec...

Page 103: ... Battery indication P14 7 Folder File number 8 Page number Total pictures 9 Histogram P30 It will be displayed when the DISPLAY button is pressed 10 Recording information Recording mode Aperture value Shutter speed ISO sensitivity Flash White balance It will be displayed when the DISPLAY button is pressed 11 Recorded date and time 12 Motion image playback 13 Flip animation P76 7 8 9 10 11 100_0001...

Page 104: ...camera near radio transmitters or high voltage lines If you record near radio transmitters or high voltage lines recorded pictures may be adversely affected Make sure to use the supplied cords and cables If you use optional accessories use the cords and the cables supplied with them Do not extend the cords and the cables Do not spray insecticides or volatile chemicals onto the camera If the camera...

Page 105: ...an explosion An unusable battery should be discarded in accordance with battery recycling laws For information you can call the RBRC hotline at 1 800 822 8837 Do not allow the battery terminals to come in contact with metal objects such as necklaces hairpins etc This can result in a short circuit or heat generation and if you touch the battery in this condition you may be badly burned Charger If y...

Page 106: ... folders shown below will appear In the 100_PANA folder it is possible to record up to 999 pictures In the MISC folder it is possible to record the files that have been set with DPOF settings The files recorded in flip animation function are stored in PRIVATE1 folder The motion images created by flip animation function are stored in 100_PANA or another folder Printing pictures recorded with HDTV m...

Page 107: ...ICTURES CAN T BE DELETED The pictures not based on the DCF standard cannot be deleted CAN T BE SET ON THIS PICTURE CAN T BE SET ON SOME PICTURES If the pictures are not based on the DCF standard the DPOF print cannot be set NO ADDITIONAL DELETE SELECTIONS CAN BE MADE You have exceeded the number of pictures that can be set at once with multi delete setting MEMORY CARD ERROR FORMAT THIS CARD The fo...

Page 108: ...ard Before recording delete some pictures The picture is not displayed on the LCD monitor Does the picture appear on the Viewfinder Press the EVF LCD button to switch to LCD monitor display The screen is too bright or dark Adjust the brightness of the screen Flash is not activated Is the flash closed Press the OPEN button to open the flash Unreadable language was selected by mistake Select icon on...

Page 109: ...ment when it is shaken The sound arises when the lens moves This is not a malfunction The lens clicks When brightness has changed due to the zoom or the movement of the camera or other the lens may click and the picture on the screen may be drastically changed however the pictures are not affected The sound is caused by automatic adjustment of the aperture It is not a malfunction Some pixels are i...

Page 110: ...structions of the printer for details Colors that were actually not around the subject appear on the picture This camera compensates the color shift caused by the characteristic of the lens However the color shift may appear when you rotate the zoom lever to Tele etc This is not a malfunction The flash is activated 2 times The first flash is activated for red eye prevention on the subject red eye ...

Page 111: ...urst recording is only with SD Memory Card MultiMediaCard performance will be less Motion image recording 320k240 pixels 30 or 10 frames second without audio The maximum recording time depends on the capacity of the card ISO sensitivity AUTO without flash from ISO64 to ISO200 with flash from ISO100 to ISO400 64 100 200 400 Shutter speed 8 1 2 000th Motion image mode 1 30th 1 2 000th White balance ...

Page 112: ...ponding Motion images QuickTime Motion JPEG motion images without audio Interface Digital USB 2 0 Full Speed Analog video NTSC PAL Composite Switched by menu Terminal V OUT DIGITAL Dedicated jack 8 pin DC IN type 3 jack Dimensions 5 q W k3 7 16q H k4 2 11q D 127 6 mm W k87 2 mm H k106 2 mm D excluding the projection part Weight Approx 18 3 oz 520 g excluding Memory Card and battery Approx 19 6 oz ...

Page 113: ...y Charger AC Adaptor CGA S002A Lithium Ion Battery BN SDCAPU 1B BN SDABPU 1B SD USB Reader Writer compatible with MultiMediaCard SD PC Card Adaptor compatible with MultiMediaCard DMW LND72 DMW LMC72 DMW LTZ10 DMW LWZ10 ND Filter MC Protector Tele Conversion Lens Wide Conversion Lens RP SDH01GU1A RP SDH512U1A RP SDH256U1A RP SD128BU1A RP SD064BPPA RP SD032BPPA 1 GB SD Memory Card 512 MB SD Memory C...

Page 114: ...8032 Ship To Mr Mrs Ms First Last Street Address City State Zip Phone Day Night 4 Shipping information UPS delivery requires complete street address Please photocopy this form when placing an order 3 Method of payment check one Check of Money Order enclosed NO C O D SHIPMENTS VISA MasterCard Make Check or Money Order to PANASONIC ACCESSORIES Please do not send cash 2 Items Ordered Quantity Accesso...

Page 115: ...123 7847 Attn Digital Camera Repair Request for Service Notice USA Only Please photocopy this form when making a request for service notice In the unlikely event this product needs service Please include your proof of purchase Failure to do so will delay your repair To further speed your repair please provide an explanation of what wrong with the unit and any symptom it is exhibiting ...

Page 116: ...hed parts or b replace it with a new or refurbished product The decision to repair or replace will be made by the warrantor During the Labor warranty period there will be no charge for labor During the Parts warranty period there will be no charge for parts You must carry in or mail in your product during the warranty period If non rechargeable batteries are included they are not warranted This wa...

Page 117: ...XCEPT AS LISTED UNDER LIMITED WARRANTY COVERAGE THE WARRANTOR IS NOT LIABLE FOR INCIDENTAL OR CONSEQUENTIAL DAMAGES RESULTING FROM THE USE OF THIS PRODUCT OR ARISING OUT OF ANY BREACH OF THIS WARRANTY As examples this excludes damages for lost time travel to and from the servicer loss of media or images data or other memory content The items listed are not exclusive but are for illustration only A...

Page 118: ...est servicenter by visiting our Web Site For Product Information Operating Assistance Literature Request Dealer Locations and all Customer Service inquiries please contact 1 800 272 7033 Monday Friday 8 30am 8pm EST As of November 2003 Service in Puerto Rico Matsushita Electric of Puerto Rico Inc Panasonic Sales Company Factory Servicenter Ave 65 de Infanteria Km 9 5 San Gabriel Industrial Park Ca...

Page 119: ...ng Pictures 49 50 Digital Zoom 74 Diopter Adjustment 29 DPOF Print Setting 83 E Exposure 34 Exposure Compensation 43 F Fine 71 Fireworks Mode 62 Flip Animation 76 Focus 34 Formatting 91 H HDTV 70 92 Highlight Display 26 29 Histogram 30 I ISO Sensitivity 70 J Jitter 34 L Language setting 27 LCD Monitor 28 102 Lens Cap 19 Lens Hood 20 Lens Hood Adaptor 20 M Macro Mode 56 Manual Exposure 53 55 Manual...

Page 120: ...5 Prefocus 66 Program AE 32 Program Shift 35 Protect 85 PTP 93 Q Quality 71 R Recording Guide Line 29 Reset of setting 26 Resizing 88 Review 37 Rotate 82 S Scene Menu 27 Scene Mode 58 Scenery Mode 60 SD Slide Show 87 Setup Menu 24 Shutter sound 26 Shutter priority AE 52 55 Slide Show 86 Snow Mode 64 Sports Mode 59 Spot 72 Spot focusing 72 Standard 71 Strap 19 T TIFF 71 Trimming 89 U USB Connection...

Page 121: ... Cargue la batería Cuando se envía la cámara la batería está sin carga Cárguela antes del uso 2 Inserte la batería y la tarjeta 3 Encienda la cámara para sacar las imágenes Ajuste el reloj 1 Ajuste el disco del modo a 2 Abra el flash Cuando usa el flash 3 Oprima el botón del obturador para sacar las imágenes 4 Reproduzca las imágenes 1 Ajuste el disco del modo a 2 Seleccione la imagen que quiere v...

Page 122: ...122 MEMO ...

Page 123: ...123 MEMO ...

Page 124: ...ita Electric Corporation of America One Panasonic Way Secaucus NJ 07094 Panasonic Sales Company PSC Division of Matsushita Electric of Puerto Rico Inc Ave 65 de Infanteria Km 9 5 San Gabriel Industrial Park Carolina Puerto Rico 00985 C 2004 Matsushita Electric Industrial Co Ltd P C ...

Reviews: