background image

Searching for an item stored in the Phonebook

You can search for an item in the Phonebook by following the steps below.
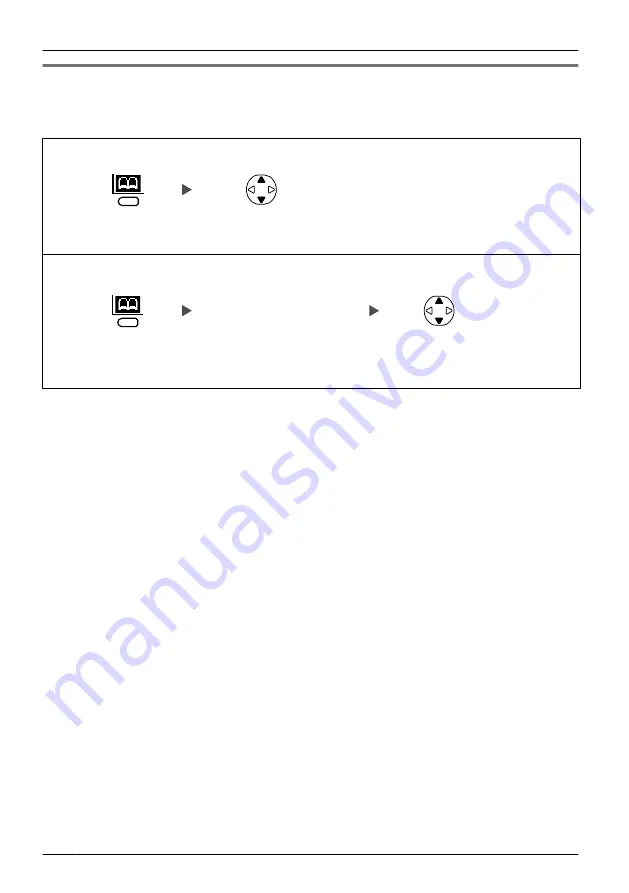
Handset Phonebook

Scrolling through all items

Press the 

left 

soft key

.

Press 

Up

 or 

Down


repeatedly.

Searching by the first character of a name

Enter the 

first character 

of the desired name

.

Select the 
desired item 
(if required).

Press the 

left 

soft key

.

To enter characters, see page 37.

While an item is displayed you can search for another item by pressing the dial key that
corresponds to the letter you are searching for. If there is no entry that corresponds to
the letter you selected, the next entry will be displayed.

20

Operation

Summary of Contents for KX-WT115

Page 1: ...product and save this manual for future use Please use only the batteries provided and charge the batteries for about 7 hours before using the handset for the first time Note In this manual the suffix of each model number is omitted unless necessary Model No KX WT115 Operating Instructions DECT Portable Station ...

Page 2: ...earching for an item stored in the Phonebook 20 Selecting the character entry mode while searching for an item stored in the Phonebook 22 Receiving Calls 23 Caller ID 24 During a Conversation 25 Useful Features 26 Making Use of the Voice Mail Service 30 Using the Handset Phonebook 32 Handset Phonebook 32 Storing an Item in the Handset Phonebook 32 Storing a New Item 32 Editing a Stored Item 33 Sto...

Page 3: ...ing Call Log 42 Configuring Handset Settings 43 Changing the Initial Settings 43 Handset Setting Menu Layout 44 Troubleshooting and Error Messages 48 Troubleshooting 48 Error Messages 50 Important Information 51 Battery Information 51 Important Safety Instructions 52 For Your Safety 52 For Best Performance 55 Additional Information 57 3 Table of Contents ...

Page 4: ...uctions The illustrations may differ in appearance from the actual items Accessories included AC adaptor 1 Model No Part No KX WT115CE PQLV219CE KX WT115UK PQLV219E KX WT115X PQLV219 Charger 1 Battery 2 Part No HHR 55AAAB Belt Clip 1 Battery Cover 1 4 Before Initial Use Before Initial Use ...

Page 5: ...the weight of the adaptor may cause it to become disconnected Fasten the AC adaptor cord to the cord holder Use only the included Panasonic AC adaptor See Accessories included on page 4 WARNING To reduce the risk of fire or electric shock do not overload AC outlets and extension cords Do not bundle the charger s AC adaptor cord with the power cords of machines located nearby Completely insert the ...

Page 6: ...rger securely on the wall Please copy this page and use as a reference for wall mounting Make sure to set the print size to correspond with the size of this page If the dimension of the paper output still deviates slightly from the measurement indicated here use the measurement indicated here When mounting the charger ensure that the correct screws are used for the type of wall Make sure that the ...

Page 7: ... the handset to your belt by following the steps below To attach Insert the clip into the designated notches in the handset To remove Remove the belt clip Note When a phone strap is attached do not attach the belt clip 7 Before Initial Use ...

Page 8: ...e speaker using Hands free mode In Receiver mode pushing this key switches to Hands free mode During a conversation using a headset Hands free mode does not work D Navigator Key Used to scroll through various lists and items A or Volume Used to adjust the receiver or speaker volume while talking B Outgoing Call Log Used to view the Outgoing Call Log C Incoming Call Log Used to view the Incoming Ca...

Page 9: ... exit the Phonebook or Function mode K Recall Flash L Microphone M Charge Contacts N Strap Holes Used to attach phone straps and similar items O Speaker Key Lock You can lock all keys while the handset is in standby mode To lock Press the centre soft key for more than 2 seconds to lock Locked To unlock Press the centre soft key for more than 2 seconds to unlock Unlocked 9 Before Operating the Hand...

Page 10: ...he desired language 1 Select Display Option Press the centre soft key Select Setting Handset Press the centre soft key Press the centre soft key Press the centre soft key Select Language and press the centre soft key 1 You can select one of the 15 languages below 10 Before Operating the Handset ...

Page 11: ...off Press for more than 2 seconds to turn the ringer off or to turn the ringer back on 1 1 If the ringer has been turned off either by setting Ringer Volume to Off or by pressing the key the ringer will not ring To turn the ringer on again do the following If you set Ringer Volume to Off change the Ringer Volume setting Level 1 6 If you turned off the ringer with the key press for more than 2 seco...

Page 12: ... subsequent calls If you attach the headset while receiving an incoming call the ring from the handset does not switch to the headset If you attach the headset before receiving an incoming call and headset ringer is set to On the ringer will be heard from the headset Adjusting the Receiver Speaker Headset Volume During a conversation Press Up or Down to adjust the volume Receiver Volume Level 1 4 ...

Page 13: ... Low Ringer off Needs to be charged Backlight off Date and Time Display Extension Number Soft Keys For more information see page 14 1 See Battery Information on page 51 Example images of the display in this manual are samples only and the actual screen on your phone may vary in appearance 13 Before Operating the Handset ...

Page 14: ...g a conversation Flashes when Mic Mute is on Opens the PBX Extension Phonebook Turns the ringer off Searches for an item in the Phonebook alphabetically Opens the main menu Pressing this key for more than 2 seconds locks all keys Allows you to select the character entry mode Displayed when in Key Lock mode Pressing this key for more than 2 seconds unlocks the keys Displays the Outgoing Call Log Re...

Page 15: ... with the Navigator Key and soft keys Main Menu Handset Phonebook PBX Extension Phonebook PBX System Phonebook Incoming Call Log Outgoing Call Log In standby mode OR To enter characters see page 37 To search for an item stored in the Phonebook see page 20 15 Before Operating the Handset ...

Page 16: ...s the Incoming Call Log Noise Reduction Accesses the Noise Reduction setting Incoming Option Accesses the Incoming Option settings New Entry Stores a new item in the Phonebook Setting Handset Accesses the Setting Handset settings Goes back to standby mode 16 Before Operating the Handset ...

Page 17: ...OR OR Using the Incoming Call Log 2 3 4 Edit phone number max 24 digits 4 3 OR Using the Handset Phonebook 5 First character of a name if required if required Using the PBX System Phonebook 1 5 First character of a name if required if required Using the PBX Extension Phonebook 5 if required First character of a name if required Hot Line To store Desired Phone No 17 Operation Operation ...

Page 18: ... the name as well as the number store the item in the Handset Phonebook before dialling it See page 35 2 If the handset is out of range or the power is off incoming calls are not recorded in the Incoming Call Log To record incoming calls in the Incoming Call Log move within range and make sure the handset is powered on 3 If the phone number of an item in the Incoming Call Log is 23 digits or longe...

Page 19: ...e predialling press for more than 1 second If an outside call is received from a phone number stored in the Handset Phonebook the number and name of the caller will be displayed in the call log To cancel dialling press If is displayed move closer to the CS and dial again For more information refer to the user documentation for your PBX 19 Operation ...

Page 20: ...hing by the first character of a name Enter the first character of the desired name Select the desired item if required Press the left soft key To enter characters see page 37 While an item is displayed you can search for another item by pressing the dial key that corresponds to the letter you are searching for If there is no entry that corresponds to the letter you selected the next entry will be...

Page 21: ...key Enter the first character of the desired name Press the left soft key Select the desired item if required To enter characters see page 37 While an item is displayed you can search for another item by pressing the dial key that corresponds to the letter you are searching for If there is no entry that corresponds to the letter you selected the next entry will be displayed 21 Operation ...

Page 22: ...ters see page 37 While an item is displayed you can search for another item by pressing the dial key that corresponds to the letter you are searching for If there is no entry that corresponds to the letter you selected the next entry will be displayed Selecting the character entry mode while searching for an item stored in the Phonebook Select the desired character entry mode Press the right soft ...

Page 23: ...ng a dial key 0 to 9 or Quick Answer feature See Answer Option on page 45 Note When Quick Answer is set to On if a brief power failure occurs when the handset is receiving a call on the charger the call may be disconnected after being answered You can select the ringer pattern See Incoming Option on page 45 For more information refer to the user documentation for your PBX 23 Operation ...

Page 24: ...n is received and it matches a phone number stored in the phonebook the stored name in the phonebook is displayed and logged in the Incoming Call Log The caller information can be displayed even if a line access number outside line number or P is stored in the Phonebook See Other Option on page 47 24 Operation ...

Page 25: ...ieve a call An Intercom Call An Outside Call Held Line No Three party Conference To add another party during a conversation Talk to the new party Talk with multiple parties Desired Phone No To leave a conference To return to the call before the transfer destination answers press For more information refer to the user documentation for your PBX 25 Operation ...

Page 26: ...ide Line Access No Outside Phone No Cancel Your Extension No Follow Me Follow Me Cancel Do Not Disturb Both Calls Set Cancel Outside Calls Intercom Calls Sending a Call Waiting Tone 1 While hearing a busy tone Wait for an answer Call Waiting To set cancel for intercom calls No Call Tone To set cancel for outside calls No Tone Tone 26 Operation ...

Page 27: ...rrent status To hold and then talk to the new party Paging To page Paging Group No 2 digits Announce Wait for an answer To answer Absent Message To set Will Return Soon Gone Home At Ext Extension No Back at Hour Minute Out until Month Day In a Meeting Enter required no 2 To cancel 27 Operation ...

Page 28: ...leave a message waiting indication When the called extension is busy or does not answer To cancel a message waiting indication Desired Extension No Called extension To call back 1 You cannot send a call waiting tone when the called party has not set the Call Waiting feature the called party has set the Data Line Security feature 2 Enter the desired value in the positions You must enter the correct...

Page 29: ...eate your personal messages Message no 9 refer to the documentation for your PBX 3 If you do not set an extension PIN you cannot lock and unlock your extension For more information refer to the user documentation for your PBX 29 Operation ...

Page 30: ...nagement Automated Attendant Message Notification Other Features End Call VPS Extension No Mailbox Password 1 If you have no password you can skip the last step VPS Voice Processing System From someone else s extension VPS Extension No Mailbox No Mailbox Password 1 If you have no password you can skip the last step 30 Operation ...

Page 31: ...u can skip the last step From your own extension Mailbox Password 1 From someone else s extension Mailbox No Mailbox Password 1 During Playback Repeat Voice Guidance Exit Menu 1 For more information on the Mailbox Password refer to the user documentation for the VPS Some feature access numbers may vary depending on the market Please consult your local dealer for details 31 Operation ...

Page 32: ... becomes unrecoverable due to product malfunction Storing an Item in the Handset Phonebook Storing a New Item Enter name max 16 characters Enter phone number max 24 digits Press the centre soft key Press the centre soft key Press the centre soft key for Save Press the centre soft key Select New Entry Press the centre soft key To enter characters see page 37 The valid digits are 0 through 9 P R Whe...

Page 33: ... soft key Press the centre soft key Press the centre soft key for Save To enter characters see page 37 To search for an item in the Phonebook see page 20 The valid digits are 0 through 9 P R To change a character or digit press the Navigator Key or to highlight it press to delete it then enter the new character or digit To clear an entire line press for more than 1 second To move the cursor to the...

Page 34: ...not store the number 2 Press to confirm each entry name max 16 characters phone number max 24 digits When storing an outside phone number the line access number will be stored automatically The line access number must be identical to the handset s Line Access Code setting See Other Option on page 47 If the handset is out of range or the power is off incoming calls are not recorded in the Incoming ...

Page 35: ...er 2 Press the left soft key Press the centre soft key 1 Press the centre soft key for Save 1 If the phone number of an item in the PBX system phonebook is 25 digits or longer an error tone will sound and you cannot store the number 2 Press to confirm each entry name max 16 characters phone number max 24 digits To search for an item in the Phonebook see page 20 35 Using the Handset Phonebook ...

Page 36: ...lect the desired item if required Press the left soft key Enter a name and phone number 1 Press the left soft key Press the centre soft key Press the centre soft key for Save 1 Press to confirm each entry name max 16 characters phone number max 24 digits To search for an item in the Phonebook see page 20 36 Using the Handset Phonebook ...

Page 37: ...ter entry mode Press the centre soft key Example To enter Anne in Alphabet Mode To switch between uppercase and lowercase press To enter a character located on the same dialling key as the previous character move the cursor by pressing the Navigator Key then enter the desired character If you enter a different character by mistake press the Navigator Key or to highlight the character press to dele...

Page 38: ... a key repeatedly will cycle through the characters associated with that key For example to enter the letter C in Alphabet Mode press 3 times The following letters are not available They will be replaced by the uppercase or lowercase version of the same letter The illustrations of the keys in the table may differ in appearance from the actual keys on the handset 38 Using the Handset Phonebook ...

Page 39: ...Verify the password 1 To avoid unauthorised access to this product Set a password that is random and cannot be easily guessed Change the password regularly 2 Make a note of the password so that you will not forget it Unlocking the Handset Phonebook Press the left soft key for more than 2 seconds Enter your password You can view the Phonebook and use it to make calls Press CANCEL Unlocked 39 Using ...

Page 40: ... the Handset Phonebook Temporarily Press the left soft key for less than 2 seconds Enter your password You can view the Phonebook and use it to make calls Press CANCEL Still locked 40 Using the Handset Phonebook ...

Page 41: ... Select the desired item if required Press the centre soft key Select Yes Press the centre soft key Press the centre soft key Erasing all entries Press the left soft key Select Yes Select Erase All Press the centre soft key Press the centre soft key Select Yes Press the centre soft key Press the centre soft key To search for an item in the Phonebook see page 20 41 Deleting Stored Items Deleting St...

Page 42: ...he desired item Press the left soft key Select Yes Press Right Press the centre soft key Incoming Call Log Select the desired item Press the left soft key Select Yes Press the centre soft key Press Left 42 Deleting Stored Items ...

Page 43: ...andset Press the centre soft key Press the centre soft key Follow the setting Select the desired sub item Press the centre soft key Press the centre soft key Press the centre soft key To return to the previous menu item press To cancel press at any time The handset will beep to indicate that the new settings have been saved 43 Configuring Handset Settings Configuring Handset Settings ...

Page 44: ...ger Volume Ringer Pattern Headset Ringer Talk Option Noise Reduction Headset Mic Vol Answer Option Quick Answer Display Option Language Backlight LCD Contrast Tone Option Key Tone Range Alarm System Option Register Handset Other Option Line Access Code 44 Configuring Handset Settings ...

Page 45: ...hts Vision Inc Talk Option Sub Item Description Setting Default Noise Reduction When set to On clear conversation is provided on both transmitting and receiving sides It is useful in noisy environments such as in a warehouse a manufacturing plant a restaurant or a garage For certain types of noise this function might be less effective On Off Off Headset Mic Vol Adjusts the headset microphone volum...

Page 46: ...Level 1 6 Level 3 Tone Option Sub Item Description Setting Default Key Tone Turns the key tone on or off On On Off Range Alarm Selects whether the range alarm tone rings or not On On Off System Option Sub Item Description Setting Default Register Handset Registers a handset with 1 PBX For information about registering the handset contact your dealer Not stored 46 Configuring Handset Settings ...

Page 47: ...Sub Item Description Setting Default Line Access Code Enters the line access code that matches the setting of your PBX One access line code can be stored Enter the code max 6 digits 0 47 Configuring Handset Settings ...

Page 48: ...r confirm that is not displayed You cannot make receive a call The handset is out of range or the CS is busy Move closer to the CS or try again later The radio channel is busy or a radio communication error occurred Try again later You cannot dial The number that you dialled is restricted by the PBX Consult your dealer Key lock mode is on To cancel the mode press for about 2 seconds See Key Lock o...

Page 49: ...7 hours but the beep tones sound and flashes needs to be charged after a few telephone calls The battery charge contacts may be dirty Clean the battery charge contacts without damaging them and charge once more It is time to change the batteries Replace with new batteries While charging the batteries the handset and the AC adaptor feel warm These are normal conditions No Service is displayed The h...

Page 50: ... trying to view the Phonebook No items have been stored See Storing an Item in the Handset Phonebook on page 32 When trying to view the Incoming or Outgoing Call Log No logs have been stored Memory Full The Phonebook is full and cannot store the new item Remove unnecessary data in the Phonebook and try again Insert battery The handset was placed on the charger without batteries Insert the batterie...

Page 51: ...es need to be charged in the following situations flashes and the alarm sounds 1 Charge Batt is displayed 1 If the low battery warning occurs during a conversation the handset will turn off in a few minutes Replacing the Batteries If flashes after using the phone for a short time even when the batteries have been fully charged the batteries should be replaced If you replace the batteries before th...

Page 52: ... supply to your home consult your dealer or local power company Do not allow anything to rest on the power cord Do not locate the charger where the power cord may be stepped on or tripped on To reduce the risk of electric shock do not disassemble this product Only qualified personnel should service this product Opening or removing covers may expose you to dangerous voltages or other risks Incorrec...

Page 53: ...n disconnect device Ensure that the AC outlet is installed near the product and is easily accessible The product should never be placed near or over a radiator or other heat source Use only the AC adaptor batteries and charger indicated in this manual Do not dispose of the batteries in a fire They may explode Check with local authorities for special disposal instructions Do not open or disassemble...

Page 54: ...completely i e use them in the handset until on the display starts flashing Then recharge them as described in the manual After the memory effect has occurred it is possible to achieve almost complete capacity of the Ni MH batteries by charging and discharging several times one after another Ni MH batteries can also self discharge This self discharge depends on the ambient temperature At temperatu...

Page 55: ...e electrical noise such as fluorescent lamps and motors These noise sources can interfere with performance of the product Do not place the product in rooms where the temperature is less than 5 C or greater than 40 C Allow 10 cm clearance around the product for proper ventilation Avoid environments with excessive smoke dust moisture mechanical vibration shock or direct sunlight The apparatus is des...

Page 56: ...T NOTICE Under power failure conditions this wireless telephone may not operate Please ensure that a separate telephone not dependent on local power is available for emergency use in emergencies When a failure occurs which results in the internal parts becoming accessible disconnect the AC adaptor immediately and return this unit to the place of purchase or service centre This apparatus is designe...

Page 57: ...r more information about collection and recycling of old products and batteries please contact your local municipality your waste disposal service or the point of sale where you purchased the items Penalties may be applicable for incorrect disposal of this waste in accordance with national legislation For business users in the European Union If you wish to discard electrical and electronic equipme...

Page 58: ...For Users in Taiwan only For Users in Singapore only Complies with IDA Standards DB 01017 For Users in Hong Kong only 58 Important Information ...

Page 59: ...Hereby Panasonic Corporation declares that the radio equipment described in this manual is in compliance with Directive 2014 53 EU The full text of the EU declaration of conformity is available at the following internet address https www ptc panasonic eu compliance documents Contact to Authorised Representative Panasonic Testing Centre Panasonic Marketing Europe GmbH Winsbergring 15 22525 Hamburg ...

Page 60: ...1006 Oaza Kadoma Kadoma shi Osaka 571 8501 Japan Panasonic Corporation 2010 PNQX3031UA KK0810KH5090 CE UK X ...

Reviews: