5.5.3 Programming the Network Settings
For successful operation of a VoIP network using the V-IPGW card, network settings for the PBX at each
location must be programmed appropriately. For a detailed discussion of related features, refer to the Feature
Guide.
This section details the procedure to programme the network settings for the local PBX. After the programming
for the local PBX has been done, repeat the procedure for the remote PBX with the appropriate setting values.
The following procedures describe the process of programming the network settings for each numbering
method.
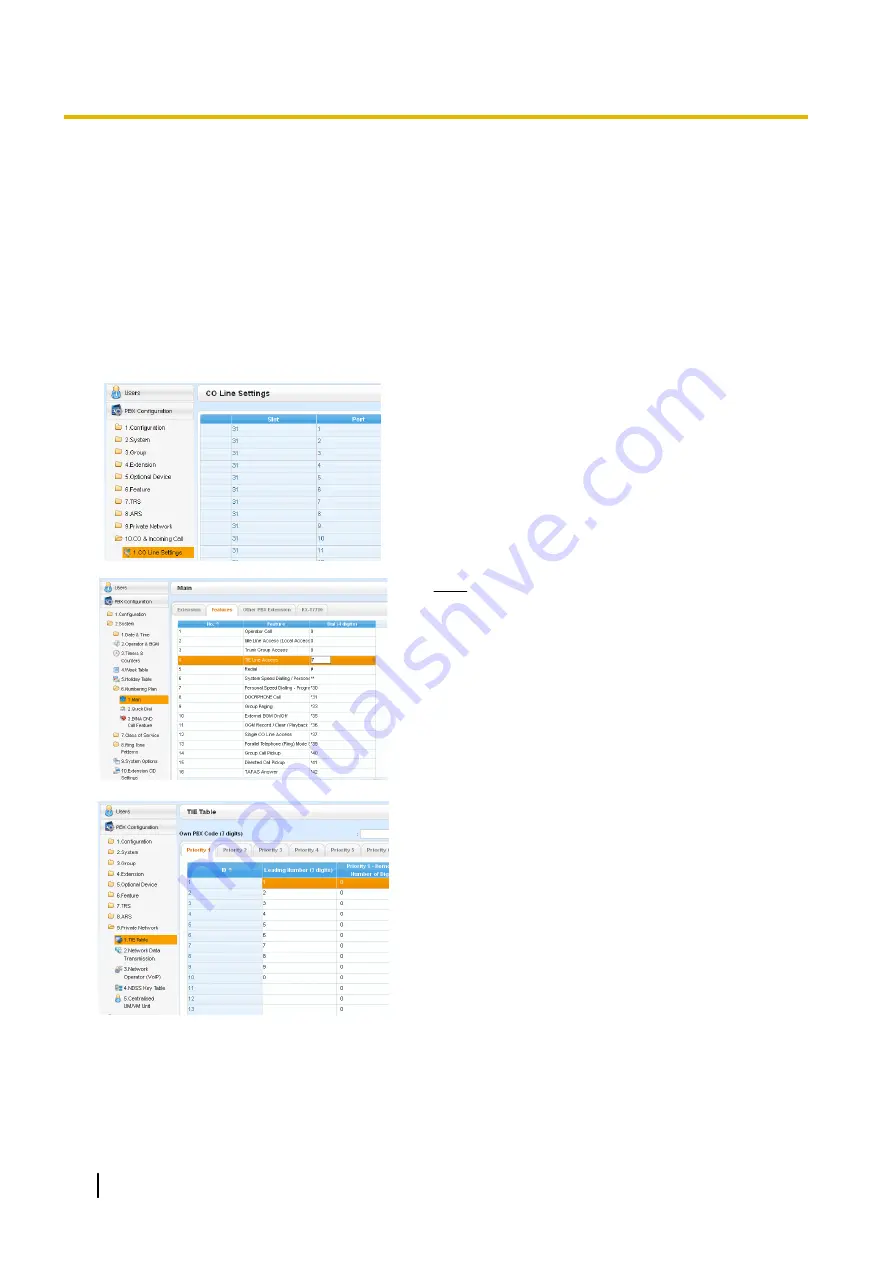
Programming for the PBX Code Method
1.
a.
Click
Setup
®
PBX Configuration
®
CO &
Incoming Call
.
b.
Click
CO Line Settings
.
c.
Type the
CO Name
and assign an unused
Trunk
Group Number
to be used for all IP trunks.
d.
Click
OK
.
2.
Note
Before changing
Numbering Plan
settings, when a
V-SIPEXT card or V-UTEXT card is installed,
change the status of the card(s) to OUS.
a.
Click
Setup
®
PBX Configuration
®
System
.
b.
Click
Numbering Plan
.
c.
Click
Main
.
d.
Click the
Features
tab.
e.
In the
TIE Line Access
cell, type the dialling
number.
f.
Click
OK
.
3.
a.
Click
Setup
®
PBX Configuration
®
Private
Network
.
b.
Click
TIE Table
.
c.
In the
Own PBX Code
cell, type the PBX code of the
local PBX in the network.
d.
In the first unused
Leading Number
cell, type the
PBX code of the remote PBX in the network.
e.
In the corresponding
Trunk Group
list, select the
number of the trunk group to be used when making
calls.
f.
If it is necessary to add number(s) to the input
number, enter the number(s) to be added in the
desired
Added Number
cell.
If it is necessary to delete number(s) from the input
number, enter the number(s) to be deleted in the
desired
Removed Number of Digits
cell.
g.
Click
OK
.
208
Installation Manual
5.5.3 Programming the Network Settings
Summary of Contents for KX-NS500
Page 16: ...16 Installation Manual Table of Contents ...
Page 28: ...28 Installation Manual 1 4 Data Security ...
Page 58: ...58 Installation Manual 2 3 3 System Capacity ...
Page 78: ...78 Installation Manual 3 1 3 Using CTI Applications ...
Page 114: ...4 Hook the main unit on the screw heads 114 Installation Manual 4 2 10 Wall Mounting ...
Page 286: ...286 Installation Manual 6 1 Methods of Stacking Expansion Units ...
Page 300: ...300 Installation Manual 7 1 6 Troubleshooting by Error Log ...
Page 332: ...332 Installation Manual 8 6 Port Security ...
Page 337: ...Installation Manual 337 Notes ...


