


10. Useful Information
76
10.4 Changing the color
calibration
If color printing is too dark or too light, change the color
calibration.
1
Select the desired color to change the calibration.
L
To change the color density for cyan, magenta,
yellow and black, press
{
Menu
}
.
i
{#}{
4
}{
8
}{
5
}
L
To change the color calibration for cyan, press
{
Menu
}
.
i
{#}{
4
}{
8
}{
6
}
L
To change the color calibration for magenta,
press
{
Menu
}
.
i
{#}{
4
}{
8
}{
7
}
L
To change the color calibration for yellow, press
{
Menu
}
.
i
{#}{
4
}{
8
}{
8
}
L
To change the color calibration for black, press
{
Menu
}
.
i
{#}{
4
}{
8
}{
9
}
2
Select the desired color calibration.
{
0
}
“
-5
”
{
1
}
“
-4
”
{
2
}
“
-3
”
{
3
}
“
-2
”
{
4
}
“
-1
”
{
5
}
“
0
”
(default)
{
6
}
“
1
”
{
7
}
“
2
”
{
8
}
“
3
”
{
9
}
“
4
”
{*}
“
5
”
3
{
Set
}
4
Press
{
Menu
}
to exit.
Printing a color test
You can print the color test to check the color density for
each color (page 104).
Option
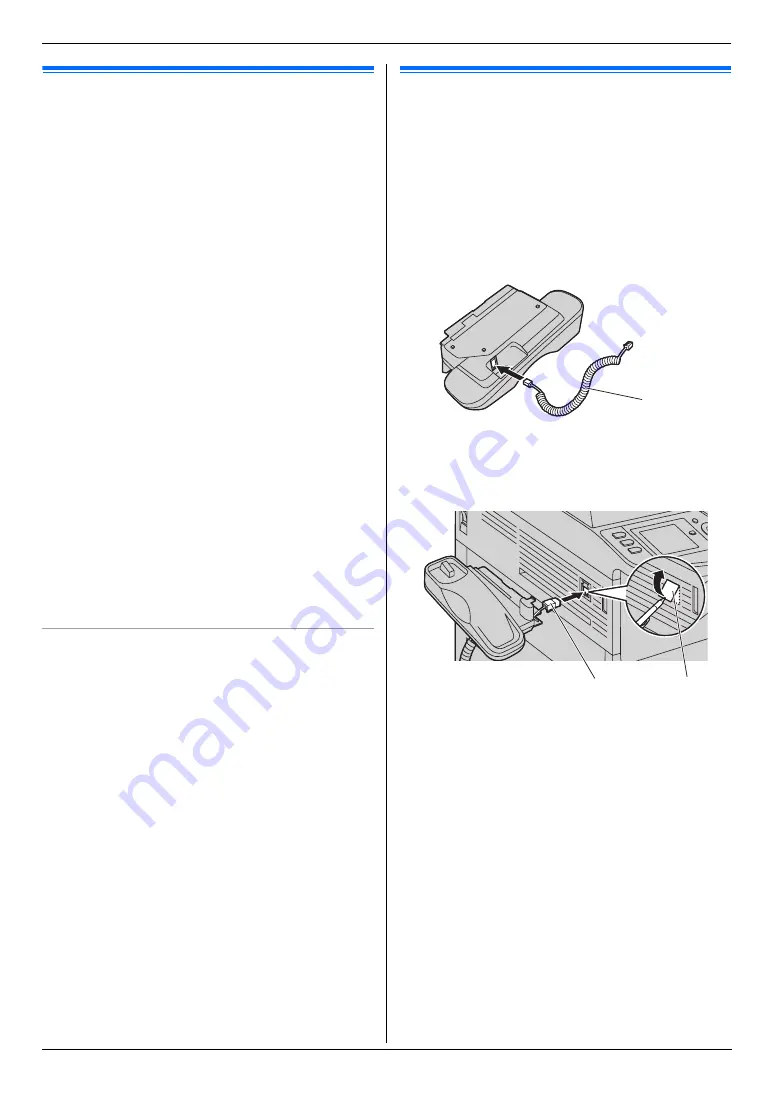
10.5 Optional handset unit
You can add an optional handset unit. See page 7 for
accessory information.
Important:
L
Before installing or removing the optional
handset unit, be sure to turn the power switch
OFF. For more details about the installation,
please refer to the installation guide for the
optional handset unit.
1
Connect the handset cord (
1
) to the handset cradle.
2
Connect the handset connector (
2
).
L
Remove the cover (
3
) from the handset unit
connection jack if attached.
1
3
2
Summary of Contents for KX-MC6040 - Color Laser Multi-Function Printer
Page 121: ...121 Notes ...
Page 122: ...122 Notes ...
Page 123: ...123 Notes ...
Page 124: ...PNQX1560ZA CM0708DY0 CD For hearing or speech impaired TTY users TTY 1 877 833 8855 ...


