- 97 -
≥
Register [A.IRIS LEVEL] to a USER button. (
)
This enables/disables the Auto Iris Level.
≥
When this item is enabled, the [AUTO IRIS LEVEL EFFECT] setting is applied. (
)
≥
Register [ZEBRA] to a USER button. (
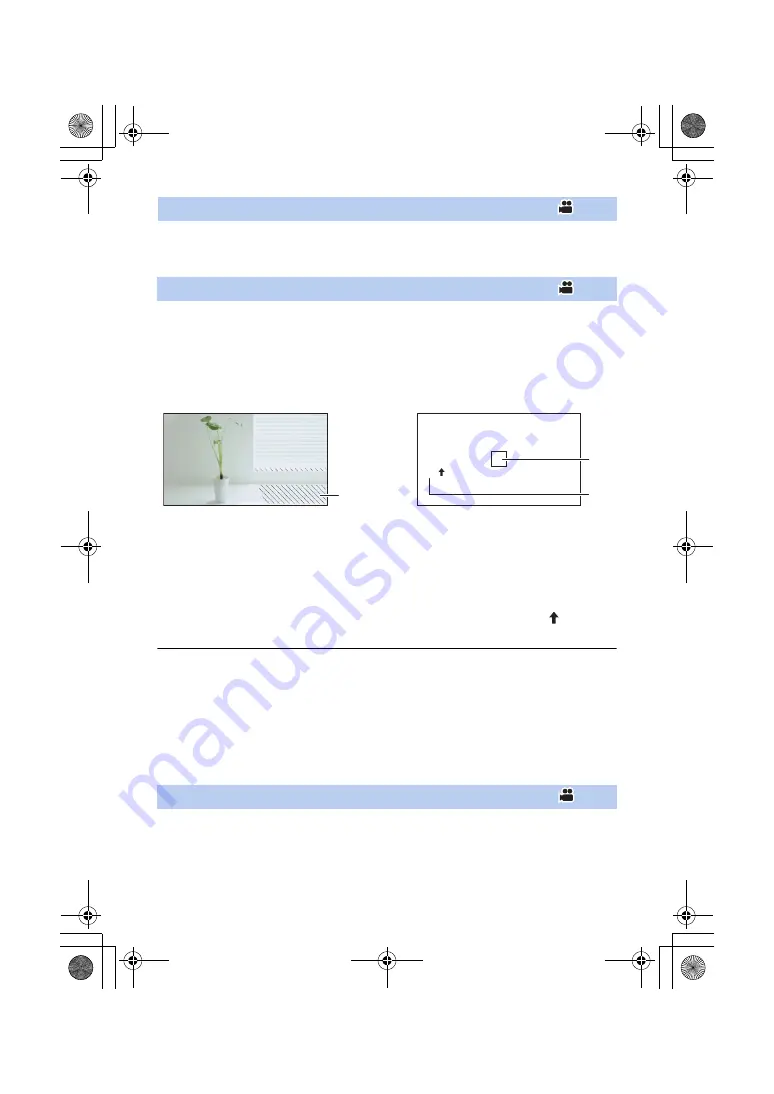
Press USER button or touch USER button icon in the recording screen.
It will switch between the zebra display and the marker display every time the button is pressed.
Zebra 1
#
Zebra 2
*
#
Marker
*
#
setting canceled
* It is not displayed when the [ZEBRA DETECT 2]/[MARKER] is set to [OFF]. (
Zebra display:
Parts where white saturation (color saturation) is likely to occur (extremely brightly lit or shiny parts)
are displayed with diagonal lines (zebra pattern
A
).
Marker display:
Displays the luminance level of the center of the screen (luminance display frame
B
) in %.
It makes the adjustment of the brightness of the object easier, by checking the luminance level of
the object, when recording same object in different surroundings.
≥
Luminance level
C
is displayed between 0% and 99%. It will be displayed as 99% when it is
over 99%.
≥
This function is not available in the following cases:
j
When [WFM] is set to [ON] (
,
)
j
During Freeze Frame (
≥
You can record an image with little white saturation if you manually adjust the shutter speed or
brightness not to display zebra pattern. (
≥
The zebra pattern does not appear on the images actually recorded.
≥
It is also possible to adjust the level of the zebra pattern to be displayed. (
≥
It is also possible to change the [ZEBRA MODE] setting to change the display time for the zebra
pattern display. (
≥
Register [O.I.S.] to a USER button. (
)
This enables/disables the Image Stabilizer. (
)
[A.IRIS LEVEL]
[ZEBRA]
(When Zebra 1 is set)
(When Marker is set)
[O.I.S.]
99%
HC-X1_GD_DVQP1183ZA_eng.book 97 ページ 2016年11月28日 月曜日 午前11時44分


