background image

E

VQT4N34

F0113KD0 ( 1200 

A

)

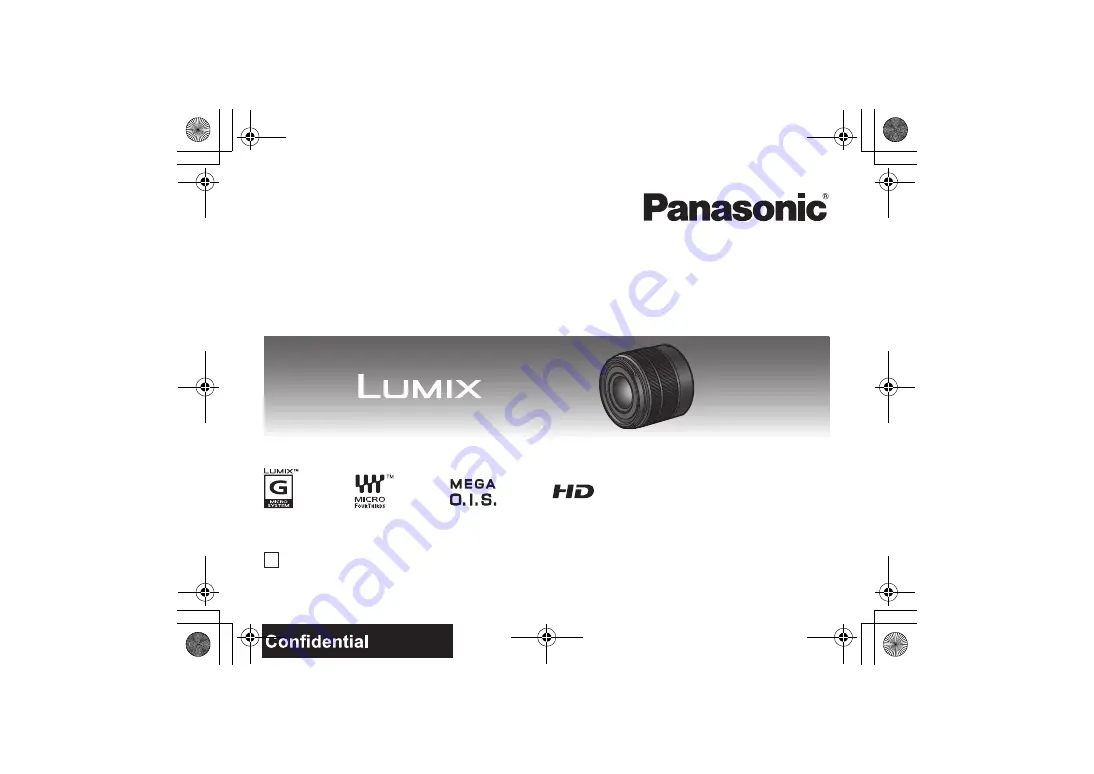
Operating Instructions

INTERCHANGEABLE LENS FOR DIGITAL CAMERA

Model No.

H-FS1442A

Please read these instructions carefully before using this product, and save this manual for future use.

until 

2013/1/25

VQT4N34_Cover.fm  1 ページ  2013年1月21日 月曜日 午前10時18分

Summary of Contents for H-FS1442AE

Page 1: ...Instructions INTERCHANGEABLE LENS FOR DIGITAL CAMERA Model No H FS1442A Please read these instructions carefully before using this product and save this manual for future use until 2013 1 25 VQT4N34_Cover fm 1 ページ 2013年1月21日 月曜日 午前10時18分 ...

Page 2: ... Four ThirdsTM System It cannot be mounted on the Four ThirdsTM mount specification camera The digital camera illustrations in these operating instructions show DMC G5 as an example The appearance and specifications of products described in this manual may differ from the actual products you have purchased due to later enhancements Micro Four ThirdsTM and Micro Four Thirds Logo marks are trademark...

Page 3: ...o save valuable resources and prevent any potential negative effects on human health and the environment which could otherwise arise from inappropriate waste handling Please contact your local authority for further details of your nearest designated collection point Penalties may be applicable for incorrect disposal of this waste in accordance with national legislation For business users in the Eu...

Page 4: ... Fogging of the Lens Condensation occurs when there are differences in temperature and humidity as described below Condensation can cause the lens to become dirty and lead to mold and malfunctioning so exercise caution in the following situations When the camera is brought indoors from outside during cold weather When the camera is brought into an air conditioned car When cold air from an air cond...

Page 5: ...and lens cap are attached to the interchangeable lens at the time of purchase Attaching Detaching the Lens Refer also to the camera s operating instructions for attaching and detaching the lens Attaching the Lens Check that the camera is turned off 1 Turn the lens rear cap to detach it A Lens Rear Cap 2 Align the lens fitting marks B red marks on the camera body and the lens and then rotate the le...

Page 6: ...Pinch the lens cap as shown in the figure to attach or detach Be careful not to lose the lens cap Attaching the Lens Hood Supplied Accessory 1 Align the fitting mark E on the short side of the lens hood with the mark on the tip of the lens 2 Turn the lens hood in the direction of the arrow until it stops and align the stop mark F on the long side of the lens hood with the mark on the tip of the le...

Page 7: ...e lens hood When using the AF assist lamp in the dark detach the lens hood Attaching Filters Vignetting may occur if using 2 or more MC protectors optional DMW LMC46 PL filters optional DMW LPL46 or ND filters optional DMW LND46 or if using thick protectors and or filters The filter may become impossible to remove if excessively tightened so please refrain from tightening it too strongly It is pos...

Page 8: ...tions for Use Take care not to drop or knock the lens Also take care not to put a lot of pressure on the lens Take care not to drop the bag that you inserted the lens in as it may strongly shock the lens The camera may stop operating normally and pictures may no longer be recorded Also the lens may be damaged When using pesticides and other volatile substances around the camera make sure that they...

Page 9: ... alcohol or other similar cleaning agents to clean the lens glass or exterior cabinet Using solvents can damage the lens or cause the paint to peel Wipe off any dust or fingerprints with a soft dry cloth Use a dry dust cloth to remove dirt and dust on the zoom ring and the focus ring Do not use a household detergent or a chemically treated cloth A sound is heard when the camera is turned on or off...

Page 10: ...In focus distance 0 2 m to focal length 14 mm to 20 mm from the focus distance reference line 0 3 m to focal length 21 mm to 42 mm from the focus distance reference line Maximum image magnification 0 17k 35 mm film camera equivalent 0 34k Optical image stabiliser Available O I S switch None Setting of the Stabilizer is done in Rec mode menu by LUMIX digital cameras Mount Micro Four Thirds Mount An...

Page 11: ...11 VQT4N34 Limited Warranty ONLY FOR AUSTRALIA VQT4N34_E book 11 ページ 2012年12月21日 金曜日 午後6時28分 ...

Page 12: ...kku heraus und oder trennen Sie das Netzadapter ab Setzen Sie den Akku dann wieder ein und oder stecken Sie das Netzadapter wieder ein und schalten Sie die Kamera ein Das Objektiv kann mit Digitalkameras verwendet werden deren Objektivfassung mit dem Micro Four Thirds System Standard kompatibel ist Objektive dieser Ausführung lassen sich nicht auf Kameras mit Four Thirds Bajonett aufsetzen Die Erl...

Page 13: ...rn Das G MICRO SYSTEM ist ein Digitalkamerasystem aus der LUMIX Reihe mit Wechselobjektiven auf Grundlage des Micro Four Thirds Standards Andere Namen von Systemen oder Produkten welche in dieser Bedienungsanleitung genannt werden sind normalerweise Warenzeichen oder eingetragene Warenzeichen der Hersteller dieser Produkte oder Systeme DEUTSCH VQT4N34_E book 13 ページ 2012年12月21日 金曜日 午後6時28分 ...

Page 14: ...erichteten kommunalen Sammelstellen bzw Wertstoffsammelhöfen die diese Geräte kostenlos entgegennehmen Die ordnungsgemäße Entsorgung dieses Produkts dient dem Umweltschutz und verhindert mögliche schädliche Auswirkungen auf Mensch und Umwelt die sich aus einer unsachgemäßen Handhabung der Geräte am Ende Ihrer Lebensdauer ergeben könnten Genauere Informationen zur nächstgelegenen Sammelstelle bzw R...

Page 15: ...hlagen des Objektivs Kondensation entsteht wenn sich Umgebungstemperatur oder Luftfeuchte wie unten beschrieben ändern Da Kondensation zu Flecken auf dem Objektiv Pilzbefall und Fehlfunktionen führen kann müssen Sie in folgenden Fällen auf Anzeichen von Kondensation achten Die Kamera wird bei kaltem Wetter von draußen nach drinnen gebracht Die Kamera wird in ein klimatisiertes Auto gebracht Eine K...

Page 16: ...l Beim Kauf sind der hintere Objektivdeckel und der Objektivdeckel auf das Wechselobjektiv aufgesetzt Objektiv ansetzen abnehmen Informationen zum Aufsetzen und Abnehmen des Objektivs finden Sie auch in der Bedienungsanleitung der Kamera Das Objektiv aufsetzen Stellen Sie sicher dass die Kamera ausgeschaltet ist 1 Drehen Sie den hinteren Objektivdeckel um ihn abzunehmen A Hinterer Objektivdeckel 2...

Page 17: ...ücken Sie zum Anbringen oder Abnehmen des Objektivdeckels wie in der Abbildung gezeigt darauf Verlieren Sie den Objektivdeckel nicht Gegenlichtblende aufsetzen Mitgeliefertes Zubehör 1 Richten Sie die Markierung E an der kurzen Seite der Gegenlichtblende mit der Markierung am Rand des Objektivs aus 2 Drehen Sie die Gegenlichtblende in Pfeilrichtung bis sie stoppt und richten Sie die Stop Markierun...

Page 18: ...enlichtblende ab wenn Sie bei wenig Licht mit der AF Hilfslampe arbeiten Filter aufsetzen Ein Vignettierungseffekt kann auftreten wenn 2 oder mehr MC Schutzfilter Sonderzubehör DMW LMC46 PL Filter Sonderzubehör DMW LPL46 oder ND Filter Sonderzubehör DMW LND46 verwendet werden oder wenn dicke Schutzfilter und oder Filter verwendet werden Der Filter lässt sich eventuell nicht mehr abnehmen wenn er z...

Page 19: ...nn es zu Fokussierungsproblemen kommen Bitte stellen Sie nach dem Zoomvorgang erneut scharf Vorsichtsmaßnahmen Achten Sie darauf das Objektiv nicht fallen zu lassen und keinen starken Stößen auszusetzen Üben Sie keinesfalls zu starken Druck auf das Objektiv aus Achten Sie auch darauf dass die Tasche in der Sie das Objektiv aufbewahren nicht herunterfällt denn das Objektiv könnte sonst schwer besch...

Page 20: ...ekt am Gerät kommen Nehmen Sie das Gerät nicht auseinander und nehmen Sie keine Veränderungen daran vor Verwenden Sie zur Reinigung der Geräte kein Waschbenzin Alkohol oder ähnliche Reinigungsmittel Lösungsmittel können zur Beschädigung des Objektivs oder zum Abblättern der Farbe führen Staub und Fingerabdrücke lassen sich mit einem weichen trockenen Tuch entfernen Verwenden Sie ein trockenes Stau...

Page 21: ...m bis Brennweite 14 mm bis 20 mm von der Bezugslinie für Fokusentfernung 0 3 m bis Brennweite 21 mm bis 42 mm von der Bezugslinie für Fokusentfernung Maximale Vergrößerung 0 17k Kleinbild Äquivalent 0 34k Optischer bildstabilisator Verfügbar O I S Schalter Keiner Die Einstellung des Stabilisator erfolgt bei LUMIX Digital Kameras im Rec Betriebsmenü Objektivbajonett Micro Four Thirds Mount Bildwink...

Page 22: ...Micro Four ThirdsTM System Il ne peut pas être monté sur les appareils à monture Four ThirdsTM Les illustrations de l appareil photo numérique de ce manuel d utilisation prennent le DMC G5 comme exemple L apparence et les spécifications des produits décrits dans le présent manuel peuvent différer des produits que vous avez achetés en raison de bonifications ultérieures Micro Four Thirds et le logo...

Page 23: ...uerez à la conservation des ressources vitales et à la prévention des éventuels effets négatifs sur l environnement et la santé humaine qui pourraient survenir dans le cas contraire Afin de connaître le point de collecte le plus proche veuillez contacter vos autorités locales Des sanctions peuvent être appliquées en cas d élimination incorrecte de ces déchets conformément à la législation national...

Page 24: ...ctif embué Il y a formation de condensation lorsque la température et l humidité changent comme suit La condensation peut salir l objectif entraîner de la moisissure et des problèmes de fonctionnement Aussi est il important de prendre des précautions dans les circonstances suivantes Lorsque l appareil est transporté de l extérieur à l intérieur par temps froid Lorsque l appareil est placé dans un ...

Page 25: ...ectif Le capuchon arrière de l objectif et le capuchon d objectif sont fixés à l objectif interchangeable au moment de l achat Fixation Retrait de l objectif Pour les instructions sur la mise en place et le retrait de l objectif reportez vous au manuel d utilisateur de l appareil photo Mise en place de l objectif Vérifiez que l appareil photo est éteint 1 Tournez le capuchon arrière de l objectif ...

Page 26: ...la monture de l objectif ne soient pas rayés Fixez le capuchon sur la monture d objectif de manière à prévenir toute infiltration de poussière dans l appareil Fixation et détachement du capuchon d objectif Pincez le capuchon d objectif comme indiqué sur l illustration pour le mettre en place ou pour l enlever Faites attention de ne pas perdre le capuchon d objectif Fixation du parasoleil Fourni 1 ...

Page 27: ...le parasoleil Nous vous recommandons de retirer le parasoleil Lorsque vous utilisez la lampe d assistance de mise au point automatique dans l obscurité retirez le parasoleil Fixation de filtres Un effet de vignetage peut survenir en utilisant 2 protecteurs MC ou plus en option DMW LMC46 filtres PL en option DMW LPL46 ou filtres ND en option DMW LND46 ou en utilisant des protecteurs et ou des filtr...

Page 28: ... Équivalent à un film de 35 mm 28 mm à 84 mm 4 Point de contact 5 Repère pour la mise en place de l objectif Note En enregistrant un sujet proche avec le flash la lumière du flash peut être bloquée par l objectif et une partie de la photo peut être sombre Vérifiez la distance du sujet en enregistrant Si vous zoomez après avoir fait la mise au point une erreur de mise au point peut survenir Après a...

Page 29: ...soleil ou sur la plage en été Dans des endroits ayant des niveaux de température et d humidité élevés ou dans des endroits où les changements de température et d humidité sont prononcés Dans des endroits ayant une forte concentration de sable de poussière ou de saleté Où il y a du feu Près de radiateurs climatiseurs humidificateurs Où l eau pourrait mouiller l objectif Où il y a des vibrations À l...

Page 30: ... un défaut de fonctionnement La fonction de stabilisation ne peut être mise hors marche ou la fonction de stabilisation ne fonctionne pas lorsque cet objectif est fixé à l appareil photo numérique La fonction de stabilisation optique de l image ne fonctionne correctement qu avec des appareils photo numériques pris en charge Lors de l utilisation d appareils photo numériques Panasonic de modèles an...

Page 31: ...t 0 2 m à longueur focale 14 mm à 20 mm à partir de la ligne de référence de la distance de mise au point 0 3 m à longueur focale 21 mm à 42 mm à partir de la ligne de référence de la distance de mise au point Grossissement maximum de l image 0 17k Équivalent à un film de 35 mm 0 34k Stabilisateur optique de l image Disponible Commutateur O I S Aucun Le réglage de Stabilisat s effectue dans le men...

Page 32: ...rrectamente apague la cámara y quite la batería y o el adaptador de CA conectado Luego vuelva a insertar la batería y o vuelva a conectar el adaptador de CA y encienda la cámara El objetivo puede usarse con una cámara digital compatible con el estándar de montaje de objetivos del Micro Four ThirdsTM System No se puede montar en una cámara con estándar de soporte Four ThirdsTM Las figuras de la cám...

Page 33: ...RO SYSTEM es un sistema de cámara digital con objetivo intercambiable de LUMIX basado en el estándar Micro Four Thirds System Los nombres de los sistemas y productos que se mencionan en estas instrucciones generalmente son marcas comerciales registradas o marcas comerciales de los fabricantes que desarrollaron el sistema o producto en cuestión ESPAÑOL VQT4N34_E book 33 ページ 2012年12月21日 金曜日 午後6時28分 ...

Page 34: ...rsos y a evitar cualquier posible efecto negativo en la salud de las personas y en el medio ambiente que pudiera producirse debido al tratamiento inadecuado de desechos Póngase en contacto con su autoridad local para que le informen detalladamente sobre el punto de recogida designado más cercano De acuerdo con la legislación nacional podrían aplicarse multas por la eliminación incorrecta de estos ...

Page 35: ...el objetivo La condensación ocurre cuando se encuentra una diferencia en la temperatura y humedad como se describe abajo La condensación puede hacer ensuciar el objetivo y producir hongos y un funcionamiento defectuoso por lo tanto ponga cuidado en las situaciones a continuación Cuando lleva la cámara en casa desde el aire libre durante un tiempo frío Cuando lleva la cámara dentro de un coche con ...

Page 36: ...y la tapa del objetivo intercambiable al momento de la compra Unir y quitar el objetivo Se refiera también a las instrucciones de funcionamiento de la cámara para unir y separar el objetivo Unión del objetivo Compruebe que la cámara esté apagada 1 Gire la tapa trasera del objetivo para separarla A Tapa trasera del objetivo 2 Alinee las marcas para ajustar el objetivo B marcas rojas ubicadas en el ...

Page 37: ... se muestra en la figura para colocarla o sacarla Ponga cuidado en no perder la tapa del objetivo Unión de la visera del objetivo Accesorio suministrado 1 Alinee la marca de ajuste E en el lado corto de la visera de lente con la marca en la punta de la lente 2 Gire la visera de la lente en la dirección de la flecha hasta que se detenga y alinee la marca de tope F en el lado largo de la visera de l...

Page 38: ...mendamos que quite dicha visera Cuando usa la lámpara de ayuda AF en la oscuridad quite la visera del objetivo Unión de los filtros La viñetas pueden ocurrir si se usan 2 o más protectores MC opcional DMW LMC46 filtros PL opcional DMW LPL46 o filtros ND opcional DMW LND46 o si se usan protectores o filtros gruesos Tal vez sea imposible de retirar el filtro si está demasiado apretado por lo que no ...

Page 39: ... enfoque Luego de hacer zoom realice de nuevo el enfoque Precauciones para el uso Tenga cuidado de no hacer caer el objetivo ni le choque contra Asimismo tenga cuidado de no presionarlo demasiado Tenga cuidado de no hacer caer la bolsa en la que cabe el objetivo Éste podría dañarse la cámara podría dejar de funcionar normalmente y las imágenes ya podrían no grabarse Cuando usa pesticidas y otras s...

Page 40: ...cohol u otros agentes de limpieza parecidos para limpiar la unidad El hecho de usar disolventes puede dañar el objetivo y hacer desconchar su barniz Quite cualquier indicio de polvo o huellas dactilares con un paño blando y seco Utilice un paño seco para polvo a fin de quitar del anillo del zoom y el del enfoque la suciedad y el polvo No use detergentes para cocina o un paño tratado químicamente S...

Page 41: ... a longitud focal 14 mm a 20 mm desde la línea de referencia de la distancia de enfoque 0 3 m a longitud focal 21 mm a 42 mm desde la línea de referencia de la distancia de enfoque Máxima ampliación de la imagen 0 17k Igual a una cámara de película de 35 mm 0 34k Estabilizador óptico de la imagen Disponible Interruptor O I S Ninguna El ajuste de Estabilizador está hecho en el menú de modo Rec por ...

Page 42: ...o l adattatore CA collegato Quindi inserire nuovamente la batteria e o ricollegare l adattatore CA Infine riaccendere la fotocamera L obiettivo può essere utilizzato con una fotocamera digitale dotata di un supporto dell obiettivo compatibile con lo standard Micro Four ThirdsTM System Non montabile su una fotocamera con specifiche sul supporto Four ThirdsTM Le illustrazioni della fotocamera digita...

Page 43: ... G MICRO SYSTEM è un sistema di fotocamera digitale LUMIX del tipo a più obiettivi basato sullo standard Micro Four Thirds System Gli altri nomi di sistemi o prodotti menzionati nelle presenti istruzioni sono generalmente marchi registrati o marchi depositati dei produttori che hanno sviluppato detti sistemi o prodotti ITALIANO VQT4N34_E book 43 ページ 2012年12月21日 金曜日 午後6時28分 ...

Page 44: ...à a far risparmiare preziose risorse ed evitare potenziali effetti negativi sulla salute umana e sull ambiente che potrebbero derivare altrimenti da uno smaltimento inappropriato Per ulteriori dettagli contattare la propria autorità locale o il punto di raccolta designato più vicino In caso di smaltimento errato di questo materiale di scarto potrebbero venire applicate delle penali in base alle le...

Page 45: ...mento dell obiettivo La condensa si forma quando si verificano differenze di temperatura e umidità come quelle descritte sotto La condensa può causare l appannamento dell obiettivo e portare alla formazione di muffe e a malfunzionamenti per cui è necessario fare attenzione nelle seguenti situazioni Quando si porta la fotocamera da un ambiente esterno freddo a uno interno Quando si porta la fotocam...

Page 46: ...ettivo posteriore e il copriobiettivo sono installati sull obiettivo intercambiabile al momento dell acquisto Installazione Rimozione dell obiettivo Consultare anche le istruzioni per l uso della fotocamera per informazioni sulla procedura di installazione e disinstallazione della fotocamera Installazione dell obiettivo Controllare che la fotocamera sia spenta 1 Ruotare il copriobiettivo posterior...

Page 47: ...er evitare che sporcizia o polvere penetrino all interno dell unità principale Installazione e rimozione del copriobiettivo Premere i lati del copriobiettivo come illustratonell immagine quando lo si installa o lo si disinstalla Fare attenzione a non perdere il copriobiettivo Installazione del paraluce Accessorio in dotazione 1 Allineare il segno per l installazione E sul lato corto del paraluce c...

Page 48: ... di aiuto AF in condizioni di oscurità scollegare il paraluce Installazione dei filtri È possibile che si verifichi un effetto vignetta se si utilizzano 2 o più protezioni MC opzionale DMW LMC46 filtri PL opzionale DMW LPL46 o filtri ND opzionale DMW LND46 o se si utilizzano protezioni e o filtri spessi Se il filtro viene stretto eccessivamente può diventare impossibile rimuoverlo Evitare quindi d...

Page 49: ...rende un immagine Se si zooma dopo aver messo a fuoco possono verificarsi errori di messa a fuoco Dopo aver zoomato mettere nuovamente a fuoco Precauzioni per l uso Fare attenzione a non lasciar cadere o a non urtare l obiettivo Evitare inoltre di esercitare una forte pressione sull obiettivo Fare attenzione a non far cadere la custodia in cui è stato inserito l obiettivo in quanto questo può dann...

Page 50: ...er pulire l unità L utilizzo di solventi può danneggiare l obiettivo o provocare il distacco di vernice Rimuovere la polvere o le impronte digitali eventualmente presenti con un panno morbido e asciutto Usare un panno asciutto per rimuovere sporco e polvere sulla ghiera dello zoom e sulla ghiera della messa a fuoco Non utilizzare un detergente da cucina o un panno chimico Quando la fotocamera vien...

Page 51: ...unghezza focale 14 mm a 20 mm da linea di riferimento distanza di messa a fuoco 0 3 m a lunghezza focale 21 mm a 42 mm da linea di riferimento distanza di messa a fuoco Ingrandimento massimo dell immagine 0 17k equivalente per fotocamera con pellicola da 35 mm 0 34k Stabilizzatore ottico di immagine Disponibile Interruttore O I S Nessuno L impostazione di Stabilizz viene effettuata nel menu della ...

Page 52: ... AC 整流 器 然後重新插入電池和 或連接 AC 整流器 隨 後 開啟相機 此鏡頭可用於與鏡頭座標準 Micro Four Thirds System 兼容的數位相機 無法安裝到 4 3 Four Thirds 接口規格的相機 上 本使用說明書中的數位相機圖例以DMC G5為例進 行說明 由於產品的不斷改進 本說明書中所描述的產品外 觀和規格可能與實際所購買的產品有所不同 Micro Four Thirds 和 Micro Four Thirds 標誌是 Olympus Imaging Corporation 在日本 美國 歐盟和 其他國家的商標或註冊商標 Four Thirds 和Four Thirds標誌是Olympus Imaging Corporation 在日本 美國 歐盟和其他國家的商標或 註冊商標 VQT4N34_E book 52 ページ 2012年12月21日 金曜日 ...

Page 53: ... 基於微型 4 3 系統 Micro Four Thirds System 標準 本說明書中提到的其他公司名稱和產品名稱是各個 公司的註冊商標或商標 如果看到此符號的話 歐盟以外國家的棄置資訊 本符號只適用於歐盟國家 如欲丟棄本產品 請聯絡當地 政府單位或經銷商 洽詢正確 的棄置方法 進口廠商 台松電器販賣股份有限公司 地址 新北市中和區員山路 579 號 電話 02 2223 5121 中 文 VQT4N34_E book 53 ページ 2012年12月21日 金曜日 午後6時28分 ...

Page 54: ...到影響 拍攝前後 請用一塊軟乾布輕輕 擦拭鏡頭表面 請勿將鏡頭支座朝下放置 請勿使鏡頭支座接觸點 1 變髒 關於水汽凝結 鏡頭的霧化 當周圍環境溫度和濕度如下變化時 會發生水汽凝 結 水汽凝結可能會使鏡頭變髒 產生霉菌及發生 故障 因此在下列情況時請注意 在寒冷的天氣裡將相機從室外帶到室內時 將相機帶到開著空調的車內時 空調等設備的冷風直接吹向鏡頭時 在潮濕的地方 要防止水汽凝結 請將相機放在塑膠袋中 直到相 機溫度接近周圍環境溫度 如果發生了水汽凝結 請關閉電源 然後將其擱置約 2 小時 當相機溫度 接近周圍環境溫度時 霧化將自然消失 故障預防 VQT4N34_E book 54 ページ 2012年12月21日 金曜日 午後6時28分 ...

Page 55: ...3 年 1 月時的為準 此後可能會有變 更 1 鏡頭遮光罩 2 鏡頭蓋 3 鏡頭後蓋 購買時 鏡頭後蓋和鏡頭蓋安在可互換鏡頭 上 安裝 取下鏡頭 安裝及取下鏡頭的方法也請參閱相機的使用說明書 安裝鏡頭 檢查相機是否關閉 1 轉動鏡頭後蓋將其取下 A 鏡頭後蓋 2 將鏡頭上的鏡頭安裝標記B 紅色標記 對準相機機身 上的鏡頭安裝標記 紅色 標記 然後朝箭頭指示的 方向轉動鏡頭 直到發出喀 噠聲為止 安裝鏡頭時 請勿按鏡頭釋放按鈕 C 請勿將鏡頭以傾斜的狀態安裝到相機上 否則 鏡 頭接座會被劃傷 檢查鏡頭是否安裝正確 VYC1113 VYF3510 VFC4605 2 1 3 VQT4N34_E book 55 ページ 2012年12月21日 金曜日 午後6時28分 ...

Page 56: ...會 劃傷鏡頭支座觸點 將機身蓋安裝到相機上 以防 止污物或灰塵進入機身內部 安裝和取下鏡頭蓋 像圖中所示的那樣捏住鏡頭蓋安裝或取下 請注意不要弄丟鏡頭 蓋 安裝鏡頭遮光罩 提供的附件 1 將鏡頭遮光罩的短的部分上 的安裝標記 E 對準鏡頭頂端 的標記 2 朝箭頭指示的方向轉動鏡頭 遮光罩直到停止為止 將鏡 頭遮光罩的長的部分上的停 止標記 F 對準鏡頭頂端的標 記 持拿鏡頭遮光罩時 您的 手指要如圖所示那樣放 置 請勿以會使其變形或 彎曲的方式持拿鏡頭 遮光罩 VQT4N34_E book 56 ページ 2012年12月21日 金曜日 午後6時28分 ...

Page 57: ...光燈變暗 因此螢幕的 下面部分可能會變暗 暈影效果 並且閃光燈的 控制可能會失效 當在暗處使用 AF 輔助燈時 請取下鏡頭遮光罩 安裝濾鏡 如果使用 2 個以上的 MC 保護鏡 可選件 DMW LMC46 PL 偏光鏡 可選件 DMW LPL46 或 ND 濾鏡 可選件 DMW LND46 或者如果 使用厚的保護鏡和 或濾鏡 可能會出現暈影 如果擰得過緊 可能無法取下濾鏡 因此 請不要 太用力地擰它 安裝了濾鏡時 可以安裝鏡頭蓋 不能將轉換鏡頭或轉接器安裝到該鏡頭上 可以使 用濾鏡 但安裝其他任何元件可能會對鏡頭造成損 壞 VQT4N34_TAI fm 57 ページ 2013年1月21日 月曜日 午前10時43分 ...

Page 58: ...確認到被攝物體的距離 如果在對焦後變焦 可能會出現對焦誤差 變焦 後 請重新進行對焦 使用時的注意事項 請務必小心 切勿跌落或撞擊鏡頭 還要務必小心 切 勿在鏡頭上施加過多壓力 請注意不要讓裝有鏡頭的包跌落 因為這樣可能會損 壞鏡頭 相機可能會停止正常操作 可能無法繼續拍 攝圖片 在相機周圍使用殺蟲劑或其他揮發性的物質時 請勿 使其接觸到鏡頭 如果此類化學藥品接觸到鏡頭 可能會損壞鏡頭 表面漆可能也會剝落 請勿在本裝置還安裝在相機機身時攜帶本裝置 任何情況下都不要在以下地方使用或存放本裝置 因為這樣做可能導致操作時出現問題或產生故障 太陽直射的地方或夏天的海邊 溫度和濕度較高或者溫度和濕度變化劇烈的地方 沙子 灰塵或污垢比較集中的地方 有火的地方 1 2 3 4 5 VQT4N34_E book 58 ページ 2012年12月21日 金曜日 午後6時28分 ...

Page 59: ...類似的清潔劑清潔 本裝置 使用溶劑會損壞鏡頭或導致表面漆剝落 請用一塊乾軟布擦袪灰塵或手印 請用軟乾布擦去變焦環和對焦環上的污垢和灰塵 請勿使用廚房清潔劑或經化學方法處理過的抹布 當相機開啟或關閉時聽到機械音 這是鏡頭或光圈運動的聲音 不是故障 將此鏡頭安裝到數位相機上時 穩定器功能無法關閉 或者穩定器功能不工作 只有在支持的相機上 此鏡頭的光學影像穩定器功 能才能正確工作 使用舊機型的 Panasonic 數位相機 DMC GF1 DMC GH1 DMC G1 時 無法將 拍攝 模式功能 表中的 穩定器 設定為 OFF 建議在下面的網站 上更新數位相機的韌體 http panasonic jp support global cs dsc download 在其他廠家生產的數位相機上使用此鏡頭時 有關 詳情 請與各自的公司聯繫 故障排除 VQT4N34_E book 59 ページ 2012...

Page 60: ... 至 F5 6 遠攝 最小光圈值 F22 鏡頭結構 9 件 8 組 2 片非球面鏡片 In focus 焦點對準 距離 0 2 m 至 焦距 14 mm 至 20 mm 從對焦距離基準線開始 0 3 m 至 焦距 21 mm 至 42 mm 從對焦距離基準線開始 最大影像放大率 0 17k 相當於 35 mm 菲林相機 0 34k 光學影像穩定器 可用 O I S 開關 無 LUMIX 數位相機的 穩定器 的設定通過 拍攝 模式功能表進行 裝配 Micro Four Thirds 接口 視角 75x 廣角 至 29x 遠攝 濾鏡直徑 46 mm 最大直徑 約 56 mm 全長 約 49 mm 從鏡頭的頂端到鏡頭接口的基準面 重量 約 110 g VQT4N34_TAI fm 60 ページ 2013年1月9日 水曜日 午後5時37分 ...

Page 61: ... Не пользуйтесь фотокамерой вблизи сотовых телефонов так как телефоны могут вызвать помехи отрицательно сказывающиеся на качестве снимков и звука Если камера подвергается негативному влиянию электромагнитного излучения и перестает работать нормально выключите камеру извлеките батарею и или подключенный сетевой адаптер переменного тока Затем снова вставьте батарею и или снова подключите сетевой ада...

Page 62: ...maging Corporation в Японии Соединенных Штатах Европейском Союзе и других странах G MICRO SYSTEM является системой объективов сменного типа для цифровых камер LUMIX разработанной на основе стандарта Micro Four Thirds System Другие названия систем и продуктов упомянутые в данной инструкции по эксплуатации обычно являются зарегистрированными товарными знаками или товарными знаками производителей кот...

Page 63: ...ии Запотевании объектива Конденсация происходит при разнице в температуре и влажности как описано ниже Конденсация может привести к загрязнению объектива появлению плесени и неисправностей поэтому необходимо соблюдать осторожность в следующих ситуациях при внесении камеры в помещение с улицы в холодную погоду при внесении камеры в салон автомобиля где работает кондиционер если поток холодного возд...

Page 64: ...тива Во время покупки крышка объектива и задняя крышка объектива прикреплены к сменному объективу Установка Снятие объектива Информацию об установке и снятии объектива см также в инструкциях по эксплуатации камеры Установка объектива Убедитесь что камера выключена 1 Поверните заднюю крышку объектива и снимите ее A Крышка задней части объектива 2 Совместите установочную метку объектива B красная ме...

Page 65: ...устройства Установка и снятие крышки объектива Чтобы установить или снять крышку объектива нажмите на нее как показано на рисунке Будьте осторожны чтобы не потерять крышку объектива Присоединение бленды объектива Принадлежность в комплекте 1 Совместите метку установки на короткой стороне бленды объектива E с меткой с края объектива Держите бленду объектива пальцами расположите их так как показано ...

Page 66: ...е вспомогательной лампы автоматической фокусировки отсоедините бленду объектива Установка фильтров При использовании двух или более многослойных защитных фильтров поставляются отдельно DMW LMC46 поляризационных фильтров поставляются отдельно DMW LPL46 или фильтров ND поставляются отдельно DMW LND46 либо при использовании толстых защитных устройств и или фильтров может возникать виньетирование Если...

Page 67: ...имки Эквивалент 35 мм пленочной камеры от 28 мм до 84 мм 4 Метка установки объектива 5 Монтажная поверхность Примечание При съемке со вспышкой близко расположенного объекта свет вспышки может блокироваться объективом и часть снимка может быть затемнена Проверяйте расстояние до объекта при съемке Если использовать функцию увеличения после выполнения фокусировки фокусировка может оказаться неправиль...

Page 68: ...м прямых солнечных лучей или на пляже летом В местностях с высокой влажностью воздуха и высокими температурами или с резкими перепадами температуры и влажности В местностях с высокими концентрациями песка пыли или грязи При срабатывании вспышки Возле обогревателей кондиционеров или увлажнителей Где возможно намокание устройства Где присутствует вибрация В автомобиле См также инструкции по эксплуат...

Page 69: ...диафрагмы объектива и не является неисправностью Когда данный объектив присоединен к цифровой камере функцию стабилизатора нельзя отключить или функция стабилизатора не будет работать Функция оптического стабилизатора изображения данного объектива правильно работает только с поддерживаемыми камерами При использовании старых цифровых камер Panasonic DMC GF1 DMC GH1 DMC G1 Стабилиз в меню режима Зап...

Page 70: ...ва Фокусное расстояние от От 0 2 м до фокусное расстояние от 14 мм до 20 мм от линии отсчета расстояния до объекта съемки От 0 3 м до фокусное расстояние от 21 мм до 42 мм от линии отсчета расстояния до объекта съемки Максимальное увеличение изображения 0 17k Эквивалент 35 мм пленочной камеры 0 34k Оптический стабилизатор изображения Имеется Переключатель O I S Нет В цифровых камерах LUMIX установ...

Page 71: ...а РФ О защите прав потребителей срок службы данного изделия равен 7 годам с даты производства при условии что изделие используется в строгом соответствии с настоящей инструкцией по эксплуатации и применимыми техническими стандартами VQT4N34_E book 71 ページ 2012年12月21日 金曜日 午後6時28分 ...

Page 72: ...panasonic net Pursuant to at the directive 2004 108 EC article 9 2 Panasonic Testing Centre Panasonic Marketing Europe GmbH Winsbergring 15 22525 Hamburg Germany EU Panasonic Corporation 2013 VQT4N34_E book 72 ページ 2012年12月21日 金曜日 午後6時28分 ...

Reviews: