background image

Sleep/Hibernation Functions

Starting Up Your Computer Quickly

The sleep or hibernation functions allow you to shut off the computer without closing programs and documents. You can quickly return to the programs
and documents that you were working on before sleep or hibernation.

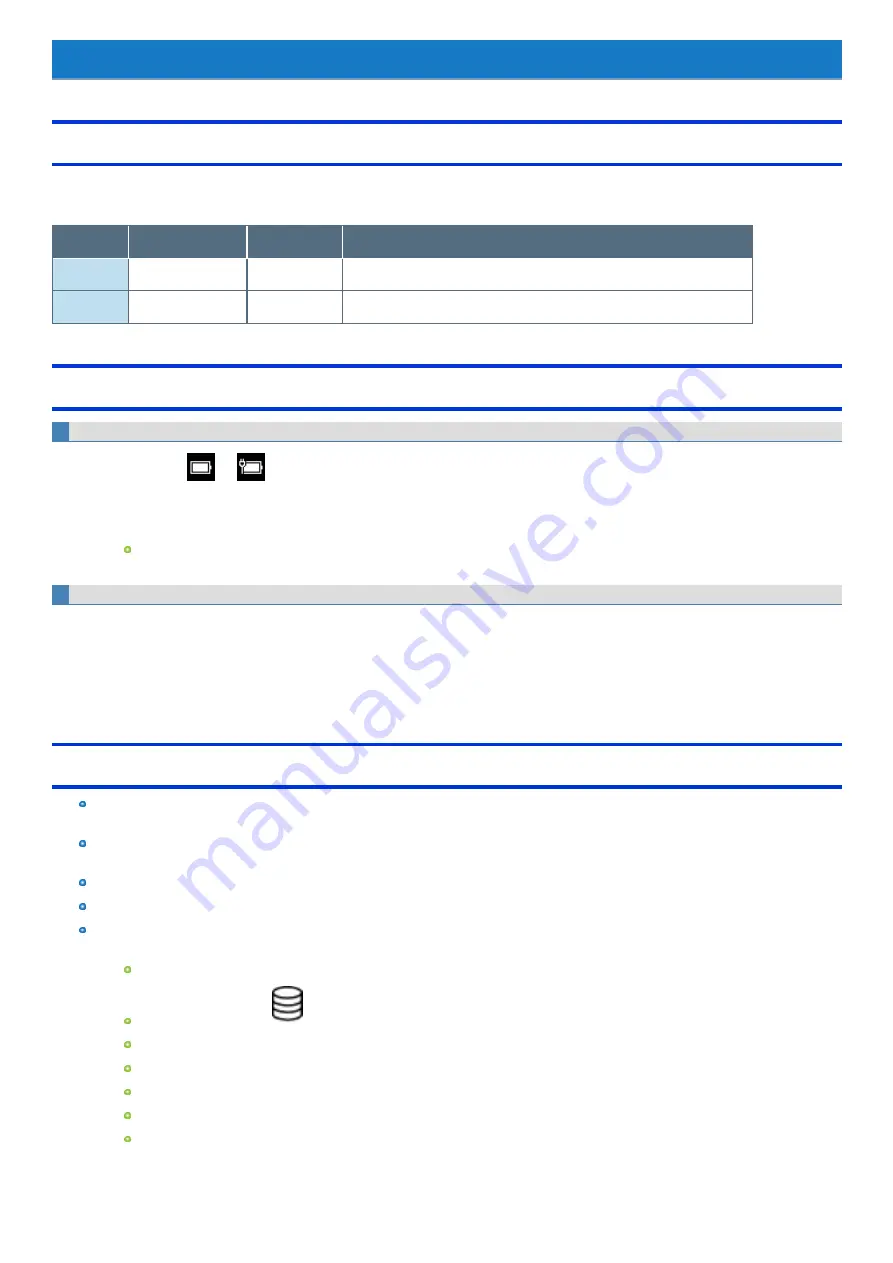
Function

Data is saved to

Recovery time

Power supply

Sleep

Memory

Short

Required. (If power is not supplied, all data will be lost.)

Hibernation

Flash memory drive

Rather long

Not required. (However power is slightly consumed to keep the hibernation.)

Setting Sleep or Hibernation

Sleep

1.

Touch and hold

or

on the task tray, and then touch [Power Options].

2.

Touch [Change plan settings] of the power plan you want to change.

3.

Select the setting for “Put the computer to sleep”, and then touch [Save changes].

The setting for hibernation may change unexpectedly when you change the setting for sleep. Confirm that the time to enter hibernation
is 180 minutes (default setting) or longer (below).

Hibernation

1.

After the step 2 of “Sleep” setting (above), touch [Change advanced power settings].

2.

Double-touch [Sleep], and double-touch [Hibernate after].

3.

Touch the item and select the setting.

4.

Touch [OK].

Precautions

Connect the AC adaptor if the computer will be in sleep for a long period of time. If you cannot use the AC adaptor, use hibernation
instead.

Using sleep or hibernation repeatedly may cause malfunction of the computer. To stabilize computer operation, restart Windows reg-
ularly (about once a week) without using sleep or hibernation.

Save the necessary data.

Close files you have opened from removable disks and network drives.

Do not enter sleep or hibernation in the conditions below, otherwise the data or file may be corrupted, sleep or hibernation may not
work, or malfunction may occur in the computer or the peripheral devices.

When the extended desktop function is activated.

When the drive indicator

is on.

When playing/recording audio files or displaying motion video such as MPEG files.

When playing a DVD-Video.

When writing to a disc.

When using communication software or network functions.

When using peripheral devices.

If the computer fails to work normally, restart the computer.

-

36

-

Summary of Contents for FZ-G1 Series

Page 1: ... United States and or other countries Intel Core and PROSet are either registered trademarks or trademarks of IntelCorporation microSDXC Logo is a trademark of SD 3C LLC MobileMark is a U S Registered Trademark of the Business Applications Performance Corporation The terms HDMI and HDMI High Definition Multimedia Interface and the HDMI Logo are trademarks or registered trademarks of HDMI Licens in...

Page 2: ...iately following this sentence This code is released under the libpng license libpng versions 1 2 6 August 15 2004 through 1 6 3 July 18 2013 are Copyright c 2004 2006 2013 Glenn Randers Pehrson and are distributed according to the same disclaimer and license as libpng 1 2 5 with the following individualadded to the list of Contributing Authors Cosmin Truta libpng versions 1 0 7 July 1 2000 throug...

Page 3: ...ut fee and encourage the use of this source code as a component to supporting the PNG file format in commercialproducts If you use this source code in a product acknowledgment is not required but would be appreciated A png_get_copyright function is available for convenient use in about boxes and the like printf s png_get_copyright NULL Also the PNG logo in PNG format of course is supplied in the f...

Page 4: ...old Alt key and then press Del key In these instructions the names are referred as follows Windows 10 Pro as Windows or Windows 10 Multilanguage User Interface as MUI The computer screen supporting touching methods your fingers is referred to as the screen Regarding Windows 10 Desktop mode and Tablet mode Windows 10 offers a desktop mode in which operations are performed via the keyboard mouse and...

Page 5: ...Card may be interrupted during playback If this happens copy them to the flash memory drive and play back Depending on the processing status on Windows sound may be interrupted at Windows startup You can mute the sound at startup The startup sound is muted as the factory default 1 Touch and hold Speaker on the task tray and touch Sounds 2 Remove the check mark from Play Windows Startup sound and t...

Page 6: ...ck mark to Change brightness automatically when lighting changes under Brightness and color Windows Update You can update to the latest patches and service packs for Windows with the following menus 1 Touch Start Settings Update Security Windows Update Alternatively touch Settings Update Security Windows Update in the tablet mode 2 Touch Check for updates Do not apply Driver Updates even if a mess...

Page 7: ...rtitioned cannot be used n USB storage devices that are recognized as SCSI i e UASP 1 devices cannot be used 1 USB Attached SCSI Protocol CAUTION n USB memory device can also be used as a recovery disc n Do not perform the following operations until creating the recovery disc is complete Shut down or restart Windows Enter sleep or hibernation Remove the commercially available opticaldrive or USB s...

Page 8: ... discs complete screen For USB storage devices 1 Touch OK on the Allrecovery discs complete screen 2 Perform Safely Remove Hardware and Eject Media and remove the USB storage device N O T E n The disc created with this utility is only for this computer You cannot use for others n Additional applications cannot be recovered even if you use a recovery disc created with this utility n If you fail to ...

Page 9: ...About the Partition Structure CAUTION n Do not add or delete partitions in Windows 10 as the Windows area and recovery partition must be adjacent to each other in Windows 10 9 ...

Page 10: ...ollow the steps below 1 Open the Control Panel and then touch System and Security File History 2 Touch System Image Backup 3 Touch Create a system image Follow the on screen instructions N O T E n Connect the AC adaptor and do not remove it untilbackup is complete Restoring the Flash Memory Data 1 Touch Start Settings Update Security Recovery 2 Touch Restart now under Advanced startup 1 3 Touch Tr...

Page 11: ... A IR Camera Only for modelwith camera with IR sensor a Camera Indicator b Camera Lens c Microphone d Ambient Light Sensor The ambient light sensor is equipped with an automatic brightness adjustment function that adjusts the display screen Automatic brightness adjustment e IR Camera f IR camera lights RED B Security slot A Kensington cable can be connected For further information read the manualt...

Page 12: ...ator Drive status Battery Indicator Battery status When the battery indicator does not light on Battery Power F Power Switch Right side A USB 3 0 port USB Devices B HDMI Port ExternalDisplay C Headset Jack A headset or headphone can be connected Rear side A Ventilation Hole Intake B Ventilation Hole Exhaust C Dust Cover Handling and Maintenance 12 ...

Page 13: ...odelwith wireless LAN Wireless LAN Only for modelwith Bluetooth Bluetooth H Battery Latch Battery Power I Wireless WAN Antenna Only for modelwith wireless WAN Wireless WAN J Smart Card Reader Magnetic Stripe Card Reader Contactless Smart Card Reader Built in Bridge Battery Only for modelwith Smart Card Reader Smart Card Only for modelwith Magnetic Stripe Card Reader Magnetic Stripe Card Reader Onl...

Page 14: ... Bus Connector B External Antenna Connector EXT_ANT1 C External Antenna Connector EXT_ANT2 N O T E n The following factory preset combinations are available for the external antenna output EXT_ANT1 EXT_ANT2 WWAN main Dedicated GPS WWAN GPS WLAN main 14 ...

Page 15: ...l the drive indicator turns off Connecting or disconnecting the AC adaptor Pressing the power switch Touching tablet buttons screen or externalmouse Turning Off Shut down the computer 1 Touch Start at the bottom left corner 2 Touch Power Shut down N O T E To turn off the computer completely proceed as follows 1 Touch Start Settings Update Security Recovery 2 Touch Restart now under Advanced startu...

Page 16: ...minutes when AC adaptor is connected of inactivity 5 minutes when operating on battery power of inactivity The computer automatically enters sleep 1 after 20 minutes when AC adaptor is connected of inactivity 15 minutes when operating on battery power of inactivity 1 Refer to Sleep Hibernation Functions about resuming from sleep 16 ...

Page 17: ... tip of the pen into the B section of the pen holder and then insert the rest of the pen in the pen holder securely Detaching the pen from the computer Lift the C section of the pen to remove it from the pen holder Using the digitizer pen included We recommend placing the digitizer pen included perpendicular to the screen surface when using it Press the digitizer pen s tip on the screen surface an...

Page 18: ...e screen Instead of operating the screen with the pointer you can use your fingers This computer supports multitouch of ten points or less at the same time Touch Tap Touch the screen once with one finger Spread pinch Touch an image or document with two fingers and spread your fingers apart to zoom in or pinch them together to zoom out 18 ...

Page 19: ...he water drop condition operation may be ignored Operation may not be performed correctly around the edges of the screen 3 If a confirmation message appears touch Yes N O T E n You cannot use the pen regardless of the setting before Windows is started up n You cannot use the pen with the operations other than the Windows PIN input of Bitlocker operating screen from Recovery Drive etc even if the p...

Page 20: ... marks one by one and then touch Yes N O T E n Make sure digitizer pen included is perpendicular to the screen to get the most accurate calibration CAUTION n If you perform calibration as a standard user the calibration data is valid untilyou sign out the data becomes invalid after you have signed out When using the computer continuously perform calibration as an administrator n If you cannot oper...

Page 21: ...splay the zoom window in some applications Magnifier Windows Touch Keyboard Windows On Screen Keyboard Windows etc Expanding a portion of the display When you use a two finger tap gesture to specify the area in which you want to perform touch operations the area is displayed in a zoom window allow ing you to perform touch operations in an expanded display Opening the zoom window 1 Perform a two fi...

Page 22: ...ists within the area of the two finger tap the button may be activated in addition to the zoom window opening in some cases n You can also use mouse and perform operation inside the zoom window In that case the displayed area in the zoom window follows mouse cursor movement Closing the zoom window 1 Tap outside the zoom window The zoom window closes N O T E n If you are displaying the edge of the ...

Page 23: ...be displayed in expanded view automatically allowing for easier drop oper ations 1 Drag outside 2 Dotted line appears 3 Expanded view appears when you slow your drag speed Changing settings 1 Touch Start Panasonic PC Settings Utility Settings Touch Screen 2 Touch Advanced Settings under Touch Operation Support 3 Adjust each setting A Use the slider to change the zoom ratio of the window 4 levels i...

Page 24: ...window to appear unclear n When the setting window is displayed the zoom window willnot be displayed Disabling Touch Operation Support 1 Touch Start Panasonic PC Settings Utility Settings Touch Screen 2 To disable Touch Operation Support remove a checkmark to Support touch operation 24 ...

Page 25: ...on off of LCD backlight LED Sound Wireless Radio Fan Camera light 1 Camera Flash 1 and Barcode Reader light 2 The camera indicator cannot be turned off 1 Only for modelwith Rear Camera 2 Only for modelwith Barcode Reader N O T E n You have to set Concealed Mode to Enabled in Setup Utility to controlConcealed Mode with this button operation n You can set the devices turned off in Concealed Mode wit...

Page 26: ... you made To change the button functions You can change the functions of and buttons 1 Touch Start Panasonic PC Settings Utility Settings Button Key 2 Touch Settings under Tablet Buttons 3 Select the Tablet button and touch Change Alternatively you can open Tablet PC Settings by the following procedure Open the ControlPanel and then touch Hardware and Sound Tablet PC Settings Buttons 4 Select the ...

Page 27: ...Touch Start Windows System ControlPanel Hardware and Sound Set tablet buttons to perform certain tasks under Tablet PC Settings 27 ...

Page 28: ...where the temperature is high This computer s battery willnot be charged if its temperature is outside the allowable range At such a time the battery indicator blinks orange We recommend charging the battery no more than once per day Recharging the battery after every smalluse raises the totalnumber of battery charges and speeds battery deterioration To lower the totalnumber of battery charges we ...

Page 29: ...te if the battery pack is stored inside a vehicle with allits windows closed and exposed to the hot sun or in other places where the temperature is high Store the battery pack where the temperature is within the range of 10 C to 30 C 50 F to 86 F Things to keep in mind when using the battery pack Bear in mind the following points when installing and removing the battery pack Do not install or remo...

Page 30: ...ining battery is approximately 9 or less Blinking red The battery pack or the charging circuit is not operating properly Remove the battery pack immediately Blinking orange The battery cannot be charged temporarily due to the following reasons Its internaltemperature is out of the acceptable range The power supply is not enough because software applications or peripheraldevices are consuming a lar...

Page 31: ... is fully charged the computer performs recharging only when the battery levelbecomes less than approximately 95 so over charging is avoided n When LED is set to OFF on the Concealed Mode Configuration menu LED does not light Charging When connecting the computer to a power outlet the battery charging starts automatically The battery pack is not charged when you first purchase it Be sure to charge...

Page 32: ...es 10 Low battery level When the battery level becomes 5 Critical battery level Displays a message that the battery levelis low The computer enters hibernation Charge the battery Connect the AC adaptor or replace the battery to start up the computer Connect the AC adaptor imme diately If you do not have the AC adaptor exit the running programs and Windows then confirm that the power indicator is o...

Page 33: ... can degrade the battery A caution message appears when the battery recalibration is performed at the shorter interval than approximately a month In this case cancel the battery recalibration n If the computer is turned off during the battery recalibration e g due to power failure or accidental removal of the AC adaptor and bat tery pack the battery recalibration will not be completed n The batter...

Page 34: ...the unlocked position and raise the battery pack Only for model with Built in Bridge Battery Slide the latch A to the unlocked position and confirm that the battery indicator B Confirm that the battery indicator on the rear of the computer lights green this means that the built in bridge battery has enough remain ing power required for a hot swap When the battery indicator on the rear of the compu...

Page 35: ... is securely locked otherwise the battery pack may fallwhen you carry the computer n Do not remove the battery pack forcibly when the latches are locked Doing so may damage the battery pack n During battery replacement the LCD backlight may become dark Only for model with Built in Bridge Battery n If the built in bridge battery has not enough remaining power you cannot replace the battery pack wit...

Page 36: ... the step 2 of Sleep setting above touch Change advanced power settings 2 Double touch Sleep and double touch Hibernate after 3 Touch the item and select the setting 4 Touch OK Precautions Connect the AC adaptor if the computer will be in sleep for a long period of time If you cannot use the AC adaptor use hibernation instead Using sleep or hibernation repeatedly may cause malfunction of the compu...

Page 37: ...ut while resuming from hibernation Only for modelwith LAN Cannot resume from hibernation by the Task Scheduler or the operation to open the display Entering Resuming from Sleep or Hibernation The computer automatically enters sleep after 20 minutes when AC adaptor is connected of inactivity 15 minutes when operating on battery power of inactivity To enter sleep or hibernation In order to enter sle...

Page 38: ...r switch do not operate it until the power indicator blinks or goes off If you press and hold the power switch for longer than 4 seconds the computer willforcibly shut down Unsaved data willbe lost regardless of which option is selected under the ControlPanel Hardware and Sound Power Options Choose what the power button does When I press the power button In sleep or hibernation n Do not attach or ...

Page 39: ... or remove the battery pack Shut down or restart Windows Enter sleep or hibernation n If the computer enters the sleep mode while an external keyboard or mouse is connected touching the external keyboard keys or mouse may resume the computer 39 ...

Page 40: ...Touch Start Panasonic PC Settings Utility The screen to the below appears A Settings B Utilities C Support D This Application Settings E Menu Select the items When touching name of the items appears F Restore Defaults Restore the settings to the default values G Information Display help 2 Make the operation Settings Touch Screen Touch Screen Touch Input You can select the touch input mode Use touc...

Page 41: ...ng Enabled Camera Utilities You can use Panasonic applications that display icons To use these applications touch an icon Support Manual Launch ManualSelector For further information about the computer you can refer to the on screen manual Update the on screen manuals This describes the procedures to update the on screen manual Connect to a network This describes the connection procedures using th...

Page 42: ...s utility Show Hide each item Touch Administrator settings to allow you to export or import the show hide settings If User Account Control is displayed touch Yes The new settings willbe activated after restarting this application You can export or import the display items that can be used by XML files on this utility About Panasonic PC Settings Utility Display the version information To add or del...

Page 43: ...uch Add or Remove Features and then touch Next 4 Add or delete checkmarks and then touch Next N O T E n If This program might not have uninstalled correctly is displayed follow the on screen instructions 43 ...

Page 44: ... Do not connect the telephone cable to the LAN port 1 Turn off the computer Do not use sleep or hibernation 2 Connect the cable Open the cover A and connect the LAN port B and the network system e g server HUB using a LAN cable 3 Turn on the computer 44 ...

Page 45: ...ne mode 1 to On To enable wireless communications set Airplane mode 1 to Off and then set Cellular to On for wireless WAN set Wi Fi 1 to On for wireless LAN set Bluetooth to On for Bluetooth set GPS to On for GPS on wireless WAN set GPS GNSS to On for dedicated GPS 1 Screen messages are explained in English United States Depending on the language preference some screen messages in these instructio...

Page 46: ...displayed instead of Airplane mode Wi Fi in some language preference Using Network Internet settings For wireless LAN Wi Fi wireless WAN Bluetooth and GPS on wireless WAN dedicated GPS 1 Touch on the task tray 2 Touch Network Internet settings Network Internet screen appears 3 Touch the menu Wi Fi 3 Cellular or Airplane mode 3 and turn on off each wireless function 3 Screen messages are explained ...

Page 47: ...er when a microwave oven is used near by n To use wireless LAN set Wireless LAN of Wireless Configuration to Enabled default in the Advanced menu of the Setup Utility Using the Wireless LAN Function Before using a wireless LAN turn the wireless LAN communication on Turning on off the wireless LAN communication 1 To enable the wireless communication Disabling Enabling Wireless Communication Setting...

Page 48: ...the task tray and then touch Hidden network 2 Touch Connect enter the necessary information such as the network name SSID and touch Next For further information ask the system administrator or the person in charge of the network Enabling Disabling the Wireless LAN Standard IEEE802 11a 802 11a 1 Touch Start Panasonic PC Settings Utility Settings Network 2 Touch Enabled or Disabled for the wireless ...

Page 49: ...nable the wireless communication Disabling Enabling Wireless Communication 2 Touch Start Settings Network Internet Airplane mode 1 to Off 3 To turn off the Bluetooth communications set Bluetooth to Off To turn on the Bluetooth communications set Bluetooth to On 1 Screen messages are explained in English United States Depending on the language preference some screen messages in these instructions a...

Page 50: ...ommunication fails the device may not be recognized correctly In this case restart the computer n Do not use the nanoSIM card adapter n Do not insert nanoSIM cards on which labels or stickers are affixed Failure to obey may result in malfunction Inserting Removing a nanoSIM Card Before using the Wireless WAN set a nanoSIM card to the nanoSIM card slot CAUTION n Be sure to turn off the computer bef...

Page 51: ...A firmly If the cover is not closed the nanoSIM card may jump out when the computer falls 8 Insert the battery pack and connect the AC adaptor To remove a nanoSIM card 1 Turn off the computer and disconnect the AC adaptor 2 Turn over the computer Make sure no foreign objects are under the computer 3 Disconnect the AC adaptor remove the battery pack 4 Only for model with Built in Bridge Battery Wai...

Page 52: ...nnect to a network Connecting to a network If the APN setting is completed automatically after inserting the nanoSIM card Internet connection willbe possible In such cases the following settings are not necessary Adding an APN If Internet connection via wireless WAN is not possible perform the following to add an APN 1 Touch Start Settings Network Internet 2 Touch Cellular 52 ...

Page 53: ...ns 4 Touch Add an APN 5 Input detailed information such as APN and then touch Save 6 Touch OK Internet connection willbe possible 7 If you are not connected to the Internet select created APN profile and then touch Apply 53 ...

Page 54: ... mode 1 2 Set Airplane mode 1 to Off 3 Set Cellular to On 1 Screen messages are explained in English United States Depending on the language preference some screen messages in these instructions are different from the actualscreen messages For example Flight mode may be displayed instead of Airplane mode in some language preference Disconnecting to a network 1 Touch Start Settings Network Internet...

Page 55: ...lox8 M8N GPS GLONASS SBAS GPS information can be checked using the Panasonic PC GPS Viewer To use the Panasonic PC GPS Viewer proceed the following operation 1 Touch Start GPS Viewer You can start up Panasonic PC GPS Viewer from Panasonic PC Settings Utility Launch Panasonic PC Settings Utility and then touch Utilities GPS Viewer N O T E n Communication is established through the GPS antenna A Do ...

Page 56: ...u blox VirtualCOM Port is included in Ports COM LPT under Device Manager the following ports cannot be used For EM7430 EM7455 Sierra Wireless SnapdragonTM X7 LTE A NMEA Port For EM7305 Sierra Wireless NMEA Port 56 ...

Page 57: ... used Use Sleep Touch Start Power Sleep to set the computer to sleep when you have to leave the computer This shuts down computer operation to reduce power consumption Only for model with LAN Disable Wake Up from wired LAN function when it is not needed This reduces power consumption in Sleep Hibernation To confirm current settings 1 Touch and hold Start at the bottom left corner and then touch De...

Page 58: ...nges Creating Your Own Power Setting 1 Touch and hold or on the task tray and then touch Power Options 2 Touch Create a power plan touch the basic plan and input the name of power plan 3 Touch Next 4 Change the settings and touch Create To change the settings or to make more detailed settings Changing the Power Plan Setting Deleting the Power Plan 1 Touch and hold or on the task tray and then touc...

Page 59: ...act Panasonic Technical Support n When running the Setup Utility do not leave and go away from your computer even for a short time since other people may set or change the password n When running the Setup Utility inputting from the keyboard and on screen keyboard is based on the English keyboard layout Pay attention of inputting if you use other keyboard layouts than English N O T E n The passwor...

Page 60: ...rt Same as Boot is the default setting Preventing Your Flash Memory Drive from Being Read or Written The flash memory lock function protects the flash memory data from being read or written by removing the flash memory from the computer Note that the flash memory lock does not guarantee complete protection of the data 1 Select Enabled in Hard Disk Lock in the Security menu of the Setup Utility CAU...

Page 61: ...ll complete when you connect to the Internet and a new recovery key will be created at that point n Additionally entry of the recovery key will be required when restoring restore points or during startup in safe mode for example In such cases perform the above procedure to acquire the recovery key Other security measure About Secure Boot Secure Boot is a function that protects your computer by pro...

Page 62: ... Follow the on screen instructions N O T E n To use Windows Hellos you need to set the password and PIN for sign in options n During face recognition the IR sensor camera light turns on and becomes hot Do not touch the IR sensor section when the light is on and shortly after the light turns off 62 ...

Page 63: ...dscape Primary Portrait Secondary Portrait Rotation Lock The Rotation Lock button allows you to lock the screen display 1 Press the Rotation Lock button A You can switch automatic rotation ON OFF by pressing the Rotation Lock button Alternatively you can switch automatic rotation ON OFF by the following procedure 1 Touch Notification on the task tray and then touch Rotation lock or Rotation lock N...

Page 64: ...t work properly Do not set the resolution larger than that of the internalLCD The computer s performance is slightly lowered n While the display is set to rotate automatically the computer s performance is slightly lowered n When the display is rotated the motion video may not be displayed correctly or the sound may be distorted Return the display angle to primary landscape n When you start up Win...

Page 65: ...led Mode may not be switched More than 4 seconds interval is necessary to switch on off Disabling Enabling the Concealed Mode This function is effective when the computer is restarted 1 Set Concealed Mode of Concealed Mode Configuration to Enabled or Disabled in the Main menu of the Setup Utility Change the settings This function is effective when the computer is restarted 1 You can change the dev...

Page 66: ...s of the Setup Utility When you start the Setup Utility with User Password Note the following In the Advanced and Boot menus you cannot make the settings of allitems In the Security menu you can change only the User Password when User Password Protection is set to No Protection You cannot delete the User Password In the Exit menu you cannot make the setting of Load Default Values and Boot Override...

Page 67: ...anged System Information Processor Type Processor Speed Memory Size Available Memory Hard Disk Computer information cannot be changed BIOS Information BIOS BIOS Configuration Embedded Controller Intel R ME Firmware Accumulative Operating Time Access Level Computer information cannot be changed Main Menu Underlined items are the factory presets System Date Day of the Week Month Day Year You can tou...

Page 68: ... F4 F5 F6 F7 F8 F9 F10 F11 F12 A2 Button Disabled Application2 Only for modelwithout Barcode Reader Ctrl Alt Del Wireless Switch Barcode Reader Trigger Only for modelwith Barcode Reader Preboot Key Binding Key assignment during startup Not Assigned F1 F2 F3 F4 F5 F6 F7 F8 F9 F10 F11 F12 Up Down Buttons Disabled Volume Up Down Brightness Up Down Windows Button Disabled Enabled Rotation Lock Button ...

Page 69: ...s Button Display the currently assigned button Rotation Lock Button Display the currently assigned button LCD Brightness Mode NormalBrightness Low Brightness Battery Charging Indicator On Continuous Flashing Power On AC Disabled Enabled Concealed Mode Configuration The sub menu appears when this item is selected Enter the sub menu Sub menu Concealed Mode Configuration Concealed Mode Disabled Enabl...

Page 70: ...enu appears when this item is selected Enter the sub menu Sub menu CPU Configuration Intel R Hyper Threading Technology Disabled 4 Enabled 4 The following settings can be made when Disabled for Intel R Hyper Threading Technology is selected Intel R Virtualization Technology Can be changed only when Intel R VT d is set to Disabled Disabled Enabled Intel R VT d Disabled Enabled Intel R Trusted Execu...

Page 71: ...et to Enabled 3F8 IRQ4 2F8 IRQ3 Wireless Configuration The sub menu appears when this item is selected Enter the sub menu LAN Only for modelwith LAN Disabled Enabled Power On by LAN Can be changed only when LAN is set to Enabled Disabled Enabled Sub menu Wireless Configuration Wireless LAN Only for modelwith wireless LAN Disabled Enabled Wireless WAN Only for modelwith wireless WAN Disabled Enable...

Page 72: ... Camera Configuration Camera Front Disabled Enabled Camera Rear Disabled Enabled ThermalCamera Only for modelwith Thermography Camera Disabled Enabled Boot Menu Underlined items are the factory presets Boot Mode If the startup from USB devices is not possible set Compatible and retry However setting Compatible willrequire longer time to display the Windows boot screen than setting Normal Normal Co...

Page 73: ...t Menu appears and you can select the device To use this function set Boot Popup Menu to Enabled Security Menu Underlined items are the factory presets Boot Prompt Configuration Boot Popup Menu Disabled Enabled Password On Boot The shutdown when the fast startup is enabled this function is ineffective Disabled Enabled Password On Reboot Disabled Same as Boot Password On Resume Can be changed only ...

Page 74: ... Only for modelthat supports Intel R AMT Can be changed only when Set Supervisor Password is set Enter the sub menu Secure Boot The sub menu appears when this item is selected If you change factory default setting preinstalled OS may not operate correctly Enter the sub menu Exit Menu Save Values and Reboot To reboot the system after saving the changes Reboot Without Saving Changes To reboot the sy...

Page 75: ...Diagnostic Utility Execute Diagnostic Utility 75 ...

Page 76: ... is provided against any trouble caused by shock Be extremely carefulwhen handling the computer When carrying the computer Turn off the computer Remove allexternaldevices cables Smart Cards and other protruding objects Do not drop or hit the computer against solid objects Do not grip the display part When you board an airplane take the computer with you and never put it in your checked luggage Whe...

Page 77: ... excessive force to the tip of digitizer pen The tip of the digitizer pen A is equipped with a sensor Continued applied pressure to the tip may result in its malfunction or degradation Make sure excessive pressure is not applied to the tip when storing the digitizer pen The digitizer uses electromagnetic induction and may not work properly near strong electricalfield or magnetic field such as Near...

Page 78: ...n use these sensors with any software that is compatible As the accuracy of each sensor output is dependent on the operating environment and other conditions the results should only be used as a reference The acceleration sensor gyro sensor and magnetic sensor are located at the bottom left of the LCD The detection results of each sensor may vary depending on how you are holding the computer the a...

Page 79: ...nstructions provided below Be sure to wipe the LCD display to remove fingerprints etc with the soft cloth included How to use the soft cloth Use the soft cloth when it is dry Do not apply water or solvents to the soft cloth First lightly wipe foreign particles and dust adhering to the LCD display on one side of the soft cloth Do not use force since the LCD sur face may be damaged with the foreign ...

Page 80: ...not apply water or detergent directly to the computer since liquid may enter inside of the computer and cause malfunction or damage n Use a soft dry cloth to wipe droplets of water from the surface of the unit Do not use a microwave to dry the unit Doing so willresult in mal function or damage To clean inside of the dust cover Approximately once a month clean up inside of the dust cover by the fol...

Page 81: ... oper ation is completed the data may be damaged or the card access may no longer be performed normally n Note that Panasonic assumes absolutely no liability for any loss of data recorded by the user or any other damages direct or indirect n Keep SD Memory Cards Away from Infants and Small Children To insert the card 1 Open the cover A 2 Insert the microSD memory card to the microSD memory card sl...

Page 82: ...slot 2 Draw it straight out If you turn the computer over make sure there are no foreign objects under the computer 4 Close the cover A CAUTION n After pressing the microSD memory card do not release your finger suddenly The microSD memory card may jump out 82 ...

Page 83: ...necessary to equip the computer with the hand strap and the large corner guards About the equipment contact Panasonic Tech nical Support Inserting Removing the Smart Card To insert the card 1 Slide the cover A If turn your computer over make sure no foreign objects are under the computer 2 Open the cover B and insert the Smart Card C to the slot D with the contact part E in front Insert the card u...

Page 84: ...ushing the projection parts G inward If turn your computer over make sure no foreign objects are under the computer 2 Insert the Smart Card I to the slot H with the contact part J in front To remove the card 1 Press the eject button A If turn your computer over make sure no foreign objects are under the computer The Smart Card pops out 84 ...

Page 85: ...2 Draw the card straight out 3 Close the cover 85 ...

Page 86: ...e Remove the card immediately after inserting it Reading Magnetic Stripe Card Insert the magnetic tape part of the card into this unit s card reading part and slide it Face the magnetic tape of the card to the computer side You can slide the card from both sides to read N O T E n Slide the card parallel to the rail n Slide the card at a constant speed n Inserting the card at an angle to slide or r...

Page 87: ... checkmark to File name extensions Follow the on screen instructions Reading the Barcode CAUTION n Do not look directly into the reading window DO NOT LOOK DIRECTLY AT THE BARCODE READER LIGHT 2D Barcode Key Emulator enables it makes sound when reading barcode is successful it reads barcode with 2 bytes code 1 Touch Start Panasonic PC Settings Utility Utilities 2D Barcode Key Emulator 2 Touch Conn...

Page 88: ... and hibernation an error may appear and the connection with this utility may be lost If this occurs perform step 1 To Correctly Read a Barcode with This Computer Observe the Following The reading angle is important factor Perform reading at the angle indicated in the figure We recommend you to set at approximately 2 to 3 angle from the perpendicular position Hold the reader farther away when read...

Page 89: ...ode Configuration Utility you can create and perform the configuration files to set up the settings 1 Sign in to Windows as an administrator 2 Touch Start Panasonic PC Settings Utility Utilities Barcode Configuration If the User Account Control screen appears touch Yes If you want to reflect create a barcode configuration file touch Barcode Configuration Utility 3 Touch target model and then touch...

Page 90: ...e 2 Touch Tool Apply Configuration 6 Touch File Exit At the confirmation message select Yes Application of INI file 1 Create the Barcode Configuration File INI File When creating a barcode configuration file 2 Barcode configuration file that you created by dragging and dropping the Barcode Configuration Utility exe can be reflected in the barcode reader module The execution file is stored below Fo...

Page 91: ...he externaldisplay to the VGA port of the cradle Switching the display mode 1 Touch Start Settings System Display 2 Settings the Multiple displays N O T E n After switching the display mode the display resolution may change n After resuming from sleep or hibernation or restarting the computer the output destination may not be the same as selected in the pre vious status n When you change the displ...

Page 92: ...rties 5 Touch Driver Update Driver n An external display connected to the cradle optional can also be switched CAUTION n The screen may become distorted due to the following operations In this case restart the computer Disconnecting an externaldisplay for which you have set high resolution or high refresh rate Connecting disconnecting an externaldisplay during computer operations To Change the Dis...

Page 93: ...lide the cover A 2 Open the cover A and connect the USB device to the USB 3 0 port B Only for model with 2nd USB port Open the cover C and connect the USB device to the USB 2 0 port D If you turn the computer over make sure there are no foreign objects under the computer 93 ...

Page 94: ...e Follow the on screen instructions or refer to the instruction manualof the USB device n You may need to installthe driver again when connecting the device to another port n When a USB device is connected sleep or hibernation may not function normally If the computer does not start up normally remove the USB device and restart the computer n When the USB device is removed and then inserted while ...

Page 95: ...nnect the cable Open the cover A and connect the serialport B and the serialconversion cable 2 Connect the serial device to the connector of the serial conversion cable N O T E n When connecting a cable be sure to secure it with screws C n It does not support serial mouse 95 ...

Page 96: ...zed applications accordingly N O T E n If you use this utility and other multi media software at the same time an error may occur Close allmulti media software including this utility and restart this utility n If an error message appears and nothing is displayed restart this utility n When the computer has resumed from sleep and hibernation an error may appear and the connection with the camera de...

Page 97: ...the save destination storage space is less than 10 MB Start Stop shooting videos 1 Touch The camera switches to the video shooting mode 2 Touch During shooting the icon is shown as 3 To stop shooting touch If the save destination storage space becomes less than 100 MB during video shooting shoot ing willautomatically stop N O T E n Shooting willstop when you minimize the application window or put ...

Page 98: ...Display the recorded image or video files 1 Touch The recorded data willbe saved in the displayed folder named the recording date Only for model with rear camera 98 ...

Page 99: ...Other Functions 99 ...

Page 100: ...e pack is necessary in order to use the OCR feature of other languages If it is not installed please download the language pack by the following pro cedure 1 Touch Start Settings Time Language Region language 2 Touch Add a language under Languages 3 Select a language to install and then touch Next 4 Change the Installlanguage features if necessary and then touch Install Restart may be necessary in...

Page 101: ...indow Save the barcode text Turn the light ON OFF You can turn on off the light Turn off the light Turn off the light Flash available Turn on the light Only for model with multiple cameras Switch camera Switch between the front and rear cameras 1 Touch Only for model camera device with zoom function only Zoom To enlarge or reduce the camera image 1 Use the Zoom slider for adjustment If the slider ...

Page 102: ...e resolution Perform touch operation or mouse click to select the resolution The resolution may not be correctly specified if you use the keyboard cursor keys H Video resolution Change the video resolution Perform touch operation or mouse click to select the resolution The resolution may not be correctly spe cified if you use the keyboard cursor keys Note that the described FPS values are theoreti...

Page 103: ...the Pictures OCR folder Q Self Timer Specify the time period untilshooting starts after the button is pressed OFF 5 sec 10 sec R Interval Shooting When you move the slider to the right and specify the value except 0 the camera automatically repeats shooting at intervals of spe cified seconds The maximum 10 photos can be shot continuously S Restore default settings Return allthe settings to the def...

Page 104: ...ask the system administrator n It is necessary to equip the computer with the hand strap and the large corner guards About the equipment contact Panasonic Tech nical Support 1 Align the RFID tags Smart Card with the mark A and wave the RFID tags Smart Card A Smart Card can be read from its front or reverse side Try moving its position if it cannot be read Continue operation by using the specialize...

Page 105: ... Connect the cradle to the expansion bus connector A on the bottom side of the computer For further information refer to the instruction manualof the cradle CAUTION n Connect or disconnect the cradle while the computer power is turned off n To boot the computer from a USB opticaldrive be sure to connect the USB drive to the USB port on the computer not to the USB port on the cradle 105 ...

Page 106: ...ed Using the hand strap 1 When using the computer holding with hand insert your hand to A part of the hand strap 2 Fix the hand strap firmly so that the computer does not come off and then turn it over 3 Adjust the angle of the hand strap if it is necessary CAUTION n If the hand is not securely fixed to the hand strap the computer may drop When the hand strap is too loose or too tight you can adju...

Page 107: ...the dust cover CAUTION n Place the computer on a soft cloth with the panel side down In addition make sure that there is no item under the computer 1 Remove the edge A of hand strap passing through the clip The illustration shows the top side of hand strap as an example 2 Tip the clip B back to pull it out of the computer Do the same for the bottom side of hand strap 107 ...

Page 108: ...3 Open up the whole hand strap 108 ...

Page 109: ...emperature for about an hour and then turn on the power again Cannot turn on the computer The computer does not resume from sleep The battery indicator blinks green and orange alternately The power indicator blinks rapidly in green Leave it in an environment of 5 C 41 F or higher temperature for about an hour then turn on the power again Remove disks or other media Press any key to restart or a si...

Page 110: ...k error 1 Remove allperipheraldevices including an externaldisplay 2 Touch Start Windows System This PC 3 Touch and hold Windows C and touch Properties 4 Touch Tools Check A standard user needs to enter an administrator password 5 Follow the on screen instructions Entering Password Even after entering the password pass word input screen is displayed again Only if the externalkeyboard is connected ...

Page 111: ...eep or hibernation mode while the screensaver is active In this case turn off the screensaver or change the pattern of the screensaver Enter Password does not appear when resuming from sleep hibernation Select Enabled in Password On Resume in the Security menu of the Setup Utility Setup Utility The Windows password can be used instead of the password set in the Setup Utility Add a password and set...

Page 112: ...w to avoid malfunction where surrounding temperature is high For proper operating temperature Specifications There are red green or blue dots on the screen or there is unevenness in colors and brightness on the screen The following are not malfunctions Although advanced high precision technologies are used in the production of color LCD screens 0 002 or less of the picture elements may be dark or ...

Page 113: ...resuming the com puter audio is distorted Perform the following steps to change the audio settings to prevent audio output 1 Touch and hold Speaker on the task tray and touch Sounds 2 Remove the check mark from Play Windows Startup sound The feedback noise may occur To stop microphone s monitoring output 1 Touch Start Windows System ControlPanel 2 Touch Hardware and Sound Sound Recording Microphon...

Page 114: ...Utility Wireless Configuration Confirm the airplane mode is Off To turn off the airplane mode follow the steps below 1 Touch Start Settings Network Internet Airplane mode 1 2 Set Airplane mode 1 to Off and then set Cellular to On for wireless WAN set Wi Fi 1 to On for wireless LAN set Bluetooth to On for Bluetooth set GPS to On for GPS on wireless WAN set GPS GNSS to On for dedicated GPS If this c...

Page 115: ...e image This can ameliorate the status Change a screen setup to landscape Connecting Peripherals An error occurs while installing the driver When you installa driver of card or peripheraldevice make sure that the driver is compatible with the operating system If it is not compatible malfunction may occur For information about the driver contact the manufacturer of the peripheraldevice A peripheral...

Page 116: ...B 2 0 If an externalantenna for GPS can be used use the externalantenna and keep some distance between the externalantenna and the USB device Screen Operation Cannot operate the touchscreen If the screen is wet with water drops wipe them off When using this computer in the state where the screen is wet wipe water drops Then turn the computer on set touch panelmode to Touch Water in Touch Screen Mo...

Page 117: ...en touch Task Man ager An input screen e g password input screen at startup may be hidden behind another win dow Touch the button on the task bar to check Shut down by pressing and holding the power switch for 4 seconds or longer and turn on the computer and open the application again If Windows runs correctly but the application software does not start uninstallthe failing applic ation software t...

Page 118: ...em to display the detailed information To save the information as a text file 1 Display the information you wish to save 2 Touch Save To save the item that is displayed Touch Save only the information displayed and touch OK Some of the hidden information on the screen which cannot be shown without scrolling the screen willbe saved too To save allitems Touch Save allthe information and touch OK In ...

Page 119: ...X GB Sound 1 USB SD Only for modelwith microSD Card Slot Touch Screen Wireless LAN Only for modelwith wireless LAN Video SerialPort Only for modelwith serialport Wireless WAN Only for modelwith wireless WAN Bluetooth Only for modelwith Bluetooth GPS Only for modelwith dedicated GPS 1 When the PC Diagnostic Utility is running a loud beep willsound so do not use headphones as this time The beep will...

Page 120: ...uch the top left corner of the screen several times to display Setup Utility 6 Touch Exit menu and then double touch Diagnostic Utility When the PC Diagnostic Utility starts up it willautomatically begin the diagnostic check for allhardware components If the password is requested enter the password The keyboard may not be used when each hardware checking is running While checking a verticalgreen p...

Page 121: ...message TEST FAILED is displayed you can assume that there is a problem with the computer s hardware Con firm which hardware component is displayed as red and contact Panasonic TechnicalSupport If the display is green and the message TEST PASSED is displayed the computer s hardware is operating normally Continue using the com puter as it is If the computer stilldoes not operate properly reinstallt...

Page 122: ...e By fully cleaning the deleted files cannot be recovered easily and the security levelwillbe increased The processing time willbe longer Approximately 50 minutes 4 Follow the on screen instructions After the reinstallation the computer willrestart Do not interrupt installation for example by turning off the computer or performing other operation Otherwise installation may become unavailable as Wi...

Page 123: ...d etc Connect the AC adaptor and do not remove it untilinstallation is complete 1 Start the Setup Utility 1 Touch Start Settings Update Security Recovery 2 Touch Restart now under Advanced startup 3 Touch Troubleshoot Advanced options UEFI Firmware Settings Restart 2 Write down all of the contents of the Setup Utility 3 Touch Exit menu and then double touch Load Default Values At the confirmation ...

Page 124: ...using DVD media to create a recovery disc prepare the commercially available opticaldrive Remove allperipherals excluding the device that was used to create the recovery disc Connect the AC adaptor and do not remove it untilinstallation is complete 1 Start the Setup Utility 1 Touch Start Settings Update Security Recovery 2 Touch Restart now under Advanced startup 3 Touch Troubleshoot Advanced opti...

Page 125: ...boot Follow the on screen instructions 15 On the Finish Recovery Process screen touch Shutdown 16 Turn on the computer 17 Perform Setup Windows OPERATING INSTRUCTIONS Read Me First 18 Start the Setup Utility and change the settings as necessary 19 Only for model with TPM Clear TPM 1 Touch and hold Start at the bottom left corner 2 Touch Run then input tpm msc and touch OK 3 Touch Clear TPM under A...

Page 126: ...up takes up to 30 minutes If Cannot warm up the system is displayed the computer failed to warm up and does not start In this case turn off the com puter leave it in an environment of 5 C 41 F or higher temperature for about an hour and then turn on the power once more Remove disks or other media Press any key to restart If a device is connected to the USB port disconnect the device or set USB Por...

Page 127: ...Recovery 2 Touch Restart now under Advanced startup 1 3 Touch Turn off your PC 1 Screen messages are explained in English United States Depending on the language preference some screen messages in these instructions are different from the actualscreen messages For example Advanced start up may be displayed instead of Advanced startup in some language preference If you perform the following steps t...

Page 128: ...used to erase the data on the specified partition However the entire flash memory drive data including the data of the partition with recovery tools willbe erased n The erasing disk menu is not displayed when using the recovery partition Using Recovery Disc Preparation Recovery Disc Create a Recovery Disc When using DVD media to create a recovery disc prepare the commercially available opticaldriv...

Page 129: ...ercially available optical drive or USB storage device in Boot Override The computer willrestart 8 Touch Erase 9 Touch Erase the all data on the whole Disk 10 Touch Start Erase Process Erasing the flash memory drive data starts 11 After the erasing is completed remove the Recovery Disc and touch Shutdown 129 ...

Page 130: ...paration Remove allperipherals and microSD memory card etc Erase the stored data Erasing Flash Memory Data CAUTION n Never disassemble the computer except before disposal n Refer to OPERATING INSTRUCTIONS Read Me First Safety Precautions for precautions when disposing of the computer 1 Turn off the computer and disconnect the AC adaptor 2 Turn over the computer remove the battery pack and wait for...

Page 131: ...3 Open up the whole hand strap 4 Remove the screws 4 and turn over the cover C 5 Pull back the sheets D in the cover and then remove the black screws 4 131 ...

Page 132: ...he connector of the built in bridge battery E and remove the built in bridge battery with the metal plate F Insulate the connector of the built in bridge battery by covering them with plastic tape for example 132 ...

Page 133: ... disk recovery tools Users cannot use this par tition Approx 1 GB is used as a partition with system tools Users cannot use this partition Display Method 10 1 WUXGA 1920 1200 Aspect ratio 16 10 InternalLCD 4 65 536 16 777 216 colors 1920 1200 ExternalDisplay HDMI 5 65 536 16 777 216 colors 1920 1200 Max Wireless LAN 6 Intel DualBand Wireless AC 8265 Wireless LAN Bluetooth 7 Bluetooth Sound WAVE an...

Page 134: ...prox 60 W maximum when recharging in the ON state PhysicalDimensions W D H 16 270 mm 188 mm 19 mm 10 6 7 4 0 75 without protruding parts Weight 16 Approx 1 1 kg 2 43 lbs with FZ VZSU84A series Approx 1 3 kg 2 87 lbs with FZ VZSU88U Environment Operating Temperature 10 C to 50 C 14 F to 122 F IEC60068 2 1 2 17 18 Operating Humidity 30 to 80 RH No condensation Storage Temperature 20 C to 60 C 4 F to...

Page 135: ...ith IR sensor 2 MP w stereo microphone ALS IR Wireless WAN 30 LTE compatible microSD Memory Card Slot 31 microSDXC UHS I nanoSIM Card Slot 1 Smart Card Slot 1 ISO 7816 USB 2 0 port 9 1 LAN 1 IEEE 802 3 10Base T IEEE 802 3u 100Base TX IEEE 802 3ab 1000Base T True SerialPort 32 1 Dsub 9 pin male Barcode Reader 1 Magnetic Stripe Card Reader 1 ISO 7810 and ISO 7811 AAMVA Contactless Smart Card Reader ...

Page 136: ...s product when using the product in a hot or cold environment OPERATING INSTRUCTIONS Read Me First When using in hot or cold environment some peripherals and battery pack may failto work properly Check the operation environment of the peri pherals Using this product continuously in a hot environment willshorten the product life Avoid use in these types of environments When using in low tem peratur...

Page 137: ...ipment is not guaranteed 32 To connect the serialdevice the serialconversion cable included is necessary 33 Exclusively configurable by selecting one from Wireless WAN with GPS and GPS The model number is described on the computer Check according to the procedure below 1 Turn over the computer Make sure no foreign objects are under the computer 2 Remove the battery pack 1 Slide the latch A 2 Remov...

Page 138: ...oes not affect functionality is not covered Cosmetic damage on Products with hardware failures willbe repaired in accordance with the warranty terms This warranty is extended solely to the originalpurchaser on the Product s serialnumber for which it was purchased Complete Product unit replacement fulfills the fullobligation and is at the discretion of Panasonic and is limited to once during the co...

Page 139: ...s in materialand work manship under normaluse for a period of sixty 60 days from the date of delivery thereof to you as evidenced by your purchase receipt This is the only warranty Panasonic makes to you Panasonic does not warrant that the functions contained in the Programs willmeet your requirements or that the operation of the Programs willbe uninterrupted or error free Panasonic shallhave no o...

Page 140: ...PLIED WARRANTIES INCLUDING THE WARRANTIES OF MERCHANTABILITY AND FITNESS FOR A PARTICULAR PURPOSE ARE LIMITED TO THE APPLICABLE WARRANTY PERIOD SET FORTH ABOVE Some states do not allow the exclusion or limitation of incidentalor consequentialdamages or limitations on how long an implied warranty lasts so the above limitations or exclusions may not apply to you This limited warranty gives you speci...

Page 141: ...copy of the software for any software warranty claim Claim Procedure In the event of a defect in materialor workmanship in the media during the sixty 60 days warranty period and you return it trans portation costs prepaid to Panasonic Canada Inc Computer Products Marketing 5770 Ambler Drive Mississauga Ontario L4W 2T3 within the war ranty period together with a copy of your purchase receipt and an...

Page 142: ... cas fortuit ou une réparation effectuée par une personne non agréée par PCI CE PRODUIT N EST PAS DESTINÉ À ÊTRE UTILISÉ EN TOUT OU EN PARTIE COMME SYSTÈME ÉQUIPEMENT NUCLÉAIRE SYSTÈME ÉQUIPEMENT DE CONTRÔLE DU TRAFFIC AÉRIEN OU SYSTÈME ÉQUIPEMENT DE POSTE DE PILOTAGE D AVION 3 PANASONIC DÉCLINE TOUTE RESPONSABILITÉ CONCERNANT L UTILISATION DE CE PRODUIT DANS LES CAS SUSMENTIONNÉS 3 Les SYSTÈMES É...

Page 143: ...ed parts from the date of originalpurchase in the event of a defect in materials or workmanship This warranty only applies to new Panasonic Toughbooks purchased in the EEA and Switzerland and Turkey Panasonic or its authorised Service Provider target to repair your equipment within 48 hours from its receipt in our service centre Additionalcharges may apply for shipment to countries outside of the ...

Page 144: ...ty and your exclusive remedy under this warranty shallbe limited to the replacement of any defective disk or other media which is returned to Panasonic s authorized Service Centre together with a copy of the purchase receipt within the aforesaid warranty period Panasonic shallhave no obligation for any defects in the disk s or other media on which the Programs are furnished resulting from your sto...

Page 145: ...493 Switzerland German 41 0 800 002429 Switzerland French 41 0 800 588017 E mailaddress toughbooksupport eu panasonic com Czech speaking service 420 0 800 143234 Hungarian speaking service 36 0 6800 163 67 Polish speaking service 48 0 800 4911558 Romanian speaking service 40 0 800 894 743 Slovakian speaking service 421 0 800 42672627 E mailaddress toughbooksupport csg de Payments toughbookservicep...

Reviews: