background image

143

Problems with Notification Area

z

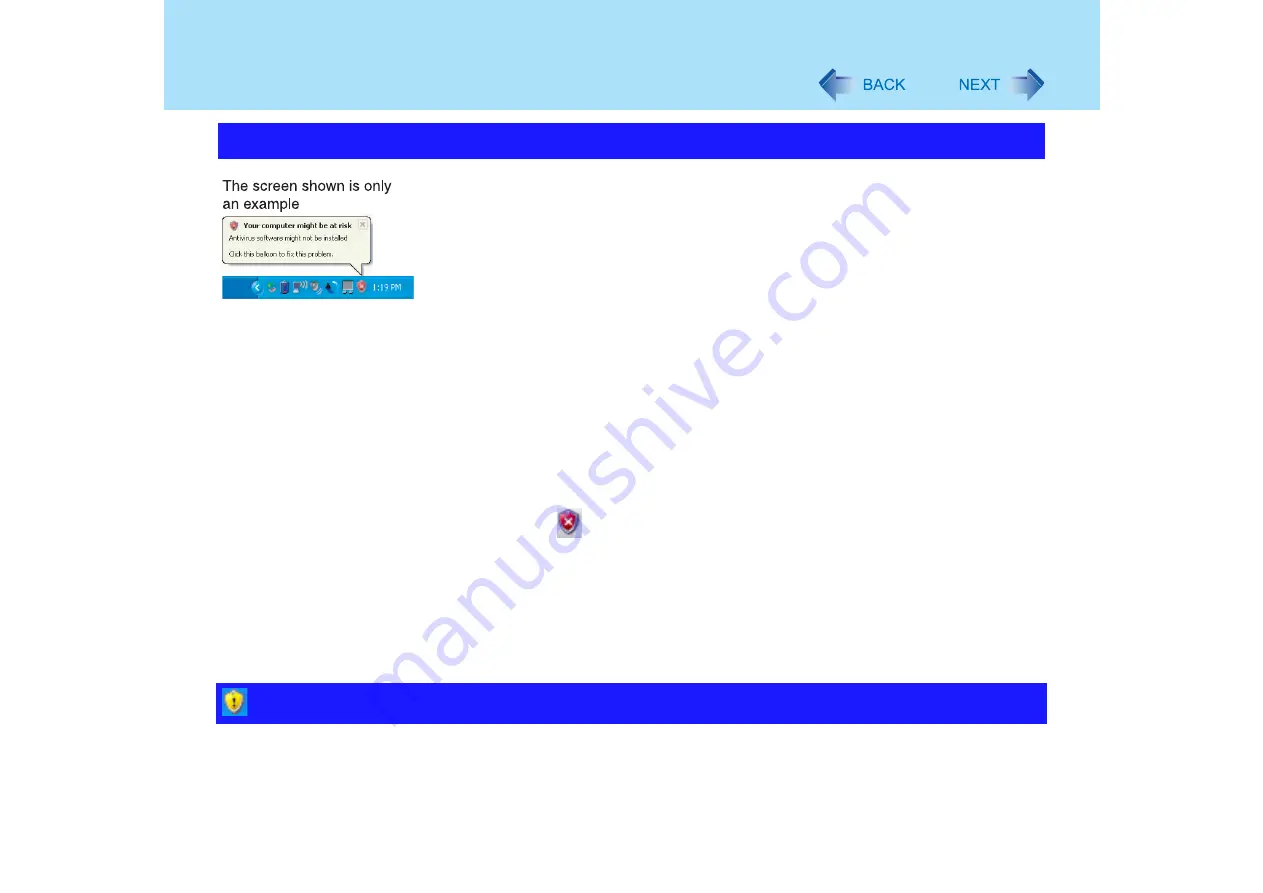
This message is displayed by the “Security Center” function in Windows XP.
The “Security Center” is a function that monitors the level of safety in Windows security 
settings in order to operate the computer safely, for example, with regard to antivirus 
measures.
It checks the following three items regularly, and displays messages until the settings are 
made at an appropriate level of safety.
• Firewall: Is the Windows Firewall enabled?
• Automatic Updates: Is the automatic Windows Update function enabled?
• Virus Protection: Has antivirus software been installed, has the latest version of the anti-

virus software been installed, and is the real-time search function enabled (ON)?

z

The message “Your computer might be at risk” is displayed by the “Security Center” func-
tion, and does not indicate an error or malfunction.  The “Security Center” function checks 
the above three items to ensure that your computer can be used safely, and notifies the 
user if the settings are not at an appropriate level of safety.
You can continue to use the computer even if these messages continue to be displayed, 
but we recommend that you follow the procedures below to minimize damage from 
viruses.

A

Read the message.

B

Click 

 on the notification area.

The [Windows Security Center] screen will be displayed.

C

Click [Recommendations] in [Firewall] or [Virus Protection], or click [Turn on 
Automatic Updates] in [Automatic Updates].
If measures are not required, [Recommendations] or [Turn on Automatic 
Updates] will not be displayed.

D

Execute the appropriate measures, following the instructions in the 
[Recommendation] screen.

z

This message is displayed because the “Automatic Updates” setting in the “Security Cen-
ter” is disabled or is not set. (Settings have not been made at the time of purchase.)
“Automatic Updates” is a function that regularly checks whether high-priority update pro-
grams (security updates, etc.) have been provided to Windows Update, and automatically 
installs these programs to maintain Windows in its latest condition.

The message “Your computer might be at risk” is displayed

 is displayed

Summary of Contents for CF-T2 Series

Page 1: ...o CF T2 Series XP For backup proposes Panasonic recommends that this Reference Manual be printed To magnify the screen display of this Reference Manual To magnify all the icon display for example etc To magnify the one part of the screen display ...

Page 2: ...se functions z In this manual Microsoft Windows XP Professional Service Pack 2 with Advanced Security Technologies is indicated as Windows or Windows XP z If the icon on the notification area being explained in this manual is hidden and not displayed click on the icon to display all icons The icons on the notification area used in this manual are only examples The actual types and order of icons m...

Page 3: ...5 This illustration means to press and hold the Fn key then press the F5 key When using with the Fn key and the Ctrl key functions interchanged read with the Fn key and the Ctrl key reversed start Run This illustration means to click start then to click Run Î or These symbols indicate related pages Î If this is clicked it will jump to the page correspond ing Reference Manual Refer to the Operating...

Page 4: ...ns and then click Intel R Extreme Graphics About Display Mode Internal LCD Notebook This computer s display External Display Monitor External display connected to this computer Simultaneous Display Intel R Dual Display Clone To display the same screen on both the LCD and external display Extended Desktop To use both the internal LCD and the external display as an extended display domain You can dr...

Page 5: ...5 How to Use this Reference Manual In this Reference Manual you can use the following method to display the desired page or search for a page using a text string The screen shown is only an example ...

Page 6: ...ou want to see This Reference Manual is displayed using Adobe Reader Adobe Reader uses the following methods to magnify and reduce the display size z Tools for magnifying reducing the display A Zoom In Tool Click to enlarge the display in the area around the position that was clicked Drag to magnify the display in the area selected B Zoom Out Display size is reduced each time this button is clicke...

Page 7: ...e screen NOTE z A printer sold separately is required to print out this Reference Manual z Depending on the printer the illustrations and screen samples may not be printed clearly 1 Confirm the page to be printed z To print out only the page currently being displayed Leave that page on the display z To print out a specified page Confirm the page number 2 Click on 3 Set Printer Print Range and othe...

Page 8: ...rk surface Tapping Clicking tapping or clicking To right click Can only be performed by clicking the right button Double Tapping Double Clicking double tapping or double clicking Dragging Two quick taps but on the second tap leaving your finger down applying pressure and moving it on the work surface or While holding down the button moving your finger on the work surface Vertical Horizontal Scroll...

Page 9: ...rolling with the touch pad the Touch Pad utility and the Virtual Scroll function You cannot use both functions at the same time The Touch Pad utility is enabled at the time of purchase z The Touch Pad utility You can scroll continuously by tracing a circle on the touch pad This is designed for ease of use in keeping with the shape of the touch pad z The Virtual Scrolling Function Î page 14 You can...

Page 10: ...e touch pad For example on a screen that will only scroll horizontally even if you execute a vertical scroll the screen will scroll horizontally z When using an external mouse Î page 88 1 Make the following settings to use the horizontal scroll Once the settings have been made it is not necessary to make the same settings the next time A Click on the Scroll Icon on the notification area at the bot...

Page 11: ... in the position where the finger is placed 2 In the following cases any scrolling will be vertical scrolling When the horizontal scroll function has not been enabled When the application software is not compatible with the horizontal scroll on the Touch Pad utility When the cursor is not placed over the area that you want to scroll Vertical scroll 1 Horizontal scroll 2 Position where finger is pl...

Page 12: ... On screens that cannot be scrolled e g desktop screen if you scroll the computer may try to scroll the screen causing the cursor to freeze If this happens remove your finger from the touch pad and begin again this time starting from the center of the touch pad Vertical scroll Horizontal scroll 1 Trace clock wise To scroll down To scroll right Icon on the notification area While scrolling the icon...

Page 13: ...various touch pad settings using the following procedure A Click on the icon on the notification area and then click Settings If the icon is not displayed on the notification area Click start All Programs Panasonic Touch Pad utility settings B Changeable settings are z General settings Use Touch Pad function On Off Display icon in task tray On Off Animated icon in task tray On Off Rotate icon when...

Page 14: ...ic Touch Pad utility settings If a message appears indicating that the Touch Pad utility is not yet running click start All Programs Panasonic Touch Pad utility settings and display the icon 2 Remove a check mark from Use Touch Pad function in General set tings and then click OK The icon on the notification area will change to the icon 3 Click start Control Panel Printers and Other Hardware Mouse ...

Page 15: ...e Properties D Click start All Programs Panasonic Touch Pad utility settings E Click General settings add a check mark for Use Touch Pad function then click OK z Because the Touch Pad utility and the Virtual Scrolling function both offer scrolling functions that use the touch pad these two features cannot be used simultaneously If you try to use them at the same time a message may be displayed ask...

Page 16: ...t Control Panel Printers and Other Hardware Mouse Device Settings 2 Click the device name in Devices e g Synaptics TouchPad then click Settings 3 Double click Sensitivity then click PalmCheck or Touch Sensitiv ity 4 After making the adjustment click OK Adjusting the Sensitivity when Touching the Touch Pad ...

Page 17: ...is dragged to the Light Touch position the cursor will move even with a light touch on the touch pad NOTE z Click on Defaults to return the settings to their original positions at the time of purchase z By design the touch pad is to be used with a fingertip only Do not place any object on the work surface or press down forcefully with sharp pointed objects e g nails or hard objects that can leave ...

Page 18: ...ing explanation gives one example for the default settings The operation settings can be changed Î page 21 Functions Operation Moving the cursor The cursor is moved to the location pointed by the stylus Clicking Tapping One tap Double clicking Double tapping Two quick taps Dragging Touch and hold the object i e file or icon move the stylus on the surface dragging the object to the desired location...

Page 19: ...y resolution z If a change is made to the display resolution or the cursor can not be pointed correctly with the stylus be sure to perform Calibration Î page 21 z When mouse drivers are installed e g Intellimouse the touchscreen function may not be used z When the operation of panning only the internal LCD is performed while the display resolution is set higher than the resolution of the internal ...

Page 20: ...changed to In this case indicates tapping and indicates right click NOTE z Double click on the desktop to view Important Tips for using the touch screen You can also view Important Tips using the following procedures Click Important Tips in start All Programs Panasonic On Line Manuals ...

Page 21: ... Test Define the calibration setup Use this procedure when the cursor the stylus included touches do not appear to agree Necessary for changes in the alignment of the touchscreen with visual images or an adjustment of the display resolution Touch the mark on the calibration screen for about one second After the calibration procedure is executed e g after the nine marks are touched the procedure en...

Page 22: ...omputer when such things as dust are on the screen Do not allow contact with substances that could dirty the touchscreen such as oil z When the touchscreen becomes dirty Wipe to remove dirt by using a dry soft cloth included with the computer Do not use benzene or thinner or rubbing alcohol For more information refer to Suggestions About Cleaning the LCD Surface that comes with the soft cloth z Cl...

Page 23: ... Each time this operation is performed the screen display switches between the landscape mode 0 degrees and the previously set angle Î page 24 To select the angle and rotate the display 1 Right click on the notification area and then select the angle You can select rotation angles of 90 180 or 270 degrees from the landscape mode NOTE z Be sure to use the above procedures to rotate the display Rota...

Page 24: ...B Changing the angle Default 180 degrees 3 Click OK 1 Rotate the display to landscape mode 0 degree 2 Right click on the notification area and then click Exit z In the default mode the Display Rotation Tool will start up when Windows starts up z To restart the tool after exiting Click start All Programs Panasonic Display Rotation Tool NOTE z The display cannot be rotated when the Command Prompt is...

Page 25: ...e touchscreen Do not set the display resolution larger than the resolution of the internal LCD z If moving video is played while the display is rotated the picture may not be displayed properly or the sound may be broken up This problem can be corrected by rotating the display to 0 degrees z The touch pad scroll function does not work while the display is rotated z Do not use the Fast User Switchi...

Page 26: ...1 and F2 simultaneously while holding down the Fn key NOTE z Do not press the following key combinations until you log on to Windows and the hard disk drive indicator turns off Note that pop up windows will not be displayed in the Setup Utility however the key combinations the Fn F1 key the Fn F2 key and the Fn F3 key are operable in the Setup Utility z The key combinations Î page 27 may not work ...

Page 27: ...control Fn F1 down Fn F2 up Pressing this key combination adjusts the LCD brightness control You can select a different brightness level setting for when the AC adaptor is connected and for when it is not connected At the time of purchase the LCD brightness is set to be darker when the AC adaptor is not connected ...

Page 28: ...n the Extended Desktop is being utilized When a game such as pinball is displayed NOTE z Simultaneous display cannot be used until Windows startup is complete during Setup Utility etc When the Fn F3 key is pressed the screen is displayed on the external display or internal LCD z This key combination does not work when Command Prompt is set to Full Screen z When switching to a different user with t...

Page 29: ...me control Fn F5 down Fn F6 up Pressing this key combination adjusts the volume of the internal speaker and headphone jack NOTE z This key combination cannot be used to adjust the volume of the warning beep or speakers connected to the USB port Fn F7 Forcing the standby function Pressing this key combination causes the current status of the computer to be saved to memory and puts the computer into...

Page 30: ...Pressing this key combination causes the current status of the computer to be saved to the hard disk and puts the computer into hibernation mode Î page 47 Fn NumLk Run the ScrLk Scroll Lock function The functions differ depending on the application software being used Fn Home Lead to the last page or move the cursor to the end of the current line End Key Functions Pop up Window Displayed after log...

Page 31: ...ettings 2 Set the parameters A Use Fn key lock Add the check mark if you want to enable the Fn key lock function The following Fn key lock function will then be enabled z To use the Fn key only once A Press the Fn key once Locked B Press another key for combination Lock released z To use the Fn key successively A Press the Fn key twice Locked B Press another key for combination Fn key remains lock...

Page 32: ...he check mark if you want to turn the popup window display function OFF Full Screen of Command Prompt or MPEG files may change to a window display if the Fn Fx 1 key is pressed To prevent this turn the popup window display function OFF 3 Click OK 1 The Fx key indicates any function key from the F1 key to the F10 key ...

Page 33: ...ower off Hibernation mode z Green Power on z Blinking green Standby mode Battery pack indicator Î page 36 Caps Lock indicator This indicator lights green when the Caps Lock key is pressed Subsequent non shifted input is capitalized To disable press the Caps Lock key again the indicator will turn off ...

Page 34: ...ns The Enter key functions differently depending on the application To disable press the NumLk key again the indicator will turn off ScrLk indicator Scroll lock This indicator lights green when the Fn ScrLk key is pressed Scroll lock functions differently depending on the application Hard disk drive indicator This indicator lights when the hard disk drive is accessed SD memory card indicator This ...

Page 35: ...g of the battery by recharging only when the remaining power is less than approx 95 of capacity after the battery is fully charged z The battery pack normally becomes slightly warm during recharging and discharging This is not a malfunction z Battery operation time is reduced at low temperatures Use the battery pack within the acceptable temperature range When the computer is not going to be used ...

Page 36: ... the battery pack with a fully charged one you can turn your computer on Blinking red 1 Battery pack or charging circuit may not be working properly Quickly save your data and power off your computer Remove the battery pack and disconnect the AC adaptor then connect them again If the problem persists contact your technical support office The battery pack or charging circuit may be defective Blinki...

Page 37: ...y remaining displays 99 and the indicator light is orange for a long period of time Low battery warning appears after a short period of time This may be caused by the use of standby mode for long periods of time The battery is discharging while the computer is in standby mode when the AC adaptor is not connected z The remaining battery power and remaining time indicated in the Windows Power Meter ...

Page 38: ...r Check the Remaining Battery Power and Remaining Time using the Windows Power Meter After logging on to Windows Display by double clicking the icon on the notification area when the AC adaptor is not connected z The remaining battery power and remaining time indicated are calculated based on the computer s usage conditions at that time so these displays may change when usage conditions change The...

Page 39: ...ew the remaining battery capacity using the following procedure A Close the display and confirm that the latch is locked B Disconnect the AC adaptor C Slide the power switch A and count the number of bright LEDs B The number of bright LEDs B Remaining Battery Capacity 0 0 4 1 5 24 2 25 49 3 50 74 4 75 94 5 95 100 ...

Page 40: ...onnect the AC adaptor or replace the battery before starting up the computer next time z Connect the AC adaptor immediately If you do not have the AC adaptor with you exit any programs currently running then exit Windows and confirm that the power indicator is off z If you have a fully charged spare battery turn off the computer replace the battery and turn the computer on again z Connect the AC a...

Page 41: ...in Alarms Alarm Action Add a check mark for Force stand by or shutdown even if a program stops responding B Set the value for Critical battery alarm to 5 or more This is necessary for the standby or hibernation function to be completed assuring data is saved when the battery level is low ...

Page 42: ...ration electrical power outage accidental removal of the AC adaptor or battery pack etc the Battery Recalibration will not be performed properly z Battery Recalibration does not increase the battery s capacity If Battery Recalibration is executed frequently deterioration of the battery may result 1 Attach the battery pack then connect the AC adaptor Remove all peripherals except for the battery pa...

Page 43: ...e specified battery pack CF VZSU24BU with your computer z Do not remove change the battery pack while the standby mode Removing the pack in the standby mode will erase your data and may damage the computer 1 Power off your computer Operating Instructions Starting Up Shutting Down Do not use the standby function 2 Turn your computer over and remove the battery pack Remove the battery pack while sli...

Page 44: ...ower CAUTION z Be sure the battery pack is properly connected to the connector z When the battery pack has been removed do not apply pressure from the top of the closed display This may result in damage to the LCD ...

Page 45: ...3 Check to see that you have your AC adaptor with you before leaving your home or office Purchasing a spare battery CF VZSU24BU is highly recommended POINT 4 Always watch your battery level Power saving Methods Change Power Schemes z Click start Control Panel Performance and Maintenance Power Options and then set Power Schemes to Max Battery Power consumption can also be minimized with detailed se...

Page 46: ...en on the CPU even when you are not operating the computer We recommend that you do not use a screensaver We recommend that you fully charge the battery pack beforehand Refer to Important Tips as well Î page 35 Before the Remaining Battery Power Level Gets to Low We recommend that you become familiar with battery power confirmation methods Î page 37 and alarm settings to become aware when battery ...

Page 47: ... standby or hibernation function is used repeatedly the computer may not work properly To stabilize computer operations shut down Windows on regularly basis about once a week without using the standby or hibernation function Use any of the following methods to enter the standby or hibernation mode To use the hibernation mode set Power Options in advance Î page 48 Enabled in factory preset z Press ...

Page 48: ...rt Turn Off Computer press and hold the Shift key then click Hibernate Setting for Using the Hibernation Mode At the time of purchase the computer is set so that hibernation mode can be used 1 Click start Control Panel Performance and Maintenance Power Options 2 In Hibernate add the check mark for Enable hibernation and click OK ...

Page 49: ...icator or SD memory card indicator is on accessing drive or card When playing recording audio files and displaying images such as MPEG files When using communications software or the network function except when the Wake Up from LAN function is in use After resuming from hibernation mode or standby mode the computer may not work properly or may not be able to connect to the network When using peri...

Page 50: ...n mode 1 Slide the power switch A release your finger at the beep 1 sound The computer will enter either the standby or hibernation mode depending on the setting CAUTION z After releasing your finger from the power switch do not touch it until the power indicator goes off or blinks z At the beep 1 sound release your finger from the power switch If you continue to slide the power switch and hold it...

Page 51: ...dby mode Setting 1 Click start Control Panel Performance and Maintenance Power Options Advanced 2 Click Stand by or Hibernate for When I close the lid of my portable computer and then click OK Entering the standby or hibernation mode 1 Close the display The computer will enter either the standby or hibernation mode depending on the setting z When entering the standby or hibernation mode close the ...

Page 52: ...mode again Using the Power Switch When the computer has gone into standby or hibernation mode resume operations using the following procedure 1 Slide the power switch A When Opening the Display When Stand by or Hibernate is selected as the setting for When I close the lid of my portable computer Î page 51 you can resume operation using the following procedure 1 Open the display Even if the display...

Page 53: ... password is forgotten Computer administrator s password Situation Function to use z You do not want the settings in the Setup Utility to be changed z Supervisor Password Î page 54 z User Password Î page 56 1 z You do not want your computer to be used without your permission z Password on boot Î page 57 1 z You do not want your computer to be used without your permission z You do not want the comp...

Page 54: ...cters can be used for Supervisor Password and User Password There is no distinction between uppercase and lowercase letters Use only the upper horizontal row of numeric keys to input your password Do not input your password while holding down on the Shift key or the Ctrl key Using an SD memory card instead of entering a password If you initialize a commercial SD memory card SD Card Setup you can s...

Page 55: ...5 Enter your password at Enter New Password and press the Enter key z To disable the Supervisor Password Press only the Enter key 6 Re enter your password at Confirm New Password and press the Enter key z To disable the Supervisor Password Press only the Enter key 7 At Setup Notice press the Enter key 8 Press the F10 key and select Yes then press the Enter key NOTE z Disabling the Supervisor Passw...

Page 56: ...ervisor Password if you have not done so Î page 54 z To disable the User Password start up the Setup Utility with the Supervisor Password 1 Run the Setup Utility Î page 109 2 Using either the Î key or the Í key select Security 3 Using either the Ï key or the Ð key select Set User Password and press the Enter key 4 Only when the User Password has been set Enter your password at Enter Current Passwo...

Page 57: ... either the Ï key or the Ð key select Protected and press the Enter key 8 Press the F10 key and select Yes then press the Enter key When Password on boot is set to Enable it is impossible to start the computer without knowing the password NOTE z You cannot set Password on boot without setting the Supervisor Password Set the Supervisor Password if you have not done so Î page 54 z When starting up t...

Page 58: ...nter key z To disable the Password on boot Using the Ï key and the Ð key select Disable and press the Enter key 5 Press the F10 key and select Yes then press the Enter key Starting Up When the Password on boot is Set The screen shown at left is displayed Enter your password 1 and press the Enter key z When the correct password is input the computer will start z After 3 wrong password attempts have...

Page 59: ...r To set a password after the log on user has been created execute step 2 and then execute steps 6 8 Step 1 and steps 3 5 are not required 1 Log on to Windows with the administrator authority 2 Click start Control Panel User Accounts 3 Click Create a new account 4 Input the account name and then click Next 5 Select an account type and then click Create Account Set the Windows Log on Password ...

Page 60: ...7 will be displayed Refer to step 7 7 Click Create a password 8 Input the password and then click Create Password NOTE z If the check mark has been removed from Prompt for password when computer resumes from standby in start Control Panel Performance and Maintenance Power Options Advanced Enter Password does not appear when resuming from standby mode ...

Page 61: ... to Enable for security reasons Note that this Hard Disk Lock does not guarantee complete protection of data NOTE z In the default setting Hard Disk Lock is set to Disable z You cannot set Hard Disk Lock without setting the Supervisor Password Set the Supervisor Password if you have not done so Î page 54 z The hard disk lock function only works with the internal hard disk This function does not wo...

Page 62: ...elect Enable and press the Enter key At Caution press the Enter key z To disable the Hard Disk Lock Select Disable and press the Enter key 5 Press the F10 key and select Yes then press the Enter key CAUTION z If your computer requires repair Be sure to set Hard Disk Lock to Disable ...

Page 63: ... total operating current does not exceed the specified limit Allowable Current 3 3 V 400 mA 5 V 400 mA z ZV card SRAM card FLASH ROM card except for an ATA interface and cards requiring 12V are not supported z With the repeated insertion removal of a PC Card the computer may no longer recognize the PC Card depending on the type of card In such cases restart the computer z If the computer freezes a...

Page 64: ... below Here is one example A Connect the peripheral device to the card B Turn the device on C Slide the card in until it snaps into place z When inserting a card do not force the card in if difficulty is encountered Depending on the shape of the card a segment may remain protruding from the slot after insertion Do not try to force the card all the way in Doing so may damage the slot making it impo...

Page 65: ...CSI card is used to connect an external hard disk to the computer In such cases turn off the power from the start menu then remove the card 1 Disable the card function A Double click the icon on the notification area click the PC Card then click Stop B Click OK on Stop a Hardware device screen When the PC Card has been removed after the computer is turned off this step is not necessary 2 Raise the...

Page 66: ... to purchase when you re format use SD memory card format software Do not use Format of Windows Formatting software can be downloaded from our web site Address http panasonic jp support audio sd download sd_formatter_e html z When using the SD memory card with other peripheral devices format the SD memory card using the peripheral device For details refer to the device s instruction manual Data tr...

Page 67: ...CK position Unlock the switch when you want to record checkout edit or save data z Use an oil base felt tip pen to write in the memo area B on the card Do not use a pencil or ball point pen Doing so can damage the card body or destroy data stored in the card z Do not remove the card or turn off the device Removing the card can destroy data stored in the card While data is being read from the card ...

Page 68: ...1 Insert the card firmly with the label side facing up and with the cut corner in front z Make sure you insert the card in the proper direction Improper insertion may result in damage to the card or slot 2 Click on the desired Windows operation z The screen on the left is an example z When the screen on the left is not displayed it can be activated by doing the following A Click start My Computer ...

Page 69: ...d z The computer may continue to access the card for some length of time after operations such as writing to the card If you try to remove the card before the operation is completed important data may be damaged or it may not be possible to properly access the card the next time it is inserted 2 When you press the card it will stick out of the slot Now pull it all the way out z If you try to force...

Page 70: ...r programs NOTE z Log on to Windows with the administrator authority z The drive letter for A Drive B Drive C Drive and Z Drive cannot be changed How to install the SD Drive Letter Name Change Tool A Click start Run B Input c util chgsddrv setup exe and click OK then follow the onscreen instructions How to change drive letter A Click start All Programs Panasonic SD Drive Letter Change Tool B Click...

Page 71: ...rd Setup z To use when starting the computer Set the Supervisor Password in the Setup Utility Î page 54 You can also set it during the initialization procedure z To use when logging on to Windows resuming from the standby or hibernation mode or while the screensaver is active The Windows log on user and password must be set in Control Panel in advance Î page 59 z When starting the computer z When ...

Page 72: ... card for multiple computers Note however that if the card is used when logging on to Windows all of the computers must use the same log on user and password as those on the SD memory card Initialization SD Card Setup 1 Log on to Windows with the administrator authority 2 Insert the SD memory card in the SD memory card slot When Removable disk appears click Take no action then click OK 3 Start the...

Page 73: ... card instead of entering a password The setting method is set separately for each computer Different SD memory cards may not use different setting methods on the same computer If you use a different method between starting the computer and logging on to Windows In this screen you can set the setting method for logging on to Windows To set the method when starting the computer run the Setup Utilit...

Page 74: ...r intended z To use when starting the computer An SD memory card will be registered with the computer Up to two cards can be registered A Add the check mark for Use when starting computer B and click Next B Click Restart the computer after entering settings then click Finish ...

Page 75: ...confirmation then click OK Click Yes on the confirmation screen Supervisor Password and Password on boot in the Security menu of the Setup Utility will be set to be enabled Î page 116 z To use when logging on to Windows The Windows log on user name and password set in Control Panel are registered in the SD memory card After making this setting the following functions will be disabled z Displaying ...

Page 76: ...ithout checking whether or not the input user name has been set on this computer For example if different user names have been set on multiple computers as in the case of a company it requires a lot of work to register the user name on each individual SD memory card for each computer If the check mark is on user names for other computers can be registered on the SD memory card When user names for ...

Page 77: ...word through the keyboard z The SD memory card indicator is blinking Enter the password through the keyboard without removing the SD memory card A software application etc may be accessing the SD memory card z The password input screen and the Windows log on screen do not appear If Leave set was selected as the setting method If an SD memory card is already inserted when starting the computer each...

Page 78: ...ed on this computer will be unusable when starting this computer Remove the check mark if there is a possibility of unauthorized card being used by another person e g if you lose an SD memory card To use the SD memory card again add the check mark for Use when starting the computer under Setting for this SD card It will be registered with the computer again z Use the SD card when logging on to Win...

Page 79: ...er name and password which are set in the SD memory card When the set user name appears enter the password and click OK Then enter the new user name and password User name and password can not be selected if the check mark is not added to Use when logging on to Windows 3 Click OK Operation differs depending on the setting z If you add the check mark for Use the SD card when starting the computer S...

Page 80: ...80 SD Memory Card Security Function B At the confirmation message The user name and password registered in the SD card will be erased click Yes 4 Restart the computer ...

Page 81: ...mputer 3 Turn on the external display then turn on your computer 4 Change the display destination There are two methods to change the display destination Do not change the display destination using any method other than the following ones z Press the Fn F3 key Î page 28 Extended Desktop switching cannot be used Do not press any keys or slide the power switch until the display destination has chang...

Page 82: ...rnation mode or before restarting z Simultaneous display cannot be used until Windows startup is complete during Setup Utility etc When the Fn F3 key is pressed the screen is displayed on the external display or internal LCD z Simultaneous display and display destination switching cannot be used while Command Prompt is set to Full Screen z When the external display is used alone set the number of ...

Page 83: ...be played back smoothly z Carefully read the operating instructions of the external display z When connecting a monitor that does not conform to the Plug Play standards Either select the correct external display driver use in the following menu or use the driver disk that was supplied with your monitor A Display Display Properties Click start Control Panel Appearance and Themes Display B Click Set...

Page 84: ...zed display z A window that has been maximized cannot be moved to the other display Precautions When the application running is not shown on the display refer to the following items z When the application is in the external display or after the application is closed in the external display there are times the application will not be shown in the display when executed the next time if the position ...

Page 85: ...main for the Extended Desktop is changed the wallpaper and icons may become displaced z Wallpaper Change the setting for the wallpaper z Icons Right click on the desktop and click Arrange Icons By Auto Arrange When an animated pointer is used for the mouse pointer e g when changing the theme in Appearance and Themes of Control Panel z An error may occur when resuming from the standby or hibernatio...

Page 86: ...ted there are instances when the standby or hibernation function will not operate normally due to the USB device In addition a USB device may have to be removed temporarily and the computer restarted when the computer is unable to start up properly z Some devices will not operate when connected to a USB HUB these devices must be connected directly to the USB port on your computer z Depending on th...

Page 87: ...ing the USB device to one port and installing the driver it may be necessary to reinstall the driver when the device is connected to the other port Removing USB Devices CAUTION z Do not remove a USB device while your computer is in the standby or hibernation mode z Save important data and close each application 1 Disable the device function A Double click the icon on the notification area and clic...

Page 88: ...he program by following the on screen instructions z If the message Locked File Detected is displayed click Reboot 2 InstallShield Wizard Complete is displayed click Yes I want to restart my computer now Finish 3 Click start Control Panel Add or Remove Programs Synaptics Pointing Device Driver and then click Change Remove to remove the driver 4 After following the message on screen to remove the d...

Page 89: ...anel Add or Remove Programs to remove the external mouse driver z The procedure may depend on the external mouse driver you are using For more information refer to the instructions manual provided with the mouse driver 2 After the driver is removed shut down Windows and turn off the computer z If an external mouse is connected disconnect it after turning off the computer 3 Turn on the computer and...

Page 90: ...ics Pointing Device Settings remove the check mark from Show this screen at startup and click Close 10 Click start Run and input c util touchpad setup exe and then click OK 11 At Touch Pad utility Setup click Next z Installing Touch Pad Utility starts z After completing the installation if the message Touch Pad function and original Flat Pad scroll function cannot be used simultaneously is display...

Page 91: ...utter on the floppy disk Exposing the disk to a magnetic field Storing the disk in locations prone to high temperatures low pitched noise dampness or dust Applying more than one label on the disk z Confirm the contents of a floppy disk before formatting it Confirm that no important data is left on the floppy disk because all data will be erased z Use the write protect tab A This is a must for pres...

Page 92: ...perating the printer z How to print this Reference Manual in this computer Î page 7 1 Power off the printer and your computer About powering off your computer Operating Instructions Starting Up Shutting Down z Do not use the standby or hibernation function 2 Connect the USB cable attached to the printer or commercially available to the printer and then connect the other cable to the USB port of th...

Page 93: ... necessary A Click Edit in start Control Panel Printers and Other Hardware Phone and Modem Options Dialing Rules then click the location from which you will be dialing in Country region B Input the necessary information items such as the area code dialing rules etc click OK then click OK NOTE z Do not enter either the standby or hibernation mode during communications If the power saving function s...

Page 94: ...n is convenient when using automatic information receiving applications such as a FAX When using this function it is necessary to run a software application that can receive telephone calls and then return the computer to the original condition after a call Enabling the Ring Resume Function A Click start Printers and Faxes B Click Set up faxing in the Printer Tasks area on the left z After Configu...

Page 95: ...rnal modem H Click Power Management add the check mark for Allow this device to bring the computer out of standby then click OK When making the settings in steps A E above the battery operation time will be shortened to some degree When not using the Ring Resume function we recommend removing the check mark from Enable device to receive in the settings in step E CAUTION z When using this function ...

Page 96: ...w the computer to resume set the Call to a larger value than a typical telephone call If it is not possible for the sending side to set a long Call set the Number of rings until answer with the software application to maintain the condition to receive telephone calls to a small value 1 To display the setting for System standby Click start Control Panel Performance and Maintenance Power Options Pow...

Page 97: ...able category 5 or higher less than 100 m in length z In some cases LAN cables with a cover attached to the connector cannot be connected Check this in advance 1 Power off your computer Operating Instructions Starting Up Shutting Down Do not use the standby or hibernation function 2 Connect the cable Connect the LAN port A and the network system server HUB etc using a LAN cable 3 Turn on the compu...

Page 98: ...mes z When using the computer as a network computer some additional settings may have to be made depending on usage We recommend asking your system administrator or the person in charge of the network NOTE z If you are unable to connect to the network when the indicator of your HUB unit does not light A Display the Device Manager screen Click Device Manager in start Control Panel Performance and M...

Page 99: ...lick on Device Manager screen to close CAUTION z Be sure to connect the AC adaptor and enable the power supply NOTE z Even when a password is set in the Setup Utility and Password on boot is set to Enable it is not necessary to input the password set in the Setup Utility when the computer resumes from standby or hibernation mode z The Wake up from LAN function will not operate under the following ...

Page 100: ...ccess by a computer A Click start Control Panel Performance and Maintenance System Hardware Device Manager B Double click Network adapters double click the internal network adaptor and then click Power Management C Add a check mark for Only allow management stations to bring the computer out of standby click OK and then click on Device Manager screen to close ...

Page 101: ...ility and stability CAUTION z Communication is performed through the wireless LAN antenna A Do not block the antenna area with your hand or otherwise interfere with the passage of the radio signals z Do not use the Fast User Switching function The wireless LAN cannot perform NOTE z The communication speeds and distances differ depending on the devices that support the wireless LAN the installation...

Page 102: ...he computer in the environments described above turn off the wireless LAN Î page 103 Prevent theft of data or unauthorized access to the hard disk via a wireless LAN z When using the wireless LAN function there is a danger that data may be stolen from the hard disk or that shared files may be accessed If you plan to use wireless LAN functions we recommend that you do so only after making the appro...

Page 103: ...eless LAN is on or the icon when the wireless LAN is off on the notification area or click start All Programs Intel PROSet Wireless Intel PROSet Wireless 2 Click T and click Wireless On or Wireless Off Enable Disable Wireless LAN Standard IEEE802 11a 802 11a In some countries communication using IEEE802 11a 5 GHz wireless LAN standard is restricted by law Comply with the laws in the country concer...

Page 104: ...the Wireless LAN Switch you can also change the setting of the wireless LAN standard by the following procedure A Click start Control Panel Performance and Maintenance System Hardware Device Manager B Double click Intel R PRO Wireless at Network adapters C Click Advanced and then click Wireless Mode in Property D Remove the check mark from Use default value and select the settings e g 802 11a and ...

Page 105: ... the icon on the notification area will change at the same time z When you uninstall the Wireless LAN Switch Confirm that Wireless LAN is set to Enable in the Setup Utility z When the wireless LAN has been disabled using Device Manager or the Setup Utility the icon or the icon will not be displayed z Even if 802 11a is set to enable 802 11a cannot be used when the wireless LAN is set to off To use...

Page 106: ...ced menu of the Setup Utility may be set to Disable Set to Enable using the following procedure A Restart the computer B Press the F2 key while Panasonic boot screen is displayed soon after the computer begins the startup procedure If a password is set Enter Password will be displayed Enter your password and press the Enter key C Select Wireless LAN in the Advanced menu and press the Enter key the...

Page 107: ...it 13 characters In the case of hexadecimal 64 bit 10 digits 128 bit 26 digits Set the same values for the computer side and the access point side When using an access point for which 128 bit can be set some access points display 104 bit we recommend setting data encryption to 128 bit to prevent unauthorized decryption 6 Select the profile you have set and click Connect z If the setting of the pro...

Page 108: ...lick the icon the icon or the icon on the notification area to check the communication status z Click start All Programs Intel PROSet Wireless Intel PROSet Wireless For more information about how to use the Intel PROSet Wireless Software refer to Help in the menu bar z Click the icon or the icon on the notification area to check whether IEEE802 11a is enabled or disabled When Disable 802 11a is di...

Page 109: ...sor Password z You can register all items of the Setup Utility When inputting the User Password z On the Advanced and the Boot menu You can view the settings but cannot change it z On the Security menu Clear registered SD card Set Supervisor Password and Hard Disk Lock will not be displayed Password on boot SD Startup SD Setting Method Setup Utility Prompt Boot First Menu and User Password Protect...

Page 110: ...s not necessary When the Setup Utility is started up The password becomes necessary This alternative can prevent the contents of the Setup Utility from being changed z If you fail to press the F2 key at the right moment the Setup Utility will not start up In this case let the computer fully boot up and then perform a shutdown or restart from Windows z To close the Setup Utility A Press the Esc key...

Page 111: ...choose the desired item by pressing the Ï key and the Ð key The color of the selected item will change C You can display the submenu by pressing the Enter key on the item shown in reverse display D When the submenu is displayed you can select items by pressing the Ï key and the Ð key E The keys that can be used for settings are displayed in the Setup Utility screen ...

Page 112: ... To move among the menus Use these keys when the Information Main Advanced Security Boot or Exit menu is selected z F5 Select previous item Use this key when changing setting values z F6 Select next item Use this key when changing setting values z Enter To display the submenu of each item Use this key after selecting the item by using the Ï key or the Ð key Close the submenu by using the Esc key z...

Page 113: ...e is shown in 24 hr style The Tab key can be used to move hour minute second Numerical values can be adjusted using the F5 key and the F6 key xx xx xx System Date Date is shown in order of Month Day Year The Tab key can be used to move Month Day Year Numerical values can be adjusted using the F5 key and the F6 key xx xx xxxx Touch Pad Select whether to use the touch pad Enable or not Disable Disab...

Page 114: ...able Enable Advanced Menu An underline indicates the factory default settings An underline indicates the factory default settings Modem Select whether to use the internal modem function Enable or not Disable This does not work for the external modem Disable Enable LAN Select whether to use the internal LAN function Enable or not Disable This does not work for the external LAN card Disable Enable B...

Page 115: ...ort Select whether to use the function that makes the computer recognize USB keyboard USB CD DVD drive and USB floppy disk Enable or not Disable before starting Windows Disable Enable An underline indicates the factory default settings ...

Page 116: ...ult settings Password on boot Select whether you will need to input Enable or not Disable the Supervisor Password or the User Password on booting Disable Enable SD Startup Select whether to use an SD memory card instead of entering the password on booting Enable or not Disable When registered SD memory card this is set to Enable Cannot be set when Password on boot is set to Disable Disable Enable ...

Page 117: ...ble or not Disable Î page 118 Disable Enable Hard Disk Lock Select whether enable Enable or disable Disable the hard disk lock This function will not work without the Supervisor Password being set Disable Enable User Password Protection Select whether to permit changing the User Password Protected or not No Protection No Protection Protected Set User Password Set User Password when multiple users ...

Page 118: ...internal devices will be displayed Press the Enter key once more to return the display to its original condition Press the Ctrl Enter key to display the names of both the floppy disk drive and the hard disk drive 3 This is not displayed when LAN or Boot up from LAN is set to Disable on the Advanced menu NOTE z The Boot menu cannot be changed when the Setup Utility is started up with the User Passw...

Page 119: ...up Utility to the default settings Load Previous Values Load previous values from CMOS for all Setup items Save Current Values Save your changes to CMOS Battery Recalibration To accurately display remaining battery capacity fully charge the battery pack then fully discharge it Î page 42 Hard Disk Backup Restore Backup data to a backup area in the hard disk Also restore backed up data to the origin...

Page 120: ...cters in homepages and HTML e mails may not be magnified NOTE z Icon Enlarger will not start up if the display resolution is set lower than 1024 x 768 dots z When magnifying screen a part of the menu or other screen elements may become hidden In this case overlay the cursor to display pop ups scroll the screen or use other functions to display the hidden elements z Close all running application be...

Page 121: ...ick start All Programs Panasonic Loupe Utility z If you want to run Loupe Utility automatically when starting Windows next time Add the check mark for Register in Startup You can change the settings later for whether or not to register at startup z If you do not want to display the confirmation screen when running Loupe Utility next time Add the check mark for In the future do not show this messag...

Page 122: ...lay window will be hidden Clicking outside the enlarged display window or right clicking while pressing the Alt key again will hide the enlarged display window too C Changing the size If you drag this part you can enlarge downsize the enlarged display window The enlarged downsized size will differ depending on the display resolution NOTE z Loupe Utility displays the screen at the moment of the dis...

Page 123: ... key and add the check mark Multiple keys can be combined for example the Alt Ctrl key C C Select either Right click or Left Click to use in combination with the key s selected in B above D z When using the keyboard A Click Keyboard A B Click the text box E and then press the key used for the shortcut e g the Alt Z key the Alt Ctrl Z key etc Changing the window shape Click Circular F or Rectangula...

Page 124: ...124 Loupe Utility 3 Click OK Select whether to make the display enlargement 2x or 3x z Right click the icon and then click 2x enlargement or 3x enlargement ...

Page 125: ...Menu appears and with the Ï key or the Ð key select Safe Mode then press the Enter key Follow the onscreen instructions 1 Supervisor Password or User Password set with the Setup Utility z When the power indicator is lit after sliding the power switch for at least four seconds to turn off turn on again z Restore the Setup Utility s settings to their default values z If Extended RAM Module Failed ap...

Page 126: ...ne is set then click OK z Check if there is a Panasonic external floppy disk drive connected CF VFDU03 It is not possible to boot from other floppy disk drives z Check that the boot disk is correctly inserted z Make sure Legacy USB Support is set to Enable in the Setup Utility Î page 115 z Turn off the computer and reconnect the external floppy disk drive z Check whether a floppy disk not allowing...

Page 127: ... the computer is communicating via the modem When you cannot execute operations slide the power switch for four seconds or more to forcibly turn your computer off z When the internal LCD is closed the computer may not enter system standby or system hibernation mode 2 In order to activate standby or hibernation set Touch Pad to Disable in the Main menu of the Setup Utility Î page 113 2 Functions th...

Page 128: ...ssible to shut down when the application is removed then consult the application software manufacturer z Check a disk error using the following procedure A Click start My Computer right click Local Disk C and click Properties B Click Tools Check Now C In Check disk options add the check mark for Automatically fix file system errors and Scan for and attempt recovery of bad sectors and click Start T...

Page 129: ... Utility and Pass word on boot is set to Enable Enter Password does not appear when the computer resumes from the standby or hibernation mode Set the Windows password with the following procedure and make input of the Windows password required A Click the account to change in start Control Panel User Accounts and set the password B Add the check mark for Prompt for password when computer resumes f...

Page 130: ...rm the reinstallation procedure and return the hard disk to its condition at the time of purchase Operating Instructions Reinstalling Software then set up Windows and reset the password z This is a system startup error Refer to List of Error Codes in the Operating Instructions z If Remove disks or other media Press any key to restart is displayed Î page 126 When the administrator password is forgo...

Page 131: ...ceptions C To register a network game or other programs as an exception Click Add Program click the program and click OK To set access through a specified port as an exception Click Add Port set the port and click OK To set a file or printer as an exception Add the check mark for File and Printer Sharing D Confirm that there is a check mark for the item to be set as an exception and click OK z The...

Page 132: ...regard to Web contents One of these is the Pop up Blocker which may prevent some Web pages from being dis played If you have any problems with Web page displays e g if a page cannot be displayed cor rectly on Internet Explorer check the contents of the message window displayed below the address bar called the Information Bar The Information Bar shows the information that has been suppressed by Int...

Page 133: ...he risk of attack from viruses etc If you need to display images click the segment where the message Some pictures have been blocked is displayed The images can be displayed temporarily z If a message received in Outlook Express has contained an attachment file with an exten sion such as exe or scr potentially unsafe files Windows XP blocks those files If you need to read the files click Tools Opt...

Page 134: ...ed click Close z If operations slow down during streaming playback try changing the number of colors of the display with the following procedure 1 A Click start Control Panel and from the See Also area click Other Control Panel Options Intel R Extreme Graphics Devices B Change Color to High Color and click OK 1 Note that this may not improve the speed of all operations z Click start All Programs P...

Page 135: ...Key combination with the Fn key may not work It may not be possible to set the settings of the display The wireless LAN cannot be used In this case log off all users without using Fast User Switching function and try the operation once more If the problem persists restart the computer z Some software applications installed after the time of purchase are not compatible with Windows XP Service Pack ...

Page 136: ...ation software then reinstall the application software z When you try to play a movie is Codec required displayed Some video files use a Codec that is not installed as a standard In these instances if you play back the video file after connecting to the Internet the Codec may be downloaded automatically allowing you to play back the file Cannot play movies with the Windows Media Player ...

Page 137: ... power off your computer Remove the battery pack and dis connect the AC adaptor then connect them again If the problem persists contact your technical support office The battery pack or charging circuit may be defective z If blinking orange Battery cannot be recharged temporarily because the internal temperature of the battery pack is outside the acceptable temperature range for recharging Once th...

Page 138: ...o keyboard commands read No response Î page 135 z Adjust the touch sensitivity To adjust the sensitivity refer to Adjusting the Sensitivity when Touching the Touch Pad Î page 16 z Check that no external mouse driver is installed Refer to steps A and B under The cursor cannot be controlled properly above z Check that the mouse is correctly connected z Install the driver for the connected mouse If t...

Page 139: ...139 Problems with Cursor z Check the item Cannot scroll with the Touch Pad utility Î page 134 Cannot scroll ...

Page 140: ...ents are functioning properly this is not considered a defect z Check if the power saving mode is active If the power indicator is lit The display is turned off Press a key with no independent effect such as the Ctrl key or the Shift key Do not use a key that may make a selection Enter Space Esc Y N numeric keys and so on If the power indicator is blinking or is not lit The standby mode or hiberna...

Page 141: ...g Stop playing the video before switching the display destination z When some applications are running the display may not be rotated and the operation of the touch pad and the touchscreen may not match the display angle Press the Ctrl Alt R key to rotate the display to the landscape mode After exiting the application rotate the display then start up the application again z If the problem persists...

Page 142: ...mber of colors screen area resolution and refresh rate to smaller values z Connect the external display then press the Fn F3 key to switch the display If this does not switch the display use the following procedure A Click start Control Panel from the See Also area click Other Control Panel Options then click Intel R Extreme Graphics Devices B Click the display destination and click OK When the sc...

Page 143: ... safely and notifies the user if the settings are not at an appropriate level of safety You can continue to use the computer even if these messages continue to be displayed but we recommend that you follow the procedures below to minimize damage from viruses A Read the message B Click on the notification area The Windows Security Center screen will be displayed C Click Recommendations in Firewall ...

Page 144: ...orrect the date and time z If you continue to experience problems the internal battery maintaining the clock may need to be replaced Contact your technical support office z When the computer is connected to a LAN confirm the date and time of the server z This computer will not correctly recognize the date and time starting from the year 2100 A D z Click the icon on the notification area to display...

Page 145: ... and select it z Check whether Fn Ctrl Key is set to Replace in the Main menu of the Setup Utility Î page 113 Change the setting back to Normal or if continuing with Replace selected use the Ctrl key in place of the Fn key z When mouse drivers are installed i e IntelliMouse the touchscreen is unable to be used Install the touchscreen driver again z Has the touchscreen driver been properly installe...

Page 146: ...orrectly connected z Has the floppy disk been correctly inserted z Has the floppy disk been correctly formatted For the method of formatting see the next item To format a floppy disk z Your floppy disk content may be corrupted z If it is possible to read but not write check whether the floppy disk is write protected z Use the following procedure to format a disk A Click start My Computer 3 1 2 Flo...

Page 147: ...ormance and Maintenance System Hardware Device Manager B Double click Sound video and game controllers and check if is displayed If is displayed click the driver for which is shown press the Del key and click OK in the confirm deletion screen Then restart the computer z Press the Fn F5 key to lower the volume or the Fn F6 key to increase the volume z During audio playback operating a key with the ...

Page 148: ...erly Use the following procedure A Click start Control Panel Performance and Maintenance System Hardware Device Manager B Select the applied device and remove the check mark for Allow the computer to turn off this device to save power in Power Management This item may be unavailable for some types of devices z When operation resumes from the standby or hibernation mode devices such as an external ...

Page 149: ...tenance System Hardware Device Manager B Double click PCMCIA adapters and double click the relevant device In Resources if Conflicting device list shows No conflicts there is no conflict z Read the instructions supplied with the PC card or consult the PC card manufacturer z Check that you are using a driver supported by the operating system z Refer to Operating Instructions RAM Module or Specifica...

Page 150: ...tomatically z If these phenomena occur even with the above settings click start Control Panel Performance and Maintenance Power Options Power Schemes click Always On from Power schemes and click OK z These operations will be helpful in easing the performance losses resulting from CPU power saving functions but will not be effective against the phenomena resulting from other causes e g noise genera...

Page 151: ...so to Cannot log on to Windows with the SD memory card Î page 125 z Is Windows set to automatically select the operation to be executed To select the operation each time a card is inserted make the settings with the following procedure A Click start My Computer B Right click Removable Disks on SD memory card MultiMedia Card and then click Properties C Click AutoPlay D Select the file type click Pr...

Page 152: ...th an ISP or an application to the network system administrator is required Following directions given by the ISP or network system administrator make the protocol and other settings Are the LAN cables correctly connected z When connected via a wireless LAN See the item Problems with Wireless LAN Î page 154 z Setting CPU Idle Setting to Performance may improve the communication speed See A device ...

Page 153: ...ess Make a note of the 12 digit string of alphanumerics displayed on the wireless LAN s Physical Address line LAN s MAC address Make a note of the 12 digit string of alphanumerics displayed on the LAN s Physical Address line D Enter exit and press the Enter key ...

Page 154: ...ntrol Panel Add or Remove Programs If it has not been installed input c util drivers wlan proset iproinst exe EoU False in start Run to install Confirm that the icon is displayed on the notification area If the is displayed the wireless LAN is off Click and click Enable Wireless LAN Even with the wireless LAN turned on 802 11a may be disabled To use 802 11a use the following procedure to enable it...

Page 155: ...ta encryption Network authentication Network key Key index z Using the following procedure confirm whether the computer s protocol settings are correct only when using TCP IP A When the icon is displayed on the notification area Right click the icon and click Open Network Connections When the icon is not displayed on the notification area Click start Control Panel Network and Internet Connections ...

Page 156: ...between the computer and the access point or if the computer is further away z When using a wireless LAN in an environment that combines both IEEE802 11g and IEEE802 11b communication speed when using IEEE802 11g may decrease z Using the CPU Idle Setting to set to Performance may improve this problem See A device connected to a PC Card does not operate correctly Î page 150 z Shorten the distance b...

Page 157: ...he Setup Utility This will restore the Setup Utility s settings to their default values except the password settings z To display the icon perform the following procedure A Click start Control Panel Network and Internet Connections Network Connections B Right click Wireless Network Connection and click Properties C Add a checkmark for Show icon in notification area when connected and then click OK...

Page 158: ...PC Information Viewer and display the information you wish to save B Click Save z To save the item that is displayed Click Save only the information displayed and click OK Some of the hidden information on the screen which cannot be shown without scrolling the screen will be saved too z To save all items Click Save all the information and click OK C Select the folder input the file name then click...

Page 159: ...tion Viewer Screen Copy z At the time of purchase the computer is set so that a copy of the screen can be saved to a file by pressing the Ctrl Alt F8 key This setting can be changed using the following procedure A Click start All Programs Panasonic PC Information Viewer B Right click Screen Copy and then click Properties Shortcut C Move the cursor to Shortcut key press the key to be used for the s...

Page 160: ...levant homepage for the manufacturer of the application software If you cannot find any hints or methods there to resolve your problem forward your question to the manufacturer When forwarding an inquiry include information on your computer s usage conditions z Pre installed software Contact the Panasonic technical support office as listed in the LIMITED WARRANTY Confirm the contact information fo...

Page 161: ...ate Windows Î page 164 In some cases security related patch programs are provided as measures against the latest types of viruses Get the newest information about viruses from the Website of Microsoft Corp Website and other software makers When using the Internet or e mail Do not open e mail from unknown senders To Protect Your Computer from being Infected by a Virus The first time you start up Wi...

Page 162: ...d on disks or from external sources such as data downloaded from the network Internet e mail etc For compressed files decompression may be required before running a check Windows Firewall protects a computer from unlawful access via the Internet At the time of purchase the firewall is set to Enable Make the settings by the following methods A Click start Control Panel Security Center Windows Firew...

Page 163: ... the help displayed by the following methods A Click start Help and Support and input Windows Firewall into Search B Click Windows Firewall overview In order to prevent secondary infection disconnect from the network and conduct a check of the hard disk and other data If a Virus Is Discovered ...

Page 164: ...to Problems with Notification Area Î page 143 or the Operating Instructions Update Windows 1 Perform Windows Update Click start All Programs Windows Update Do not apply Driver Updates even if a message to update a driver appears If a driver update is required contact your technical support office NOTE z Be sure to perform Windows Update after reinstallation How to confirm installed patch programs ...

Page 165: ...ained in the following folders c windows docs c windows dotnetfx c windows i386 c windows support tools c windows valueadd Windows has security functions aside from the security functions in the Setup Utility For details refer to Windows Help When Using the Files on the Retail Version of the Windows CD ROM Windows Security ...

Page 166: ...ms Panasonic The screen shown at left is displayed When you click an item detailed information on that item will be displayed Displayed information can be saved to a text file txt Run the DMI Viewer and display the information you wish to save 1 Select save method z To save the item that is displayed Click Save Selected Data from the File menu z To save all items Click Save All Data from the File ...

Page 167: ...ow to create an account Operating Instructions First time Operation z In the case of limited accounts some functions and applications cannot be accessed Ad Hoc Mode A wireless LAN communication method in which two computers with wireless LAN conduct data interactions without using an Access Point see above Data interaction methods between two or more computers using an Access Point are referred to...

Page 168: ... a mouse button right or left button or the touch pad is pressed once quickly and then released When this operation is executed twice in quick succession it is referred to as a double click Î page 169 A click is used when selecting or executing a program menu item or piece of data Clicking the right button is called right click and clicking the left button is called left click but generally the te...

Page 169: ... drive modem or LAN Dithering Displaying an intermediate color tone by combining several colors For example one form of dithering is to create a gray image by lining up alternating black and white pixels Double Click Pressing and releasing the mouse button or touch pad twice in quick succession to display data or execute a program or menu The right mouse button is used to execute a double click Dr...

Page 170: ...less LAN radio waves data can be exchanged with a large number of networks Each computer or access point Î page 167 confirms this text string allowing communications only between parties with matching ESS IDs Extended Desktop Dual Display Using the internal LCD Î page 173 and an external display as a continuous display field Windows and other items can be dragged between the two displays F Firewal...

Page 171: ...sk when the power is turned off so that when the power resumes the working conditions immediately before the power was turned off will be displayed on the screen Hotkey A specified function executed by pressing two or more allocated keys in combination There may be a Hotkey function which executes a specified function with a single key z One example of a Hotkey operation on this computer pressing ...

Page 172: ...approved by IEEE Institute of Electrical and Electronics Engineers Enables communications at speeds up to 54 Mbps 1 A standard using a 5 GHz frequency band Outdoor communications using IEEE802 11a 5 GHz wireless LAN however are prohibited When using IEEE802 11a in other countries follow the each country s respective law Also supports encryption using WEP Wired Equivalent Privacy Î page 181 AES Î p...

Page 173: ...ns at speeds up to 54 Mbps 3 This standard enables data transfers at about five times the speed of 802 11b using the same 2 4 GHz frequency band Also supports encryption using WEP Wired Equivalent Privacy Î page 181 AES Î page 168 and TKIP Temporary Key Integrity Protocol Î page 180 3 The values shown are the maximum theoretical values for wireless LAN standards and do not indicate actual data tra...

Page 174: ...ter system Logged On Also referred to as log out Log On The status in which the user can access a network or computer system Also referred to as log in M MAC Address A unique number allocated to each device network card built in wireless LAN module etc used on a network Displayed in a format such as 00 11 22 AA BB CC This number is allocated in advance by the device manufacturer No two devices hav...

Page 175: ... is designed for distribution of video with low picture quality or high compression rates through telephone lines and other lines with low communication speeds N Network Key Encryption Î page 170 Notification Area Appears at the right edge of the Taskbar Î page 179 displayed at the bottom of the screen time display and other icons Tools for changing settings such as volume adjustments are included...

Page 176: ...indow A window that appears automatically when a specified screen is displayed or when the cursor is moved to a particular position etc This window displays information including explanations of how to use the window or gives a menu of functions that can be selected In many cases this window only appears for a short time and disappears when it is no longer needed z On this computer the term Pop up...

Page 177: ... computer Refresh Rate Screen The number of times the screen is updated with a new display each second If the screen seems to flicker it may be because the refresh rate is too low Reinstall Refers to reinstalling software drivers and other components into the computer Also refers to reinstallation of the entire operating system This operation is conducted when software or other components no longe...

Page 178: ...ideo or still image is displayed when the computer is on but not in use for a specified period of time Scrolling Moving the display contents up or down or right or left when all of the information displayed in a window e g text or an image cannot be contained in a single screen SD Memory Card A memory card roughly the size of a postage stamp with a unique ID Enables recording of music and video da...

Page 179: ...ic RAM Standby A function that enables the current working conditions to be stored in memory when the power is turned off so when the power resumes the working conditions immediately before the power was turned off will be displayed on the screen When the power supply is disconnected the data stored in memory is lost so always connect the AC adaptor or battery pack when the computer is in standby ...

Page 180: ...urrently open and other information The entire window can be moved by dragging Î page 169 this bar with the mouse pointer TKIP Short for Temporary Key Integrity Protocol The encryption standard considered the successor to WEP Wired Equivalent Privacy The WEP encryption key WEP key is fixed but in the case of TKIP the encryption key changes automatically at specific intervals or at specific packet ...

Page 181: ...protect security during information transmissions communication can only occur when the same network key Î page 170 is registered to both parties involved in the communication Wireless LAN A LAN Î page 174 that conducts wireless communications using radio waves Data is sent and received using common wireless frequencies Because a LAN cable is not required the computer can be located some distance ...

Page 182: ...rred directly or indirectly from errors omissions or discrepancies between the computer and the manuals z Trademarks Microsoft Windows the Windows logo and IntelliMouse are registered trademarks of Microsoft Corporation of the United States and or other countries Intel Pentium and PROSet are either registered trademarks or trademarks of Intel Corporation SD Logo is a trademark Adobe the Adobe logo...

Reviews: