

(Setting Procedure via AW-RP50)
<How to manually adjust the iris of AW-HE40 connected to CAM1>
①
Press the button 1 at <CAMERA STATUS/SELECTION>. - (Fig. 1-A)
②
Hold down the CAMERA OSD button - (Fig. 1-B) at the upper right of the panel. The button will light up and
the on-screen menu will be displayed on SDI (or HDMI) output image from the selected AW-HE40 camera.
* If CAMERA OSD button is held down again while it is lit, the on-screen menu will disappear and the button’s
light will go off.
③
Use F1 dial to change the following camera menu setting. - (Fig. 1-C)
【
Location
】
・
Camera
>
Scene
⇒
Put the setting to [Manual1]. * The setting can be selected from [Manual1 – 3].
④
Press “IRIS AUTO” button (*1) on the front panel to switch between Auto and Manual. - (Fig. 1-D)
(*1) When this button’s light is ON, it indicates Auto Iris. When it is OFF, it indicates Manual Iris and the iris
can be adjusted using IRIS dial. - (Fig. 1-E)
The status of “IRIS AUTO” button is linked with the following camera menu setting.
・
Camera
>
Scene
>
Contrast
>
Contrast Mode
⇒
[Auto], [Manual]
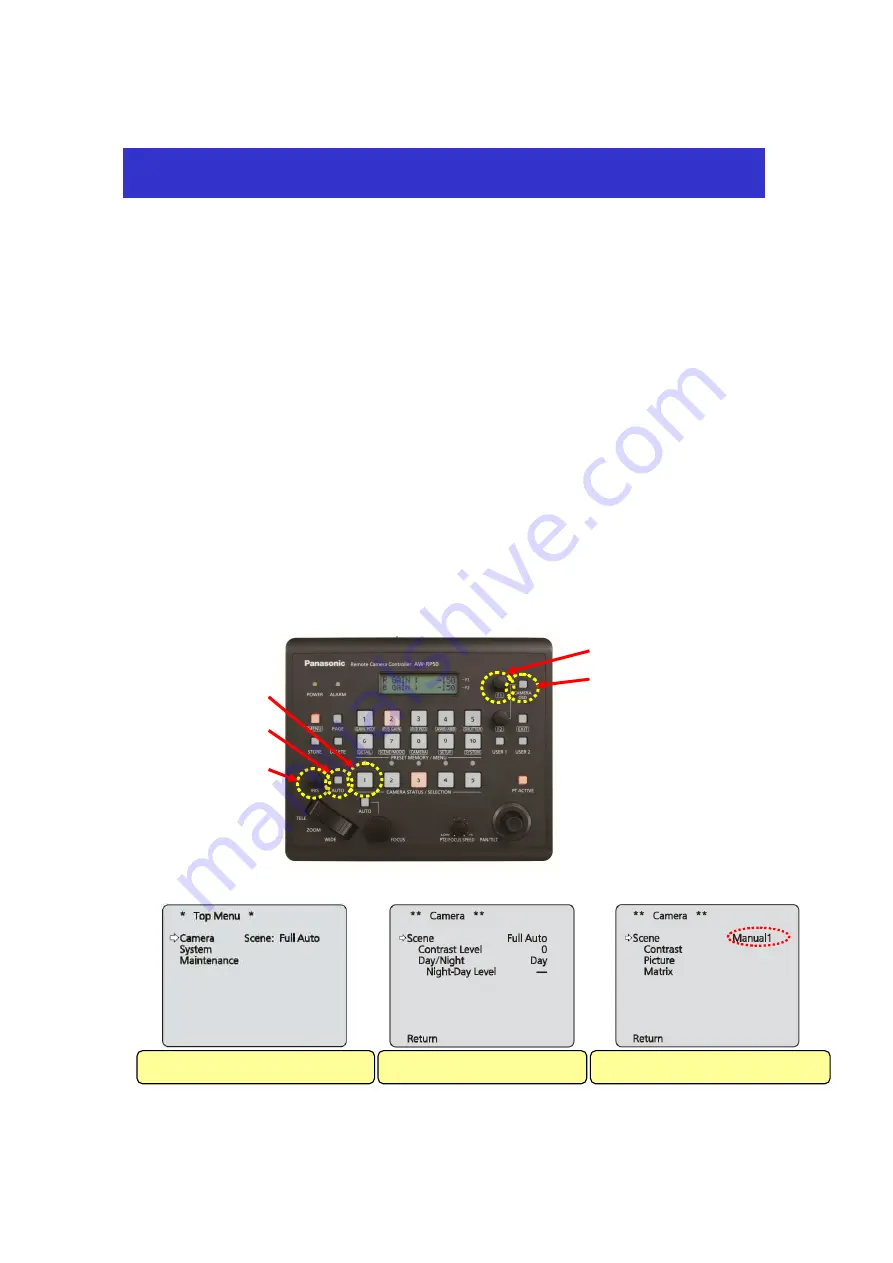
(Displayed On-Screen Menu)
Controlling Iris of AW-HE40 Camera Manually
Turn F1 → Select “Camera” → Press F1
Press F1 → “Full Auto” blinks
(
A
)
(
D
)
(
B
)
(
C
)
(Figure 1)
Turn F1 → Select “Manual1” → Press F1
(
E
)


