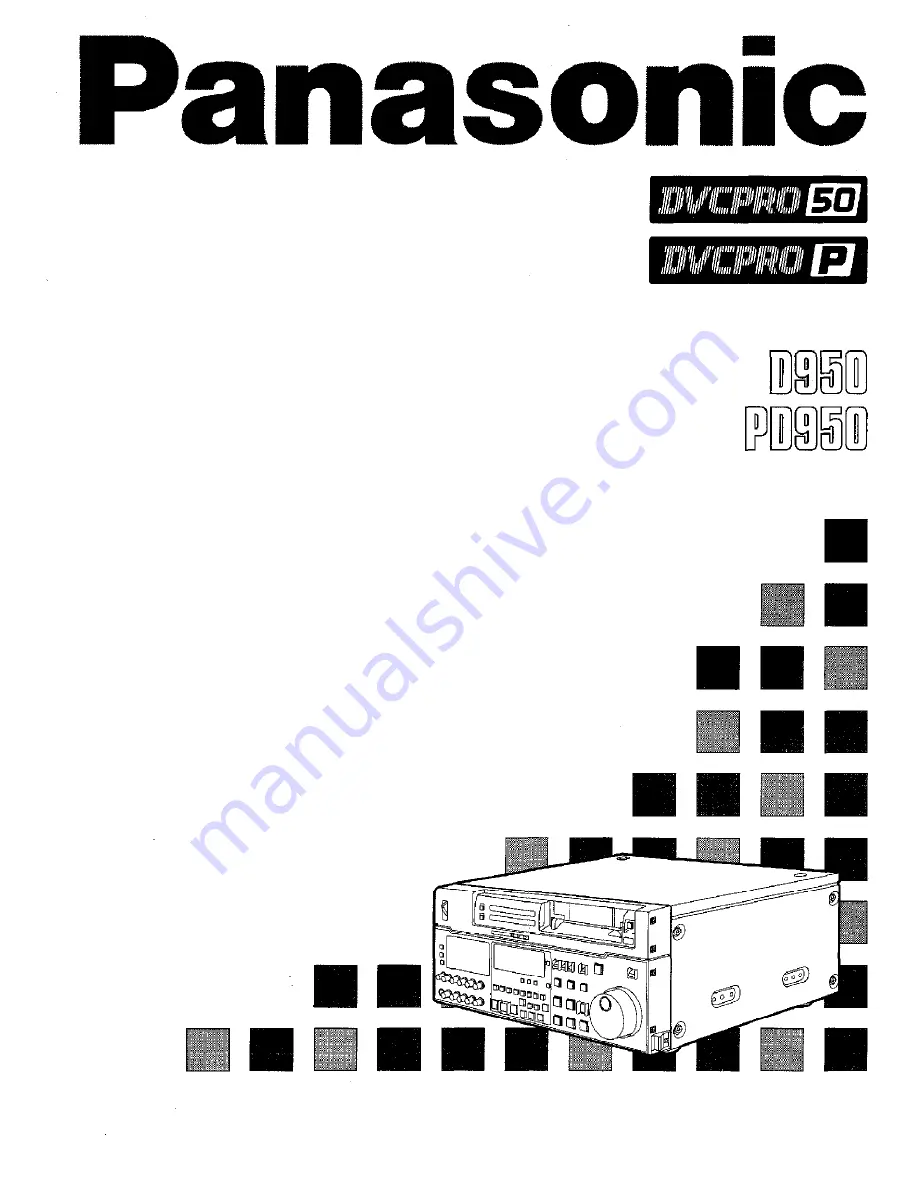
Digital Video Cassette Recorder
AJ-
Operating Instructions
Page 1: ...Digital Video Cassette Recorder AJ AJ Operating Instructions ...
Page 2: ...ital device pursuant to Part 15 of the FCC Rules These limits are designed to provide reasonable protection against harmful interference when the equipment is operated in a commercial environment This equipment generates uses and can radiate radio frequency energy and if not installed and used in accordance with the instruc tion manual may cause harmful interference to radio communications Operati...
Page 3: ...3 24 25 26 27 28 29 30 31 32 33 34 35 36 37 38 39 40 41 Video output encoder output signal adjustment Setup default settings Setup menus System menu Basic menu Operation menu Interface menu Edit menu Tape protect menu Time Code menu Video menu Audio menu AJ PD950 USER menu Time code user bit Recording internal external time codes Reproducing the time code user bit Superimpose screen Servo referenc...
Page 4: ...tapes can be used with this unit M cassette max 33 minutes and L cassettes max 92 minutes The width of the tapes measures 1 4 inch to achieve a compact design Superior Picture quality Superior picture quality is delivered in the component signal and the 4 2 0p progressive signal recording mode Switchable 525i 625i 525p The video input signal switch settings 525i 625i 525p can be set to accommodate...
Page 5: ...pin RS 422A RS 232C remote In addition to the standard 9 pin serial remote RS 422A RS 232C and 25 pin parallel remote connectors are also featured The RS 422A connector enables another VTR to be operated in parallel with the unit if a looping connection is used for the two units 4 channel high sound quality digital audio The 4 channel PCM audio allows for not only independent editing and mixing on...
Page 6: ...tem has been selected 525P This lights when the 525 progressive TV system is selected or is currently playing back The 525P setting is selected on setup menu No 012 SYSTEM FORMAT 625 This lights when a 625 interlaced TV system is selected 25Mbps 50Mbps 25Mbps This indicates that the tape is recorded or played back in the 25Mbps DVCPRO format 50Mbps This indicates that the tape is recorded or playe...
Page 7: ...log audio signals the display flashes to alert the user when the selected input signal is not supplied Video Y PB PR Analog component video signal CMPST Analog composite video signal SDTI V A Compressed data serial digital video audio signal optional SDI Serial digital video signal SMPTE259M C 272M 294M The entire display lights when signal generation using the internal signal generator has been s...
Page 8: ...to rotate even in the stop mode and the tape remains in close contact with the drum If the stop mode continues for more than a certain period of time the unit automatically switches to the standby OFF mode in order to protect the tape The stop mode is established immediately after a cassette has been inserted into the unit FF button 2 The tape is fast forwarded when this is pressed REW button 2 Th...
Page 9: ...utton When this button is pressed its lamp lights and the player connected to the unit can be operated by remote control The unit s editing and tape transport buttons now control the player s functions RECORDER button When this button is pressed its lamp lights and the editing and tape transport buttons control the recorder s the unit s functions Both lamps light and the recorder functions as the ...
Page 10: ...ravels in the REV direction provided that the lamp in the search button has lighted STILL This lights in the JOG mode while the dial is kept stationary and the tape stops traveling provided that the lamp in the search button has lighted It lights in the SHTL mode provided that the dial is at the STILL position FWD This lights when the dial is turned clockwise and the tape travels in the FWD direct...
Page 11: ...d to the recorder IN A IN SET OUT A OUT buttons When IN A IN or OUT A OUT button is pressed together with the SET button the IN A IN or OUT A OUT point is entered A IN and A OUT are used during audio split editing to enter an audio IN or OUT point that differs from the video In or OUT point While an IN A IN or OUT A OUT point is selected the IN A IN or OUT A OUT button corresponding to the point e...
Page 12: ...ay lamp This lights when a cassette has been inserted into the unit DVCPRO format 25Mbps cassette playback display lamp This lights when a cassette recorded in the DVCPRO format 25 Mbps is being played back SCH lamp This lights when the SCH of the external sync signal is within a specific range CF lamp This lights when the color framing is locked Level meters These indicate the respective levels o...
Page 13: ...H1 CH2 CH3 CH4 CUE and back to CH1 However this switching is disabled when CH1 2 or CH3 4 has been selected for setup menu No 729 MONITOR MIX L Each time the R button is pressed the signals output to the monitor R channel are selected in turn in the following order CH1 CH2 CH3 CH4 CUE and back to CH1 However this switching is disabled when CH1 2 or CH3 4 has been selected for setup menu No 730 MON...
Page 14: ...using this control HUE control and switch When setup menu No 00 ENCODER SEL is set to LOCAL the hue can be adjusted When the switch is set to PRESET the hue is the unity value 0 When the switch is set to MANUAL the hue can be adjusted using this control CF switch This selects whether the playback framing is to be locked in 4 field or 8 field increments or 2 field increments Applies only to AJ PD95...
Page 15: ...playback choose a video cassette tape that corresponds to the 525i 625i 525p selection MENU button When this is pressed the setup menu appears on the TV monitor using VIDEO OUT 3 connector and the setup menu No appears on the display When it is pressed again the menu setting mode is exited and the original operating mode is restored SET button When this is pressed the data which has been set on th...
Page 16: ...Controls and their functions Connector area 1 6 ...
Page 17: ...he CUE track is supplied to this connector The audio signals from a microphone can also be recorded by selecting the 60dB input mode on the setup menu No 705 CUE IN LV CUE OUT connector The analog signal recorded on the CUE track is output from this connector MONITOR OUT connector During playback the playback signals from the CUE track or PCM audio signal CH1 CH2 CH3 CH4 are output from this conne...
Page 18: ...or digital component audio and video signals which comply with the SMPTE 259M C 272M 294M standard Remote control connectors The unit can be controlled from an external source by connecting the unit with another unit or an external controller There are two remote control connectors one for IN OUT uses and the other for OUT uses IN OUT For connection with an external controller For connection with ...
Page 19: ...tors Analog video input connectors Reference input connectors Digital audio video input connector Digital audio output Digital audio video output Analog audio input connectors connector Digital audio input connector Active through output connector Analog audio output connectors Video monitor output connectors 1 9 ...
Page 20: ... Recorder Set the CONTROL switch on the front panel to LOCAL Reference Signal generator To audio monitor device Source machine OFF Remote control signal 9P To audio monitor Recorder device ON To video monitor device Digital video audio signal Digital audio Analog video signal component To video monitor device 2 0 ...
Page 21: ...AV monitor Source machine AV monitor Editing controller AV switcher Remote To REMOTE To REMOTE IN OUT connector IN OUT connector Reference signal generator Reference signal Source machine AV monitor Note When an editing controller made by CMX is used support must be provided at the editing controller side 2 1 Recorder ...
Page 22: ...F REF VIDEO IN VIDEO IN VIDEO IN VIDEO 1 VIDEO 1 VIDEO IN OUT OUT REF BB P1 IN REF IN P2 IN Switcher RECORDER OUT MONITOR OUT Make these two cables equally long Supply the external reference signal from a sync signal generator to the units Use the composite connectors for the video signals TV monitor REF BB WFM VSC waveform monitor vectorscope 75 2 2 ...
Page 23: ...a maximum capacity of 92 minutes L cassette AJ P64LP AJ P94LP AJ P123LP AJ 5P92LP Align the cassette with the center of the insertion slot and push it in gently The cassette tape is loaded automatically M cassette L cassette Notes Consumer DV tapes cannot be used and should not be inserted AJ 5P92LP tape is used only for DVCPRO 50 50 Mbps mode Do not use it for DVCPRO 25 Mbps mode and DVCPRO 25 Mb...
Page 24: ...s off When condensation has formed or some other trouble has occurred the AUTO OFF lamp lights and all operations are disabled Insert the cassette tape Insert the tape at its proper position without force Check that the STOP lamp is on When the tape is inserted the cylinder rotates automatically the tape is loaded and the unit goes into the stop mode The EJECT lamp goes off 1 2 4 3 2 4 ...
Page 25: ...appropriate mode When the STAND BY button is pressed the unit goes into the standby ON OFF mode When the button s lamp is lighted the unit is in the standby ON mode When the button is pressed during the stop mode the unit goes into the standby OFF mode and half loading mode and the lamp goes off When the button is pressed during the standby OFF mode the unit goes to the standby ON mode Still Timer...
Page 26: ...VIDEO IN LEVEL control switch to MANUAL and use it to adjust the level to a setting between 3 dB and 3 dB 5 3 Adjusting the audio level 1 Adjust the audio input signal levels of the analog audio CH1 CH2 CH3 CH4 signals and analog cue signal Keep the audio input output level controls pushed in unity value The audio signals will be recorded at the proper level 2 To adjust the recording level pull ou...
Page 27: ...ll out the audio level controls and turn them clockwise or counterclockwise to adjust the levels Normally they are kept in the pushed in state unity value To end playback press the STOP button The VTR now goes into the stop mode Note Check that the SERVO lamp is lighted during playback If it flashes or if it is off the images played back will be disturbed 2 7 ...
Page 28: ...dial The playback picture speed can be switched to 8x and 16x normal speed with setting menu No 101 SHTL MAX The dial s center position is a clickstop where a still picture appears as the playback image When the SHTL SLOW switch has been set to SLOW the playback picture speed is varied from 4 1 to 4 1x normal speed depending on the position of the dial The playback picture speed can be switched fr...
Page 29: ...ton Search for the position where the editing is to be commenced IN point while viewing the TV monitor and press the PLAY and EDIT buttons together at the IN point Press the STOP or PLAY button at the position where editing is to be completed OUT point while viewing the TV monitor The unit goes into the stop mode and editing is completed Notes The edit IN and OUT points are not entered with manual...
Page 30: ...een entered the tape is rewound for the duration set by setup menu 000 from the position where the button was pressed and the unit then goes into the stop mode Preroll Notes The time code or CTL signal must be continuously recorded between the edit IN point and preroll point When the IN point has not been entered whether to enter the IN point and perform preroll or to perform preroll without enter...
Page 31: ...the CONTROL switch to REMOTE on the player and to LOCAL on the recorder 2 Select the editing mode 3 Enter the edit points of the recorder and player 4 Check and modify the edit points 5 Check Preview before proceeding with the editing 6 Proceed with the editing 7 Check Review the recording that has resulted from the editing Note The editing can not be performed when the digital videocassette recor...
Page 32: ...e POWER switch signals using the INPUT SELECT Set the CONTROL to ON switches switch to LOCAL Adjust the recording level Set the time counter display to TC or CTL When the unit is used as the player Set the POWER switch to ON Set the CONTROL switch to REMOTE Adjust the playback level Set the time counter display to TC or CTL 32 ...
Page 33: ...shed Select the editing channel With assemble editing the ASSEMBLE lamp light With insert editing press the button of the channel whose signals are to be edited and light its lamp Select the VTR to be operated this setting is performed when editing with 2 VTRs Press the PLAYER or RECORDER button to select the VTR PLAYER Press this button to operate the player VTR and enter the edit points RECORDER...
Page 34: ... mode at the desired position Refer to page 28 for details on the jog shuttle operations Press the OUT and SET buttons together The edit OUT point is now entered The edit OUT point value now appears on the display 2 4 1 3 Match frame processing function When using two VTRs for editing a total of four edit points namely the player s IN and OUT points and the recorder s IN and OUT points need to be ...
Page 35: ... mode is established if the TAPE EE switch has been set to the EE position when STOP has been selected for the setup menu No 315 AFTER CUE UP Press the IN and OUT buttons together to check the edit duration The duration time appears on the display Calculating the duration When both edit points have been set the duration between the two edit points When only one edit point has been set the duration...
Page 36: ...e edit point is put ahead by 1 frame each time the button is pressed The edit point is put back by 1 frame each time the button is pressed Resetting the edit points 3 1 Resetting both the edit IN and OUT points Press the RESET button 3 2 Resetting either the edit IN or OUT point Press the RESET button while holding down the IN or OUT button Notes Edit points can be reset only in the CTL mode An ed...
Page 37: ...e position where the PREVIEW button was pressed will be entered at the edit IN point To stop the preview at any time press the STOP button If the PREVIEW button is pressed again while preview is in progress after the IN point preview will start again from the beginning When the edit OUT point is reached the unit automatically goes into the stop mode 1 3 7 ...
Page 38: ...ssed the tape is rewound to the OUT point and the unit goes into the stop mode Retry function If the AUTO EDIT button is pressed again after the STOP button has been pressed to stop the editing editing will start again from the beginning Auto tag editing If the AUTO EDIT button is pressed when the next edit point has not yet been entered upon completion of editing the previous edit OUT point will ...
Page 39: ...n of the editing press the REVIEW button The review is started in the recorder To stop the review at any time press the STOP button When the edit OUT point is reached the unit goes into the stop mode after postrolling 1 3 9 ...
Page 40: ...hannel When for instance sound from AUDIO CH2 is to be additionally inserted during video channel insert editing 2 1 Press the AUDIO CH2 button during video channel editing The lamp in the button lights and the AUDIO CH2 sound is insert edited 2 2 Press the AUDIO CH2 button again and turn off the lamp in the button This completes the AUDIO CH2 insert editing 2 4 0 ...
Page 41: ...IN point Press the RESET button while holding down the IN button Video OUT point Press the RESET button while holding down the OUT button Audio IN point Press the RESET button while holding down the A IN button Audio OUT point Press the RESET button while holding down the A OUT button Modifying the edit points Video IN point Press the TRIM or TRIM button while holding down the IN button Video OUT ...
Page 42: ...ltaneously Duration from audio IN point to OUT point Press the A IN and A OUT buttons simultaneously Match frame processing mechanism When two VTRs are used for audio split editing operations there will be a total of eight edit points two pairs of video IN and OUT points one for the player and the other for the recorder and two pairs of audio IN and OUT points one for the player and the other for ...
Page 43: ...gnals using this unit Adjust the source machine independently 3 1 When using the preset values Set the PRESET MANUAL switches of the VIDEO OUT LEVEL CHROMA LEVEL SETUP and HUE controls to PRESET 3 2 When adjusting the video output signals without using the preset values 1 Play back a cassette tape on which standard color bar signals have been recorded 2 Adjust the controls in such a way that the w...
Page 44: ...n rotate the search dial at the position where the change is to be made The setting No now flashes When the dial is rotated clockwise the setting value is incremented when it is rotated counterclockwise it is decremented Release the search button when the setting is completed The setting value on the menu screen and display flashes During the SHTL mode the item moves if the search dial is not at t...
Page 45: ... switch to the previous user file FF REW FF FF FF F F SYSTEM USER 1 USER 2 USER 3 REW USER 4 USER 5 REW REW REW REW USER FILE Each user file contains the following items BASIC OPERATION INTERFACE EDIT TAPE PROTECT TIME CODE VIDEO AUDIO Repeat the operation in step 2 to select the user file to be used and press the SET button The user file is changed and stored in the memory Note SYSTEM menu items ...
Page 46: ...return to factory default setting System phase adjustment 74 ns steps Advanced Delayed Note If setting operation is performed the setting value does not return to factory default setting Video phase adjustment 148 ns steps Advanced Delayed SCH phase adjustment 90 units Advanced Delayed The S and C phases change but the H phase does not change SCH phase adjustment Total variable range 45 or more Ad...
Page 47: ... selects whether the remaining tape time is shown on the front panel 0 Not shown 1 Shown Note Even when shown while the unit is calculating the remaining tape time after ejecting or inserting the cassette This selects whether the SETUP MENU No is displayed on screen 0 The SETUP MENU No is not displayed 1 The SETUP MENU No is displayed This selects whether the level meters are to display the CUE tr...
Page 48: ...UT 3 SERIAL OUT 3 connector 18 Notes 1 When setting this item the DISPLAY SEL status is output 22 to VIDEO OUT 3 SERIAL OUT 3 even if SUPER OFF has been set However when the menu is exited operation 0 complies with the SUPER OFF ON setting 23 28 WHITE W OUT 422 411 MANUAL AUTO 2 When the DISPLAY SEL setting causes characters to extend beyond the edges of the screen the setting value is changed so ...
Page 49: ... output after the status stabilizes Note When set to 0 OFF the sound in the initially output part is incomplete Therefore this setting is not recommended for broadcasts This selects whether to warn the operator when the REF VIDEO signal has not been connected 0 Warning is not given 1 Warning is given by the flashing STOP lamp This selects the VTR mode in which the EE status is established when the...
Page 50: ...g 2 When both the AUTO REW function and MEMORY function have been selected at the same time the AUTO REW function takes precedence The underline on the setting item denotes the initial setting Memory stop function FWD direction Zero point The MEMORY STOP function does not work if it is activated within a range of 0 2 frames REW button FF button FF button REW button When the FF button is pressed th...
Page 51: ...n which is returned to the controller 0 20 25H 1 DVCPRO s own ID is returned F0 33H This selects whether the PARALLEL 25P connector functions when the REMOTE LOCAL switch has been set to REMOTE 0 Does not function 1 Functions These settings are for selecting whether the RS 232C connector is to function when the REMOTE LOCAL switch is set to REMOTE 0 Connector does not function 1 Connector function...
Page 52: ... NON STD This selects the video signal processing 0 Servo is synchronized with the input signal during recording and editing or with the REF signal during playback 1 Servo is synchronized at all times with the REF signal This sets the channel assignments for the controller s analog audio preset when editing the digital audio of the VTR using a controller which does not have a digital audio edit pr...
Page 53: ... the channel concerned when the VTR CUE edit preset is set in compliance with the ON or OFF presetting for the analog audio signals designated by the editor or controller 0 Not set 1 Compliance with analog CH1 edit preset 2 Compliance with analog CH2 edit preset 3 Compliance with either analog CH1 ot CH2 edit preset This selects whether to conduct simultaneous playback while editing is in progress...
Page 54: ...ing in the still status reaches 30 minutes This selects whether the head drum is to be rotated when operation is transferred to the standby OFF mode 0 Head drum remains stationary 1 Head drum is rotated The underline on the setting item denotes the initial setting Note The cumulative standby time at the same tape position increases when transmitting programs or otherwise using identical materials ...
Page 55: ...ng complies with REGEN PRESET switch setting This selects the time code to be used when an external time code is to be used 0 The LTC of the TIME CODE IN connector is used 1 The video signal VITC is used This sets the usage status of the user bit of the time code generated by the TCG 0 NOT SPECIFIED character set not specified 1 ISO CHARACTER 8 bits character set based on ISO646 1502022 2 UNASSIGN...
Page 56: ...med This selects ON or OFF for the closed caption signal in the second field 0 Forced blanking performed 1 Blanking not performed This selects the freeze mode for still pictures 0 Field freeze 1 Frame freeze Note When frame freeze has been selected the frame slow status is established with the slow setting This selects chroma color killer processing for the video output signals 0 The signals are f...
Page 57: ...s not displayed in the 625 mode When recording composite signals be sure to double check whether the signals are to be recorded with or without setup This selects the analog component output level 0 MII level 1 CAM level Note This setup menu is not displayed in the 625 mode This selects the signal to output from the VIDEO OUT2 connector 0 The CTL signal is output 1 The TIME CODE signal is output 2...
Page 58: ...ITY VAR OFF ON ANA DIGI This selects the audio input CH2 reference level switching This selects the audio input CH3 reference level switching This selects the audio input CH4 reference level switching This selects the audio input CUE reference level switching This selects the audio output CH1 reference level switching This selects the audio output CH2 reference level switching This selects the aud...
Page 59: ... MONITOR SELECT 0002 AUTO2 1 The output defaults to AUDIO except when speed factor is between 0 43x and 1x inclusive in which case output is PCM AUDIO 2 The output defaults to CUE except in PLAY mode in which 0000 CH1 0001 CH2 0002 CH1 2 case output is PCM AUDIO This selects the input signal to be recorded on the audio CH1 track 0000 CH1 0001 CH2 0002 CH1 2 0 Audio input CH1 signal 1 Audio input C...
Page 60: ...CH2 are mixed and output to the right channel 2 CH3 and CH4 are mixed and output to the right channel This selects whether or not the cue audio signal is to be output to the main line output in the search mode 0 CUE AUDIO is not output 1 CUE AUDIO is output This applies only when setup menu No 721 MONI CH SEL is not set to MANU The underline on the setting item denotes the initial setting AJ PD950...
Page 61: ...ert editing to be conducted independently using the time code alone In addition the VTR s playback speed can be read from the stop mode to slow motion playback up to high speed play approx 50X normal speed approx 100X when using DVCPRO tape The time code values are indicated using the display and superimpose functions TCR 00 07 04 24 Hours Seconds Frames Minutes User bit User bit refers to the 32 ...
Page 62: ...the TC SET button Use the TC SET button to set the start number of the time code or user bit 1 Press the SHIFT button The leftmost digit flashes 2 Press the ADJ button to change the value Each time the button is pressed the number changes The setting range is given below When using the time code and user bit in real time 00 00 00 00 23 59 59 29 User bit 00 00 00 00 FF FF FF FF 3 Repeat steps 1 and...
Page 63: ... on the display When setup menu No 007 SUPER is ON the time code value is superimposed onto the video signal from the VIDEO OUT 3 connector Notes The colon between the seconds and frames changes to a period when the drop frame time code is read When the time code signal cannot be read the time code is automatically interpolated by the CTL signal The display appears as shown below T R 00 01 04 07 T...
Page 64: ...haracters superimposed on the display can be changed using setup menu No 011 CHARA TYPE TCR TV monitor Display position The position of the characters superimposed on the display can be changed using setup menus No 009 CHARA H POS and No 010 CHARA V POS TCR TCR TV monitor TV monitor Operation mode The VTR s operation mode can also be displayed using setup menu No 008 DISPLAY SEL TCR STOP VTR opera...
Page 65: ... the flowchart presented below EXT What is the SERVO REF on the setup menu No 304 setting AUTO YES Is the unit in the recording mode NO Is the unit in the editing mode Is VIDEO CH1 CH2 CH3 CH4 CUE YES or TC selected NO BB CB NO What is the setup menu No 600 INT SG setting OFF Is the input video signal available YES NO Is the REF VIDEO signal supplied YES The REF VIDEO input The internal sync signa...
Page 66: ...signal REF IN signal Internal sync signal REF IN signal Internal sync signal REF IN signal Internal sync signal During recording or editing SERVO REF Input signal status on the setup menu Reference signal No 304 position VIDEO IN signal REF IN signal servo reference VIDEO IN signal VIDEO IN signal AUTO EXIT REF IN signal Internal sync signal REF IN signal Internal sync signal REF IN signal Interna...
Page 67: ...No 727 is AUTO When the edit point splicing selection setup menu No 311 and 312 is CUT Audio signal A Audio signal B Noise appears at the edit splice When the edit point splicing selection setup menu No 311 and 312 is FADE Audio signal A Audio signal B V fade is performed instantaneously to eliminate the noise Notes When the playback fade selection No 727 is CUT cut processing is performed for all...
Page 68: ...input CH1 input CH2 input CH1 input CH2 input CH3 input CH4 input CH3 input CH4 input CH3 input CH4 input CH3 input CH4 input CH1 input CH2 input CH3 input CH4 input CH1 input CH2 input CH3 input CH4 input Monitor output channel The monitor output channels are selected using the MONITOR SELECT switch as shown below Monitor output Output signal L CH1 CH2 CH3 CH4 CH1 CH2 CH3 CH4 CUE R CH1 CH2 CH3 CH...
Page 69: ... SW Audio Input Impedance SW Audio Input Impedance SW Cue Input Impedance SW Function Factory setting This sets the CH1 audio input impedance HIGH 600 HIGH This sets the CH2 audio input impedance HIGH 600 HIGH This sets the CH3 audio input impedance HIGH 600 HIGH This sets the CH4 audio input impedance HIGH 600 HIGH This sets the CUE input impedance HIGH 6 9 Ω Ω Ω Ω ...
Page 70: ...restriction If some of the mounting screws have been lost or misplaced use screws which are less than 4 long in their place Use four screws to secure each inner member Attach the outer member brackets to the rack Check that the height is the same for the left and right brackets Attach the AJ MA75P rack mounting adaptors with included 4 screws Rack mounting adaptors Remove the 4 rubber legs from th...
Page 71: ...s when the unit or tape is moved between places where the temperature or humidity varies greatly or when for instance It is moved to a very humid place full of steam or a room immediately after it has been heated up It is suddenly moved from a cold location to a hot or humid location When moving the unit to locations such as these leave it standing for about 10 minutes rather than switching on the...
Page 72: ...the monitor is connected to the VIDEO OUT 3 connector on the connector section Displaying the DIAG menu Press the DIAG button The DIAG menu screen is displayed on the monitor and the message is displayed on the counter display The WARNING information and HOURS METER information can be switched by pressing the search buttons Press the DIAG button again to return to the original display 2 1 3 WARNIN...
Page 73: ...hen multiple events occur the event with the highest priority is displayed Priority Display High Error messages See error message table INT SG NO INPUT Low Warning messages See error message table Warning messages Priority Monitor display High FAN STOP SERVO NOT LOCKED LOW RF HIGH ERROR RATE Low Description When an abnormal operation is detected in this unit the AUTO OFF lamp lights up and an erro...
Page 74: ...tor speed is abnormally high the AUTO OFF lamp lights and the message display flashes If the cylinder motor speed is abnormally low the AUTO OFF lamp lights and the message display flashes If the tape start and tape end are detected simulta neously either during or after loading the AUTO OFF lamp lights and the message display flashes The AUTO OFF lamp lights and the message display flashes when t...
Page 75: ...ashes POWER OFF ON If the start end processing operation is not completed STOP the AUTO OFF lamp lights and the message display POWER OFF ON flashes If the supply reel motor should rotate at an abnormally STOP fast rate the AUTO OFF lamp lights and the message display flashes POWER OFF ON If an abnormal torque applied to the supply reel motor is detected or if an abnormal current flowing to the ST...
Page 76: ...over cable supported Pin No Signal Circuit name 1 FG Protective ground 2 RXD Received data 3 TXD Transmitted data 4 CTS Clear to send 5 RTS Request to send 6 DTR Data terminal ready 7 SG Signal ground 20 DSR Data set ready 2 Example of connection with controller PC Using crossover cable with D SUB 25 pin connectors PC side D SUB 25 pin connector FG 1 TXD 2 RXD 3 RTS 4 CTS 5 DSR 6 SG 7 DTR 20 VTR s...
Page 77: ...TR Data format STX command data ETX 02h 3Ah 03h ASCII code symbols numbers upper case letters 20h 7Fh command Command identifier a 3 byte identifier ASCII code symbols numbers upper case letters is sent as the command This code serves as a delimiter between the command and data data Data ASCII code symbols numbers upper case letters can be added in the number of bytes required Outline of send proc...
Page 78: ...Example Send command Return message data STX OPL ETX ACK STX OPL ETX When the communication has terminated abnormally NACK 15h When processing is not possible due to incorrect data or trouble in the VTR 1 The receive completion message is returned ACK 06h 2 An error code is returned STX E R N1 N2 N3 ETX 02h Error code 03h 4 Error code table ER001 Invalid command Unsupported command received Error ...
Page 79: ...s selected for the setup menu No 105 AUTO EE SEL This command is for ejecting the cassette tape The resulting output picture and sound statuses differ according to the settings selected for the setup menu No 105 AUTO EE SEL This command is for starting playback This command is for rewinding the tape The resulting output picture and sound statuses differ according to the settings selected for the s...
Page 80: ... STILL 1 0 03 2 0 1 3 0 2 4 0 5 5 1 6 1 85 7 4 1 8 9 5 9 16 This speed differs according to the setting selected for setup menu No 101 SHTL MAX A 32 This speed differs according to the setting selected for setup menu No 101 SHTL MAX STANDBY OFF STANDBY ON STX OBF ETX STX OBN ETX STX OBF ETX STX OBN ETX This command is setting the VTR to standby OFF This command is setting the VTR to standby ON 8 0...
Page 81: ... QOP ETX data f w gh mm ss ff f F W S gh CTL g SP 20h for a plus display 2Dh for a minus display h 0 9 hours TC gh 00 23 hours mm 00 59 minutes CTL or TC is returned whichever corresponds to the front display ss 00 59 seconds mode ff 00 29 frames 525 mode 00 24 frames 625 mode STX xxx ETX This command is for inquiring about the VTR s ope ration mode xxx OEJ EJECT OFF FAST FORWARD OPL PLAY ORC REC ...
Page 82: ...Command SEND IF SEND QUIT THEN GOTO ProgEnd PRINT l STX SEND ETX REM Wait for Receive Command WHILE LOC 1 0 WAITKEY INKEY IF WAITKEY Q THEN PRINT Quit GOTO ProgEnd WEND REM Receive Command RecvCmd RECV INPUT l l IF RECV STX THEN RECV Stx IF RECV ACK THEN RECV Ack IF RECV NAK THEN RECV Nak IF RECV ETX THEN BUFFER BUFFER Etx GOTO DispOut BUFFER BUFFER RECV GOTO RecvCmd REM Output Receive Command Dis...
Page 83: ...ANALOG XLR x 2 CH1 CH2 CH3 CH4 3 COLD CUE IN XLR x 1 TIME CODE IN XLR x 1 AUDIO OUT SERIAL OUT DIGITAL BNC x 3 AUDIO OUT DIGITAL XLR x 2 CH1 CH2 CH3 CH4 AES EBU format AUDIO OUT ANALOG XLR x 2 CH1 CH2 CH3 CH4 CUE OUT XLR x 1 TIME CODE OUT XLR x 1 MONITOR OUT XLR x 2 HEADPHONES front M6 RS 422A REMOTE 9P REMOTE IN OUT Pin No Signal Pin No Signal Pin No Signal 1 FRAME GROUND 4 RECEIVE COMMON 7 TRANS...
Page 84: ...urrent 6 mA RS 232C REMOTE 25 pin D SUB crossover cable supported Pin No Abbreviation 1 FRAME GROUND 2 RxD 3 TxD 4 CTS 5 RTS 6 DTR 7 GND 20 DSR ENCODER REMOTE 15P Pin No Signal 1 2 SET UP 3 C LEVEL 4 GND 5 12V Circuit Protective ground Received data Transmitted data Clear to send Request to send Data terminal ready Signal ground Data set ready Description Frame ground Sends data to the PC Receives...
Page 85: ... 8 Not including the support legs connectors and JOG dial DVCPRO 50 DVCPRO P DVCPRO format selectable 525i 525p 4 2 0p 625i selectable DVCPRO 50 DVCPRO P 48 kHz 16 bit 4 channels DVCPRO 48 kHz 16 bit 2 channels Digital video audio helical track The time code is recorded in the sub code area Cue track 1 track Control track 1 track 67 640 mm sec 525 67 708 mm sec 625 92 minutes using the AJ 5P92LP M...
Page 86: ... 525p 20 dB 625i 18dB T1 50 s T2 15 s on off selectable Cue Track Frequency response 300 Hz to 6 kHz 3 dB Audio Input Connector Analog input CH1 CH2 CH3 CH4 Digital input CH1 CH2 CH3 CH4 Serial digital input Cue track input Audio Output Connector Analog output CH1 CH2 CH3 CH4 Digital output CH1 CH2 CH3 CH4 Serial digital output Cue track output Monitor output Headphones XLRx4 600 high impedance se...
Page 87: ... Western 4001 West Alameda Ave Suite 100 Burbank CA 91505 818 562 1579 Fax 818 562 6663 Parts Information Ordering 9 00 am 5 00 pm EST 800 334 4881 24 hr Fax 800 334 4880 Technical Support Emergency 24 hr Parts Support 800 222 0741 Training information Digital System Products 201 392 6076 Service Literature 201 392 6281 Panasonic Canada Inc 5770 Ambler Drive Mississauga Ontario L4W 2T3 905 624 501...