80
PA-5400 SERIES NEXT-GEN FIREWALL HARDWARE REFERENCE | Service the PA-5400 Series Firewall
Hardware
©
2021 Palo Alto Networks, Inc.
Replace an MPC System Drive
STEP 1 |
Ensure that you have access to an ESD work surface for placement of the Management
Processor Card (MPC).
STEP 2 |
Put the provided ESD wrist strap on your wrist ensuring that the metal contact is touching your
skin. Then attach (snap) one end of the ground cable to the wrist strap and remove the alligator
clip from the banana clip on the other end of the ESD grounding cable. Plug the banana clip
end into one of the ESD ports located on the back of the appliance before handling ESD
sensitive hardware. For details on the ESD port location, see
.
STEP 3 |
Remove the MPC from card slot 7 of the appliance. See
Management Processor Card (MPC)
for details on removing the MPC.
STEP 4 |
Place the MPC on an ESD work surface. Detach your wrist strap’s ground cable from the ESD
port on the appliance and securely attach the alligator clip to the new ESD surface.
STEP 5 |
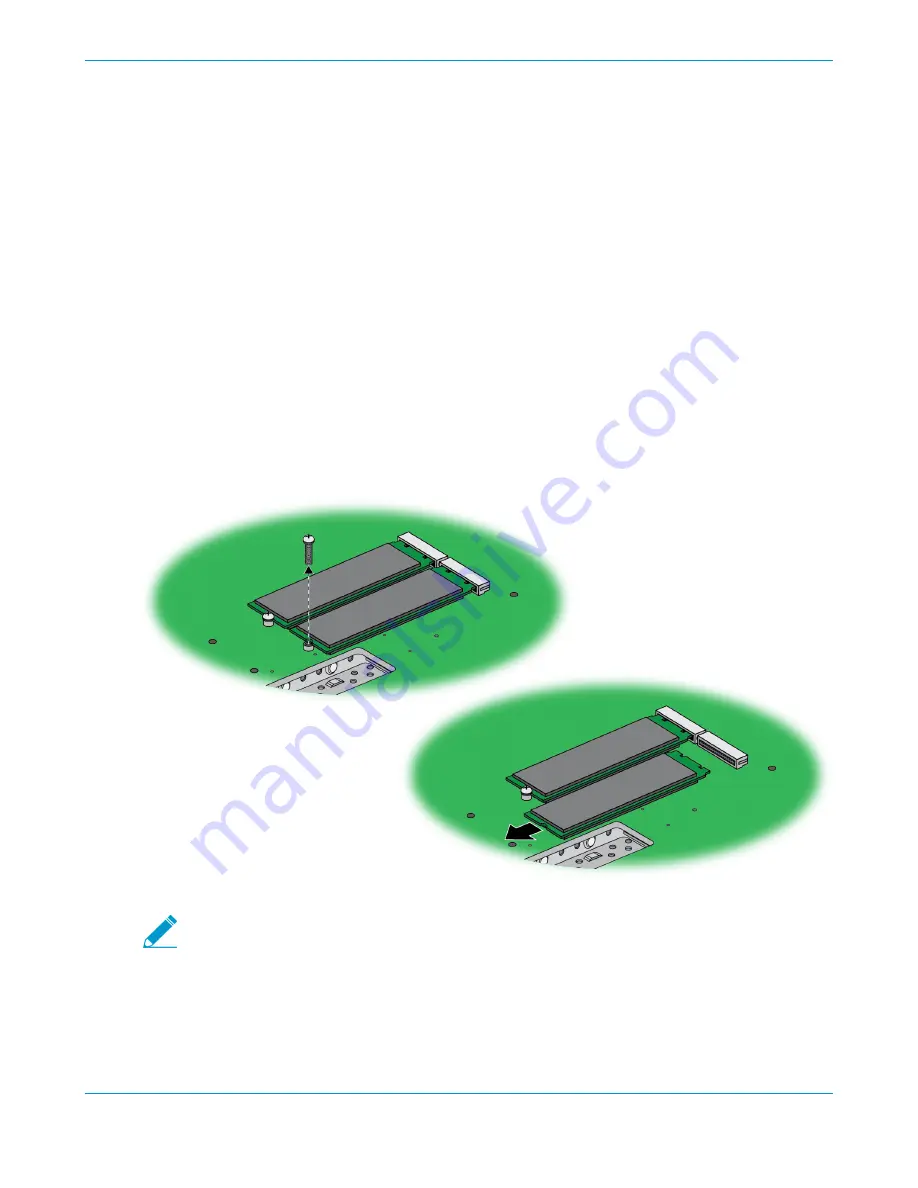
Flip the MPC over and locate the two SSDs on the bottom surface of the card. Remove the
retention screw for the SSD you intend to replace.
The plastic standoff becomes loose after the retention screw is removed. Do not lose the
standoff as it is needed when installing the new SSD.
STEP 6 |
Gently pull the SSD away from its mating connector. Place the old SSD to the side.
STEP 7 |
Slide the new SSD into the vacant mating connector. Ensure that the SSD aligns with the
plastic standoff on the MPC.
STEP 8 |
Fasten the retention screw back into place at a torque of 4 in-lbs.


