background image

Chapter 4

Working with Applications

36

Selecting copy settings

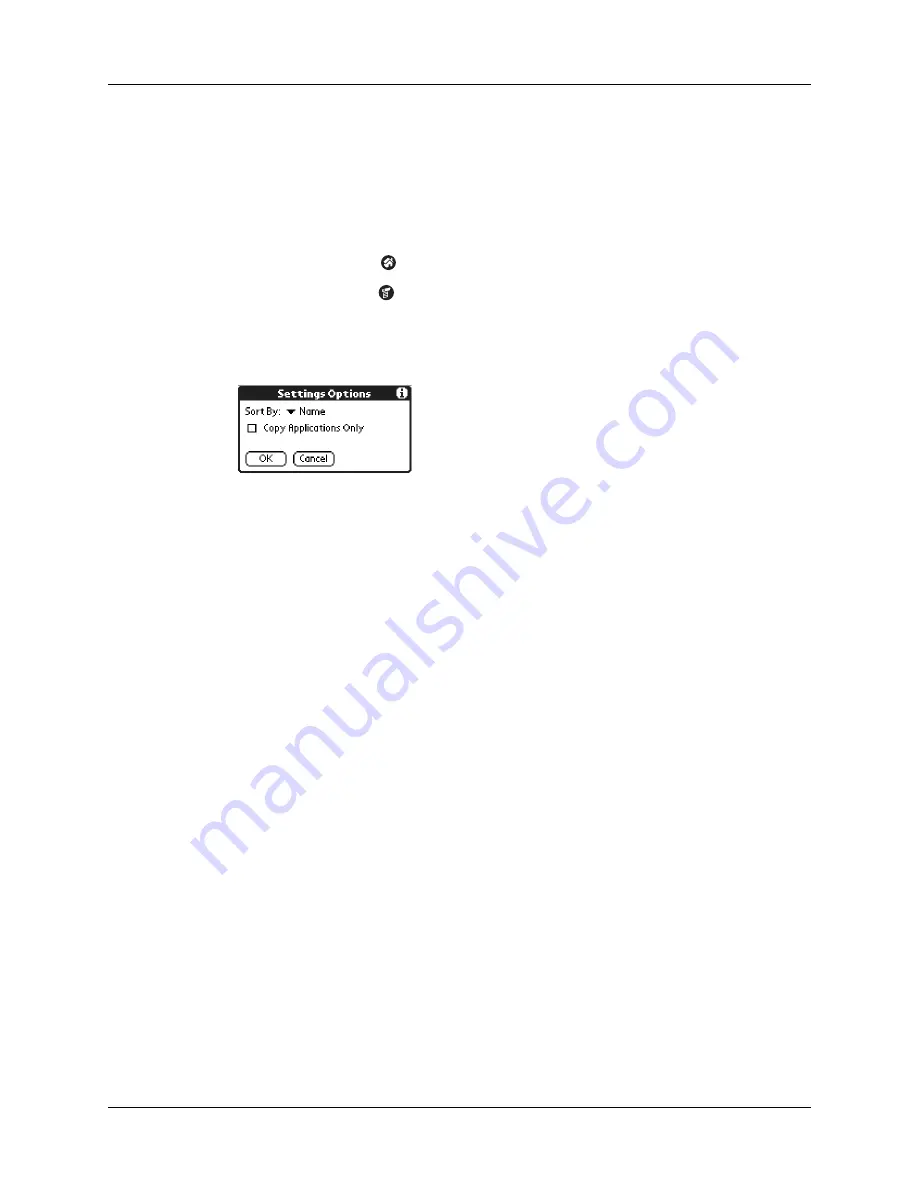
When using the copy feature, you can set how applications are sorted and listed, 
as well as whether to copy only the application or both the application and its data 
files. 

To select copy settings:

1.

Tap the Home icon 

.

2.

Tap the Menu icon 

.

3.

Select Copy on the App menu.

4.

Tap Settings.

5.

Tap the Sort By pick list, and then select Name or Size.

6.

Tap the Copy Application Only check box to select it if you want to copy only 
the application files. Leave it deselected if you want to copy both the application 
file and its associated data file(s).

7.

Tap OK.

NOTE

The Sort By setting is in effect each time you use the copy feature. Each time 

you want to copy an application only, you must select the Copy Applications Only 
check box.

Using menus

Menus on your handheld are easy to use. Once you have mastered them in one 
application, you can use them the same way in all other applications.

The menus of each application are illustrated in the chapter that discusses that 
application.

Summary of Contents for P80880US - Tungsten E - OS 5.2.1 126 MHz

Page 1: ...Handbook for the Palm Tungsten E Handheld TM TM ...

Page 2: ...oss resulting from the use of this handbook Palm assumes no responsibility for any loss or claims by third parties which may arise through the use of this software Palm Inc assumes no responsibility for any damage or loss caused by deletion of data as a result of malfunction dead battery or repairs Be sure to make backup copies of all important data on other media to protect against data loss IMPO...

Page 3: ... Exploring Your Handheld 7 Locating front panel controls 7 Locating top panel components 8 Locating back panel components 9 Locating bottom panel components 10 Adjusting brightness 10 Adding an expansion card 10 Tapping and typing 11 Elements of the handheld interface 12 Using the navigator 14 Additional software 15 Chapter 3 Entering Data on Your Handheld 17 Using the onscreen keyboard 17 Using G...

Page 4: ...Deleting records 40 Purging records 41 Categorizing records 41 Finding information 44 Sorting lists of records 47 Attaching notes 48 Choosing fonts 49 Receiving alerts 50 Hiding or masking private records 51 Installing and removing applications 51 Installing files and add on applications 51 Installing applications and files on a Windows computer 52 Palm Quick Install tips 55 Installing application...

Page 5: ...ter 6 Using Card Info 77 Reviewing Card information 77 Renaming a card 77 Formatting a card 78 Managing expansion cards 78 Using Card Info menus 79 Card menu 79 Chapter 7 Using Contacts 81 Creating a contact 81 Displaying additional contact fields 84 Selecting field types 84 Changing Contact details 86 Creating a business card 86 Making connections from Contacts 86 Using Contacts menus 89 Chapter ...

Page 6: ...4 Changing Note Pad color settings 104 Setting an alarm for a note 105 Using Note Pad menus 107 Record menu 107 Options menu 107 Chapter 11 Using Palm Photos 109 Viewing photos 109 Viewing photos in Thumbnail view 109 Viewing photos in List view 110 Viewing a slide show 111 Rotating photos 112 Viewing photo information 112 Creating an album 113 Filing photos in albums 114 Copying photos 114 Renami...

Page 7: ...unts 128 Account and connection types 129 Network e mail account prerequisites 129 Creating an e mail account 132 Editing e mail accounts 140 Deleting an e mail account 141 Selecting a different service for a given e mail account 142 Adding ESMTP to an account 143 Troubleshooting account access problems 145 Getting sending and managing e mail 145 Getting e mail 145 Auto get mail with notification ...

Page 8: ...ming a HotSync operation Windows computers 219 Performing a HotSync operation Mac computers 222 Customizing HotSync application settings 224 Conducting infrared HotSync operations 226 Preparing your computer for infrared communication 226 Performing an infrared HotSync operation 228 Returning to cable HotSync operations 229 Conducting network HotSync operations 229 Connecting to your company s dia...

Page 9: ...taining Your Handheld 273 Caring for your handheld 273 Prolonging battery life 274 Resetting your handheld 274 Performing a soft reset 275 Performing a hard reset 275 Appendix B Frequently Asked Questions 279 Software installation problems 280 Operating problems 282 Tapping and writing problems 283 Application problems 284 HotSync problems 285 Beaming problems 289 E mail problems 289 Recharging pr...

Page 10: ...Contents x ...

Page 11: ...set up and operate your handheld You must install this software on your desktop computer before you can use your handheld To install and operate Palm Desktop software your computer system must meet the requirements described in this section Minimum requirements Windows computers The minimum requirements for Windows computers are as follows A Pentium class PC running one of the following operating ...

Page 12: ...ware from the included CD ROM or you can download Palm Desktop software from www palm com Mouse One available USB port Upgrade information If you already own a Palm OS handheld perform a HotSync operation with your old handheld and Palm Desktop software Then follow the setup instructions below Step 1 Charge your handheld a Connect the charging cable to a power source b Connect your handheld to the...

Page 13: ...allation CD ROM into your computer s CD ROM drive b Windows Follow the onscreen instructions which guide you through installing Palm Desktop software Mac Double click the Software Installation CD icon that appears on the desktop and then double click the Palm Desktop Installer icon NOTE You need administrator rights to install Palm Desktop software on a computer running Windows 2000 XP or Mac OS X...

Page 14: ... HotSync operations ensures that you always have a backup copy of the information that you enter on your handheld You can also use Palm Desktop software to enter information on your desktop computer and then transfer the information to your handheld through a HotSync operation To perform a HotSync operation 1 Connect the HotSync cable to your handheld and your computer 2 Turn on your handheld 3 Ta...

Page 15: ...ding this electronic handbook For more information about using Palm Desktop software see the following The online Help for Palm Desktop software To access the online Help go to the Help menu in Palm Desktop software Mac The electronic Palm Desktop Software for the Macintosh User s Guide To access this guide open the Palm folder and then open the Documentation folder Double click the file Palm Desk...

Page 16: ...Chapter 1 Setting Up Your Palm Tungsten E Handheld 6 ...

Page 17: ...contact names addresses and phone numbers prioritize and assign due dates for tasks jot quick notes and create text memos listen to MP3 music files and much more To use some of your handheld s features you must install software from the CD ROM that comes with your handheld See Additional software later in this chapter for information Locating front panel controls Screen Input area Application butt...

Page 18: ...2 characters Navigator Enables you to select and display records on your handheld screen See Using the navigator later in this chapter for additional information and look for tips throughout this handbook Application buttons Activate the individual handheld applications that correspond to the icons on the buttons Calendar Contacts Tasks and Note Pad See Buttons Preferences in Chapter 16 for detail...

Page 19: ...r 3 and see Conducting infrared HotSync operations in Chapter 15 for more information Headphone jack Enables you to connect standard 3 5mm stereo headphones sold separately to your handheld Stylus To use the stylus slide it out of the slot and hold it as you would a pen or pencil Power button Keylock control Turns your handheld on or off and enables you to turn on the Keylock feature See Keylock P...

Page 20: ...ator or drag the slider to adjust the brightness 3 Tap Done Adding an expansion card An expansion card sold separately increases the variety of tasks you can do and the amount of space you have for storing software and data on your handheld Your handheld is compatible with SD SDIO or MultiMediaCard expansion cards Power connector Connects your handheld to the power adapter which in turn connects t...

Page 21: ...s to tap elements on your handheld screen to get things done on your handheld The first time you start your handheld the setup instructions appear on the screen These instructions include a calibration screen Calibration aligns the internal circuitry of your handheld with its touch sensitive screen so that when you tap an element on the screen the handheld can detect exactly which task you want to...

Page 22: ... can also use the stylus to drag the slider of any scroll bar Elements of the handheld interface This section describes the common elements in the handheld interface Menu bar Use the menu bar to access a set of application specific commands Not all applications have a menu bar Icons Tap the icons to open applications menus and a favorite application and to find text anywhere in your data See Openi...

Page 23: ...Command buttons appear at the bottom of dialog boxes and application screens Previous next arrows Tap the left and right arrows to display the previous and next records tap the up and down arrows to display the previous and next pages of information Pick list Tap the arrow to display a list of choices and then tap an item in the list to select it Scroll bar Drag the slider or tap the top or bottom...

Page 24: ...navigator When you work with most applications the navigator on the front panel of your handheld makes it easy for you to navigate among and select your entries You can use the navigator to perform tasks without the stylus using one hand Look for the navigator icon to find navigator tips throughout this guide See Chapter 4 and Chapter 7 for additional information about using the navigator with Con...

Page 25: ...r Down on the navigator to highlight an item and then press Select on the navigator to select the item Press Select on the navigator to close a dialog box If there s only one button pressing Select activates that button If there are two buttons pressing Select activates the action button versus Cancel such as OK Yes or Delete If there are multiple buttons Select activates affirming buttons such as...

Page 26: ...Chapter 2 Exploring Your Handheld 16 ...

Page 27: ...can open the onscreen keyboard anytime you need to enter text or numbers on your handheld You can also use Graffiti 2 writing when the keyboard is open which makes it easy to switch between these two methods of entering data To use the onscreen keyboard 1 Open any application such as Memos 2 Tap any record or tap New 3 Tap ABC to open the alphabetic keyboard or tap 123 to open the numeric keyboard...

Page 28: ...his section contains tables of all the Graffiti 2 characters NOTE By default your full screen pen stroke is set to open Graffiti 2 help See Pen Preferences in Chapter 16 for more information To access Graffiti 2 help from an application 1 Tap on an editable text field 2 Tap the Menu icon 3 Select Graffiti 2 Help from the Edit menu To access Graffiti 2 information from Quick Tour 1 Tap the Home ico...

Page 29: ...ull screen writing area A shaded box appears in the lower right corner of the screen 3 Position the cursor where you want the characters to appear 4 Do any of the following Write lowercase Graffiti 2 letters anywhere on the left side of the screen Write numbers anywhere on the right side of the screen Write uppercase letters in the middle of the screen Write the Shift stroke before writing symbols...

Page 30: ... 3 Entering Data on Your Handheld 20 Graffiti 2 character set Graffiti 2 alphabet Draw letters on the abc and ABC writing area Letter Strokes Letter Strokes A B C D E F G H I J K L M N O P Q R S T U V W X Y Z ...

Page 31: ...rks Draw numbers on the 123 writing area Number Strokes Number Strokes 0 1 2 3 4 5 6 7 8 9 Draw these marks on the abc or ABC writing area Mark Stroke Mark Stroke Period Ampersand Comma Carriage return Apostrophe At Space Straight quotes Question Tab Exclamation ...

Page 32: ...u can write symbols and other special characters using the Punctuation Shift stroke NOTE You can also use the Punctuation Shift stroke to write punctuation marks Draw these marks on the 123 writing area Mark Stroke Mark Stroke Period Backslash Comma Slash Tilde Left Paren Dash Right Paren Plus Equal Asterisk Draw accents on the 123 writing area Accent Stroke Accent Stroke Acute á Dieresis ä Grave ...

Page 33: ...ctuation Shift strokes also cancels the automatic capitalization of the first letter of a new record or sentence 2 Write the symbol or other special character shown in the table that follows You can make a symbol stroke anywhere in the Graffiti 2 input area 3 Enter an additional Punctuation Shift stroke to finish writing the character and to make the character appear more quickly After the arrow d...

Page 34: ...followed by the ShortCut characters The ShortCut symbol appears at the insertion point to show that you are in ShortCut mode Your handheld includes the following predefined Graffiti 2 ShortCuts Draw gestures on the abc or ABC writing area Gesture Stroke Gesture Stroke Cut Paste Copy Undo Erase Tab Punctuation Shift Menu Command Short Cut ShortCut Draw ShortCuts on the abc or ABC writing area Entry...

Page 35: ...displayed in Calendar Contacts Tasks Note Pad or Memos All selected photos in the currently displayed album in Palm Photos A special Contacts record that you designate as your business card containing information you want to exchange with business contacts An application installed in RAM memory An application installed on an expansion card that is seated in the card slot TIP You can also perform H...

Page 36: ...s and 1 meter approximately 39 inches apart and the path between the two handhelds must be clear of obstacles The beaming distance to other devices may be different 5 Wait for the Beam Status dialog box to indicate that the transfer is complete before you continue working on your handheld To beam an application 1 Tap the Home icon 2 Tap the Menu icon 3 Tap App and then tap Beam 4 Tap the Beam From...

Page 37: ...es directly to and from your handheld you also need an Internet service provide ISP account and a compatible mobile phone or modem accessory sold separately For additional information see Chapter 13 To use your handheld for SMS communication you need to install the Telephony SMS applications from the CD ROM and you need a Global System for Mobile Communications GSM mobile phone sold separately For...

Page 38: ...archive dba Contacts archive aba Tasks archive tda Memos archive mpa Archive formats can be used only with Palm Desktop software Use the archive file formats to share information with other people who use a Palm OShandheld or to create a copy of your important Palm Desktop information To import data from a Windows computer 1 Open Palm Desktop software 2 Click the application into which you want to...

Page 39: ...l file on your Windows computer You can configure the File Link feature to check for changes to the external file when you perform a HotSync operation HotSync Manager stores the data in a separate category in Palm Desktop software and on your handheld With File Link you can import data stored in any of the following formats Comma separated csv Memos archive mpa Contacts archive aba Text txt For in...

Page 40: ...a field wait for the cursor to change to a double arrow and then drag the field to a new location 6 If you do not want to import a field click the arrow between the field names 7 From the Fields pop up menu select the appropriate field 8 From the Delimiters pop up menu select the appropriate delimiter 9 Click OK 10 To add the imported data to your handheld perform a HotSync operation See Palm Desk...

Page 41: ...lated groups Opening applications You can tap the Home icon to see a list of all applications installed on your handheld or an expansion card Tap the application icon to open it You can also open Calendar Contacts Tasks and Note Pad with the application buttons on your handheld In addition to providing a way for you to open applications the Home screen displays the current time battery level and a...

Page 42: ... insert a card containing data from the current application the application displays the data on the card In other cases the Home screen switches to the card and displays its contents and the pick list in the upper right corner of the screen displays the name of the card Switching between applications When working with any application tap the Home icon or press an application button on your handhe...

Page 43: ...hen display either a single category or all your applications By default your handheld includes system defined categories such as All and Unfiled and user defined categories such as Games Main and System You cannot modify the system defined categories but you can rename and delete the user defined categories In addition you can create your own user defined categories You can have a maximum of 15 u...

Page 44: ...ies Press Right on the navigator to cycle through the categories Tap the pick list in the upper right corner of the screen and then select the category you want to display When the highlight on the Home screen is not active press and hold Select on the navigator to open the category list press Up or Down on the navigator to highlight a category and then press Select on the navigator to view that c...

Page 45: ...n See Installing files and add on applications later in this chapter for details NOTE If you view your applications on the card using a Card Reader on your computer the actual file names may differ from those displayed in the Home screen To copy an application from an expansion card 1 Tap the Home icon 2 Tap the Menu icon 3 Select Copy on the App menu 4 Tap the Copy From pick list and select the c...

Page 46: ...y Application Only check box to select it if you want to copy only the application files Leave it deselected if you want to copy both the application file and its associated data file s 7 Tap OK NOTE The Sort By setting is in effect each time you use the copy feature Each time you want to copy an application only you must select the Copy Applications Only check box Using menus Menus on your handhe...

Page 47: ...lack background at the upper left corner of the screen Graffiti 2 menu commands Most menu commands have an equivalent Graffiti 2 Command stroke which is similar to the keyboard shortcuts used to execute commands on computers The command letters appear to the right of the command names Tap the Menu icon Tap the title area Command letters Menu commands ...

Page 48: ...e from the Edit menu draw the Command stroke followed by the letter p Command mode is active only for a short time so you must tap an icon or write the command letter immediately to select the menu command Performing common tasks The tasks described in this section use the term records to refer to an individual item in any of the applications a single Calendar event Contacts entry Palm Photos phot...

Page 49: ... title line Entering text For information on how to enter text using Graffiti 2 writing the onscreen keyboard or the keyboard attached to your computer see Chapter 3 For information on entering text in Note Pad see Chapter 10 Using the Edit menu The Edit menu is available with any screen where you enter or edit text In general commands available in the Edit menu apply to text that you select in an...

Page 50: ...mple if you used Cut to remove text Undo restores the text you removed Undo also reverses deletions you made using backspace Cut Removes the selected text and stores it temporarily in the memory of your handheld You can paste the text you cut into another area of the current application or into a different application Copy Copies the selected text and stores it temporarily in the memory of your ha...

Page 51: ... desktop be sure that the check box is selected If you don t want to save a copy tap the check box to deselect it Expense Select the category you want to purge All data in the selected category will be purged and there is no archive option 4 Tap OK or in Expense tap Purge If you chose to save a copy of the purged records your handheld transfers them to an archive file on your desktop the next time...

Page 52: ...rd and then tap OK NOTE In Contacts Note Pad and Memos you can select the category name in the upper right corner of the screen to assign the item to a different category To display a category of records 1 Tap the category pick list in the upper right corner of the list screen NOTE The category pick list does not display by default in the Calendar application To display the category pick list in C...

Page 53: ...name of the new category and then tap OK 5 Tap OK You can assign any of your records to the new category To rename a category 1 Tap the category pick list in the upper right corner of the screen or list 2 Select Edit Categories 3 Select the category that you want to rename and then tap Rename Calendar only Select the category that you want to rename and then tap Edit Tap here ...

Page 54: ...our handheld Find does not search applications that reside on an expansion card To use Find 1 Tap the Find icon 2 Enter the text that you want to find TIP If you select text in an application before you tap Find the selected text automatically appears in the Find dialog box Find is not case sensitive For example searching for the name davidson also finds Davidson Find locates any words that begin ...

Page 55: ...to Smith If you sort the list by company name the Look Up feature scrolls to the first letter of the company name 2 Tap the record to view its contents To look up a Contacts record with the navigator 1 From the Address list screen press Right on the navigator to display the Quick Look Up line 2 Press Up and Down on the navigator to select the first letter of the name you want to find The list scro...

Page 56: ...ts of the selected record TIP If there is only one possible match for the letters you selected the contents of the record automatically display Using Phone Lookup Phone Lookup displays the Contacts list screen You can add to a record the information that appears in this list To use Phone Lookup 1 Display the record in which you want to insert a phone number The record can be in Calendar Tasks Memo...

Page 57: ...NOTE You can also assign records to categories See Categorizing records earlier in this chapter To sort records in Expense 1 Open the application to display the list screen 2 Tap Show 3 Tap the Sort by pick list and then select an option 4 Tap OK To sort records in Contacts Note Pad Memos and Tasks 1 Open the application to display the list screen 2 Tap the Menu icon 3 Select Options and then sele...

Page 58: ...s In Contacts Calendar Palm Photos Tasks and Expense you can attach a note to a record A note can be up to several thousand characters long For example for an appointment in Calendar you can attach a note with directions to the location To attach a note to a record 1 Display the entry to which you want to add a note To display an entry tap it or press Up or Down on the navigator to highlight it an...

Page 59: ... small bold large or large bold fonts in each application that enables you to change the font style To change the font style 1 Open an application 2 Tap the Menu icon 3 Select Options and then select Font 4 Tap the font style you want to use 5 Tap OK Small font Large font Small bold font Large bold font Tap here for small font Tap here for small bold font Tap here for large bold font Tap here for ...

Page 60: ...r handheld reminds you of the item again in five minutes The Reminders screen displays alerts that await attention Receiving alerts from Palm Desktop software You can set an option to receive Calendar event alerts from Palm Desktop software The feature is disabled by default so you must enable it within Palm Desktop software To enable an event alert from Palm Desktop software 1 Double click the Pa...

Page 61: ...lso install other files that are associated with an application on your handheld such as photos or audio files Files that are not associated with an application on your handheld may not be installed during a HotSync operation Both applications and files are easy to install during a HotSync operation You can install the following types of files Palm OS file types including PRC and PDB Image files i...

Page 62: ... install the files on your handheld or on an expansion card You can use any of the following methods to install applications and files with Palm Quick Install Drag and drop files onto the Palm Quick Install icon on the Windows desktop Drag and drop files onto the Palm Quick Install window Use the commands or buttons in the Palm Quick Install window Right click a file and send it to Palm Quick Inst...

Page 63: ...iles are unrecognized try launching the associated application from your handheld and then performing another HotSync operation If the files still remain in the list they are not associated with an application on your handheld and cannot be installed Expansion cards may also hold files that are not Palm application files To drag and drop applications or files onto the Palm Quick Install window 1 C...

Page 64: ... during the HotSync operation If files are unrecognized try launching the associated application from your handheld and then performing another HotSync operation If the files still remain in the list they are not associated with an application on your handheld and cannot be installed Expansion cards may also hold files that are not Palm application files To use the command buttons in the Palm Quic...

Page 65: ...on and cannot be installed Expansion cards may also hold files that are not Palm application files To use the right click menu to send the file to Palm Quick Install 1 Copy or download the application s or file s you want to install onto your computer 2 From My Computer or Windows Explorer right click the file s or folder that you want to install 3 Select Send To and then select Palm Quick Install...

Page 66: ...e files to a different file list You can also access the Palm Quick Install window by clicking Quick Install on the Palm Desktop Launch bar Installing applications and files on a Mac computer The Install tool makes it easy to install applications and files during a HotSync operation You can specify whether to install the files on your handheld or on an expansion card To install add on software on ...

Page 67: ...ou are installing click Change Destination in the Install Handheld Files window and then use the arrows to move applications between your handheld and an expansion card 9 Click OK to close the Change Destination window 10 Close the Install Handheld Files window 11 Perform a HotSync operation to install the selected application s on your handheld See Conducting HotSync operations in Chapter 15 for ...

Page 68: ...Palm Desktop software If you no longer want to use Palm Desktop software you can remove it from your computer This process removes only the application files The data in your Users folder remains untouched IMPORTANT If you remove Palm Desktop software you also remove the HotSync Manager synchronization software and can no longer synchronize with your computer If you want to synchronize data with a...

Page 69: ...tion CD ROM into the CD ROM drive on your computer 2 Double click the Software Installation CD ROM icon on your desktop 3 Double click the Palm Desktop Installer icon 4 From the Easy Install screen select Uninstall from the pop up menu 5 Select the software you want to remove 6 Click Uninstall 7 Select the folder that contains your Palm Desktop software files 8 Click Remove 9 Restart your computer...

Page 70: ...Chapter 4 Working with Applications 60 ...

Page 71: ...remind you when they happen NOTE Certain tasks are common among several handheld applications For more information see Chapter 4 Working with Applications To open Calendar Press the Calendar application button on the front panel of your handheld Calendar opens to Agenda View by default TIP Press the Calendar application button repeatedly to cycle through the Agenda Day Week and Month views Calenda...

Page 72: ...the start and stop times for the calendar screens see Option menu Preferences later in this chapter Agenda View button Tap an appointment to go to event in Day View Tap a task to go to item in Tasks If there is space on the screen the next event on your Calendar displays Status of Task items Default View Choose from the pick list the view that displays when you open Calendar Show Due Tasks Display...

Page 73: ...alendar screens see Option menu Preferences later in this chapter Day View button Tap to view repeating Event Details dialog box Tap to view alarm Event Details dialog box Tap to view note Tap to view previous or next day Tap to select a category to view from pick list Colored circle in category column The color indicates the category of the event Show Category List By default the Category pick li...

Page 74: ...shorter than an hour tap the time of the event to open the Set Time dialog box TIP You can also use the Graffiti 2 input area to open the Set Time dialog box Make sure that no event is selected and then on the number side of the Graffiti 2 input area write a number for the start time of the event Show Time Bars Activates the time bars that appear in the Day View The time bars show the duration of ...

Page 75: ...vents that span midnight so that they appear in the list of events for two days An event spanning midnight is automatically created when your End Time precedes a Start Time An event spanning midnight cannot be longer than 24 hours To schedule an event for another day 1 Select the date you want for the event by doing one of the following Tap the day of the week that you want in the date bar at the ...

Page 76: ...t no start or end times are defined for the new event TIP You can also create a new untimed event by making sure no event is selected and then writing letters in the Graffiti 2 input area 4 Enter a description of the event 5 Tap a blank area on the screen to deselect the untimed event If you create an event and decide later that there is no particular start or end time you can easily change it to ...

Page 77: ...tinuous event tap the End on pick list and tap Choose Date Use the date picker to select an end date 7 Tap OK After you schedule a repeating or continuous event the Repeat icon appears at the far right of the event To delete repeating events 1 Select the record you want to delete 2 Tap the Menu icon 3 Select Delete Event from the Record menu 4 Do one of the following Tap Current to delete only the...

Page 78: ...ou of the pending alarm and the reminder message appears again five minutes later Tap Go To to open Calendar Calendar will open and display the event associated with the alarm Alarm for untimed events You can set a silent alarm for an untimed event In this case the alarm is triggered at the specified period of minutes hours or days before midnight beginning of the day of the untimed event When the...

Page 79: ...me tap the Time box and then tap a new time 4 To change the date tap the Date box and then tap a new date 5 Tap OK Using categories Categories are a way to group similar events so that they can be viewed separately The color coding in Calendar makes it easy to track events from different categories when all events are shown For more information on categories see Categorizing applications in Chapte...

Page 80: ...Week View 1 Tap the Week View button 2 Tap the navigation controls to move forward or backward a week at a time or tap on a column to display details of an event The Week View also shows untimed events and events that are before and after the range of times shown Continuous events appear in green with the Repeat icon Previous week Next week Tap for that day Bar indicates earlier event Bar indicate...

Page 81: ...Preferences settings If you have an event before or after this time span a bar appears at the top or bottom of that day s column Use the onscreen scroll arrows to scroll to the event or press Up and Down on the navigator to scroll to earlier and later time slots within the selected week Working in Month View The Month View screen shows which days have events scheduled You can control the types of ...

Page 82: ...w Setting Month View display options You can customize the Month View appearance using the Display Options dialog box To set the start and stop times for the calendar screens see Option menu Preferences later in this chapter Show Category List By default the Category pick list does not appear at the top of the screen You can choose to have the pick list display by selecting the check box Default V...

Page 83: ...conflicts With the ability to define specific start and end times for any event you could schedule events that overlap an event that starts before a previous event finishes An event conflict time overlap appears in the Week View as overlapping bars The first event created appears as a gray bar and any subsequent conflicting events appear as a single red bar The Day View displays overlapping red br...

Page 84: ... Date Range the Date Range dialog box opens you can set a start and end range using the Set Date dialog box 6 Tap Beam To receive a beamed category of events Perform on of the following in the Receive Category dialog box Tap Add to add a new category or add the events to the current category by the same name Tap Replace to delete the events in the current category and replace them with the beamed ...

Page 85: ... to send the selected event to another device The options available depend on the software installed on your handheld Start End Time Defines the start and end times for Calendar screens If the time slots you select do not fit on one screen you can tap the scroll arrows to scroll up and down Alarm Preset Automatically sets an alarm for each new event The silent alarm for untimed events is defined b...

Page 86: ...Chapter 5 Using Calendar 76 ...

Page 87: ...the Card Info icon 3 Review Card name Type and Size 4 Review card contents summarized by directory Renaming a card The expansion card name appears in the Category pick list and in other lists that enable you to choose where to store information on your handheld You can assign a name to each expansion card that indicates its contents To rename a card 1 Tap the Home icon 2 Tap the Card Info icon 3 T...

Page 88: ...corruption or accidental damage to the expansion card You can install applications to an expansion card after performing an initial HotSync operation See Installing files and add on applications in Chapter 4 for information For optimal performance we recommend that you do not install more than 50 applications to a single expansion card Reading and writing information on an expansion card uses more...

Page 89: ...rd Info menu commands that are not explained elsewhere in this book are described here See Using menus in Chapter 4 for information about selecting menu commands Card menu Help Provides help text About Card Info Shows version information for Card Info ...

Page 90: ...Chapter 6 Using Card Info 80 ...

Page 91: ...handheld Contacts opens to display the list of all your records TIP Press the Contacts application button repeatedly to cycle through the categories in which you have records Pressing and holding the application button will beam your business card to another handheld See Creating a business card later in this chapter for information Creating a contact You can create contacts on your handheld or yo...

Page 92: ...held automatically capitalizes the first letter of each field You do not have to use the Graffiti 2 capital stroke to capitalize the first letter of the name Title Company City and State Text appears for the first logical match that exists in your Contacts list As you enter more letters a closer match appears For example you may already have Sacramento and San Francisco in your Contacts list As yo...

Page 93: ... to scroll to the year you want and then tap to select the birth month and date or tap Today to select the current date as the birthday TIP If you do not select a year the current year is displayed Tap and hold the left or right arrow to scroll quickly through the years 2 If you want a reminder select the Reminder check box enter the number of days in advance of the birthday that you want the remi...

Page 94: ... Contact Edit screen 2 Select the field you want displayed The fields appear in a preset order on the Contact Edit screen NOTE Each field type can be displayed a certain number of times on the Contact Edit screen for example you can display multiple IM fields Contacts sets a maximum number for how many times each field type can appear on the screen Once you reach this maximum for example the maxim...

Page 95: ...or phone numbers and e mail addresses Select a new label For IM accounts Select the IM service you want to use or select IM if you do not want to specify a service You must set up an IM account with a service provider to use IM on your handheld See Making connections from Contacts later in this chapter for more information Tap triangle Select from list Select from list ...

Page 96: ...n Making connections from Contacts You can use the contacts in your Contacts list to launch applications that perform tasks such as dialing a phone number or creating an e mail or SMS message Some of the applications you can launch are included on the CD ROM that comes with your handheld and others may be available from third party developers and are sold separately Most of these applications requ...

Page 97: ...use to connect Quick Connect initiates the related task For example if you tap a phone number Quick Connect sends the selected phone number to your mobile phone To use Quick Connect from the Contacts list 1 Highlight the contact to which you want to connect 2 Tap the Menu icon 3 Select Connect on the Record menu 4 Select the method you want to use to connect Quick Connect initiates the related tas...

Page 98: ...with the stylus By default Tap to Connect is not enabled You must install the Telephony SMS application from the CD ROM to access and use this feature To enable Tap to Connect 1 From the Contacts list tap the Menu icon 2 Select Option and then select Preferences 3 Tap Enable Tap to Connect 4 Tap OK TIP You can also configure which application opens when you tap a specific Contacts record field and...

Page 99: ...nnect Opens the Quick Connect dialog box where you can choose which application you want to use to make the connection This command appears only after you install the Telephony SMS application from the CD ROM and the options that are available depend on the software installed on your handheld Send Category Opens a dialog box where you can choose how you want to send all records in the selected cat...

Page 100: ...ory you selected If you deselect it Contacts displays the All category Rename Custom Fields These custom fields appear at the end of the Contacts Edit screen Rename them to identify the kind of information you enter in them The names you give the custom fields appear in all contacts You can use these custom fields to track additional information in your Contacts records such as names of spouses ch...

Page 101: ...r computer To open Expense 1 Tap the Home icon 2 Tap the Expense icon Adding expense items A record in Expense is called an item You can sort your Expense items into categories or add other information that you want to associate with the item To add an expense item 1 Tap New 2 Enter the amount of the expense Tap New Cursor of new item ...

Page 102: ...ot select an expense type your handheld does not save the entry Changing the date of an Expense item Initially Expense items appear with the date on which you enter them You can change the date associated with any Expense item To change the date of an Expense item 1 Tap the Expense item you want to change 2 Tap the date of the selected item 3 Tap the new date Tap here Tap date ...

Page 103: ...d such as airline tickets supplied by your company you can choose Prepaid to place your expense in the appropriate company paid cell of your printed expense report Currency Enables you to choose the type of currency used to pay the Expense item The default currency unit is defined in the Preferences dialog box You can also display up to four other common types of currency See Customizing the Curre...

Page 104: ... whose currency you want to display on that line 3 Tap OK to close the Select Currencies dialog box and then tap OK Changing the default currency You can select which currency appears by default when you re entering Expense items You can override this setting when entering individual expense items To change your default currency 1 Open Expense 2 Tap the Menu icon 3 Tap Options and then tap Prefere...

Page 105: ...currency symbol 1 Tap the Menu icon 2 Tap Options and then tap Custom Currencies 3 Tap one of the four Country boxes 4 Enter the name of the country and the symbol that you want to appear in Expense 5 Tap OK to close the Currency Properties dialog box and then tap OK again Setting Show Options Show Options defines the sort order and other settings that relate to your Expense items Tap a Country bo...

Page 106: ...omputers Add modify and delete your Expense data Organize your Expense data by category amount date type or notes View Expense data in various formats List Large Icons or Small Icons Record individual expenses in various currencies and display the total in one selected currency type Print Expense reports Transfer Expense data to other applications such as Microsoft Excel using the Send command or ...

Page 107: ...fault to increase printing speed If the printer font does not include the euro a box is printed instead of the euro symbol You can work around this problem by transferring the Expense data to another application and inserting a bitmap image of the euro into the document in the appropriate places or by not using the printer s built in fonts if allowed Using Expense menus Expense menu commands that ...

Page 108: ...Chapter 8 Using Expense 98 ...

Page 109: ...th Applications To open Memos 1 Tap the Home icon 2 Select the Memos icon Creating memos This section describes how to create a memo Each memo you create can be up to approximately 32KB in size To create a new memo 1 Open Memos 2 Tap New TIP In the Memo list screen you can also begin writing in the input area to create a new memo The first letter is automatically capitalized and begins your new me...

Page 110: ... Record and Options menus differ depending on whether you re displaying the Memo list or an individual memo Record menus Select a memo to review Send Category Opens a dialog box where you can choose how you want to send all records in the selected category to another device This command appears only after you install the e mail or SMS application from the CD ROM included with your handheld and the...

Page 111: ...Using Memos menus 101 Options menus Preferences Displays the Memo Preferences dialog box where you define the sort order for memos About Memos Shows version information for Memos ...

Page 112: ...Chapter 9 Using Memos 102 ...

Page 113: ...ng you might do with a piece of paper and a pencil NOTE Certain tasks are common among several handheld applications For more information see Chapter 4 Working with Applications To open Note Pad Press the Note Pad application button on the front panel of your handheld Note Pad opens to display the list of all your records Note Pad button ...

Page 114: ...at the top of the screen and then enter a title using Graffiti 2 writing 4 Tap Done To clear the screen 1 Tap the Menu icon 2 Select Edit and then select Clear Note Changing Note Pad color settings You can change the color of both the paper and the ink from the pen for all your notes You cannot change the color settings for individual notes To set the colors 1 In the Note Pad list tap the Menu ico...

Page 115: ... specific time and date to remind you to follow up on a note To set an alarm for a note 1 Tap the note to which you want to assign an alarm 2 Tap the Menu icon 3 Select Options and then select Alarm 4 Tap the Date box 5 Tap the year month and date you want the alarm to sound After you tap the date the Set Alarm dialog box reappears 6 Tap the Time box Tap here to select month Tap here to select yea...

Page 116: ...urn to the current screen An attention indicator blinks in the upper left corner of the screen to remind you of the pending alarm and the reminder message appears again in five minutes When the reminder message reappears the current time appears in the Reminder bar and the note title appears on the screen If you did not title the note the time the note was created appears on the screen Tap Go To t...

Page 117: ...Opens a dialog box where you can choose how you want to send the selected note to another device This command appears only after you install the e mail or SMS application from the CD ROM included with your handheld and the options available depend on the software installed on your handheld Compatibility Displays the Compatibility dialog box where you can choose to beam notes to a previous version ...

Page 118: ...Chapter 10 Using Note Pad 108 ...

Page 119: ...Palm Photos to transfer photos from your computer or receive photos beamed from another device and then view the photos on your handheld You can also view photos from an expansion card inserted into your handheld You can view the following types of photos JPG files BMP files TIFF files GIF files Viewing photos in Thumbnail view Thumbnail view displays miniature versions of your photos so that you ...

Page 120: ... then press Select to view the photo 4 Tap anywhere on the screen to return to Thumbnail view Viewing photos in List view List view displays a list of your photos so that you can see the names and dates associated with your photos Use this view to locate a photo when you know the name or the date the photo was created To view photos in List view 1 Tap the List icon 2 Tap the Album pick list in the...

Page 121: ...column heading to sort the photos based on that item 2 Tap the column heading to sort the photos in reverse order Viewing a slide show A slide show is a sequential presentation of each of the photos in the current album To view a slide show 1 Tap the Album pick list in the upper right corner and then select the album you want to view 2 Tap Slide Show Tap here to sort by date Tap here to sort by na...

Page 122: ...inute 4 Tap OK Rotating photos If a photo appears in the wrong orientation you can rotate the photo To rotate a photo 1 Tap the Menu icon 2 Select Photo and then select Rotate 3 Tap the photo you want to rotate 4 Select the new orientation and then tap Done Viewing photo information The Photo Details dialog box enables you to view information about a photo and to change the photo name assign it to...

Page 123: ...p Done twice TIP You can press Right or Left on the navigator to change photo information Creating an album The process for creating a new photo album is identical to the process for creating a new category in your other handheld applications To create an album 1 Tap the Album pick list in the upper right corner 2 Select Edit Albums 3 Tap New 4 Enter a title for the album 5 Tap OK and then tap Don...

Page 124: ...um A plus sign appears next to each photo you select TIP You can also tap and drag to select adjacent photos 4 Tap any photos you want to remove from the current album The plus signs next to the selected photos disappear 5 Tap Done Copying photos The Copy command enables you to make a copy of a photo on your handheld or on an expansion card When you copy a photo from an expansion card to your hand...

Page 125: ...r deleting an album You can rename or delete any of the albums that you create You cannot rename or delete the Unfiled album To rename an album 1 Tap the Album pick list in the upper right corner 2 Select Edit Albums 3 Select the album you want to rename 4 Tap Rename and then enter the new name 5 Tap OK and then tap Done To delete an album 1 Tap the Album pick list in the upper right corner 2 Sele...

Page 126: ... Chapter 3 Follow the steps below to beam multiple photos To beam photos 1 Tap the Menu icon 2 Select Photo and then select Beam 3 Tap the photos you want to beam A plus sign appears next to the photos you select 4 Tap Beam 5 Point the IR port on your handheld at the IR port on the receiving device See Sending data in Chapter 3 for additional information on beaming data Deleting photos If you no l...

Page 127: ...computer See the Palm Desktop software online Help for details View photos in various formats List Thumbnails Details and Editor with a Handheld preview Drag photos onto the Palm Quick Install icon or the Palm Photos desktop window to install them on your handheld or on an expansion card during the next HotSync operation Modify and delete your photos Organize your photos and add notes Transfer pho...

Page 128: ...Photos menus Palm Photos menu commands that are not explained elsewhere in this book are described here See Using menus in Chapter 4 for information about selecting menu commands Options menu About Photos Shows version information for Palm Photos ...

Page 129: ...e date priority level or category NOTE Certain tasks are common among several handheld applications For more information see Chapter 4 Working with Applications To open Tasks Press the Tasks application button on the front panel of your handheld Tasks opens to display the list of all your records TIP Press the Tasks application button repeatedly to cycle through the Tasks list filters Tasks button...

Page 130: ...em Setting priority You can use the priority setting for items to arrange the tasks according to importance or urgency The default setting for Tasks is to arrange items by due date and then priority with priority 1 items at the top If you have a number of items in your list changing an item s priority setting may move its position in the list To set the priority of a task 1 Tap the Priority number...

Page 131: ...k Tap the check box on the left side of the item Changing task details The Tasks Details dialog box enables you to change settings for individual items To display the Tasks Details dialog box 1 Tap the text of the item whose details you want to change TIP You can also select an item with the navigator See Using the navigator in Chapter 2 for details 2 Tap Details 3 Change any of the settings NOTE ...

Page 132: ...ferences dialog box you can tap directly on the due date in the Tasks list to open the pick list shown in step 2 Setting an alarm You can set an alarm before a task is due to remind you to start the task To set an alarm for a task 1 Select the task to which you want to assign an alarm 2 Tap Details 3 Tap the Alarm box The Alarm box only appears if you have set a due date The Set Alarm dialog box a...

Page 133: ...ep 5 5 Tap Day Week Month or Year to set how often the task repeats 6 Tap Fixed Schedule 7 On the Every line enter a number that corresponds to how often you want the task to repeat For example if you select Month and enter 2 the task repeats every other month 8 To specify an end date for the repeating task tap the End on pick list and then tap Choose Date Use the date picker to select an end date...

Page 134: ...ed 8 To specify an end date tap the End on pick list and then tap Choose Date Use the date picker to select an end date 9 Tap OK After you schedule a repeating task the Repeat icon appears next to the task in the Tasks list Display options You can choose what tasks you want to view and how the tasks are sorted by choosing a display filter and setting Tasks Preferences Using the display filters You...

Page 135: ...elect Preferences from the Options menu All Displays a list of all tasks Date When Date is selected the Date filter pick list appears in the upper right corner below the title bar Select from the following date filters Due Today Lists all tasks due today Last 7 Days Displays a list of all tasks that were due in the 7 days including today Next 7 Days Displays all tasks that are due in the next days...

Page 136: ...re still in the memory of your handheld You can purge completed items to remove them from memory Record Completion Date Replaces the due date with the actual date when you complete check the task If you do not assign a due date to a task the completion date still records when you complete the task Show Due Dates Displays the due dates associated with tasks in the list and displays an exclamation m...

Page 137: ...yles and user selected display options Basic Hypertext Markup Language HTML formatting display for e mail messages received in HTML format Increased number of file types supported for being sent and received as attachments Scheduled retrieval of new e mail with notification Improved message addressing capabilities Enhanced security Getting started with the VersaMail application To start using the ...

Page 138: ...mail database for use with the VersaMail 2 6 application To upgrade an existing e mail database for use with the VersaMail application 1 Perform a HotSync operation with a user profile that contains the existing e mail database To do so tap the HotSync icon on the Home screen and then select a profile that contains an e mail database from the displayed list of users 2 Tap the VersaMail icon 3 Tap ...

Page 139: ... Wireless network card accessory sold separately seated in the expansion card slot on your handheld External modem accessory sold separately that connects through the expansion card slot on your handheld HotSync cable connected to your desktop Windows users only Network e mail account prerequisites Before you can set up a network e mail account you must do the following Establish the e mail accoun...

Page 140: ...twork GPRS Wireless network card accessory sold separately Active high speed wireless network account ordered from your wireless carrier GSM dial up via external modem accessory Wireless modem accessory that attaches through the expansion card slot on your handheld Active wireless service with a GSM carrier If you are using a high speed wireless network the same carrier generally provides both GSM...

Page 141: ...word protocol and incoming and outgoing server settings when you set up your corporate e mail account With a corporate e mail account you can access the following types of mail servers among others Microsoft Exchange Lotus Domino Sun iPlanet VPNs If you want to access e mail on your handheld using your corporate e mail account you may need to set up a virtual private network VPN on your handheld A...

Page 142: ...k NOTE The auto get mail with notification feature in the VersaMail application may not work with a particular VPN connection Also you cannot use scheduled sending retry of e mail with accounts that use a VPN connection See Auto get mail with notification and Send retry later in this chapter for information Creating an e mail account You create a new account in Account Setup which guides you throu...

Page 143: ...ing the account username and password In the next part of the VersaMail Account Setup you enter the username and password for this account The VersaMail 2 6 application provides strong128 bit AES encryption for your password Account Name Enter a descriptive name for the account such as My Yahoo Mail Service Tap the Mail Service pick list and then select the provider to which you are connecting Sel...

Page 144: ...mail server settings 1 If you chose a preconfigured service from the Mail Services pick list on the Account Setup screen the e mail address field is completed automatically based on the username and mail service you entered Check the address to verify that it is correct and edit it if necessary If you chose Other from the Mail Services pick list on the Account Setup screen enter the e mail address...

Page 145: ... managing e mail later in this chapter for information on getting and sending e mail If you set up a synchronize only e mail account you need to configure this account on your desktop See Configuring account settings in HotSync Manager later in this chapter for information You will not be able to synchronize e mail between your handheld and your desktop until you configure the account on your desk...

Page 146: ...d mail ONLY Delete messages on server To delete messages on your provider s mail server when they are deleted in the VersaMail application select the Delete messages on the server when they are deleted in VersaMail check box Leave mail on server POP account only To get e mail on your handheld but also leave it on the server so you can view it later on your desktop select the Leave mail on server c...

Page 147: ...an incoming message is 5KB by default but you can enter any size up to 2048KB including attachments The maximum message size that you can retrieve is 60KB for the body text and approximately 5 megabytes MB of total data for any attachments Because downloading large messages can consume handheld resources the VersaMail application displays the size of and asks if you want to continue downloading an...

Page 148: ...hich you are sending the message For example if you are sending a message from me yahoo com but you want recipients to reply to me earthlink net enter the reply to address here Reply To Address makes it look as though the e mail came from the address you entered BCC Select the BCC check box to send a blind copy of any e mail message you send to another e mail address The blind copy e mail address ...

Page 149: ...mber check with your mail server administrator Authentication Select the My server requires authentication ESMTP check box if the outgoing server SMTP requires authentication Check with your system administrator before selecting this option See Adding ESMTP to an account later in this chapter for information If you select this option username and password fields appear These fields are already fil...

Page 150: ...ation You will not be able to synchronize e mail between your handheld and your desktop until you configure the account on your desktop Editing e mail accounts From time to time you may need to edit information about one of the e mail accounts you set up To select the account to edit 1 Tap the Menu icon select Accounts and then select Account Setup 2 Tap the name of the account to edit and then ta...

Page 151: ...dheld Your e mail account still exists at Yahoo com NOTE You can delete all but one of your e mail accounts you must have at least one account To delete an account 1 Tap the Menu icon select Accounts and then select Account Setup 2 Tap the name of the account you want to delete and then tap Delete 3 Tap Yes in the Delete Account dialog box to delete the account and all associated e mail messages 4...

Page 152: ...e mail account you have the option of switching to a different service for use with that account only For example the default service you have selected for your handheld may be called Modem and may use a modem accessory sold separately to make a dial up connection to your e mail service provider You may also have set up an e mail account called My Earthlink which connects using the Modem service b...

Page 153: ...new connection Infrared in this example until you either select a new service or deselect the Always connect using check box If you deselect the Always connect using check box the e mail account My Earthlink connects using the default handheld service Modem in this example The Always connect using check box changes the connection service for the selected e mail account only You must follow the pre...

Page 154: ...lect the My server requires authentication ESMTP check box if the outgoing server SMTP requires authentication Check with your system administrator before selecting this option If you select this option username and password fields appear These fields are already filled in based on the account information you entered previously In most cases the information displayed is correct however occasionall...

Page 155: ... You can manage the messages in your e mail accounts by moving messages between folders deleting old e mail messages individually or in groups and marking messages as read or unread Getting e mail You can get e mail subjects only the message size author and subject or you can get entire messages immediately If you choose to get message subjects only and want to read a full message you can get more...

Page 156: ...Get Mail If you have e mail stored in your Outbox tap Get Send 2 In the Get Mail Options dialog box tap Subjects Only to download subjects only or tap Messages to download entire messages TIP You can deactivate the Get Mail Options dialog box by using VersaMail Preferences See Setting preferences for getting and deleting e mail later in this chapter 3 Optional Tap Details and then select options f...

Page 157: ...il using a VPN connection you may be asked to enter the username and password you use to log in to the VPN If so enter the username and password See VPNs earlier in this chapter for more information 7 The Getting Messages dialog box shows updates as your e mail is downloaded When the Getting Messages dialog box disappears another dialog box appears and displays the number of new e mail messages 8 ...

Page 158: ... location you must be in range of a network access point for the auto get to work Scheduling auto get mail When setting up a schedule you select the interval for retrieving mail the start and end times for retrieving mail and the days on which scheduled e mail retrieval should take place You can set up different schedules for each of your e mail accounts but you can set up only one schedule for an...

Page 159: ...terval Start Time Tap the Start Time box tap to enter the start time hour and minute and tap to enter AM or PM Then tap OK NOTE The start and end time screens display the hour and minute using the default time format you select for your handheld End Time Tap the End Time box tap to enter the end time hour and minute and tap to enter AM or PM Then tap OK Days Tap the days you want the schedule to b...

Page 160: ... appear during the auto get connection and mail retrieval process You can choose to have your handheld alert you when a new message arrives in your account The beep or alert sound your hear is called a notification Your handheld also notifies you of a new message s arrival by blinking an indicator light or vibrating if certain preferences are selected For more information see Making your handheld ...

Page 161: ...5 Tap the Notify Sound pick list and then select a sound The handheld plays a brief demonstration of the sound NOTE If you have installed a custom sound on your handheld it appears on the Notify Sound pick list 6 To receive notifications of successful auto get mail and automatic send retries only deselect the Notify me of Auto Get and Send failures check box Leave the check box selected if you wan...

Page 162: ...the General Preferences list tap Sounds Alerts 4 Do any of the following To change the volume of the Alarm Sound tap the Alarm Sound pick list and then select Low Medium High or Off To change whether or not the handheld indicator light blinks when you receive new e mail tap the Alarm LED pick list and then select On or Off To change whether or not the handheld vibrates when you receive new e mail ...

Page 163: ...ppears on the Reminders screen tap the notification to go to the Inbox of that account or launch the VersaMail application and go to that account Once you view a message in the Inbox it is removed from the Reminders screen even if you do not open the message Auto get then starts at the next scheduled interval with the Reminders screen counter reset to 1 If you do not view the Inbox of the selected...

Page 164: ...r message but would display the number of messages retrieved after the successful retrieval Reminders screen notifications are specific for each account For example if auto get fails for one account but succeeds in downloading new messages for a separate account the Reminders screen displays an error message for the first account and a message indicating the number of messages downloaded for the s...

Page 165: ...y drain your handheld s battery charge more quickly and thus need to recharge the battery more frequently Increasedmonthly charges If your e mail service provider is a wireless provider such as Cingular or T Mobile that charges a fee for data transactions using the auto get feature can substantially add to your monthly charges This issue is especially noticeable for POP accounts because the size o...

Page 166: ...e downloaded message exceeds your maximum message size only a partial message is displayed Tap the More button to view the entire message See Getting e mail by subject or getting the entire message earlier in this chapter If you chose to get entire messages the body of the e mail message is displayed However if the downloaded message exceeds your maximum message size only a partial message is disp...

Page 167: ...n text will be displayed as plain text only You can also set the application to receive all messages as plain text only regardless of the format in which they were sent If you choose this option only the text of any messages sent in HTML format will be displayed NOTE The VersaMail application sends all messages as plain text only with all HTML tags stripped even if you are forwarding or replying t...

Page 168: ...he screen 2 Tap the folder you want to view Managing display options in the folder s list view You can customize the way in which messages appear in the list view of your mail folders The options you choose apply to all folders The display options that you can customize and the default settings are as follows Option Default Sort by Date Sort order Descend Summary view Two line view Summary view co...

Page 169: ...t order 1 Tap Display 2 Tap the Sort by pick list and then select the column name 3 Tap Descend or Ascend to change the sort order 4 Tap OK To select a one line or two line view 1 Tap Display 2 Tap the Show pick list and then select the view you want 3 Tap OK ...

Page 170: ...change depending on whether you choose a one line or a two line view NOTE If you select Date the Date column displays the message time for any messages received today that is any message received after 12 01 A M Otherwise the Date column shows the date the message was received 3 Tap OK To change the font 1 Tap Display 2 Tap in the Font field 3 Tap the Font pick list and then select the font you wa...

Page 171: ... font style you want 6 Tap OK To select colors for read and unread mail 1 Tap Display 2 Tap the Unread pick list and then select the color you want to use to display unread messages 3 Tap the Read pick list and then select the color you want to use to display read messages 4 Tap OK In the list view itself you can also change the size of the columns ...

Page 172: ... to change the width of the column You can also change the font within an individual message This change affects the the font of all messages you compose To change the font of a composed message 1 On the message screen tap the Menu icon 2 Select Options 3 Tap Font 4 Tap the Font pick list and then select the font you want 5 Tap the Size pick list and then select the font size you want Drag the col...

Page 173: ...s pick list in the upper right corner of the screen and then select the folder name or press Up or Down to move to the folder you want and then press Select to select the folder 2 Tap the message you want to move press Right on the navigator to open the Message menu press Down to go to the Move To option and then press Select to select this option Alternately tap the icon to the left of the messag...

Page 174: ...the folder you want To move multiple e mail messages 1 Tap the folder that contains the e mail messages you want to move 2 Select the messages by tapping to the left of each message icon TIP To select a group of adjacent messages drag the stylus to the left of the message icons A checkmark appears next to each selected message 3 Do either of the following Tap the Menu icon and then select Move To ...

Page 175: ...create new folders so that you can store e mail messages by subject person or project The VersaMail application has certain existing folders such as Inbox Outbox Drafts and Trash The procedure for creating and editing folders varies slightly between POP and IMAP e mail accounts as described in the following procedure To create and edit e mail folders 1 Tap the folders pick list in the upper right ...

Page 176: ...dit IMAP Folders screen select any of the following To create a new folder tap New and then enter the new folder name For IMAP accounts only select the check box if you also want to create the folder on the server When finished tap OK POP accounts IMAP accounts POP accounts IMAP accounts ...

Page 177: ...s the folder will be deleted immediately and you will not see a confirmation screen Creating and sending new e mail When you create a new e mail message you can enter the person s e mail address or use the Lookup screen to find a particular address To create a new e mail message 1 Tap New 2 Entertherecipient snameusingoneofthemethodsdescribedin thenextprocedures NOTE When you address a message to ...

Page 178: ...o the To field and enter the address and then tap Done For multiple recipients type a semicolon and then a space between recipient names The To field expands to two lines during address entry for addresses longer than the one line display After address entry addresses longer than one line are shown on a single line with a red ellipsis symbol to the right of the address line Red ellipsis indicates ...

Page 179: ...ressed If you want to edit an e mail address that is longer than the line provided on the New Message screen tap the To field and edit the address 2 To send copies tap cc or bcc and then enter the recipient s address Copies cc allow recipients to see the addresses of the other recipients addresses in the blind copies bcc field are hidden from all other recipients TIP To automatically fill in the a...

Page 180: ...art Addressing to address a message 1 On the New Message screen tap in the To field 2 Start entering the person s name such as Joe Smith Once the name is recognized from your Contacts list the name and e mail address are automatically completed on the recipient list For example if you have a Joe Smith and a Joan Smith in Contacts and no other names starting with J once you type Joe the entry Joe S...

Page 181: ...n tap Preferences 2 Tap Advanced 3 Tap the Enable Smart Addressing check box if it is not selected A checkmark means it is turned on 4 Tap OK Composing and sending e mail After you enter your recipient addresses you can compose the rest of the e mail message To compose the rest of the e mail and send it 1 Tap the Subject field and enter the subject of your e mail Subjects longer than one line are ...

Page 182: ...handheld is out of range or the application cannot connect to the mail server you can choose to have the application move the message to the Outbox and continue to try to send the message at 30 minute intervals a maximum of three times If you put a message in the Outbox you must perform a manual send to send the message on the first attempt The VersaMail application attempts automatic send retry o...

Page 183: ...con appears next to a notification when an automatic send retry fails Tap the notification or open the account in the VersaMail application to view a detailed error message Viewing the error message deletes the notification from the Reminders screen The Reminders screen shows only the most recent notification for an e mail account no matter how many automatic send retries have been attempted for t...

Page 184: ...ons that indicate messages awaiting the next automatic send retry as well as messages in the locked and error state Outbox icons in the VersaMail applications The icons to the left of a message in the Outbox indicate the message s status Completing drafts If you are composing an e mail message and you exit the VersaMail application before tapping Outbox Send or Cancel the e mail automatically move...

Page 185: ...ure 1 Tap the Menu icon tap Options and then tap Preferences 2 Tap Signature 3 Tap the Attach Signature check box to select it 4 Enter your signature information and then tap OK Forwarding e mail You can quickly forward e mail messages from any folder other than the Outbox folder To forward e mail 1 Tap the folders pick list and then select the folder that contains the e mail 2 Tap the e mail mess...

Page 186: ...ddress See the procedure for creating new e mail earlier in this chapter for more information on addressing messages 6 Optional Enter some text describing the forwarded message 7 Tap Send to send the message or tap Outbox to store it in the Outbox NOTE Forwarded messages are always sent as text only even if you received the original message in HTML format Tap Forward ...

Page 187: ...e that you are reading 1 Tap the message you want to reply to 2 Tap Reply 3 In the Reply Options dialog box select options for replying to the sender only or to all e mail recipients and for including original message text 4 Tap OK 5 Enter a reply 6 Tap Send to send the message now or tap Outbox to send it later NOTE Replies are always sent as text only even if you received the original message in...

Page 188: ...ect to select this option TIP Alternately you can tap the folders pick list select the folder that contains the e mail tap the envelope icon next to the message and then tap Reply on the pick list 3 In the Reply Options dialog box select options for replying to the sender only or to all e mail recipients and for including original message text 4 Tap OK The e mail is addressed 5 Enter a reply 6 Tap...

Page 189: ...ith e mail messages Downloading attachments to your handheld E mail may contain attached files such as Microsoft Word or text files that you want to view work with or install on your handheld When you receive an e mail message with an attached file the VersaMail application automatically scans your handheld to see if an application resides on the handheld that can open the attachment If the VersaM...

Page 190: ...uld using the Excel application on your desktop Graphics files jpg bmp tif gif You can download these files and view them using the Palm Photos application on your handheld Other application files For other types of application files your handheld may contain a viewer that allows other applications to pass it a file for viewing You do not need to do anything different in the steps for downloading ...

Page 191: ...lication displays the size of and asks if you want to continue downloading any message that exceeds your maximum message size up to a total size of 5MB To download an attachment 1 In the Inbox tap the message with the attachment A paper clip icon appears on the message s icon if the message has an attachment that has been downloaded If you choose to get messages by subject only you must tap More f...

Page 192: ... are multiple viewers registered on your handheld for the attachment file type either use the default viewer shown or select a viewer from the list For example if you have two photo viewing applications on your handheld and you select a photo attachment on the list the Viewer pick list appears containing the names of the photo viewing applications Tap the pick list and then select the application ...

Page 193: ...ultiple attachments whose total size exceeds your maximum message size requires some extra steps To determine if a message has an attachment or multiple attachments that exceed the maximum message size In the Inbox tap the message title If the message plus attachments exceeds the maximum message size the More button appears on the Message screen In the case of multiple attachments if some of the a...

Page 194: ...to continue downloading the entire message with attachment When downloading is complete the red paper clip icon appears and the More button is no longer displayed Follow the procedure for viewing an attachment presented earlier in this chapter To download multiple attachments whose total size exceeds the maximum message size 1 Tap the red paper clip icon Tap More ...

Page 195: ... Follow the procedure for viewing an attachment presented earlier in this chapter Saving attachments to an expansion card If you have purchased an expansion card that provides extra memory you can save downloaded attachments to the expansion card To save an attachment to an expansion card 1 Insert the expansion card into the slot on your handheld 2 Follow the procedure for downloading attachments ...

Page 196: ...chments total size The types of files you can attach from a handheld application include the following vCard vcf vCal iCal vcs ics Memo Text txt PRC prc PDB pdb Microsoft Word document doc Microsoft Excel spreadsheet xls To attach a file from a handheld application 1 Tap the Menu icon tap Options and then tap Attachment 2 Tap the Type pick list and then select the file type The VersaMail applicati...

Page 197: ...n e mail message tap the attached file in the Attachments box and then tap Delete 5 Tap Send or Outbox Attaching files from an expansion card If you have purchased an expansion card and have saved files to the card you can attach files from the card to an e mail message you are sending The types of files you can attach from an expansion card include the following Word docs HTML files JPEG and GIF ...

Page 198: ...screen tap the Menu icon tap Options and then tap Attachment 3 Tap the From pick list and select Files on Card 4 Tap the Type pick list and then select the file type The VersaMail application displays all file types that reside on the card You can select a particular file type or select All Files to view all files on the card 5 Tap the file that you want to attach and then tap Add ...

Page 199: ...look up the recipient address See the procedure for creating e mail earlier in this chapter for more information on addressing messages 5 Follow the procedure for attaching files presented earlier in this chapter Deleting messages You can delete one or more e mail messages from any folder For example you can delete old messages in the Inbox or messages that you were working on in the Drafts folder...

Page 200: ...ant to delete the messages from the server now The selected messages move to the Trash folder and are deleted from your handheld when you empty the trash You can empty the trash manually or set the preference to automatically empty the trash By default the trash auto empties all deleted e mail older than one week See Emptying the trash later in this chapter for more information IMPORTANT If you de...

Page 201: ... folder that contains the messages you want to delete 3 Tap the Older than pick list and then tap One Week One Month or Choose Date If you tap Choose Date you can select a date from the calendar 4 Tap Delete 5 Optional Tap Also delete message s on server if you want to delete the message from the server now Displays the current folder for deleting messages Tap a date to select it or tap Today ...

Page 202: ... see how many messages are in the trash and whether the messages are set to be deleted on the server 3 If you want to delete messages from the handheld as well as from the server tap Both A message asks if you want to update the server now To delete the message from only the handheld now tap Handheld NOTE Many e mail providers such as Yahoo have size restrictions for mail storage If your mailbox o...

Page 203: ...s as read or unread 1 Tap the folders pick list and then select the folder you want 2 Tap the icon next to the message you want to mark 3 Tap Mark Read or tap Mark Unread TIP To mark multiple messages tap the bullets next to the messages you want tap the Menu icon and then select Mark Read or Mark Unread 4 For IMAP accounts only Tap Handheld to mark the messages as read or unread on your handheld ...

Page 204: ... server NOTE Because POP servers do not support the read or unread message feature the message is in bold or regular typeface for POP accounts on the handheld but you can t connect with the server to change the message state Read messages appear in plain text unread messages appear in bold text Setting preferences for getting and deleting e mail VersaMail Preferences determine how the VersaMail ap...

Page 205: ...ill be asked each time you delete messages on your handheld whether you want to also delete them on the server Because mailboxes on the server usually have size restrictions we recommend periodically deleting messages on the server Download Attachments Causes files attached to e mail to be automatically downloaded to your handheld Attachments that exceed the maximum message size cannot be download...

Page 206: ... the recipient Synchronizing e mail between the handheld and the desktop IMPORTANT You must have a Windows computer to synchronize e mail between your handheld and your computer To manage your e mail on your desktop as well as on your handheld you can synchronize an e mail account on the handheld with an e mail application on the desktop You can use many popular e mail applications called clients ...

Page 207: ...ction As Default to make the current settings the default settings for all accounts Setting synchronization options and account settings Next you must configure each e mail account s general synchronization settings For example if you created an Earthlink e mail account on the handheld and want to synchronize that with the desktop set the synchronization options for the Earthlink account During a ...

Page 208: ...e VersaMail Configuration For User screen click the plus sign to the left of the account you want to configure 2 Under the account name click Mail Client Sync Setup 3 Select the option Check this box to synchronize this mail account when you perform a HotSync operation otherwise the account cannot be synchronized Click plus sign ...

Page 209: ... check box and select a mail client in order to synchronize the account between your desktop and your handheld Mail client Action Microsoft Exchange 5 0 or later Select a MAPI profile to access the mail server The conduit displays any existing MAPI profiles in the list Enter your password for Exchange Microsoft Outlook 97 or later Select the MAPI profile to access the mail server The conduit check...

Page 210: ...t e mail program 4 Click OK TIP You can also make Outlook Express the default e mail handler within the e mail application From the Tools menu select Options Click the General tab and then click Make Default Lotus Notes Enter your Lotus Notes ID and password Click Browse if you need to locate your Notes ID If you want to synchronize to a local mail file instead of a server mail file select the Syn...

Page 211: ...ant Personality in Eudora 5 1 or later Direct POP connection to server Select this option to synchronize an account by connecting directly with a POP server You must enter the information about the server in the VersaMail application on your handheld when you create the e mail account to access the server You will enter information about the incoming POP server the outgoing SMTP server your e mail...

Page 212: ...our password and your e mail address During the HotSync operation the conduit reads the settings you made If the settings do not exist or all server information is wrong an error is reported in the HotSync log file However if the incoming server IMAP is correct the Inbox is synchronized if the option to synchronize the Inbox is selected If the outgoing server SMTP is correct the Outbox is synchron...

Page 213: ...he account name click Advanced Sync Options 5 Enter the synchronization options you want Maximum message size KB Enter the maximum message size from 1 to 2048KB If the message exceeds the maximum size the conduit truncates the message For example the maximum message size might be 50KB and the message might have the following Message header 1KB Body 20KB Attachment 140KB Attachment 220KB In this ca...

Page 214: ...u enter 3 e mail is synchronized for today yesterday and the day before Synchronize unread mail only Select whether to synchronize all e mail between your desktop and your handheld or unread e mail only By default the check box is deselected meaning that all e mail will be synchronized Download attachments Select whether to download attachments during synchronization By default the check box is se...

Page 215: ...follows a Click the name of the folder you want b Click in the Synchronize column to the right of the folder name c Click the arrow to open the drop down list and then click Yes or No to synchronize the folder or not 7 Click OK 8 Click the Save icon on the toolbar to save the settings for this account ...

Page 216: ...e account is active whether the account has been synchronized and if so the last synchronization date the mail client for this account and whether the mail client and or the incoming mail server has been changed since the last HotSync operation The Handheld Settings Overview screen lists the server protocol display name e mail address incoming and outgoing mail server addresses and whether APOP or...

Page 217: ...thentication or a secure SSL connection for incoming mail you must select the option to use APOP ESMTP or a secure connection on your handheld See Adding ESMTP to an account earlier in this chapter for information on ESMTP Mail filters Any mail filters you have configured for an e mail account on your handheld also apply during the synchronization process For example if you have set filters to acc...

Page 218: ...Sync Manager icon in the Windows system tray 2 Select Custom 3 Select VersaMail in the Conduit list 4 Click Change 5 Select one of the following 6 Optional Select Set Selection As Default to apply the options you selected to all subsequent HotSync operations Otherwise the settings apply to the next HotSync operation only 7 Click OK 8 Perform a HotSync operation Synchronize Active Accounts Select t...

Page 219: ...es account 5 combined direct POP or direct IMAP accounts If you attempt to synchronize more than the limit for a particular type of account during a HotSync operation you will receive an alert prompting you to deactivate any accounts over the allowed number Using SSL with the conduit When you set up an e mail account you can choose to use a secure connection Secure Sockets Layer or SSL for sending...

Page 220: ...Chapter 13 Using Palm VersaMail Personal E mail Software 210 ...

Page 221: ...nd to set an alarm To open World Clock 1 Tap the Home icon 2 Tap the World Clock icon TIP You can also open World Clock by tapping the Clock icon in the upper left corner of the active input area and then tapping Go to Clock or when your handheld is off you can press Select on the navigator and then tap Go to Clock ...

Page 222: ...e primary location settings are also your system date and time and that these settings are used by all the applications on your handheld The primary Location settings also appear in the Date Time Preferences screen Similarly if you change the settings in the Date Time Preferences screen those settings become your system date and time and also appear under the primary location in World Clock The pr...

Page 223: ...nth 5 Tap the current date or tap Today 6 Tap Done To set the time 1 Tap Set Date Time 2 Tap the Set Time box 3 Tap the up or down arrows to change the hour 4 Tap each number of the minute and then tap the arrows to change the minutes 5 Tap OK and then tap Done Tap to set date Tap arrows to select year Tap to select month Tap to select date Tap to set time ...

Page 224: ...ically updates the date and time in all the applications on your handheld Setting the secondary locations The secondary locations display the date and time in two locations other than the primary location You can use the secondary locations to view the time in places to which you travel or need to contact people To select the secondary locations 1 Tap the pick list next to either secondary locatio...

Page 225: ...hange automatically occurs at 1 00 AM on the selected start and end dates To add a location 1 Tap a Location pick list 2 Select Edit List 3 Tap Add 4 Select a location that is in the same time zone as the city you want to add 5 Tap OK 6 Optional Tap the Name field and then modify the location name 7 Optional Tap the Time Zone box and then select a time zone 8 Tap OK and then tap Done To set Daylig...

Page 226: ... realize you did not use the correct settings you can modify the location To modify a location 1 Tap a Location pick list 2 Select Edit List 3 Select the location you want to modify 4 Tap Edit 5 Adjust the settings See Adding a location earlier in this chapter for details 6 Tap OK and then tap Done Removing a location If you no longer need a location that appears in the Location list you can remov...

Page 227: ... OK 4 When the alarm reminder message appears do one of the following Tap OK to permanently dismiss the reminder and return to the current screen Tap Snooze to dismiss the reminder and return to the current screen An attention indicator blinks in the upper left corner of the screen to remind you of the pending alarm and the reminder message appears again in five minutes When the reminder message r...

Page 228: ...World Clock screen Show Multiple Locations Activates the secondary location displays When this is selected the secondary locations appear below the primary location Date Activates the date display When this is selected the date appears below the time for each location Alarm Preferences Sound Sets the sound of the alarm The choices are Alarm Bumble Bee Reveille Sonata Wake Up and Warbler Volume Def...

Page 229: ... you perform an initial HotSync operation See Step 5 Perform a HotSync operation in Chapter 1 for details As part of this initial HotSync operation you need to enter user information on Palm Desktop software After you enter this information and synchronize with your handheld HotSync Manager recognizes your handheld and doesn t ask for this information again NOTE Before you perform an initial HotSy...

Page 230: ...your handheld 2 If HotSync Manager is not running start it On the Windows desktop click Start and then select Programs Navigate to the Palm Desktop software program group and select HotSync Manager Alternatively you can start the Palm Desktop software which automatically opens HotSync Manager 3 Turn on your handheld 4 Tap the Star icon on the Home screen ...

Page 231: ...s 5 Wait for a message on your handheld indicating that the process is complete After the HotSync process is complete you can unplug the cable from your handheld To perform a HotSync operation using an alternate cable method 1 Connect the HotSync cable to your handheld and your computer 2 Turn on your handheld 3 Tap the Home icon to open the Home screen 4 Tap the HotSync icon in the Home screen 5 ...

Page 232: ...r in the User pop up menu on the right side of the toolbar You can change users by selecting a new name in the pop up menu Each subsequent time you perform a HotSync operation HotSync Manager reads the username from your handheld and synchronizes the data in the folder of the same name Be sure you select the correct username from the User pop up menu before entering data on Palm Desktop or perform...

Page 233: ... HotSync cable into the port on the bottom of your handheld 2 Make sure that HotSync Manager is enabled Double click HotSync Manager icon in the Palm folder Click the HotSync Controls tab and make sure the Enabled option is selected 3 Turn on your handheld 4 Tap the Star icon on the Home screen ...

Page 234: ...ine a set of options that determines how records are handled during synchronization These options are called a conduit By default a HotSync operation synchronizes all files between the handheld and Palm Desktop software IMPORTANT If you are synchronizing data between Microsoft Outlook and your handheld you can customize the conduit settings from your handheld by selecting Microsoft Outlook from th...

Page 235: ...mmand on the Palm Desktop software menu bar 2 From HotSync Manager menu select Custom 3 Select the appropriate username from the list 4 Select an application in the Conduit list 5 Click Change 6 For each application click the direction in which you want to write data or click Do Nothing to skip data transfer for an application Changing the HotSync setting from the default affects only the next Hot...

Page 236: ...ration The operation may time out before all the information has been synchronized Preparing your computer for infrared communication Before you can perform a HotSync operation using the IR port the computer with which you want to synchronize must fulfill these requirements Your computer must support the IrCOMM implementation of the Infrared Data Association IrDA standards Your computer must have ...

Page 237: ...lected on the menu b From HotSync Manager menu select Setup c Click the Local tab d In the Serial Port drop down box select the simulated port that your computer uses for infrared communication See the documentation for your operating system for instructions on finding the simulated port This information is usually located in the Control Panel e Click OK NOTE You can continue using the HotSync cab...

Page 238: ...it s easy to perform the actual operation To perform an infrared HotSync operation on your handheld 1 Tap the Home icon 2 Select the HotSync icon 3 Tap Local 4 Tap the pick list below the HotSync icon and then select IR to a PC Handheld 5 Position the IR port of your handheld within a couple of inches of the IR port of your computer 6 Tap the HotSync icon to start the infrared HotSync operation Sh...

Page 239: ...rform a HotSync operation just tap the HotSync icon on the Home Screen as you always did before Conducting network HotSync operations When you use the network HotSync technology you can take advantage of the local area network LAN and wide area network WAN connectivity available in many office environments Network HotSync technology enables you to perform a HotSync operation by using a cable that ...

Page 240: ...select Network 3 From the HotSync Manager menu select Setup 4 Click the Network tab and make sure your username has a checkmark next to it If the checkmark is not there click the check box next to your username 5 Click OK 6 Plug the HotSync cable into your handheld and then perform a HotSync operation The HotSync operation records network information about your computer on your handheld With this ...

Page 241: ...231 4 Select Modem Sync Prefs from the Options menu 5 Tap Network 6 Tap OK 7 Tap Modem 8 Tap Select Service 9 Tap Service and select a service 10 Tap Done 11 Tap the Menu icon 12 Select Conduit Setup from the Options menu Tap here Tap here ...

Page 242: ...duit help in HotSync Manager Follow these steps to access MS Outlook conduit help Click the HotSync Manager icon in the Windows system tray Select Custom Select one of the Outlook conduits from the list Select Change Tap the Help icon To change the Conduit Setup for a network HotSync operation 1 Tap the Home icon 2 Select the HotSync icon 3 Tap the Menu icon 4 Select Conduit Setup from the Options...

Page 243: ...for changes to the external file when you perform a HotSync operation NOTE The File Link feature is available only in Palm Desktop software for Windows With File Link you can import data stored in any of the following formats Comma separated csv Memos archive mpa Contacts archive aba Text txt For information on how to set up a file link see the Palm Desktop online Help Creating a user profile A us...

Page 244: ...dividual data file NOTE The handhelds that are synchronized with a user profile must be either new ones that have never been synchronized or handhelds that have had their usernames and data removed by a hard reset To create a user profile on a Windows computer 1 Open Palm Desktop software 2 From the Tools menu select Users 3 Click Profiles 4 Click New 5 Enter a unique name for the profile and then...

Page 245: ...g HotSync application settings earlier in this chapter Performing the first HotSync operation with a user profile After you create a user profile you are ready to transfer the information to the new handheld during the first HotSync operation To use a profile for a first time HotSync operation on a Windows computer 1 Plug the HotSync cable into the port on the bottom of your new handheld 2 Tap the...

Page 246: ... 1 Plug the HotSync cable into the port on the top of the new handheld 2 Tap the HotSync icon on the Home screen TIP You can also tap the Star icon to perform a HotSync operation if you have not changed the application associated with this icon By default tapping the Star icon performs a HotSync operation 3 Select the profile you want to load onto the handheld and then click OK to transfer all the...

Page 247: ...held Formats Set the country default and the formats for times dates calendar and numbers Graffiti 2 Select alternate strokes for selected Graffiti 2 characters Keylock Prevent your handheld from turning on accidentally Power Set these features auto shutoff interval On while charging and Beam receive Security Set a password privacy options and locking options Sounds Alerts Select system game and a...

Page 248: ...r that location You can also indicate whether this location observes daylight saving time and the dates daylight saving time starts and ends All of these settings also appear as the primary location in the World Clock application and are used by all the applications on your handheld Buttons Assign an application to the Favorites icon Reassign various applications to the following the application b...

Page 249: ...o create a new location 3 Tap Done When you travel changing the primary Location setting automatically resets the date and time on your handheld based on the local time zone but it does not change the time of appointments set in Calendar To set the date 1 From the General Preferences list select Date Time 2 Tap the Set Date box 3 Tap the arrows to select the current year 4 Tap the current month an...

Page 250: ... or if your digitizer drifts You may need to repeat this process a few times until the calibration registers To calibrate your handheld screen 1 From the General Preferences list select Digitizer 2 Tap the targets as indicated on the screen as precisely as possible TIP You can also press Left Right Up and Down on the navigator to highlight a Preferences screen name and then press Select on the nav...

Page 251: ... handheld To select the time date week start and numbers format 1 From the General Preferences list select Formats 2 Tap the Time pick list and then select a format 3 Tap the Date pick list and then select a format 4 Tap the Week starts pick list and then select whether you want the first day of the week to be Sunday or Monday This setting controls the Day Week and Month views in Calendar and all ...

Page 252: ... want to change 3 Tap the check box to activate the alternate stroke and then tap Done 4 Repeat steps 2 through 4 for other letters and then tap Done Keylock Preferences Use the Keylock Preferences screen to prevent your handheld from turning on if a button or key is accidentally pressed This feature helps conserve the charge on your handheld To change Keylock settings 1 From the General Preferenc...

Page 253: ...eferences list select Power 2 Tap the Auto off after pick list 3 Select the setting you want to use for the automatic shutoff feature 30 seconds 1 minute 2 minutes or 3 minutes 4 Tap Done On while charging You can choose to leave your handheld on when it is charging so that you can continue to view your data By default your handheld remains on when it is charging that is connected to a power sourc...

Page 254: ...rity Preferences help you prevent unauthorized users from viewing entries that you want to protect Use Security Preferences to do the following Lock and turn off your handheld so that it does not operate until you enter the correct password Mask all records that you mark as private so that the information appears as gray bars Hide all records that you mark as private so that they do not appear on ...

Page 255: ...en tap OK 7 Tap Done Changing or deleting a password Once you define a password for your handheld you can change or delete it at any time You must enter the current password before you can change or delete it To change or delete your password 1 From the General Preferences list select Security 2 Tap the Password box 3 Enter the current password 4 Tap OK Tap here Tap here ...

Page 256: ...st or stolen this helps protect your data from unauthorized use You can set your handheld to lock automatically or you can lock it manually You can set your handheld to lock automatically when any one of the following occurs When you turn off the power At a time you specify After a period of inactivity you specify To set your handheld to lock when you turn it off 1 From the General Preferences lis...

Page 257: ... preset delay 4 Enter the inactive period and then select Minute s or Hour s from the pick list 5 Tap OK and then tap Done CAUTION If you lock your handheld you must enter the exact password to reactivate your handheld If you forget the password your handheld will present the hint you entered to help you remember the password If you still cannot remember the password you must perform a hard reset ...

Page 258: ...tered one to help you remember the password If you are still unable to remember the password you can delete it from your handheld Deleting a forgotten password also deletes all entries and files marked Private IMPORTANT If you synchronize with your computer before deleting a forgotten password your handheld restores your private entries the next time you perform a HotSync operation but it does not...

Page 259: ...n the same position in which they would appear if they were not masked and are marked with a lock icon Hidden records disappear completely from the screen If you define a password for your handheld you must enter it to display private records To hide all private records 1 From the General Preferences list select Security 2 Tap the Current Privacy pick list and then select Hide Private Records 3 Ta...

Page 260: ...Security 2 Tap the Current Privacy pick list and then select Show Private Records If you do not have a password hidden and masked records become visible If you have a password the Show Private Records dialog box appears Enter your password and then tap OK 3 Tap Done To unmask individual records 1 Select a masked record If you do not have a password a masked record becomes visible If you have a pas...

Page 261: ...adset To select a profile 1 From the General Preferences list select Sounds Alerts 2 Tap the Custom or Silent profile box TIP You can also press Right or Left on the navigator to select a profile box 3 Tap Done System Sound Game Sound and Alarm Sound settings Your handheld uses a variety of sounds The System Sound Game Sound and Alarm Sound settings enable you to turn the sounds on or off and to a...

Page 262: ...ound pick list and then select the sound level 6 Tap Done Writing Area Preferences Writing Area Preferences offer you the option of using the full screen to enter Graffiti 2 characters When Writing Area Preferences are turned on and active you can write letters anywhere on the left side of the screen write numbers anywhere on the right side of the screen and write capital letters across the imagin...

Page 263: ...ns 1 Tap the Home icon 2 Tap the Prefs icon Connection Preferences The Connection Preferences screen enables you to define the settings used to connect your handheld to other devices The screen displays a list of available configurations that are ready to be further defined the list varies depending on the kind of software you ve added to your handheld For existing connection types you can either ...

Page 264: ... Tap Details 5 Tap the Speed pick list and then select the appropriate speed 6 Tap OK 7 Tap OK again to save the configuration Network Preferences You can use the software that is included in the handheld operating system to connect with Internet service providers ISPs or dial in remote access servers using a mobile phone or optional modem accessory Your mobile phone must be equipped with an IR po...

Page 265: ...ns that support viewing the transmitted data Visit www palm com for information on third party applications that take advantage of TCP IP Creating and selecting network service profiles Use network service profiles to store the configuration settings for your ISP or for a dial in server You can create save and reuse network service profiles You can create additional network service profiles from s...

Page 266: ...enter a username 1 From the Communications Preferences list select Network 2 Tap the User Name field 3 Enter your username NOTE Most dial in servers do not accept spaces in the username 4 Tap Done Entering a password The Password box identifies the password you use to log in to your server or ISP Your entry in this field determines whether your handheld prompts you to enter a password each time yo...

Page 267: ...nection Use the Connection setting to select the method you want to use to connect to your ISP or to a dial in server See Connection Preferences earlier in this chapter for information about creating and configuring connection settings To select a connection 1 From the Communications Preferences list select Network 2 Tap the Connection pick list 3 Select the connection you want to use 4 Tap Done E...

Page 268: ... for your ISP or dial in server 4 If you need to enter a prefix or to disable Call Waiting skip to those procedures Otherwise tap OK 5 Tap Done Entering a prefix A prefix is a number that you dial before the telephone number to access an outside line For example many offices require that you first dial 9 to dial a number outside the building To enter a prefix 1 From the Communications Preferences ...

Page 269: ...ny assigns a code to disable Call Waiting Contact your local telephone company for the code that is appropriate for you 5 Tap OK and then tap Done Using a calling card The Use calling card field enables you to use your calling card when dialing your ISP or intranet server Keep in mind that there is usually a delay before you enter your calling card number When you define your calling card number y...

Page 270: ... Preferences establishing a connection to your ISP or your company s network dial in server is easy NOTE If you are connecting to an ISP you need a third party application such as a web browser or news reader to take advantage of this connection For information about third party applications that support TCP IP check www palm com To establish a connection 1 From the Communications Preferences list...

Page 271: ...e Details dialog box to add more information to a selected network service profile To add connection details 1 From the Communications Preferences list select Network 2 Tap Details Idle timeout The Idle timeout setting defines how long your handheld waits before dropping the connection with your ISP or dial in server when you switch out of a TCP IP application To set the Idle timeout 1 Tap the Idl...

Page 272: ... To enter a primary and secondary DNS 1 Tap the Query DNS check box to deselect it 2 Tap the space to the left of the first period in the Primary DNS field and then enter the first section of the IP address Each section must be a number from 0 to 255 3 Repeat step 2 for the second third and last sections of the Primary DNS field 4 Repeat steps 2 and 3 for the Secondary DNS field 5 Tap OK IP addres...

Page 273: ... modem or network connection The script is generally prepared by the system administrator and distributed to users who need it It automates the events that must take place to establish a connection between your handheld and the corporate servers You can create login scripts in two ways In a text editor on your desktop computer in which you create a file with the extension PNC which you then instal...

Page 274: ...nter on your handheld This command takes two arguments separated by a vertical bar on the input line Send Transmits specific characters to the TCP IP server to which you are connecting Send CR Transmits a carriage return or line feed LF character to the TCP IP server to which you are connecting Send User ID Transmits the user ID information entered in the User ID field of the Network Preferences s...

Page 275: ...m Platform For additional information on creating plug in applications send e mail to Palm developer Support at devsupp palmsource com Deleting a network service profile There is only one way to delete a network service profile Use the Delete command from the Service menu To delete a network service profile 1 From the Communications Preferences list select Network 2 Tap the Service pick list 3 Sel...

Page 276: ... to your ISP or dial in server take a look at the Network Log The Network Log lists all of the communication that occurs between your modem and your dial in server during the login procedure The information in the Network Log can help your ISP or your system administrator pinpoint where the login procedure communication fails and why To view the Network Log 1 From the Network Preferences screen ta...

Page 277: ...ns on the front and side of the handheld The Star icon is assigned to perform a HotSync operation by default But if you use Memos or some other application more frequently you can assign Memos or the other application to the icon so that you don t have to scroll through the Home screen whenever you want to use that application To change the Buttons Preferences 1 From the Personal Preferences list ...

Page 278: ...en select one of the following settings for the full screen pen stroke 4 Tap OK and then tap Done Brightness Opens the brightness control dialog box Keyboard Opens the onscreen keyboard for entering text characters Graffiti 2 Help Opens a series of screens that show the Graffiti 2 character set Turn Off Lock Turns off and locks the handheld You must assign a password to lock the handheld When it i...

Page 279: ...ou to update the name company name phone number or any other information that you want to associate with your handheld This information could help someone contact you if you ever lose your handheld and there is sufficient battery power to turn it on By default the Owner Preferences screen contains the information that you supplied when you installed the Palm Desktop software and set up your handhe...

Page 280: ...erences screen 1 From the Personal Preferences list select Owner 2 Tap Unlock 3 Enter the password that you defined in the Security Preferences 4 Tap OK and then tap Done ShortCuts Preferences The ShortCuts Preferences screen enables you to define abbreviations for entering text with Graffiti 2 strokes This section describes how to create edit and delete a ShortCut Creating a ShortCut You can crea...

Page 281: ...ce automatically follows the ShortCut text 5 Tap OK To use a ShortCut draw the ShortCut stroke followed by the ShortCut characters When you draw the ShortCut stroke the ShortCut symbol appears at the insertion point to show that you are in ShortCut mode 6 Tap Done Editing a ShortCut After you create a ShortCut you can modify it at any time To edit a ShortCut 1 From the Personal Preferences list se...

Page 282: ... Deleting a ShortCut If you no longer need a ShortCut you can delete it from the list of ShortCuts To delete a ShortCut 1 From the Personal Preferences list select Shortcuts 2 Select the ShortCut you want to delete 3 Tap Delete tap Yes and then tap Done ...

Page 283: ... and should not be exposed to rain or moisture Under extreme conditions water may enter the circuitry through the front panel buttons In general treat your handheld as you would a pocket calculator or other small electronic instrument Take care not to drop your handheld or subject it to any strong impact Do not carry your handheld in your back pocket if you sit on it you may damage it Protect your...

Page 284: ...held to a power source using the power adapter cable to recharge the unit This helps prevent accidental data loss If the battery drains to the point that your handheld does not operate it stores your data safely for about a week In this case there is enough residual energy in the battery to store the data but not enough to turn on your handheld If your handheld does not turn on when you press the ...

Page 285: ... a sharp tip to gently press the reset button inside the hole on the back panel of your handheld Performing a hard reset With a hard reset all records and entries stored on your handheld are erased Never perform a hard reset unless a soft reset does not solve your problem NOTE You can restore any data previously synchronized with your computer during the next HotSync operation To perform a hard re...

Page 286: ...ustom 3 Select the appropriate username from the list 4 Select an application in the Conduit list 5 Click Change 6 Select Desktop overwrites handheld for each conduit Changing the HotSync setting from the default affects only the next HotSync operation Thereafter the HotSync Actions revert to their default settings To use a new setting on an ongoing basis select the Set as default box Thereafter w...

Page 287: ...tions revert to their default settings To use a new setting on an ongoing basis click Make Default Thereafter whatever you selected as the default setting is used for HotSync operations 7 Click OK 8 Repeat steps 4 through 7 to change conduit settings for other applications 9 Close the Conduit Settings window 10 Perform a HotSync operation ...

Page 288: ...Appendix A Maintaining Your Handheld 278 ...

Page 289: ...entation folder on your installation CD The Palm Knowledge Library accessible at www palm com in the Support section The most recent Palm Tungsten E handheld HelpNotes on your regional web site If you are still having problems contact Technical Support or go to www palm com support tungstenE NOTE Palm works with developers of third party add on applications to ensure the compatibility of these app...

Page 290: ...alm Desktop software on my Windows computer Try the following 1 Disable any virus scanning software on your computer 2 Close any open applications 3 Make sure your computer has at least 50 megabytes MB of disk space available 4 Delete all temporary files 5 Run ScanDisk or another disk verification tool on your computer 6 Install the latest Windows software updates to your computer 7 If you are upg...

Page 291: ...the Palm Quick Install window If files do not install after you perform a HotSync operation the file type was not recognized Try launching the associated application from your handheld and then performing another HotSync operation If the files still remain in the list they are not associated with an application on your handheld and cannot be installed If you dropped a zip file on the Quick Install...

Page 292: ... unless a soft reset does not solve your problem You can restore any data previously synchronized with your computer during the next HotSync operation I get a warning message telling me my handheld memory is full Try each of these in turn Purge records from Calendar and Tasks This deletes tasks and past Calendar events from the memory of your handheld See Purging records in Chapter 4 You must perf...

Page 293: ...g happens Not all applications or screens have menus Try changing to a different application I can t get my handheld to recognize my handwriting Try each of these in turn For your handheld to recognize handwriting input with the stylus you need to use Graffiti 2 writing See Using Graffiti 2 writing in Chapter 3 Make the Graffiti 2 character strokes in the input area not on the display part of the ...

Page 294: ...d make sure that Sort by is set to Manual If you choose to view your memos or notes alphabetically on Palm Desktop software and then perform a HotSync operation the memos on your handheld still appear in the order defined in the Preferences setting In other words the sort settings you use with Palm Desktop software are not transferred to your handheld I created an event in Calendar but it doesn t ...

Page 295: ...se steps 1 Check the Windows system tray to make sure HotSync Manager is running If it is not click Start on the Windows taskbar and then select Programs Navigate to the Palm Desktop software program group and then select HotSync Manager 2 Make sure you selected Local USB from the HotSync Manager menu On a Mac computer try these steps 1 Make sure HotSync Manager is enabled If it is not double clic...

Page 296: ...software I tried to do a local HotSync operation but it did not complete successfully Try each of these in turn Check the connection between the HotSync cable and the USB port on your computer Make sure the username you selected in Palm Desktop software matches the username assigned to your handheld Make sure the date on your computer matches the date on your handheld Read the HotSync Log for the ...

Page 297: ... is set to Infrared Port See Conducting infrared HotSync operations in Chapter 15 for more information On your handheld be sure the HotSync application is set to Local with the option IR to PC Handheld Be sure that the IR port of your handheld is aligned directly opposite to and within a few inches of the infrared device of your computer Infrared HotSync operations do not work after you receive a ...

Page 298: ...The error usually reads an application has failed to respond to a hotsync notification 8009 The known fix for the 8009 error is to rebuild the HotSync Manager registry entries Go to www palm com support and search the Palm Knowledge Library for error 8009 My handheld displays the message Waiting for sender when it s near my computer s IR port Try each of these in turn Your computer s IR port may b...

Page 299: ...application you must have at least 60KB free Perform a soft reset See Performing a soft reset in Appendix A for more information Problem Solution E mail settings are inaccurate For the latest information on settings consult your ISP or e mail service provider The settings for the default list of preconfigured accounts in the Palm VersaMail e mail application are accurate at release but mail server...

Page 300: ... OK again Select another available server for sending mail Many ISPs such as cable companies require that you have an Internet connection to their network to send e mail through their servers In this case you can almost always receive e mail from these accounts but if you want to send e mail you must send it through another server Press Function Menu on the keyboard and then select Account Setup f...

Page 301: ...an use Security to delete the password but your handheld deletes all entries marked as private However if you perform a HotSync operation before you delete the password the HotSync process backs up all entries whether or not they are marked private Then you can follow these steps to restore your private entries a Use the Palm Desktop software and the cable or infrared communication to synchronize ...

Page 302: ...the application try to replicate the operation that created the error If removing the application solves your problem contact the application developer for a solution Finding a third party application that is causing a problem If you have multiple third party applications installed on your handheld or have upgraded from an earlier model of a Palm handheld perform the following procedure to remove ...

Page 303: ...eld and try to replicate problem operations 6 Perform one of the following If installing the application recreates your problem remove the application and contact the application developer for a solution Continue to re install your applications one application at a time to make sure another application is not creating a problem If installing the application does not cause a problem got to step 1 a...

Page 304: ...o ensure the compatibility of these applications with your new Palm handheld Some third party applications however may not have been upgraded to be compatible with your new Palm handheld If you suspect that a third party application is adversely affecting the operation of your handheld contact the developer of the application 4 Tap Version to see version numbers and tap Size to see the amount of f...

Page 305: ...rence to radio or television reception which can be determined by turning the equipment off and on the user is encouraged to try to correct the interference by one or more of the following measures Reorient or relocate the receiving antenna Increase the separation between the equipment and receiver Connect the equipment into an outlet on a circuit different from that to which the receiver is conne...

Page 306: ...ndtering Udskiftning må kun ske med batteri af samme fabrikat og type Levér det brugte batteri tilbage tilleverandøren Varoitus Paristo voi räjähtää jos se on virheellisesti asennettu Vaihda paristo ainoastaan valmistajan suosittelemaan tyyppiin Hävitä käytetty paristo valmistajan ohjeiden mukaisesti Advarsel Eksplosjonsfare ved feilaktig skifte av batteri Benytt samme batteritype eller en tilsvar...

Page 307: ...ng 25 26 Calendar 61 Card Info 77 categories 34 Contacts 81 copying to or from an expansion card 34 deleting 58 Expense 91 fonts 49 installing 51 57 Memos 99 Note Pad 103 opening 32 opening from expansion card 32 Palm Photos 109 plug in 265 removing 58 size in kilobytes 294 sorting 36 Tasks 119 VersaMail 127 version of 294 World Clock 211 See also Add on applications Archive files importing data f...

Page 308: ...nts 73 continuous events 67 creating records 38 Day View display options 63 deleting records 40 display Week View 70 displaying Agenda View 62 displaying Day View 63 displaying e mail messages 62 displaying tasks 62 end time for Day view 75 events spanning midnight 65 fonts 49 menus 75 Month view 71 notes for records 48 49 opening 61 private records 251 purging records 41 repeating events 67 sched...

Page 309: ... mail 195 196 archive files aba 28 business card for beaming 25 categorizing records 42 conduit for synchronizing 225 creating records 38 deleting records 40 displaying category 90 displaying data in the Contacts list 86 finding records 45 fonts 49 notes for records 48 49 opening 81 private records 251 sorting records 47 using to address e mail 169 Contrast control See Brightness control Copying t...

Page 310: ...ng messages on handheld 189 192 display options 158 displaying in Calendar 62 downloading large attachments 183 185 drafts 174 emptying trash 192 193 font selection 158 forwarding 175 177 forwarding attachments 189 getting entire message 146 getting on desktop 197 203 getting subject only 146 HTML 156 icons 155 174 leaving mail on server 136 marking read and unread 193 194 maximum message size 137...

Page 311: ...F FAQs See Frequently asked questions FCC Statement 295 Files error log 197 Files linking to external 29 233 Finding information in applications 44 phone numbers 46 scrolling in Contacts list 45 using the Find application 44 Folders creating new 165 viewing other 158 Fonts 49 97 Formats preferences 240 Forwarding e mail 175 Frequently asked questions application problems 284 beaming problems 289 H...

Page 312: ...229 linking to external files 29 233 local operation 220 286 local operation on Mac 223 network operation 229 233 operations using cradle 229 operations using IR port 226 228 problems with 285 288 problems with IR 287 restoring data 276 277 starting Manager 196 224 232 synchronize active accounts 197 synchronizing e mail 208 HotSync cable connecting 3 HotSync operation performing initial 4 USB por...

Page 313: ...ging informational errors 197 Login script 131 Login scripts 263 265 Lost handheld contact for 83 records 284 Lotus Notes selecting as mail client 200 Lotus Organizer importing data from 28 M Mail service default service for e mail account 142 143 Mailbox adding new 132 Maintenance information 273 Marking messages unread read 193 Maximum message size incoming e mail 137 Memo Pad See Memos Memory a...

Page 314: ... opening 103 Notes attaching to records 48 49 Notifications See Auto get mail Numbers decimal point and thousands separator 241 onscreen keyboard 13 17 O Old messages deleting 189 Onscreen keyboard 17 40 pen stroke to open 268 Opening applications 31 Calendar 61 Contacts 81 Expense 91 Memos 99 Note Pad 103 Palm Photos 109 Tasks 119 World Clock 211 212 Organizer Lotus PIM 28 Outbox 165 storing e ma...

Page 315: ...240 deleting e mail 194 Digitizer 240 Formats 240 General 237 238 252 getting mail 194 Graffiti 2 19 Network 255 266 opening 238 Owner 269 Personal 238 Power 243 244 Security 244 ShortCuts 270 Sounds Alerts 251 252 Trash 192 Writing Area 252 253 Primary DNS 262 Printing expense reports 97 Prioritizing Tasks records 120 126 Private records displaying and creating 249 251 284 lost with forgotten pas...

Page 316: ... slot Searching See Finding Secondary DNS 262 Security preferences 244 248 changing password 245 deleting password 245 displaying owner s name 269 forgotten password 248 private records 249 251 setting a password hint 245 unmasking individual records 250 Selecting date for event 65 phone numbers in Contacts 84 text 40 Send retry 172 modifying messages during 173 notifications 173 VPN connections 1...

Page 317: ...gorizing records 41 126 checking off items 121 completed items 126 completion date 126 conduit for synchronizing 225 creating records 38 deleting records 40 67 display options 125 displaying in Calendar 62 due date 122 126 filtering options 124 fonts 49 notes for records 48 49 opening 119 prioritizing records 120 126 private records 251 purging records 41 126 sort order setting 126 sorting records...

Page 318: ...cable USB port 10 User name for ISP 256 identifying handheld 269 User profiles 234 HotSync operation with 235 236 Username 134 editing in account 140 synchronizing existing 128 V vCal 28 29 vCard 28 29 Vendor for Expense item 93 VersaMail application 127 icons 155 174 setting preferences for 194 Vibrate alarm 152 Video files 51 55 VPN accessing e mail using 131 W Web address See URLs Week Calendar...

Reviews:

Related manuals for P80880US - Tungsten E - OS 5.2.1 126 MHz