


Chapter 3
Navigating and Entering Data
24
Using ShortCuts
ShortCuts make entering commonly used words or phrases quick and easy.
ShortCuts are similar to the Glossary or Autotext features of some word
processors.
The handheld comes with several predefined ShortCuts, and you can also create
your own. Each ShortCut can represent up to 45 characters. For example, you
might create a ShortCut for your name or for the header of a memo. See
to learn about creating your own ShortCuts.
To use a ShortCut:
1.
Press Function
+ ShortCut
.
When you press the ShortCut key, the ShortCut symbol appears at the insertion
point to show that you are in ShortCut mode.
2.
Type the ShortCut characters.
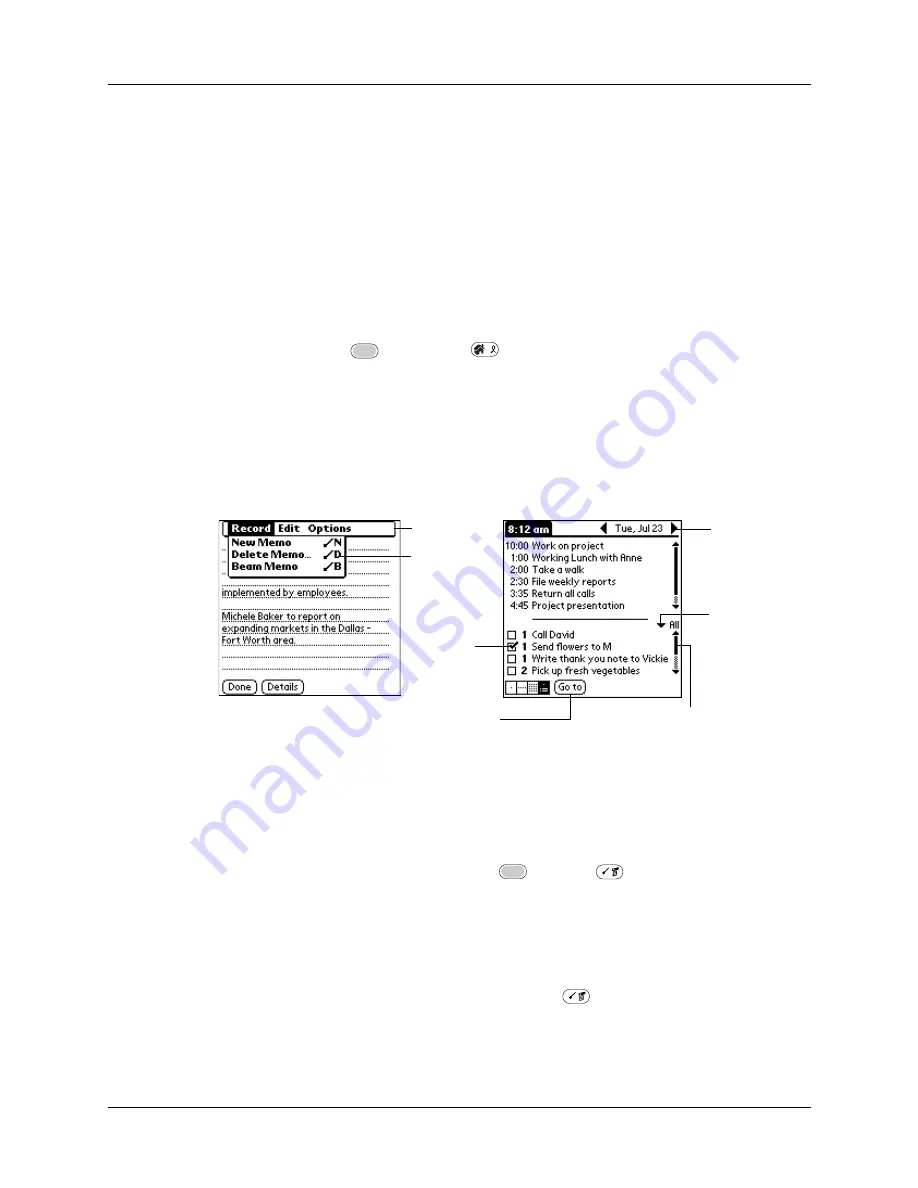
Using elements of the handheld interface
Menu bar and menu
commands
A set of commands that are specific to the application. Not
all applications have a menu bar.
To access the menu bar, do one of the following:
■
Tap the Menu bar.
■
Press Function
+ Menu
.
To access the menu commands, do one of the following:
■
Tap the menu command on the menu.
■
Use Right, Left, Up, or Down on the navigator.
■
Press Command Stroke
+ the letter. For more
information see
later in this
chapter.
Scroll
bar
Previous/next
arrows
Check
box
Command
button
Pick list
Menu bar
Menu
command
Summary of Contents for P80505RGRS - Tungsten W Smartphone
Page 1: ...Handbook for Palm Tungsten W Handhelds ...
Page 13: ...Contents xiii Product Regulatory and Safety Information 395 Index 399 ...
Page 14: ...Contents xiv ...
Page 16: ...About This Book 2 ...
Page 22: ...Chapter 1 Welcome 8 ...
Page 30: ...Chapter 2 Exploring Your Handheld 16 ...
Page 88: ...Chapter 6 Using Calculator 74 ...
Page 92: ...Chapter 7 Using Card Info 78 ...
Page 118: ...Chapter 10 Using Memo Pad 104 ...
Page 144: ...Chapter 11 Using Palm Mobile 130 ...
Page 154: ...Chapter 13 Using SIM Manager 140 ...
Page 266: ...Chapter 17 Using Palm VersaMail Personal E mail Software 252 ...
Page 322: ...Chapter 20 Performing HotSync Operations 308 ...
Page 408: ...Appendix B Frequently Asked Questions 394 ...
Page 412: ...Product Regulatory and Safety Information 398 ...
Page 428: ...Index 414 ...