©2016 PACE Inc., Vass, North Carolina,
All Rights Reserved
Page
12
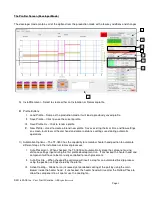
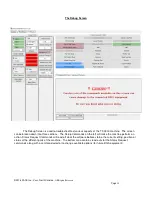
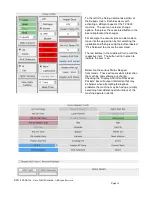
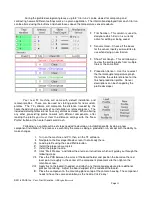
The Setup Screen
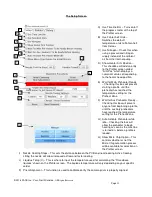
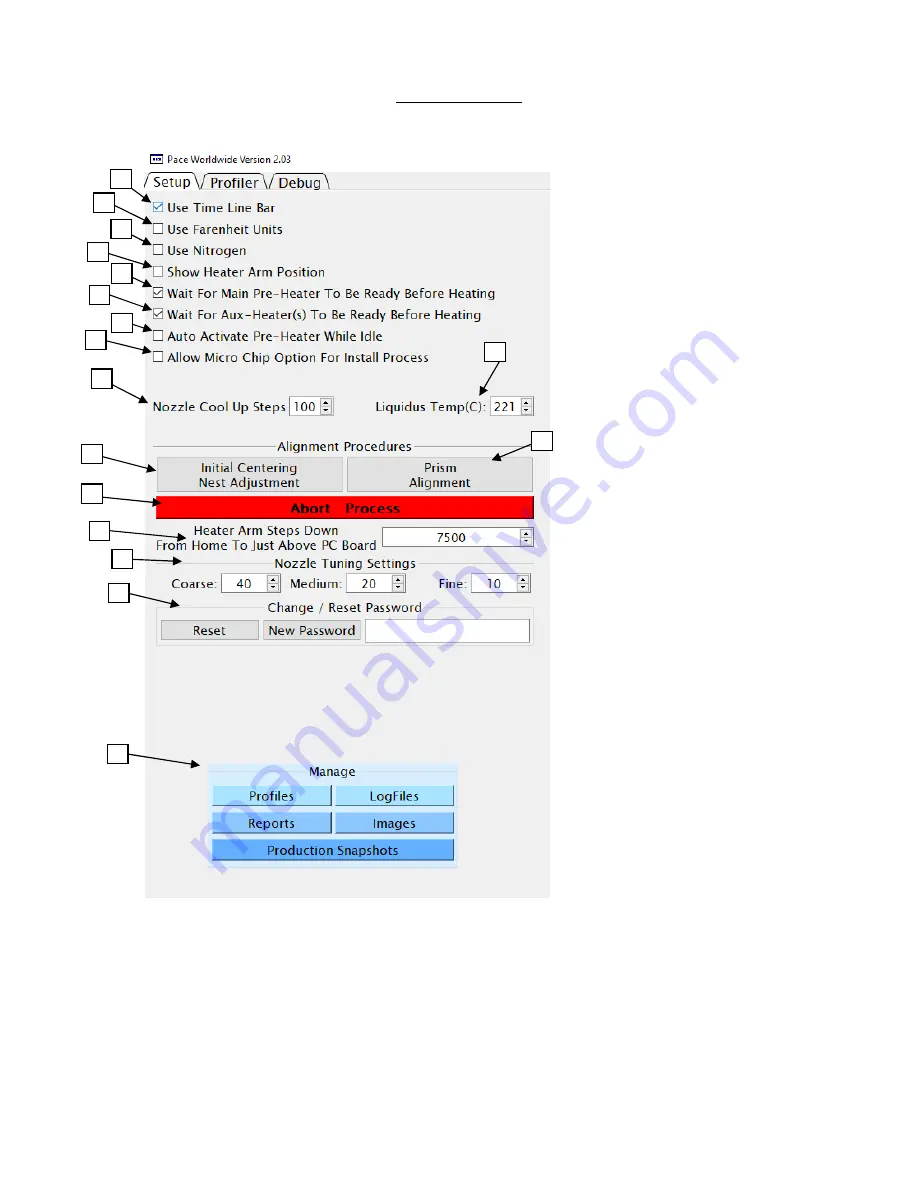
A) Use Timeline Bar – Turns on/off
the progress meter at the top of
the Profiler screen.
B) Use Fahrenheit Units –
Switches the default
temperature units to Fahrenheit
from Celsius.
C) Use Nitrogen – Check this when
using a pressurized nitrogen
supply instead of the ambient
air from the internal pump.
D) Show Heater Arm Position –
This checkbox will add an entry
to the Profiler screen called
“Arm Pos” which displays a
numerical value corresponding
to the heater head position.
E) Wait for Main Preheater Ready
– Checking this box will prevent
starting a profile until the
preheater has reached the
temperature setting for the
Preheat Zone.
F) Wait for Aux Preheater Ready –
Checking this box will prevent
anyone from beginning a profile
until the auxiliary preheaters
have reached the temperature
setting for the Preheat Zone.
G) Auto Activate Preheater while
idle – Checking this box will
allow the preheater to begin
heating as soon as the machine
is turned on, before a profile is
loaded.
H) Allow Micro Chip Option – This
controls whether or not the
Micro Chip automation process
will be available for selection on
the Profiler screen.
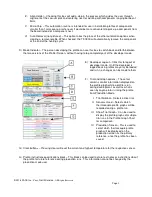
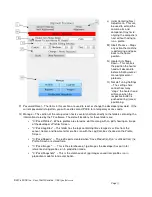
I) Nozzle Cool Up Steps – This sets the distance between the PCB and nozzle during Active Cooling.
Lifting the nozzle will allow increased airflow and faster cooling.
J) Liquidus Temp (C) – This is where to input the temperature used for calculating the “Time above
liquidus” shown on the Profiler screen. The liquidus temperature will vary depending on your specific
solder.
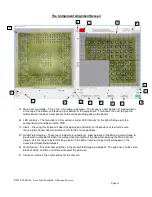
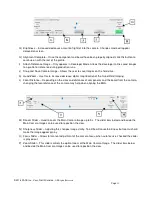
K) Prism Alignment – This function is used to calibrate/verify the camera prism is properly aligned.
A
B
C
I
F
G
H
J
D
L
K
M
N
O
P
E
Q


