Manual de Instrucciones
LEA TODAS LAS INSTRUCCIONES ANTES DE USAR ESTE APARATO
Instruction Manual
PLEASE READ ALL INSTRUCTIONS BEFORE USING THIS APPLIANCE
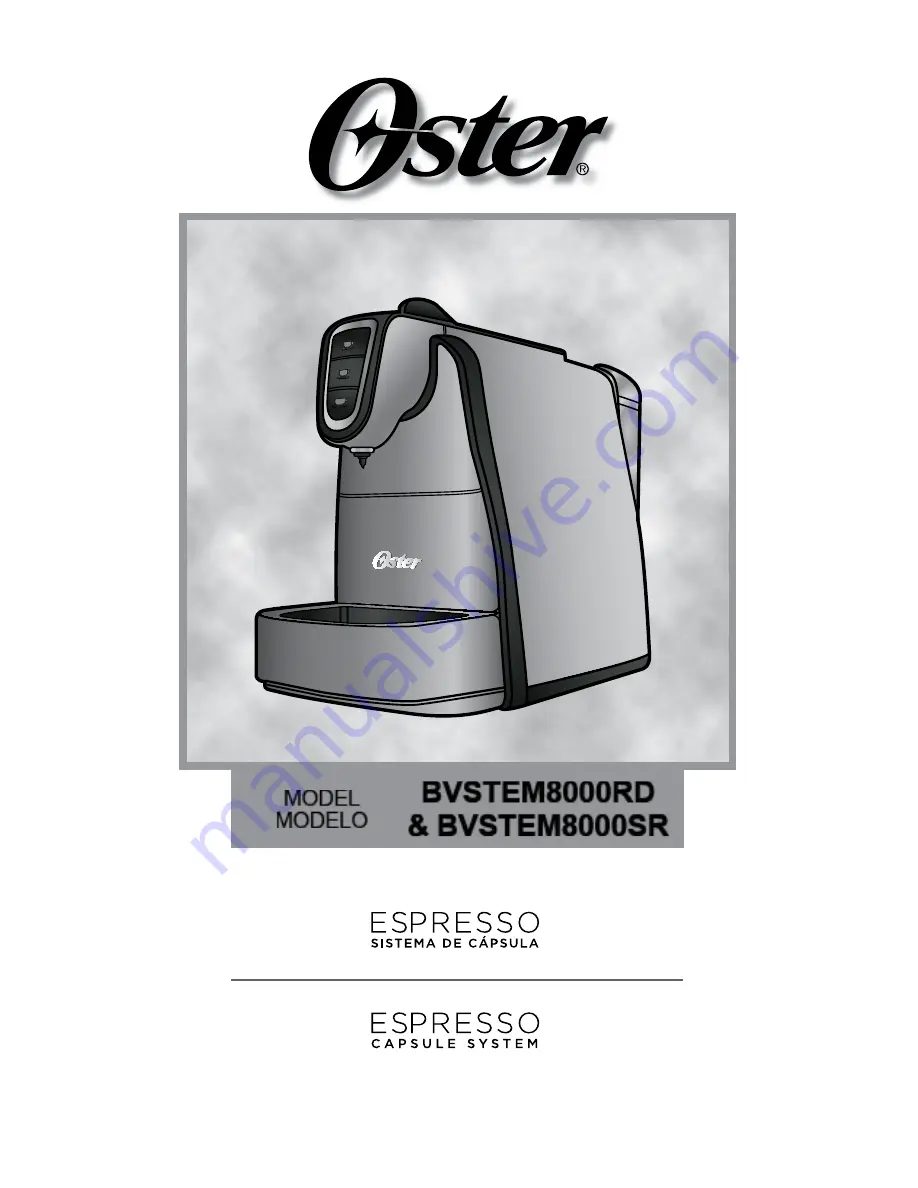
MODEL
MODELO
BVSTEM8000RD
& BVSTEM8000SR
Page 1: ...Manual de Instrucciones LEA TODAS LAS INSTRUCCIONES ANTES DE USAR ESTE APARATO Instruction Manual PLEASE READ ALL INSTRUCTIONS BEFORE USING THIS APPLIANCE MODEL MODELO BVSTEM8000RD BVSTEM8000SR...
Page 2: ...lectrodom stico cuelgue del borde de la mesa o la mesada ni que entre en contacto con superficies calientes 10 Antes de usar el electrodom stico compruebe que no haya objetos extra os dentro del dep s...
Page 3: ...e que una persona o una mascota se enrede o tropiece con un cable largo 2 Se puede comprar y utilizar una extensi n si se emplean las debidas precauciones 3 Si se usa una extensi n la potencia nominal...
Page 4: ...a 5 Compartimiento de la c psula 6 Bot n para caf espresso sencillo con luz indicadora 7 Bot n para caf espresso doble con luz indicadora 8 Bot n para caf espresso largo con luz indicadora 9 Luz indic...
Page 5: ...todas las piezas nuevamente en la unidad 5 Compruebe que el dep sito de agua est fijado firmemente en la unidad para garantizar el funcionamiento adecuado NOTA Si el dep sito de agua no est debidament...
Page 6: ...electrodom stico 3 Los botones de las tres funciones comenzar n a parpadear simult neamente indicando que la unidad se est calentando Una vez que la luz de los botones est fija la unidad est lista pa...
Page 7: ...spensadora 8 Seleccione el caf espresso que desee preparar presionando una vez el bot n correspondiente consulte la figura 4 Espresso sencillo Espresso doble Espresso largo Figura 4 9 El bot n selecci...
Page 8: ...idad tenga agua en el dep sito 2 Coloque el interruptor en la posici n I para encender la cafetera 3 Los botones de las tres funciones comenzar n a parpadear simult neamente indicando que la unidad se...
Page 9: ...ARRO DE LA UNIDAD CICLO DE ELIMINACI N DEL SARRO PRIMERA ETAPA Este electrodom stico posee un programa avanzado que monitoriza cu nta agua se utiliza para las bebidas 1 Apague la unidad 2 Vac e y enju...
Page 10: ...utilizadas y seque la bandeja 3 La luz azul del bot n Espresso doble del medio y las luces indicadoras roja y anaranjada de funcionamiento defectuoso parpadear n alternadamente 4 Coloque un envase o t...
Page 11: ...jo 4 Retire y vac e el dep sito del agua 5 Mantenga presionados los tres botones para colar y presione el bot n I para activar la unidad 6 La luz indicadora parpadear y la unidad ejecutar un ciclo de...
Page 12: ...l pitido pero puede colar caf Las luces roja y anaranjada indicadoras de falla parpadean alternadamente 0 25 segundos Se escuchar n tres pitidos cada 0 5 segundos Segunda indicaci n para eliminar el s...
Page 13: ...the appliance cord hang over edge of table or counter or touch hot surfaces 10 Check the appliance hopper for presence of foreign objects before using 11 DO NOT place this appliance on or near a hot g...
Page 14: ...in or tripping over a longer cord 2 An extension cord may be purchased and used if care is exercised in its use 3 If an extension cord is used the marked electrical rating of the extension cord must b...
Page 15: ...ment 6 Single shot espresso button with indicator light 7 Double shot espresso button with indicator light 8 Lungo espresso button with indicator light 9 Malfunction indicator light 10 Used capsule dr...
Page 16: ...water tank is attached in tightly in place back on the unit to ensure proper operation NOTE If water tank is not properly attached to the unit water will not flow into it and unit will not brew PRIMI...
Page 17: ...ls 2 Press the power button to turn the appliance on I 3 The three function buttons will start blinking simultaneously indicating that the unit is warming up Once the buttons light stay solid on the u...
Page 18: ...ou would like to prepare by pressing once the appropriate button see figure 4 Single Shot Espresso Double Shot Espresso Lungo Shot Espresso Figure 4 9 The selected coffee button will start blinking wh...
Page 19: ...in the tank 2 Turn power switch on I 3 The three function buttons will start blinking simultaneously indicating that the unit is warming up Once the buttons light stay solid on the unit is ready to b...
Page 20: ...is used to beverages 1 Turn the unit off 2 Empty and rinse out the used capsule drawer and drip tray 3 Remove and empty the water tank 4 Prepare a descaling solution made of four parts of water and 1...
Page 21: ...r 2 Empty and rinse out the used capsule drawer and drip tray 3 Press the Power button to turn unit off O 4 Make sure there are no capsules in the capsule compartment 5 Make sure the lever is lowered...
Page 22: ...ion indicator light will keep blinking and beep will keep sounding but it can still brew the coffee Red Orange malfunction indicator lights will blink alternately 0 25 second There will be a triple be...
Page 23: ...y letter between A and Z Impreso en China Printed in China Impresso na China P N 164337 CBA 081613 2013 Sunbeam Products Inc Todos los derechos reservados Distribuido por Sunbeam Latin America LLC 520...