background image

1

EN

TABLE OF CONTENTS

About this guide ................................................... 2

Product overview .................................................. 3

Getting started ..................................................... 8

    Batteries ........................................................... 8

    AC power adapter ............................................ 8

    Change settings ............................................... 9

Remote unit set up ............................................... 9

Clock ................................................................... 10

Alarm ................................................................... 12

Weather forecast ................................................. 13

Temperature ........................................................ 14

Backlight .............................................................. 16

Projector .............................................................. 16

Reset system ...................................................... 18

Safety and care ................................................... 18

Warnings ............................................................. 18

Troubleshooting ................................................... 19

Specifications ...................................................... 21

Additional resources ........................................... 22

Summary of Contents for FSP-301

Page 1: ...started 8 Batteries 8 AC power adapter 8 Change settings 9 Remote unit set up 9 Clock 10 Alarm 12 Weather forecast 13 Temperature 14 Backlight 16 Projector 16 Reset system 18 Safety and care 18 Warni...

Page 2: ...301 This powerful device bundles time keeping alarm projection indoor and wireless outdoor temperature measurement features Keep this manual handy as you use your new product It contains practical ste...

Page 3: ...3 EN PRODUCT OVERVIEW TOP VIEW 1 2 3 4 DESCRIPTIONS 1 Snooze Light 13 16 2 Channel 9 14 3 Memory 14 4 Projection lens 17...

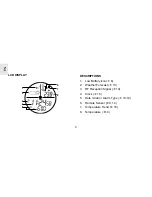
Page 4: ...DISPLAY 1 6 7 8 2 3 4 5 DESCRIPTIONS 1 Low Battery icon 8 2 Weather Forecast 13 3 RF Reception Signal 10 4 Clock 10 5 Date Alarm Alarm Type 10 12 6 Remote Sensor 9 14 7 Temperature Trend 16 8 Tempera...

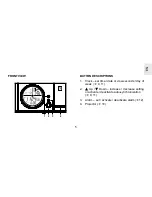
Page 5: ...3 4 BUTTON DESCRIPTIONS 1 Clock set time date or view seconds day of week 9 11 2 Up Down increase decrease setting or activate deactivate auto synchronization 9 11 3 Alarm set activate deactivate alar...

Page 6: ...ONS 1 Projector focus knob 17 2 180 rotation flip image button 17 3 Image rotation button 17 4 C F switch 9 15 5 Projector switch 17 6 Radio signal format switch 10 7 Reset button 18 NOTE AC power ada...

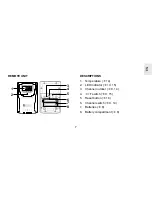
Page 7: ...EN REMOTE UNIT 1 2 6 8 7 4 5 3 DESCRIPTIONS 1 Temperature 14 2 LED indicator 10 15 3 Channel number 9 14 4 C F switch 9 15 5 Reset button 18 6 Channel switch 9 14 7 Batteries 8 8 Battery compartment...

Page 8: ...tery compartment After you change the batteries press the RESET button with the point of a blunt object such as a ball point pen NOTE Insert the batteries in the remote unit before you set up the main...

Page 9: ...ement unit C or F and channel number 1 2 or 3 switches are located in the battery compartment and should be set prior to installation NOTE Additional remote units sold separately If you are using more...

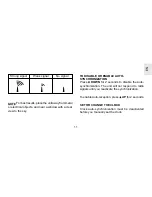
Page 10: ...LOCK This product can automatically synchronize the date and time with official time keeping organizations in Frankfurt Germany and Rugby England When the unit is within 1500 km 932 miles of a RF sign...

Page 11: ...to the sky TO DISABLE OR ENABLE AUTO SYNCHRONIZATION Press DOWN for 2 seconds to disable the auto synchronization The unit will not respond to radio signals until you reactivate the synchronization T...

Page 12: ...ish F French D German I Italian and S Spanish VIEW DAY OF WEEK OR SECONDS Press CLOCK ALARM When activated the Beep Alarm starts quietly then gradually becomes louder until it crescendos at 1 minute I...

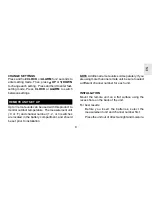
Page 13: ...ress CLOCK UP or DOWN To turn the alarm off completely deactivate it for the next day press DOWN when the alarm time is displayed Press UP to activate the alarm again WEATHER FORECAST This product for...

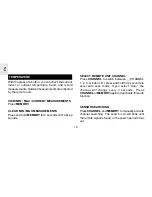
Page 14: ...MEMORY for 2 seconds until a beep sounds SELECT REMOTE UNIT CHANNEL Press CHANNEL to switch between CHANNEL 1 2 3 or indoor Or press and hold for 2 seconds to enter auto scan mode If you select Auto t...

Page 15: ...or units This is normal and does not affect the general performance of the product Reception will automatically resume once the interference ends NOTE Check the remote unit batteries if no signal is f...

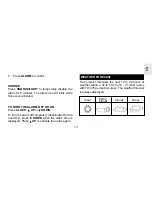
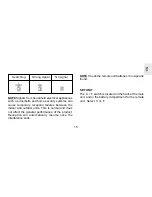
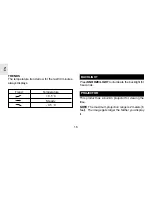
Page 16: ...Trend Temperature 0 5 C Steady 0 5 C BACKLIGHT Press SNOOZE LIGHT to illuminate the backlight for 5 seconds PROJECTOR This product has a built in projector for viewing the time NOTE The maximum proje...

Page 17: ...button while the projector is on ROTATE IMAGE The ROTATION knob is located on the back of the projector Rotate to adjust FOCUS IMAGE The FOCUS knob is located on the back of the unit Rotate to adjust...

Page 18: ...y link with remote unit or automatic clock This will return all settings to default value and you will lose any stored information alarm and clock settings SAFETY AND CARE Wash the unit with a slightl...

Page 19: ...is product for a long period of time Do not scratch the LCD display Do not make any changes or modifications to this product Unauthorized changes may void your right to use the product The contents of...

Page 20: ...ate Check batteries 8 Check location 9 Temp Shows LLL or HHH Temperature is out of range Symptom Problem Remedy RESET 18 3 Manually activate auto synch 11 If it still fails you may be too far from a s...

Page 21: ...t 100 grams 0 2 lb Temperature Unit C or F Indoor Range 5 C to 50 C 23 F to 122 F Outdoor Range 20 C to 60 C 4 F to 140 F Resolution 0 1 C 0 2 F Memory Minimum maximum Trend 0 5 C change per 30 minute...

Page 22: ...lkaline batteries AC DC 6V power adapter for continuous projector Remote unit 2 x UM 4 AAA 1 5V alkaline batteries ADDITIONAL RESOURCES Visit our website www oregonscientific com to learn more about y...

Page 23: ...compatibility Article 3 1 b of the R TTE Directive applied standard s ETS 300 683 1997 Safety of information technology equipment Article 3 1 a of the R TTE directive applied standard s EN 60950 1997...

Page 24: ...24 EN Radio Controlled Projection Clock with Indoor and Outdoor Temperature Model FSP 301 Maranello User Manual...

Reviews: