1
EN
CONTENTS
Introduction ............................................................. 1
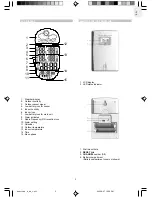
Product Overview ................................................... 2
Front View ........................................................... 2
Back View ........................................................... 2
LCD Display ........................................................ 3
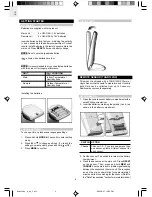
Remote Sensor (THGR122NX) ........................... 3
Getting Started ........................................................ 4
Batteries .............................................................. 4
Change Settings .................................................. 4
Table Stand ......................................................... 4
Remote Sensor (THGR122NX) ............................... 4
Setup Sensor ...................................................... 4
Data Transmission .............................................. 5
Search for Sensor ............................................... 5
Clock ........................................................................ 5
Turn Clock ON / OFF .......................................... 5
Set Clock / Calendar ........................................... 5
Switch Clock Display ........................................... 6
Alarm ........................................................................ 6
View Alarm Settings ............................................ 6
Set Alarm ............................................................ 6
Activate Alarm ..................................................... 6
Silence Alarm ...................................................... 6
Weather Forecast .................................................... 6
Temperature and Humidity .................................... 6
Select Temperature Unit ..................................... 6
Select Channel Number ...................................... 6
Minimum / Maximum Records ............................. 6
Moon Phase ............................................................. 6
Reset System .......................................................... 7
Backlight .................................................................. 7
Safety and Care ....................................................... 7
Warnings .................................................................. 7
Troubleshooting ...................................................... 7
Specifications .......................................................... 7
Main Unit Dimensions ......................................... 7
Remote Sensor Dimensions ............................... 7
Temperature ........................................................ 7
Relative Humidity ................................................ 7
Weather Forecast ................................................ 7
Remote Sensor (THGR122NX) ........................... 7
Clock ................................................................... 8
Power .................................................................. 8
About Oregon Scientific ......................................... 8
EC-Declaration
of Conformity ............................ 8
Wireless Weather Station
Model: BAR638HG /
BAR638HG-2 / BAR638HGU /
BAR638HGU-2
USER MANUAL
INTRODUCTION
Thank you for selecting the Oregon Scientific
TM
Wireless
Weather Station (BAR638HG / BAR638HG-2 /
BAR638HGU / BAR638HGU-2). This device bundles
precise time keeping, weather forecast, and indoor and
outdoor temperature and humidity monitoring features
into a single tool you can use from the convenience of
your home.
In this box, you will find:
• Main unit
• Remote sensor (THGR122NX)
• Main unit batteries, 3 x UM-3 (AA) 1.5V
• Remote sensor batteries, 2 x UM-4 (AAA) 1.5V
BAR638HG / BAR638HGU package includes 1 remote
sensor (THGR122NX).
BAR638HG-2 / BAR638HGU-2 package 2 remote
sensors (THGR122NX).
Keep this manual handy as you use your new product.
It contains practical step-by-step instructions, as well as
technical specifications and warnings you should know.
BAR638HG_M_EN_6.p65
2005.4.27, 10:56 PM
1


