background image

8.

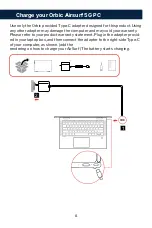
Use only the Orbic provided Type-C adapter designed for this product. Using 

any other adapter may damage the computer and may void your warranty. 

Please refer to yourproduct warranty statement. Plug in the adapter provid-

ed in your laptop box, and thenconnect the adapter to the right-side Type-C 

of your computer, as shown. (add the 

rendering on how to charge your AirSurf) The battery starts charging.

Charge your Orbic Airsurf 5G PC

1

2

Summary of Contents for AIRSURF 5G

Page 1: ...USER MANUAL...

Page 2: ...drive 28 Use a recovery drive to restore or reset Windows 28 Managing Power Consumption 29 Trouble Shooting Your Windows Device 30 5G Connectivity 14 Connect to Wi Fi networks 14 Forget a Wi Fi netwo...

Page 3: ...able on all models This guide contains instructions that are based on the Windows 10 operating system These instructions are not applicable if you install and use other operating systems Microsoft mak...

Page 4: ...ecord sound and voice 2 Camera Take photos record videos and video chat using stills and moving images Detect faces with face recognition 3 Digital MIC Recording function 4 Screen Display text graphic...

Page 5: ...s hotkeys and function keys for changing settings and performing tasks quickly 4 Speakers Produces sound 5 Touchpad Perform finger touch and all the functions of a traditional mouse Note The touchpad...

Page 6: ...connected to AC power 3 USB 3 0 Connect to an external storage or data device 4 Combo Audio Jack Connect to headphones or headsets with a 3 5 mm 0 14 inch 3 pole plug Note This jack does not support...

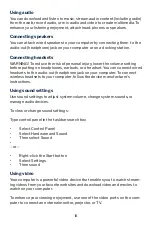
Page 7: ...ct System Memory Type low power double data rate 4x LPDDR4x Number of slots 1 Storage device Type SSD Bus UFS 3 0 Screen Size 355 6 mm 14 inches Display resolution 1920 1080 pixels FHD Keyboard Functi...

Page 8: ...er and may void your warranty Please refer to yourproduct warranty statement Plug in the adapter provid ed in your laptop box and thenconnect the adapter to the right side Type C of your computer as s...

Page 9: ...jection tool included to eject the nano SIM card tray and then slide the tray out of the computer If a nano SIM card is installed gently take the nano SIM card out of the tray Install a new nano SIM c...

Page 10: ...the device Microsoft accounts A Microsoft account is a user account that you use to sign into Microsoft software and services If you use Microsoft services like OneDrive Outlook com Xbox Live Office...

Page 11: ...s the first time you use a Micro soft account on that device If you want to switch back to use a local account open the Start menu and select Settings Accounts Sign in with a local account instead Add...

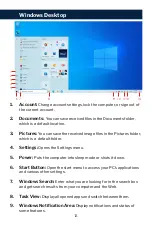
Page 12: ...ings Opens the Settings menu 5 Power Puts the computer into sleep mode or shuts it down 6 Start Button Open the start menu to access your PC s applications and various other settings 7 Windows Search...

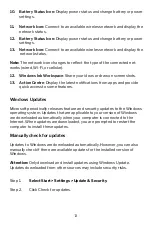
Page 13: ...ps and provide quick access to some features Windows Updates Microsoft periodically releases feature and security updates to the Windows operating system Updates that are applicable to your version of...

Page 14: ...ayed check that the airplane mode is off Step 2 Select a network and click Connect Provide security key if prompted Note Network keys are usually managed by the network administrator Forget a Wi Fi ne...

Page 15: ...top notebook Phones cellular cordless smartphone Imaging devices printer camera Audio devices headset speakers Mouse Bluetooth devices provide a peer to peer capability that allows you to set up a per...

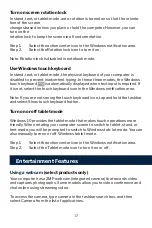
Page 16: ...our actual product Turn on or off tablet mode Windows 10 provides the tablet mode that makes touch operations more friendly When rotating your computer screen to switch to tablet stand or tent mode yo...

Page 17: ...con in the Windows notification area Note If you are not seeing the touch keyboard icon tap and hold the taskbar and select Show touch keyboard button Turn on or off tablet mode Windows 10 provides th...

Page 18: ...an attach wired speakers to your computer by connecting them to the audio out headphone jack on your computer or on a docking station Connecting headsets WARNING To reduce the risk of personal injury...

Page 19: ...ser Open Search app Switch display devices Open the Windows Settings app Decrease Increase screen brightness Open Email app Disable Enable touchpad Turn on off or adjust the brightness of the keyboard...

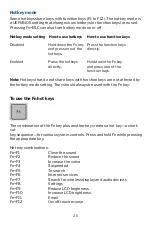
Page 20: ...LCD brightness Fn F11 Email Fn F12 On off touch mouse 20 Hotkey mode Some hotkeys share keys with function keys F1 to F12 The hotkey mode is a UEFI BIOS setting that changes how hotkeys or function ke...

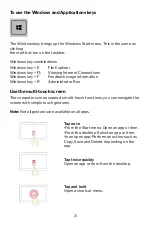
Page 21: ...formation Windows key R Administrator Run Use the multi touch screen The computer screen supports multi touch functions you can navigate the screen with simple touch gestures Note Not all gestures are...

Page 22: ...m the left edge View all your open windows in task view Swipe downwards shortly from the top edge for full screened app or when your computer is in the tablet mode Show a hidden title bar Swipe in fro...

Page 23: ...he battery is fully charged in about two to four hours The actual charging time depends on the battery capacity the physical environment and wheth er you are using the computer Note To maximize the li...

Page 24: ...S setup utility This section introduces what is UEFI BIOS and the operations you can perform in its setup utility What is UEFI BIOS setup utility UEFI BIOS is the first program that runs when a comput...

Page 25: ...ty Administrator Password and press Enter Step 3 Enter a password string that contains only letters and numbers and then press Enter Step 4 Enter the password again and press Enter Step 5 Select Exit...

Page 26: ...a restore point If your computer does not work well after installing apps drivers or updates you can revert your system to a previous restore point Note If you revert your system to a previous restore...

Page 27: ...point Step 1 In Windows 10 search box enter Recovery and select the matched result Step 2 Select Open System Restore Next Step 3 Select a restore point and then select Next Finish Note You may select...

Page 28: ...r PC option If you want to free up drive space on your computer select it and then select Delete Otherwise select Finish Use a recovery drive to restore or reset Windows If Windows cannot start you ca...

Page 29: ...eouts automatically occur based on the values set in the Power Management Properties window The following tables describe the power management timeouts you can set in Windows Turn off monitor Action W...

Page 30: ...ainment Sound Recorder U disk ROM Drive Problems 1 Make sure the U disk is a bootable U disk 2 If you always want to boot from a U disk when one is present check the boot order in BIOS Setup and follo...

Page 31: ...en power on the computer 2 When you see the ORBIC logo press Delete key to enter the BIOS Setup utility 3 Open the Boot menu The default boot sequence is usb flash drive 4 If the default startup mode...

Reviews: