Adding NVMe Expansion Storage
Add NVMe storage to an Oracle Database Appliance X9-2L. Note that the Oracle Database
Appliance X9-2S does not support additional storage.
•
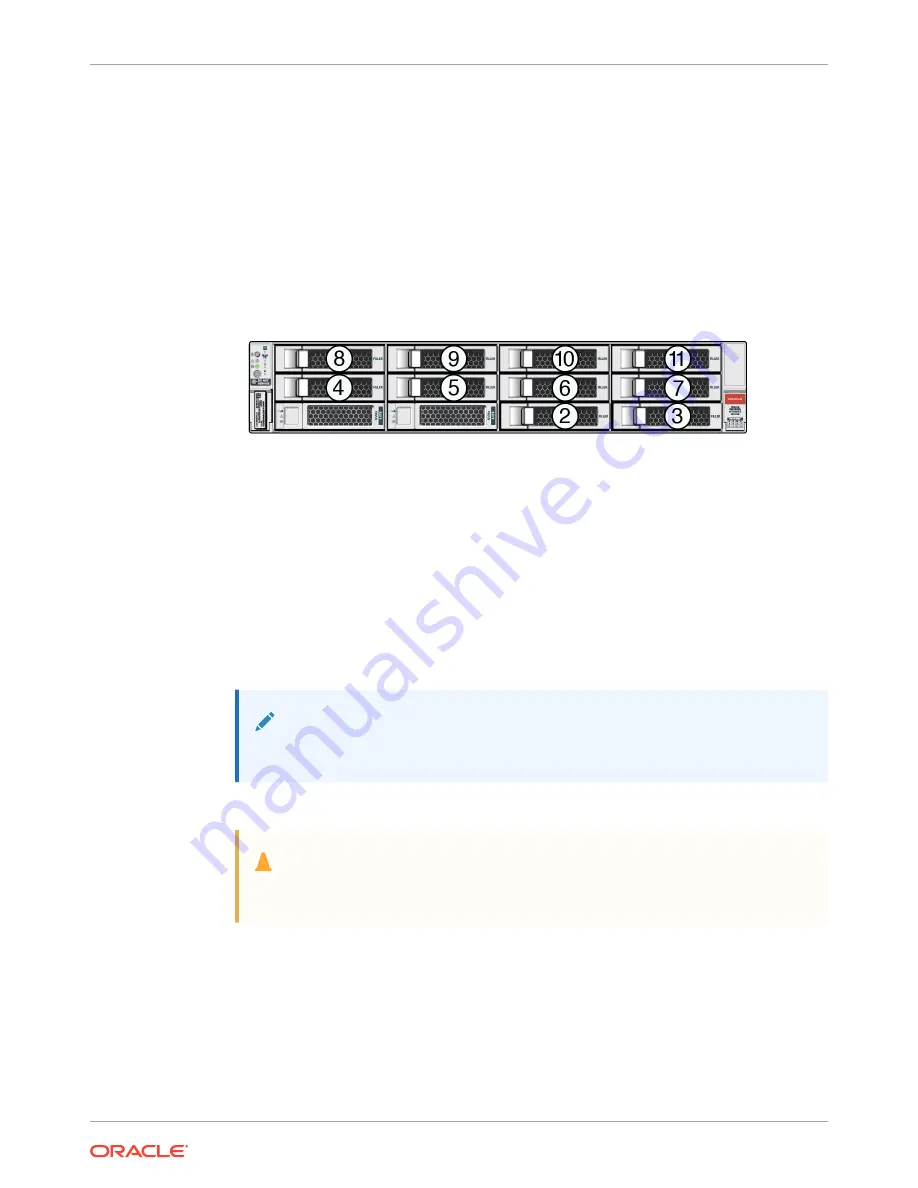
The Oracle Database Appliance X9-2L supports ten expansion slots for NVMe drives.
These are slots labeled 2 through 11 as seen from the front of the system (callouts 2
through 11 in the following illustration). Storage drives can be added in sets of two. For
information about supported optional storage drives, refer to the Owner's Guide.
•
When expanding storage, populate slots starting with the lowest numbered available slot
(for example, slot 2 as seen on the front panel).
•
The drive power-up and storage expansion
odaadmcli
commands listed here should
only be run after all new disk drives have been physically installed. Once you expand
storage, you cannot revert to a previous storage configuration (for example, the default
installation with only two NVMe drives).
1.
Remove the drive filler panel of an unpopulated slot by using your finger to pry open the
panel release latch and pulling the filler out of the drive slot.
Note:
Replace filler panels with drives one at a time to ensure proper system cooling.
2.
Open the latch of the new drive by pressing the release button on the drive.
Caution:
Do not over-rotate the latch outwards when opening. Doing so can damage it.
3.
Insert the new drive by sliding the drive into the slot until the drive is fully seated. Then
close the drive latch to lock the drive in place.
4.
Repeat steps 1 - 3 for each new drive.
For the Oracle Database Appliance X9-2L, the name for these drives to the host will be
pd_02
,
pd_03
,
pd_04
, etc., matching the numbering of their respective drive slots up to
pd_11
.
Chapter 3
Oracle Database Appliance X9-2 Server Hot-Pluggable Components
3-5


