


Installing and Cabling a Storage Expansion Shelf
Use this procedure to install and cable a storage expansion shelf for Oracle Database
Appliance
1.
Place the storage expansion shelf below your Oracle Database Appliance, if
possible, or else close enough to connect the provided cables.
The storage expansion shelf normally sits at the bottom of Oracle Database
Appliance, beneath the storage shelf. However, because racks should always be
provisioned from the bottom up, that space may be unavailable. In that case, to
avoid re-rack mounting the entire system, you can position the storage expansion
shelf above the server nodes, or in a different, but adjacent, rack.
2.
Install the extension storage shelf in exactly the same manner as the original
storage shelf. To review information about installing optional components for
Oracle Database Appliance, see the section "Optional Component Installation" in
Chapter 4 of Oracle Database Appliance Owner’s Guide.
3.
Use the figures in this topic to assist you to cable the storage expansion shelf for
your Oracle Database Appliance model.
Caution:
Incorrect connections can cause data loss when adding a storage
expansion shelf to Oracle Database Appliance with existing databases.
4.
Attach the supplied power cords. Refer to the section "Attaching Power Cords and
Initializing Components" to obtain information and see figures showing how to
attach power cords.
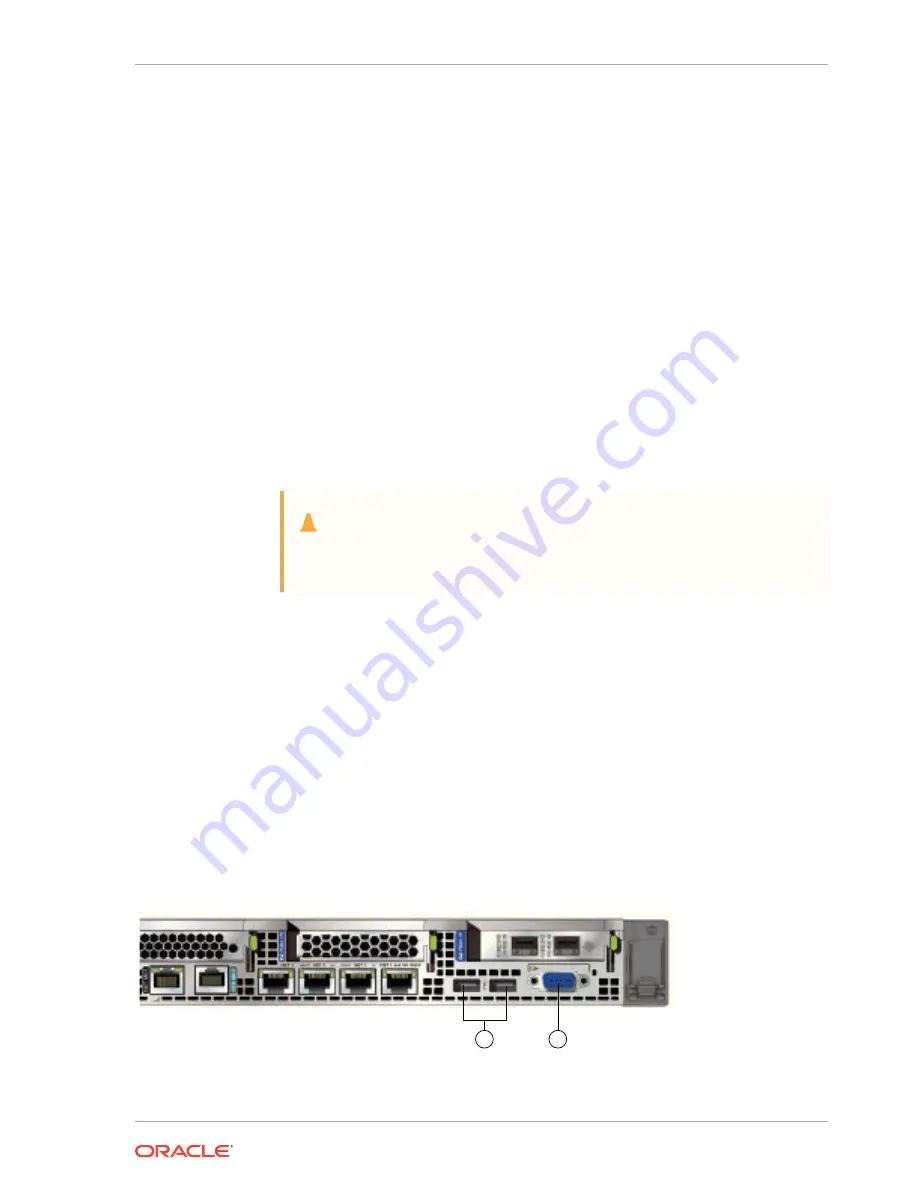
Attaching Peripheral Devices
Complete this task if you have direct access to Oracle Database Appliance and you
intend to use a locally connected monitor, keyboard and mouse.
Oracle Database Appliance is not equipped with human-computer interface devices,
such as a monitor or keyboard. If you want to log in locally, instead of through a
network, then you must attach interface devices.
Attach a monitor to the graphics card port, and attach a keyboard and a mouse to the
USB ports. Refer to the figure and table to identify the ports.
2
1
Chapter 3
Attaching Peripheral Devices
3-7
Summary of Contents for Database Appliance X6-2-HA
Page 15: ...Index xv...


