ACCTRI
Relay-Interface Kit/ Relais-Interface-Kit
ACCTRI-MAD-ED2016-10-A
I
Quick Reference/ Kurzanleitung
Scope of Supply/ Lieferumfang
Relay interface board incl. terminal block/ Relais Interface-Platine inkl.
Anschlussklemmblock
Cable gland/ Kabelverschraubung M12x1,5
Mounting screws, cable tie/ Schrauben, Kabelbinder
Quick reference/ Kurzanleitung
Installation of the relay interface board/
Einbau der Relais-Interface-Platine
Installation
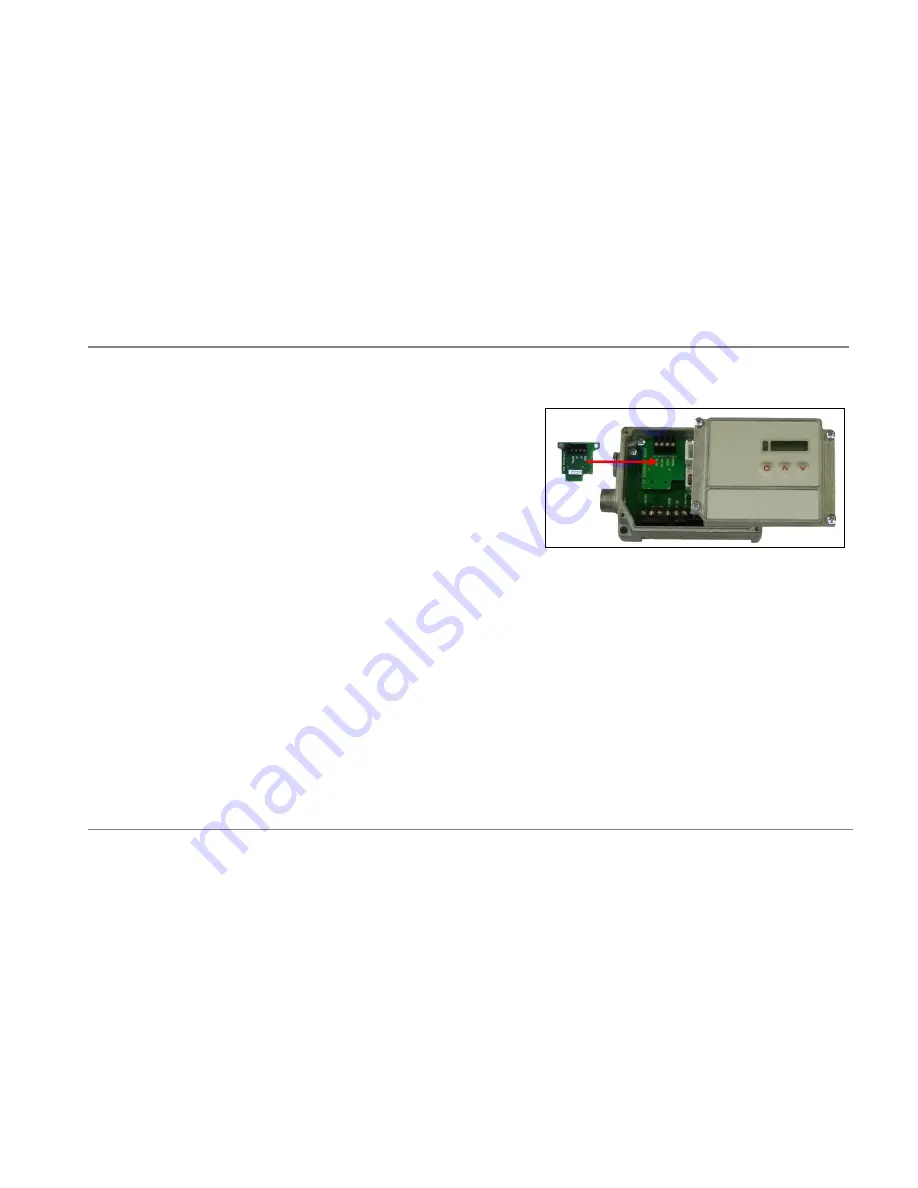
Please plug the relay interface into the place provided, which is located beside the display. In the correct position the holes of the relay
interface match with the thread holes of the CT box.
Now press the PCB down to connect it with the CT. Use both M3x5 screws for fixing the board. Exchange the blind screw on the CT box
by the cable gland and install the connection cable of the external circuit (not supplied).
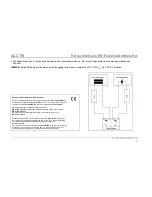
Connect the external electrical circuit with the terminal blocks. A red LED indicates a closed switch.
NOTE:
The relay board provides two fully isolated switches which have the capability to switch max. 60 VDC/ 42 VAC
RMS
, 0,4 A DC/AC.
Stecken Sie das Relais-Interface in die dafür vorgesehene Aufnahme im CT, welche sich neben der Anzeige befindet. Die richtige Lage
ist erreicht, wenn die Schraubenlöcher des Relais-Interface mit denen des CT übereinstimmen.
Drücken Sie das Interface nun nach unten und befestigen Sie es mittels der beiden mitgelieferten Schrauben M3x5. Tauschen Sie die
Blindverschraubung an der CT-Box gegen die Kabelverschraubung und installieren Sie das Anschlusskabel des externen Stromkreises
(nicht im Lieferumfang enthalten).


