

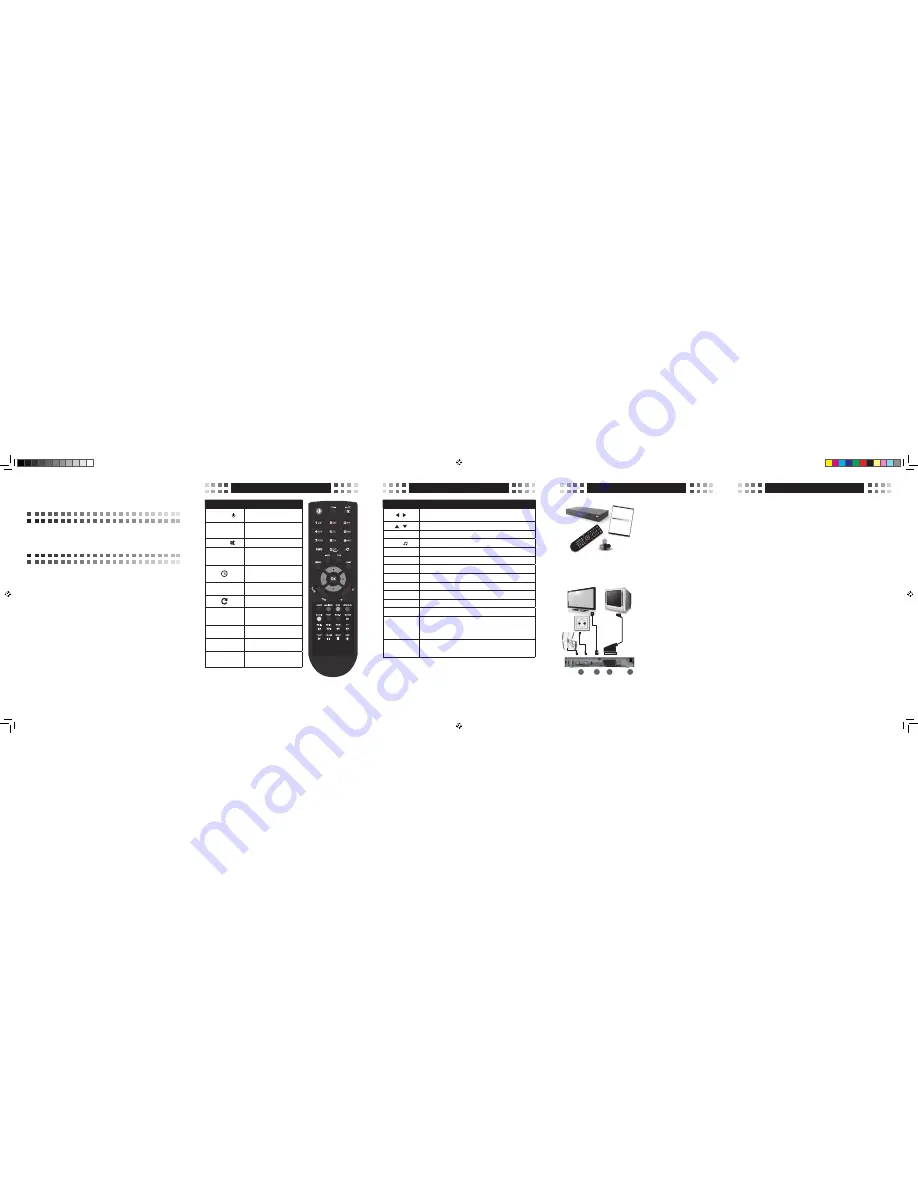
Remote control
Remote control
Basic connection
Notes on usage
Quick start
HD Digital Satellite Receiver
One smart card reader
Support of SD / HD (MPEG2 / MPEG4
H.264), DVB-S, DVB-S2, DVB-T
High definition video output – HDMI
Port USB 2.0
Low power consumption in Standby mode –
below 1 W
Support of DiSEqC 1.0, 1.1
Electronic Programme Guide – EPG
Display on the front panel – LED 4 digits
Button
Function
POWER—
turns the receiver on/off from/
to a standby mode
HDMI
selects the resolution of the
image output
MUTE —
turns on/off the audio sound
Number buttons
select channels; let you enter
programming parameters in
the menu
sets the sleep timer for
10/30/60/90/120 min
FAV
displays and scrolls to your
favourite list of channels
returns to the previous channel
MENU
displays the main menu on the
screen; returns to the previous
menu
INFO
displays the infobar of the
programme
EPG
displays the electronic
programme guide
EXIT
Exits the on screen-menu
Button
Function
/
adjust the volume, moves the cursor to the left or right in the
menu
/
changes channels, moves the cursor up and down
OK
displays the channels list, selects the menu options
TV /
selects the TV/Radio source
FIND
lets you find a channel by its number
SUB-T
subtitles settings
HOME
optional function ( available in some versions)
STATUS
displays the window of the status
AUDIO
audio settings
TEXT
displays Teletext for a current channel
PVR
displays the list of recordings (optional)
MAILBOX
displays the list of Your payments
SLOW, SKIP-,
SKIP+, REW, FF,
PLAY, PAUSE,
STOP, REC
sets video options (time shift, playing, recording)(optional)
RED, GREEN,
YELLOW, BLUE,
WHITE, BLACK
Colour buttons: use them according to the instruction on screen
Automatic power turn-off
In accordance with the current EU requirements, the receiver you have just purchased is
equipped with a feature Automatic Power OFF. It switches the receiver to a stand-by mode
after 3 hours from its last activity. It means that if within this time no command is sent to the
receiver from the remote control buttons or keypad on the front panel, it gets turned off. The
moment of turning off will be proceeded ( 2 minutes earlier) by a relevant message on the screen
of the TV set. Please note that this feature is enabled by default in EU countries, however, at
your own request, it can be disabled by choosing an appropriate option in the menu.
Connecting to an external USB drive
While selecting and using an external USB drive ( an external hard drive, flash memory), make
sure:
• it is compatible with USB 2.0 standard and has appropriate write and read speed
• it has one single partition adequately formatted
• if necessary, it can be supplied with power from an external charger (in particular it refers to
external USB hard drives that have high power consumption)
• you do not disconnect it during the process of data writing/reading
• it is not completely full or highly fragmented
Negligence of the above recommendations can lead to faulty work of the devices and cause
their damage.
The manufacturer does not take responsibility for damage caused directly or indirectly by any
problems resulting in data loss on the external USB drive connected to the receiver. Nor does
he give warranty on any other data on the USB drive connected to the device in case of its faulty
work.
Package content
After purchasing the receiver , please
unpack it and make sure the following
items are included:
• Receiver
• Remote control
• Quick start manual
• Batteries – 2 x AAA ( optional)
To install batteries in the remote control
remove the battery compartment cover. If
there are batteries already there, remove
them and insert the new ones. Make sure
the positive and negative ends are facing
the correct direction as shown. Replace
the battery compartment cover.
Model ID:XS65-COMBO
MC/2014/09
Connecting
(1) Connect the satellite cable into the
SAT input on the receiver and connect
aerial into the AERIAL IN.
(2) Connect the receiver with a flat panel
TV using a HDMI cable, or
(3) Connect the receiver with a
conventional TV, using a SCART cable.
(4) Finally, plug the power cord into a wall
outlet.
Turn on the TV set and turn on the receiver
using POWER button on the remote
control. After few minutes, the interface
of the product set-up should be displayed
on screen (OSD). If the TV set does not
display OSD, the wrong input source
must have been selected. See the TV
set documentation to double check the
settings.
ENGLISH ENGLISH EN
GLISH ENGLISH EN
GLISH ENGLISH EN
GLISH ENGLISH EN
GLISH ENGLISH EN
GLISH ENGLISH EN
GLISH ENGLISH EN
GLISH ENGLISH EN
GLISH ENGLISH EN
GLISH ENGLISH EN
GLISH ENGLISH EN
GLISH ENGLISH EN
GLISH ENGLISH EN
GLISH ENGLISH EN
GLISH ENGLISH EN
GLISH ENGLISH EN
GLISH ENGLISH EN
GLISH ENGLISH EN
GLISH ENGLISH
Digital Cable Receiv
er
KP 07/2012
ModelID: X2
• Slot for Smart Car
d
• Support of S
D/HD (MPE
G2 / MPEG4) DVB-C s
ystems
• High definition
video output - HDMI
• Standard resolutio
n video output - SCA
RT
• High speed USB 2.
0 port
• PVR Ready
• Time Shift (pause
, rewind)
• Automatic Stand-b
y
• Low power consu
mption in Stand-by mod
e,
below 1W
• Multilingual men
u, including English
• Electronic Progr
am Guide - EPG
• 4 digit LED d
isplay on front pan
el
• Multimedia Pla
yer Full HD 1080p
Quick Start
1
2
3
4
XS65-COMBO_ENG_REV02.indd 1
2014-09-11 12:09:11


