


Photodiode Sensors
StarBright User Manual
41
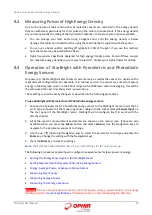
7.1
Operation of StarBright with Photodiode Sensors
To use StarBright with Photodiode sensors:
1.
Connect the Photodiode sensor to the StarBright meter: Insert the 15 pin D type connector of
the measuring sensor cable into the socket marked
Sensor Input
on the rear panel of the
StarBright meter. StarBright will reconfigure itself to work with the attached sensor.
2.
All of the sensor’s measurement parameters are shown on the main screen. (These are also
available when you press the
Menu
button and select
Sensor
). Use the Navigation keys to
navigate to the parameter you want to change.
3.
Use the up (
↑
) /down (
↓
) Navigation keys to select the parameter to change and press the
Enter
key. Change the setting with the Navigation keys.
4.
Press the
Enter
key to save the settings.
Note:
The StarBright automatically saves the current settings for the next power up.
Warning:
Do not exceed maximum sensor limits for power, energy, power density, and energy
. Otherwise, there is a risk of damaging the absorber.
7.2
Measuring Laser Power with Photodiode Sensors
The following procedure describes how to use Photodiode Sensors to measure laser power. (The
power is measured 15 times per second.) You can specify the expected laser
Range
,
Wavelength
,
whether the
Filter
is IN or OUT as physically configured on the sensor, and the
Average
power
period.
Photodiode sensors have a different sensitivity at different wavelengths. Moreover, the filters
used in the sensor have a different transmission at different wavelengths. In order to compensate,
each sensor has a built in calibration curve (with 1nm resolution) over the entire measurement
range.
When you choose the correct laser wavelength, the correction factor for that wavelength is
automatically introduced. Note that the laser wavelength presently corrected for is displayed in
the upper left portion of the display.
The PD300 sensor is equipped with a built in filter so that the Photodiode can measure up to
30mW without saturating the detector. In addition, the PD300 comes with an additional
removable filter for measuring up to 300mW. Other models of the PD300 series also have built-in
and removable filters. The exact maximum power is reached when the reading reaches full scale
or the output current from the sensor reaches 1.3mA, whichever comes first. See
and
for the exact maximum as a function of wavelength.
Depending on what powers you wish to measure, choose whether to work with the removable
filter installed or not. For this purpose, the StarBright has a "filter" setting and uses the proper
correction curve depending on whether the filter is installed.
To set measurement parameters for laser power when using Photodiode sensors:
1.
The measuring mode is
Power
.
2.
Set
Range
to
dBm, AUTO
, or to one of the manual ranges, as follows:
dBm
: Logarithmic scale, where dBm units are defined as: 10 x log (reading in mW). At 1mW
the reading will be 0 dBm, at 100mW it will be 20 dBm, and so on.