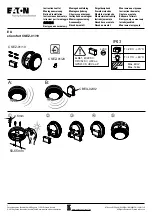
rotating the product on the anti-clockwise direction.
2
、
Take out the 9V battery from battery compartment, remove the insulation film from the battery,
connect the battery to battery buckle and put it back to battery compartment.
3
、
Depress(keep depressing and release till finish the testing) the test/hush button
,
the RED
LED flashes quickly and in the meanwhile the detector sounds, which means the the detector
works well. At the same time the product goes into low sensitivity detection mode, round 10
minutes later the product goes into standard sensitivity detection mode again.
Ⅳ
、
Installation
1
、
Choose a right place to install the smoke alarm.
The alarm may not be mounted In:
A)a room in which the temperature can reach below 4 and above 40oC.
B)in damp spaces
C)just in front of doors or windows and not near a ventilator or radiator
D)Maintain a distance of at least 50 cm from fluorescent lights or low-energy bulb.
2
、
Fix two plastic screw base into ceiling according to installation hole position of smoke alarm
base
3
、
Fix the installation base on ceiling via screws at pre-installed screw base.
4
、
Make sure the battery is installed and well connected to the smoke alarm (you may use the
test button function to check) and fasten the smoke alarm to pre-installed base via clockwise
rotation.
4
、
Use the test button again to make a final check
5
、
Ⅴ
、
Maintain and use
1
、
Test the smoke alarm weekly and after battery replacement.Test the alarm for normal
operation using the test facility when the battery is replaced.
2
、
If the product does not work properly, please check the product according to Failure Analysis
and Troubleshooting part as below.If the product still can not work please contact your local
dealer and do not open the product by yourself.
9V Battery
Connector to base
TEST/HUSH BUTTON
Buzzer
LED
(
red
)
Screw position hole
Summary of Contents for ATN062
Page 25: ...5 1 2 1 6 1 9 43 1 2 3 9 HUSH r LED...
Page 26: ......


