I N S T R U C T I O N M A N U A L
Pedometer with Download Capability
Model
HJ-720IT
HJ-720IT-IM.qxd 10/28/05 10:58 AM Page 1
Page 1: ...INSTRUCTION MANUAL Pedometer with Download Capability Model HJ 720IT...
Page 2: ...ons Battery Installation 9 Battery Replacement 10 Setting the Time 11 Setting the Weight 13 Setting the Stride Length 14 Attaching the Pedometer 15 Changing the Display 17 Using the Event Function 17...
Page 3: ...k your distance the number of steps you take and how many calories you burn The convenient memory function supports the management of daily walking You can easily set and reach your daily goals This p...
Page 4: ...the instruction book and any other literature included in the box before using the unit Operate the unit only as intended Do not use for any other purpose Properly dispose of used battery Do not thro...
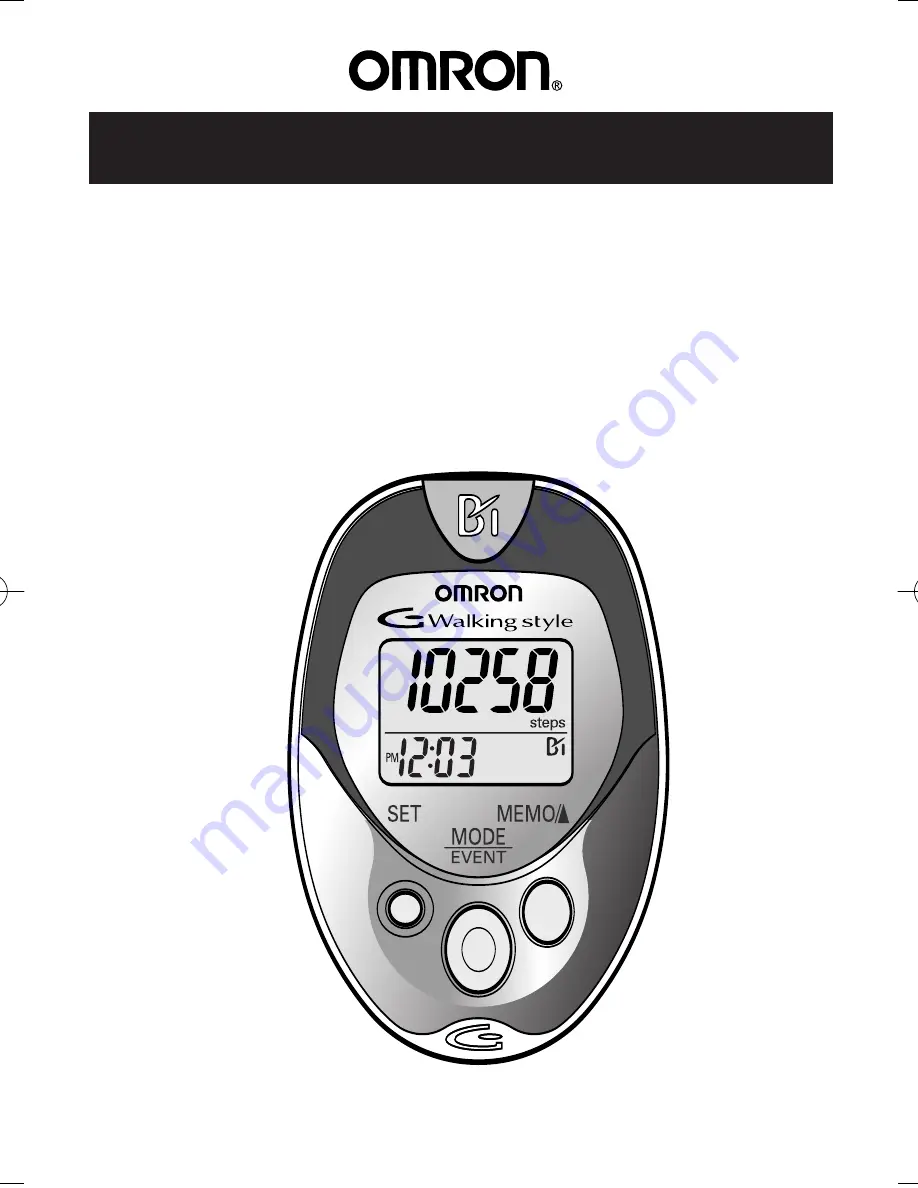
Page 5: ...R UNIT Display MODE EVENT Button Holder USB Connector Cover SYSTEM RESET Button Battery Cover Screw of Battery Cover Strap Clip Backofthemainunit MEMO Button USB Connector SET Button 5 KNOW YOUR UNIT...
Page 6: ...of your pants 1 Attach the main unit to the holder 2 Fasten the holder clip to your pants How to attach the strap to the main unit How to connect the strap and the clip How to release from a clip and...
Page 7: ...g after 10 minutes is considered as continuous walking The calorie and amount of fat burned display indicates a calorie consumed by walking and length from the weight stride distance number of steps a...
Page 8: ...1 Walk 10 steps with your normal stride as illustrated below 2 Measure the distance from START to END in inches 3 Calculate your stride length by dividing the total distance by 10 Example Total distan...
Page 9: ...use a commercially available small screwdriver to remove the screw on the battery cover 2 Open the battery cover 3 Insert the battery Place the positive side of the battery CR2032 upward Insert the ba...
Page 10: ...ous hour will not be deleted The current day is automatically stored in the memory when the time reaches 12 00AM Do not replace the battery at 12 00AM For example If you remove the battery at 11 59PM...
Page 11: ...of steps and time 2 Press the MEMO Button to advance by increments of one hour NOTE Press the MODE EVENT button to return the hour to 12AM 3 Press the SET Button to set the hour The minutes flash on t...
Page 12: ...12 5 Press the SET button to set the minute The weight flashes on the display SETTING THE TIME...
Page 13: ...the button to advance weight in 10 lb increments NOTE Press the MODE EVENT button to return the weight to 88 2 Press the SET Button to set the weight The stride length flashes on the display 13 SETTI...
Page 14: ...the stride length The number of steps and time will display All the settings are completed To change the time weight or stride length after the setting is completed 1 Press and hold the SET Button fo...
Page 15: ...n the back pocket of your pants Attach the clip on the edge of your pocket to prevent the unit from dropping Place the unit in your bag Place the unit in your pocket or the partition of your bag Attac...
Page 16: ...from your belt the top of your pants or a bag When you walk at an inconsistent pace When you shuffle or wear sandals When you fail to walk consistently in a crowded place When you use the unit in the...
Page 17: ...minutes Calories with amount of fat burned Distance Press the MODE EVENT Button for 2 seconds while current day s data is displayed The times of event in current day is displayed for 2 seconds NOTES...
Page 18: ...to view data stored in the memory Press the MODE EVENT Button until the data you want to see is displayed Steps Aerobic Steps with minutes Calories with amount of fat burned Distance Press the MEMO B...
Page 19: ...OTES Full memory indicator starts display when there are 35 days including current day of stored data which has not been downloaded Follow the direction by instructor or service provider to download t...
Page 20: ...ecognizable Press the SYSTEM RESET Button on the back of the main unit with a thin stick that is not easily breakable The time is reset NOTE The data stored in the memory is not deleted After all char...
Page 21: ...warranty 1 Open the USB Connector cover 2 Plug the normal USB Connector Large Connector into the personal computer 3 Plug the mini USB connector Small Connector into the USB connector PC will appear o...
Page 22: ...eful so water does not get into the unit Store the unit in a safe and dry location Avoid the unit being exposed to direct sunlight high temperatures high humidity water and or dust Do not subject the...
Page 23: ...d values are incorrect The polarities of battery and are aligned in the wrong directions Insert the battery in correct alignment The battery is worn Replace the battery with a new one CR2032 The unit...
Page 24: ...C to 40 C 30 to 85 RH and Humidity Storage Temperature 4 F to 140 F 20 C to 60 C 30 to 95 RH and Humidity Precision of Step Counting Within 5 by vibration testing machine Time Precision Within 30 seco...
Page 25: ...y one or more of the following measures Reorient or relocate the receiving antenna Increase the separation between the product and the receiver Connect the product into an outlet on a circuit differen...
Page 26: ...er with your name address phone number and description of the specific problem Pack the product carefully to prevent damage in transit Because of possible loss in transit we recommend insuring the pro...
Page 27: ...27 NOTES...
Page 28: ...Distributed by Omron Healthcare Inc 1200 Lakeside Drive Bannockburn Illinois 60015 2005 OMRON HEALTHCARE INC World Rights Reserved 720IT INST Rev 9042803 3A...