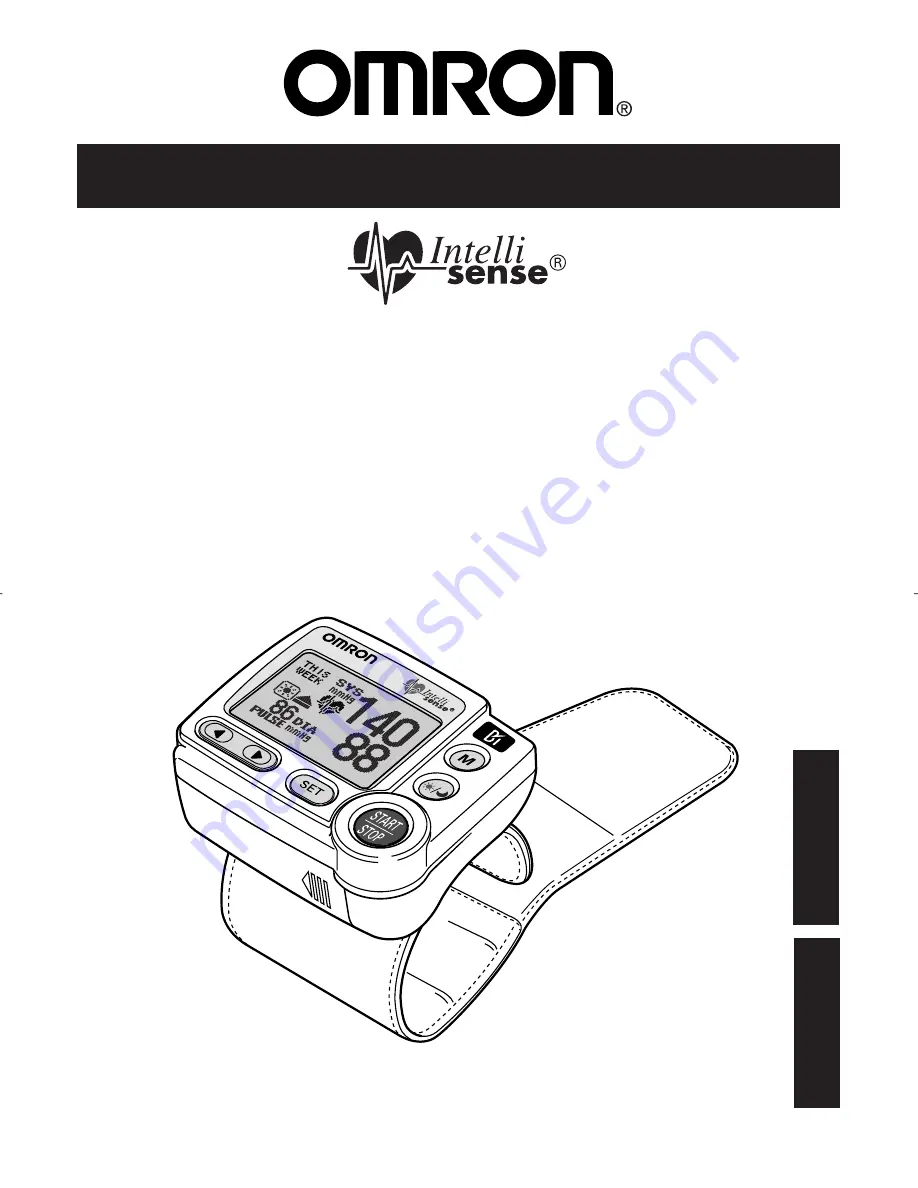
Ultra Premium
Wrist Blood Pressure Monitor
with Advanced Positioning Sensor (APS
®
)
and Omron Health Management Software
Model
HEM-670IT
HEM
-670
IT
Instruction Manual
ESPAÑOL
ENGLISH
HEM-6040-Z_EN_SP_Q6_051507.qxd 5/15/07 12:25 PM Page 1
Page 1: ...Ultra Premium Wrist Blood Pressure Monitor with Advanced Positioning Sensor APS and Omron Health Management Software Model HEM 670IT HEM 670IT Instruction Manual ESPA OL ENGLISH...
Page 2: ...l 13 Average Value Symbol 13 Morning Average Symbol 13 Evening Average Symbol 13 Battery Installation 14 Adjusting Settings 16 Setting the Memory Function 17 Setting the TruRead Function 18 Setting th...
Page 3: ...ing on the Display 46 Systolic Values above 170 mmHg 47 Display Combinations 48 To Delete All Values Stored in the Memory 50 Downloading Instructions Installing the Software 52 Using the Software 63 T...
Page 4: ...ist blood pressure reflect changes in arm blood pressure because the arteries in the arm and wrist connect The software included with this monitor can help you provide important trending information f...
Page 5: ...ual and any other literature in the box before operating the unit This device is intended for use in measuring blood pressure and pulse rate in the adult population Do not use this device on infants o...
Page 6: ...age the unit Use only 1 5V alkaline batteries with this device Do not use other types of batteries This may damage the unit Do not play the CD ROM disc included with this monitor on general audio play...
Page 7: ...stressful times 3 The cuff can be applied to your left or right wrist 4 Measurements should be taken in a quiet place and you should be in a relaxed seated position 5 Remain still and do not talk dur...
Page 8: ...Battery Cover Display Wrist Cuff Main Unit Button SET Button MORNING EVENING AVERAGE Button MEMORY Button Serial Port Cover START STOP Button Operating Instructions Fabric fastener hook Fabric fasten...
Page 9: ...ES A RELIABLE MEASUREMENT Correct cuff positioning is critical when monitoring blood pressure The Omron Wrist Blood Pressure Monitor with APS has a unique positioning sensor that confirms the cuff is...
Page 10: ...10 UNIT DISPLAY Systolic Blood Pressure Diastolic Blood Pressure Morning Hypertension Symbol Morning Average Symbol Pulse Display Week Display Heartbeat Symbol...
Page 11: ...ined as a rhythm that is more than 25 slower or 25 faster from the average rhythm detected while the monitor is measuring the systolic blood pressure and the diastolic blood pressure If the irregular...
Page 12: ...ce WARNING Contact your physician for specific information about your blood pressure Self diagnosis and treatment using measured results may be dangerous Follow the instructions of your physician or l...
Page 13: ...e USING THE MEMORY FUNCTION The Heartbeat Symbol flashes when the blood pressure reading stored in the memory is above 135 for the Systolic Blood Pressure value and or 85 for the Diastolic Blood Press...
Page 14: ...f in the direction of the arrow 2 Install 2 AAA size batteries so the positive and negative polarities match the polarities of the battery compartment as indicated 3 Replace the Battery Cover by slidi...
Page 15: ...e unit off before replacing the batteries Measurement values stored in the memory are not deleted during battery replacement When the batteries are replaced you may need to reset the date and time If...
Page 16: ...16 THE SETTINGS FOR THE MONITOR CAN BE ADJUSTED Automatic Memory Alarm TruRead Interval Time Position Sensor Wrist Time Contrast Delete Data refer to p50 Reset Setting ADJUSTING SETTINGS...
Page 17: ...Memory Function to OFF 1 TO CHANGE THE SETTING Press the START STOP button to turn the power off then press the SET button The Auto Memory Screen is displayed with the current setting The unit is set...
Page 18: ...ON the INTERVAL TIME can be set to 15 30 60 or 120 seconds Note When the Automatic Memory Function is set to OFF the TruRead function can not be set to ON 1 TO CHANGE THE SETTING Press the START STOP...
Page 19: ...e the setting to the desired time interval between measurements The INTERVAL TIME is set to 60 at the time of purchase 5 CONFIRM THE INTERVAL SETTING To continue to change other settings press the SET...
Page 20: ...he START STOP button to turn the power off then press the SET button Continue to press the SET button until the Position Sensor Screen is displayed The Position Sensor Screen is displayed with the cur...
Page 21: ...SENSOR 3 CONFIRM THE SETTING To continue to change other settings press the SET button to confirm the APS Function you selected The Wrist Screen is displayed If no other changes are needed press the S...
Page 22: ...button until the Wrist Screen displays The Wrist Screen displays with the current setting 2 SELECTING LEFT WRIST OR RIGHT WRIST Press the button to change the wrist setting to RIGHT Press the button t...
Page 23: ...setting the monitor taking a measurement using the memory or using the graph function 1 TO CHANGE THE SETTING Press the START STOP button to turn the power off then press the SET button Continue to p...
Page 24: ...Press the button to turn the sound on or off Press the SET button to confirm the setting Setting the Second Alarm Follow the same instructions for setting the first alarm To continue to change other...
Page 25: ...After resetting the monitor 1 TO CHANGE THE SETTING Press the START STOP button to turn the power off then press the SET button Continue to press the SET button until the Time Set Screen displays The...
Page 26: ...r PM Press the button to select AM or PM and the hour Press the SET button to confirm the setting The minute flashes on the display 6 SETTING THE MINUTE Press the button to set the minute To continue...
Page 27: ...The Contrast Screen displays with the current setting 2 SELECTING DARKER OR LIGHTER Press the button to darken the display Press the button to lighten the display 3 CONFIRM THE SETTING To continue to...
Page 28: ...is reset To delete all values stored in the memory refer to page 50 1 TO CHANGE THE SETTING Press the START STOP button to turn the power off then press the SET button Continue to press the SET button...
Page 29: ...reset the monitor press the button to select YES then press the SET button To cancel this change press the button to select NO then press the SET button The Auto Memory screen displays Press the START...
Page 30: ...the left wrist at the time of purchase CAUTION Read all of the information in the instruction manual and any other literature in the box before operating the unit CAUTION This device is intended for...
Page 31: ...r left wrist with your left thumb facing upward 3 Position the cuff leaving a clearance of approximately 1 2 to 1 inch between the cuff and the bottom of your palm as illustrated 4 Hold the bottom par...
Page 32: ...this case do not wrap the wrist cuff any tighter it will not affect the measurement Fold and fasten the extra portion of wrist cuff as shown to the right If the extra portion of wrist cuff is not fast...
Page 33: ...D MODE The POSITION SENSOR and SIGNAL are set to ON and the TruRead is set to OFF 1 Press the START STOP button The Position Sensor Screen is displayed NOTE If the date and time is not set the Time Sc...
Page 34: ...e mark Slowly move your wrist up and down so that the wrist comes to the level of your heart mark Please be careful not to raise your wrist too high If your wrist is raised higher than the level of yo...
Page 35: ...layed on the screen NOTE If you move your wrist higher or lower than your heart during the measurement the measurement will stop An error will display on the screen Turn the monitor off Take another m...
Page 36: ...se rate date and time are displayed NOTE To stop the inflation or measurement press the START STOP button The monitor will stop inflating start deflating and will turn off 4 Press the START STOP butto...
Page 37: ...Press the START STOP button The Position Sensor Screen is displayed NOTE If the date and time is not set the Time Screen is displayed Be sure to set the date and time before using the monitor Hold yo...
Page 38: ...e mark Slowly move your wrist up and down so that the wrist comes to the level of your heart mark Please be careful not to raise your wrist too high If your wrist is raised higher than the level of yo...
Page 39: ...he symbol changes to the symbol Hold your wrist in this position Do not move until the measurement is complete NOTE If you move your wrist higher or lower than your heart during the measurement the me...
Page 40: ...is complete waiting to start the next measurement The interval of time set between each measurement will appear on the display The second measurement is complete waiting to start the next measurement...
Page 41: ...ividual measurement results are not displayed during the consecutive measurements However the results for each individual measurement can be displayed after all the measurements are completed During t...
Page 42: ...ORY is set to OFF measurement values are not stored in the memory AVERAGING FUNCTION The monitor calculates the average reading based on the three most recent sets of measurement values taken within 1...
Page 43: ...cent reading The Average Value Symbol appears on the display when the average reading is shown 2 Press the button to display the set of measurement values from the most recent to the oldest Press the...
Page 44: ...ek begins Sunday at 4 00 AM MORNING AVERAGES Morning averages are based on the first average reading using the TruRead Mode or the first 3 reading within 10 minutes using the Single Mode Measurement t...
Page 45: ...ORNING EVENING AVERAGE button again The Evening Data graph is displayed NOTE Continue to press the MORNING EVENING AVERAGE button to display the data again 2 Press the START STOP button to turn the mo...
Page 46: ...mHg The bottom of the vertical bar displays the diastolic pressure of 99 mmHg The box displays the pulse rate of 100 beats per minute TO VIEW THE DATA FLASHING ON THE DISPLAY Press the SET button duri...
Page 47: ...he symbol appears at the top of the vertical bar 2 If the systolic blood pressure value is measured at 170 mmHg or higher three of more times during 8 weeks of data displayed in the graph the screen a...
Page 48: ...be displayed in the following combinations Display Average above AHA guidelines Morning Hypertension Average within AHA guidelines Morning Average Evening Average Morning average from This Week with M...
Page 49: ...ng Hypertension Symbol appears if the weekly average for morning measurements is above 135 85 In this case the Morning Hypertension Symbol is displayed when the Evening Average is displayed regardless...
Page 50: ...press the SET button Continue to press the SET button until the Delete Data Screen displays 2 Select YES or NO NOTE The DELETE DATA SETTING automatically defaults to NO after deleting the measurement...
Page 51: ...ta Deleted blank screen displays NOTE If you delete the data the monitor will automatically turn off To cancel the Delete Data press the button to select NO Press the SET button The Reset Setting Scre...
Page 52: ...meter NOTE This software is exclusive to Omron s blood pressure monitors and pedometers Visit http software omronhealthcare com to register your customer information for online support and to get soft...
Page 53: ...8MB or more Hard disc space 32MB or more Display Super VGA 800 x 600 pixel or higher resolution video adapter and monitor Others A CD ROM or DVD drive USB port USB Revision 1 1 compliant A printer Mic...
Page 54: ...ing to http software omronhealthcare com 1 HOW TO CONFIRM THE VERSION OF THE SOFTWARE BEFORE INSTALLATION Check A and B part of the CD ROM If you do not find any version indication like U1 21 its vers...
Page 55: ...Management Software 3 Select Uninstall Omron Health Management Software 4 Follow the directions on the message boxes 2 3 Install Omron Health Management Software from either a CD ROM or the Omron Web...
Page 56: ...set up program of this software Enable the anti virus software again after installation is complete 1 Insert the installation CD ROM disc into the CD drive of your PC If no screen appears Windows 200...
Page 57: ...57 INSTALLING THE SOFTWARE 2 The installation screen of MDAC may appear Click OK If this screen does not appear skip to Step 5 3 Select the checkbox I accept and click Next...
Page 58: ...rs when your PC must be restarted Select the checkbox Let setup restart the system now and click Finish Your PC will restart After restart start the CD ROM Refer to Step 1 for how to start the CD ROM...
Page 59: ...tep 8 6 Microsoft NET Framework 1 1 License Agreement appears Read the License Agreement thoroughly and if you agree with it select I agree and click Install NOTE The program will not be installed if...
Page 60: ...re appears Click Next to continue installation 9 The License Agreement of Omron Health Management Software appears Read the License Agreement thoroughly and if you agree with it select I accept the te...
Page 61: ...lection screen appears Check the installation destination folder and click Next To change the installation destination click Change and select a folder for installation 11 The installation confirmatio...
Page 62: ...This screen below appears when your PC must be restarted Click Yes to restart your PC 13 The Omron Health Management Software shortcut icon is created on the desktop 14 Remove the CD ROM disc from the...
Page 63: ...g up 1 Double click the Omron Health Management Software shortcut icon on the desktop If no icon appears on the desktop From the Start menu select All programs or Programs Omron Health Management Soft...
Page 64: ...ement Software can manage multiple users data Data is controlled by user name The number of users who can register for this software varies depending on the amount of free disc space in your PC The us...
Page 65: ...mron authorized parts and accessories Parts and accessories not approved for use with the device may damage the unit 1 Open the Serial Port Cover 2 Plug the USB Connector large connector into the USB...
Page 66: ...the data 5 The Confirm dialog appears Make sure your cable is connected then click Yes 6 Select the blood pressure monitor being used and click OK 7 Start importing data Click Cancel if you want to ca...
Page 67: ...installation ERROR MESSAGES The operating system currently installed in your PC is neither Windows 2000 nor Windows XP You cannot run this program on your PC Install Omron Health Management Software...
Page 68: ...ater Do not subject the monitor to extreme hot or cold temperatures humidity or direct sunlight CAUTION Store the device and the components in a clean safe location CAUTION Do not subject the monitor...
Page 69: ...S After several seconds Arm or body movement during the measurement Talking during the measurement Turn the unit off Refer to Taking a Measurement Take another measurement Do not move or talk until th...
Page 70: ...p the cuff may affect your blood pressure Review the sections Before Taking a Measurement and Taking a Measurement TROUBLESHOOTING TIPS ERROR INDICATORS AND TROUBLESHOOTING TIPS Batteries are almost w...
Page 71: ...y one or more of the following measures Reorient or relocate the receiving antenna Increase the separation between the product and the receiver Connect the product into an outlet on a circuit differen...
Page 72: ...on is available by calling 1 800 634 4350 or visit our website at www omronhealthcare com Enclose the Proof of Purchase Include 5 00 for the return shipping and handling Include a letter with your nam...
Page 73: ...ximately 300 uses when used 3 times a day with new alkaline batteries when inflated to 170 mmHg at 72 F Operating Temperature 50 F to 104 F 10 C to 40 C 30 to 85 RH Humidity Storage Temperature 4 F to...
Page 74: ...Manufactured by OMRON HEALTHCARE Made in China Distributed by OMRON HEALTHCARE INC 1200 Lakeside Drive Bannockburn Illinois 60015 www omronhealthcare com Copyright 2007 Omron Healthcare Inc...
Page 75: ...onitor de presi n arterial de mu eca Ultra Premium con Sensor de Posicionamiento Avanzado APS y Software para el Cuidado de la Salud de Omron Modelo HEM 670IT HEM 670IT Manual de instrucciones ESPA OL...
Page 76: ...medio E13 S mbolo de promedio matutino E13 S mbolo de promedio nocturno E13 Colocaci n de las pilas E14 Ajuste de configuraci n E16 Configuraci n de la funci n Memoria E17 Configuraci n de la funci n...
Page 77: ...t licos superiores a 170 mmHg E47 Combinaciones de pantalla E48 Para borrar todos los valores almacenados en la memoria E50 Instrucciones de descarga Instalaci n del Software E52 Uso del software E63...
Page 78: ...al de la mu eca reflejan cambios en la presi n arterial del brazo debido a que las arterias del brazo y de la mu eca est n conectadas El software incluido con este monitor puede brindarle informaci n...
Page 79: ...manual de instrucciones y cualquier otro material impreso incluido en la caja antes de usar la unidad La unidad est dise ada para medir la presi n arterial y el pulso en pacientes adultos Este dispos...
Page 80: ...el dispositivo pueden da ar la unidad Utilice s lo pilas alcalinas de 1 5V para este dispositivo No utilice otro tipo de pilas Podr a da ar la unidad No reproduzca el disco CD ROM inclu do con este mo...
Page 81: ...colocar la banda para la mu eca tanto en la mu eca izquierda como en la derecha 4 Las mediciones se deber n llevar a cabo en un lugar tranquilo mientras est sentado y relajado 5 Qu dese quieto y no ha...
Page 82: ...u eca Unidad principal Bot n Bot n SET Configuraci n Bot n MORNING EVENI NG AVERAGE Promedio Ma ana Noche Bot n MEMORY Memoria Tapa del puerto serial Bot n START STOP Inicio Detener Instrucciones de f...
Page 83: ...ente la cantidad ptima de presi n requerida para una medici n r pida y c moda de su presi n arterial Esto ayuda a garantizar una medici n precisa EL SENSOR DE POSICIONAMIENTO AVANZADO APS GARANTIZA UN...
Page 84: ...DE LA UNIDAD Presi n arterial sist lica Presi n arterial diast lica S mbolo de hipertensi n matutina S mbolo de promedio matutino Pantalla de visualizaci n del pulso Pantalla semanal S mbolo de latido...
Page 85: ...n ritmo que es m s del 25 m s lento o m s del 25 m s r pido que el ritmo promedio que se detecta mientras el monitor mide la presi n arterial sist lica y diast lica Si se muestra el s mbolo de latido...
Page 86: ...o como dispositivo de diagn stico ADVERTENCIA Consulte a su m dico para obtener informaci n espec fica acerca de su presi n arterial El autodiagn stico y la automedicaci n realizados sobre la base de...
Page 87: ...CI N MEMORIA El s mbolo de latido parpadea cuando la lectura de la presi n arterial almacenada en la memoria es superior a 135 para el valor de la presi n arterial sist lica y o 85 para el valor de la...
Page 88: ...bierta en la direcci n que indica la flecha 2 Coloque 2 pilas AAA de modo que las polaridades positiva y negativa concuerden con las polaridades que se indican en el compartimiento de las pilas 3 Vuel...
Page 89: ...Los valores de medici n que se almacenan en la memoria no se borran durante el cambio de pilas Al cambiar las pilas es posible que necesite volver a configurar la fecha y hora Si el a o parpadea en l...
Page 90: ...DE AJUSTAR LA CONFIGURACI N DEL MONITOR Memoria autom tica Alarma TruRead Intervalo de tiempo Sensor de posicionamiento Mu eca Tiempo Contraste Borrar datos consultar p50 Reconfiguraci n AJUSTE DE CON...
Page 91: ...memoria autom tica en OFF Apagado 1 PARA CAMBIAR LA CONFIGURACI N Presione el bot n START STOP Inicio Detener para apagar el monitor luego presione el bot n SET Configuraci n Se muestra la pantalla d...
Page 92: ...n de memoria autom tica est configurada en OFF Apagado la funci n TruRead no se puede configurar en ON Encendido 1 PARA CAMBIAR LA CONFIGURACI N Presione el bot n START STOP Inicio Detener para apaga...
Page 93: ...i n al intervalo de tiempo deseado entre las mediciones El INTERVALO DE TIEMPO est configurado en 60 al momento de la compra 5 CONFIRME LA CONFIGURACI N DEL INTERVALO Para cambiar otras configuracione...
Page 94: ...Apagado Cuando laSE ALest configuradaen ON Encendido el monitor emite un bip cuando llega ala posici n correcta 1 PARA CAMBIAR LA CONFIGURACI N Presione el bot n START STOP Inicio Detener para apagar...
Page 95: ...ones presione el bot n SET Configuraci n para confirmar la funci n APS seleccionada Aparece la pantalla de mu eca Si no necesita realizar otros cambios presione el bot n START STOP Inicio Detener para...
Page 96: ...eca Se muestra la pantalla de mu eca con la configuraci n actual 2 SELECCI N DE MU ECA IZQUIERDA O MU ECA DERECHA Presione el bot n para cambiar la configuraci n a RIGHT Derecha Presione el bot n par...
Page 97: ...la memoria o usar la funci n gr fico 1 PARA CAMBIAR LA CONFIGURACI N Presione el bot n START STOP Inicio Detener para apagar el monitor luego presione el bot n SET Configuraci n Mantenga presionado e...
Page 98: ...para encender o apagar el sonido Presione el bot n SET Configuraci n para confirmar la configuraci n Configuraci n de la segunda alarma Siga las mismas instrucciones para la configuraci n de la prime...
Page 99: ...CAMBIAR LA CONFIGURACI N Presione el bot n START STOP Inicio Detener para apagar el monitor luego presione el bot n SET Configuraci n Mantenga presionado el bot n SET hasta que aparezca la pantalla de...
Page 100: ...AM o PM y la hora Presione el bot n SET Configuraci n para confirmar la configuraci n Los minutos parpadear n en la pantalla 6 CONFIGURACI N DE LOS MINUTOS Presione el bot n para configurar los minuto...
Page 101: ...ntraste con la configuraci n actual 2 SELECCI N DEL GRADO DE CONTRASTE CLARO OSCURO Presione el bot n para oscurecer la pantalla Presione el bot n para aclarar la pantalla 3 CONFIRME LA CONFIGURACI N...
Page 102: ...enados en la memoria consulte la p gina 50 1 PARA CAMBIAR LA CONFIGURACI N Presione el bot n START STOP Inicio Detener para apagar el monitor luego presione el bot n SET Configuraci n Mantenga presion...
Page 103: ...el bot n para seleccionar YES S luego presione el bot n SET Para cancelar este cambio presione el bot n para seleccionar NO No luego presione el bot n SET Aparece la pantalla de memoria autom tica Pr...
Page 104: ...u eca izquierda al momento de la compra PRECAUCI N Lea toda la informaci n del manual de instrucciones y cualquier otro material impreso incluido en la caja antes de comenzar a usar la unidad PRECAUCI...
Page 105: ...con el pulgar izquierdo hacia arriba 3 Coloque la banda dejando un espacio de 1 2 a 1 pulgada aproximadamente entre la banda y la parte inferior de la palma de la mano como se muestra en la ilustraci...
Page 106: ...justado En ese caso no ajuste m s la banda ya que no afectar la medici n Doble y ajuste el sobrante de la banda hacia la derecha tal como se indica Si no lo ajusta no afectar la medici n COLOCACI N DE...
Page 107: ...SE AL est n configurados en ON Encendido y la funci n TruRead est configurada en OFF Apagado 1 Presione el bot n START STOP Inicio Detener Se muestra la pantalla de sensor de posicionamiento NOTA Si...
Page 108: ...Mueva lentamente la mu eca hacia arriba y hacia abajo para que quede al nivel de la marca del coraz n Tenga cuidado de no levantar demasiado la mu eca Si la mu eca se encuentra en un nivel m s alto qu...
Page 109: ...a pantalla NOTA Si mueve la mu eca por encima o por debajo del nivel del coraz n durante el proceso se detendr la medici n Se mostrar un error en la pantalla Apague el monitor Tome otra medici n y no...
Page 110: ...al pulso fecha y hora NOTA Para detener el inflado o la medici n presione el bot n START STOP Inicio Detener El monitor dejar de inflarse comenzar a desinflarse y se apagar 4 Presione el bot n START S...
Page 111: ...n START STOP Inicio Detener Se muestra la pantalla de sensor de posicionamiento NOTA Si la fecha y la hora no est n configuradas aparece la pantalla de hora Aseg rese de configurar la fecha y hora an...
Page 112: ...Mueva lentamente la mu eca hacia arriba y hacia abajo para que quede al nivel de la marca del coraz n Tenga cuidado de no levantar demasiado la mu eca Si la mu eca se encuentra en un nivel m s alto qu...
Page 113: ...mbolo cambia a Mantenga la mu eca en esta posici n Permanezca quieto hasta que se complete la medici n NOTA Si mueve la mu eca por encima o por debajo del nivel del coraz n durante el proceso se dete...
Page 114: ...letado espere para iniciar la pr xima medici n El intervalo de tiempo establecido entre una medici n y otra aparece en la pantalla La segunda medici n se ha completado espere para iniciar la pr xima m...
Page 115: ...nte las mediciones consecutivas no se muestran los resultados de las tres mediciones individuales No obstante los resultados de cada medici n individual se pueden visualizar una vez que se hayan compl...
Page 116: ...tom tica est configurada en OFF Apagado los valores de medici n no se almacenan en la memoria FUNCI N DE PROMEDIO El monitor calcula una lectura promedio basada en los valores de los tres conjuntos de...
Page 117: ...m s reciente El S mbolo de valor promedio aparece en la pantalla cuando se muestra la lectura promedio 2 Presione el bot n para mostrar el conjunto de valores de medici n desde el m s nuevo al m s ant...
Page 118: ...0 AM PROMEDIOS MATUTINOS Los promedios matinales se basan en la primera lectura promedio utilizando el modo TruRead o las primeras 3 lecturas dentro de los 10 minutos utilizando el Modo Individual Los...
Page 119: ...EVENING AVERAGE Promedio matutino nocturno Se muestra el gr fico de los datos de la noche NOTA Mantenga presionado el bot n MORNING EVENING AVERAGE para mostrar los datos nuevamente 2 Presione el bot...
Page 120: ...la barra vertical muestra una presi n diast lica de 99 mmHg La casilla muestra un pulso de 100 latidos por minuto PARA VISUALIZAR DATOS QUE PARPADEAN EN LA PANTALLA Presione el bot n SET Configuraci n...
Page 121: ...manas aparece el s mbolo en la parte superior de la barra vertical 2 Si el valor de la presi n arterial sist lica resulta 170 mmHg o superior por tres o m s veces en los datos incluidos en el gr fico...
Page 122: ...r con las siguientes combinaciones Pantalla Promedio superior a las pautas de la AHA hipertensi n matutina Promedio dentro de las pautas de la AHA Promedio matutino Promedio nocturno Promedio matutino...
Page 123: ...a aparece si el promedio semanal para las mediciones matutinas es superior a 135 85 En este caso el s mbolo de hipertensi n matutina aparece en pantalla cuando se muestra el promedio nocturno independ...
Page 124: ...enga presionado el bot n SET hasta que aparezca la pantalla de eliminaci n de datos 2 Seleccione YES S o NO No NOTA La CONFIGURACI N DE ELIMINACI N DE DATOS vuelve autom ticamente a NO luego de borrar...
Page 125: ...naci n de datos en blanco NOTA Si borra los datos el monitor se apagar atom ticamente Para cancelar la eliminaci n de datos presione el bot n para seleccionar NO No Presione el bot n SET Configuraci n...
Page 126: ...n NOTA Este software es exclusivo para los monitores de medici n de presi n arterial y ped metros de Omron Visite http software omronhealthcare com para registrar su informaci n de cliente acceder a a...
Page 127: ...AT Capacidad de 128MB o superior memoria Espacio en 32MB o m s disco duro Pantalla Super VGA 800 x 600 pixel o adaptador de video y monitor de mayor resoluci n Otros Lectora de CD ROM o DVD Puerto US...
Page 128: ...MO CONFIRMAR LA VERSI N DEL SOFTWARE ANTES DE INSTALAR Verifique la parte A y B del CD ROM Si no encuentra ninguna indicaci n de versi n como por ejemplo U1 21 la versi n es 1 0 y es necesario actual...
Page 129: ...l cuidado de la salud de Omron 3 Haga clic en Uninstall Omron Health Management Software Desinstalar software para el cuidado de la salud de Omron 4 Siga las instrucciones que se indican en los cuadro...
Page 130: ...Habilite el sofware anti virus nuevamente luego de completar la instalaci n 1 Inserte el disco CD ROM de instalaci n en la unidad lectora de CD en su PC Si no aparece la pantalla Windows 2000 i Haga c...
Page 131: ...ALACI N DEL SOFTWARE 2 Podr aparecer la pantalla de instalaci n de MDAC Haga clic en OK Aceptar Si no aparece esta pantalla pase al Paso 5 3 Seleccione la opci n I accept Acepto y haga clic en Next Si...
Page 132: ...p restart the system now Permitir reiniciar el equipo ahora y haga clic en Finish Finalizar Su PC se reiniciar Luego de reiniciarla ejecute el CD ROM Consulte el Paso 1 para informaci n acerca de c mo...
Page 133: ...cuerdo de Licencia de Microsoft NET Framework 1 1 Lea detenidamente el Acuerdo de Licencia y si acepta los t rminos seleccione I agree Acepto y haga clic en Install Instalar NOTA El programa no se ins...
Page 134: ...Siguiente para continuar la instalaci n 9 Aparecer el Acuerdo de Licencia del software para el cuidado de la salud de Omron Lea detenidamente el Acuerdo de Licencia y si acepta los t rminos seleccion...
Page 135: ...e la carpeta destino de la instalaci n y haga clic en Next Siguiente Para cambiar el destino de la instalaci n haga clic en Change Cambiar y elija una carpeta para la instalaci n 11 Aparecer la pantal...
Page 136: ...a siguiente pantalla aparecer cuando deba reiniciar su PC Haga clic en Yes Si para reiniciar su PC 13 Se crear un cono de acceso directo al software para el cuidado de la salud de Omron en el escritor...
Page 137: ...o de acceso directo del software para el cuidado de la salud de Omron Omron Health Management Software en el escritorio Si no aparece el cono en el escritorio Desde el men Start Inicio seleccione All...
Page 138: ...de m ltiples usuarios La informaci n se controla seg n el nombre del usuario La cantidad de usuarios que pueden registrarse en este software variar seg n el espacio libre en el disco de su PC El nomb...
Page 139: ...s accesorios autorizados por Omron Las piezas y accesorios que no hayan sido aprobados para usar con el dispositivo pueden da ar la unidad 1 Abra la tapa del puerto serial 2 Coloque el conector USB co...
Page 140: ...maci n Aseg rese de que el cable est conectado luego haga clic en Yes S 6 Seleccione el monitor de presi n arterial que usar y haga clic en OK Aceptar 7 Comienza la importaci n de informaci n Haga cli...
Page 141: ...ra la instalaci n MENSAJES DE ERROR El sistema operativo instalado en su PC no es Windows 2000 ni Windows XP No podr ejecutar este programa en su PC Instale el software para el cuidado de la salud de...
Page 142: ...emas altas o bajas humedad o luz directa del sol PRECAUCI N Guarde el dispositivo y los componentes en un lugar limpio y seguro PRECAUCI N No someta al monitor a golpes fuertes como por ejemplo dejar...
Page 143: ...ios segundos Movimiento del brazo o del cuerpo durante la medici n Hablar durante la medici n Apague la unidad Consulte C mo tomar una medici n Realice otra medici n No se mueva o hable hasta que apar...
Page 144: ...tores como el estr s la hora del d a y la forma en que se coloca la banda pueden afectar su presi n arterial Repase las secciones Antes de tomar una medici n y C mo tomar una medici n INDICADORESDEERR...
Page 145: ...aplicando una o m s de las siguientes medidas Reoriente o reubique la antena receptora Aumente la distancia de separaci n entre el equipo y el receptor Conecte el equipo a un tomacorrientes que est e...
Page 146: ...o e informaci n sobre reparaciones llamando al 1 800 634 4350 o visitando nuestro sitio Web en www omronhealthcare com Adjunte el comprobante de compra Incluya US 5 00 para la devoluci n por correo In...
Page 147: ...ndo se utiliza 3 veces por d a con pilas alcalinas nuevas y cuando se infla a 170 mmHg a 72 F Temperatura de funcionamiento 50 F a 104 F 10 C a 40 C 30 a 85 RH Humedad Temperatura de almacenamiento 4...
Page 148: ...Fabricado por OMRON HEALTHCARE Hecho en China Distribuido por OMRON HEALTHCARE INC 1200 Lakeside Drive Bannockburn Illinois 60015 www omronhealthcare com Copyright 2007 Omron Healthcare Inc 1664126 4A...