


Ultra XR User Guide
C–5
XR-56-201 5
Applic
ations
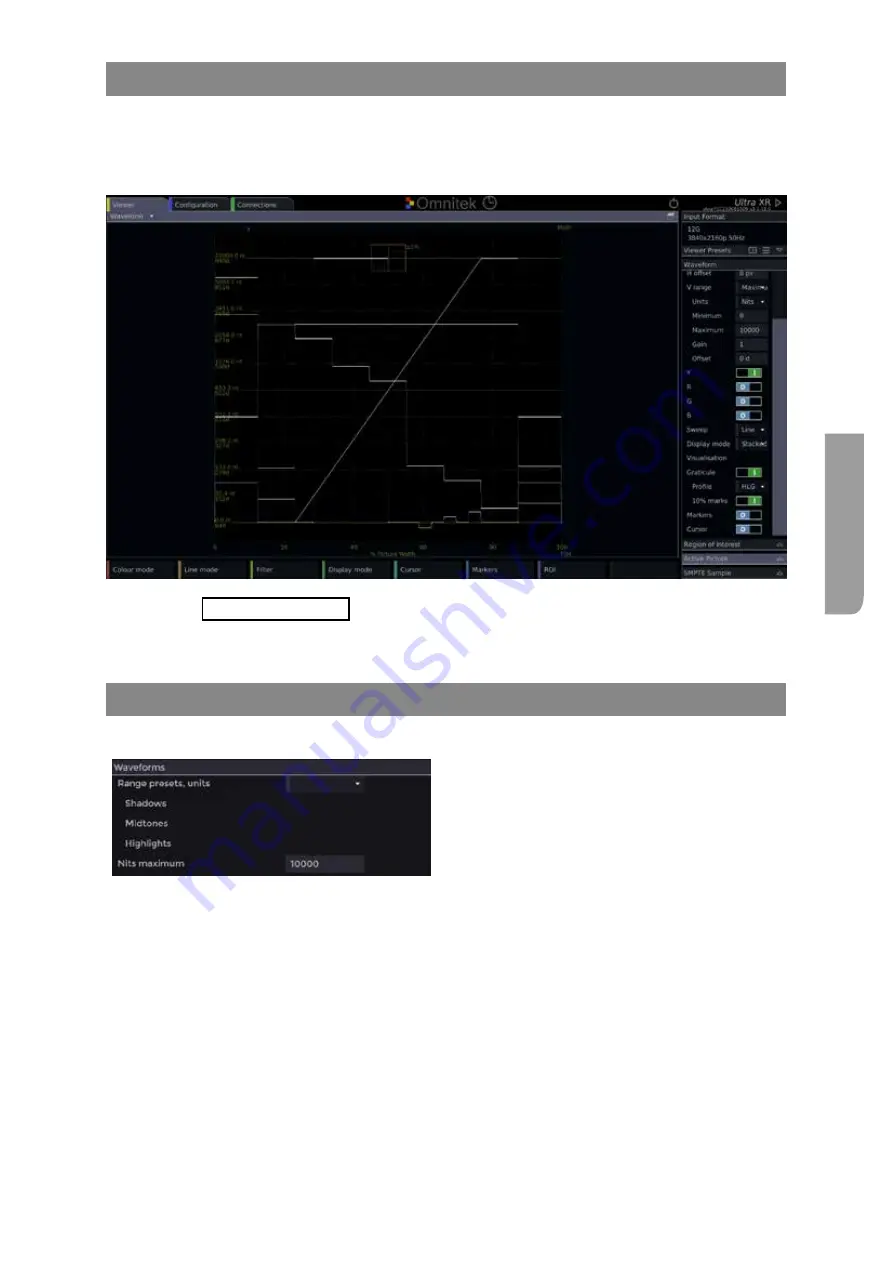
Waveform Monitor Setup
The
Graticule i
n the Waveform panel enables / disables the waveform graticule. The graticule can be
Digital Levels
,
% IRE
,
mV
or
Nits
. With the
10% Marks
enabled (1) the graticule vertical division will be
in 10% steps. This should be set to Nits which allows Profile to be set to
Rec 706 EOTF
,
Rec 2020 EOTF
,
PQ EOTF
or
HLG EOTF
to match the deliver format.
See the "Waveform Controls" section in the Viewer chapter for details
Note that specific settings can be saved as a Viewer Preset for future use.
Waveform Nits Settings
The
Waveforms
Control Panel allows the Nits settings to be selected.
Here the Shadows, Midtones and Highlight levels
to be used in the Waveforms tile can be setup.
Note that the Nits graticule is not be displayed
on the YCbCr waveforms.
Range preset, limits
allows the waveform graticule to be set to
Digital Levels
or
Nits
.
Shadows
allows the digital levels or Nits levels to be defined for images levels classed as
'shadows'. This should be setup to match normal working practices.
Midtones
allows the digital levels or Nits levels to be defined for images levels classed as
'midtones'. This should be setup to match normal working practices.
Hghlights
allows the digital levels or Nits levels to be defined for images levels classed as
'highlights. This should be setup to match normal working practices.
Nit maximum
sets the maximum Nits level. This should be set to match that of the delivery
format.
Note that specific settings can be saved as a Configuration Preset for future use.
Summary of Contents for Ultra XR
Page 13: ...Ultra XR User Guide 1 1 XR 56 201 5 1 Overview...
Page 14: ...1 2 XR 56 201 5 Overview 03 18 Overview...
Page 16: ...1 4 XR 56 201 5 Overview 03 18 Overview...
Page 25: ...Ultra XR User Guide 2 1 XR 56 201 5 2 Viewer...
Page 26: ...2 2 XR 56 201 5 Viewer 03 18 Viewer...
Page 38: ...2 14 XR 56 201 5 Viewer 03 18 Viewer...
Page 56: ...2 32 XR 56 201 5 Viewer 03 18 Viewer...
Page 64: ...2 40 XR 56 201 5 Viewer 03 18 Viewer...
Page 76: ...2 52 XR 56 201 5 Viewer 03 18 Viewer...
Page 80: ...2 56 XR 56 201 5 Viewer 03 18 Viewer...
Page 85: ...Ultra XR User Guide 3 1 XR 56 201 5 3 Generator...
Page 86: ...3 2 XR 56 201 5 Generator 03 18 Generator...
Page 92: ...3 8 XR 56 201 5 Generator 03 18 Generator...
Page 93: ...Ultra XR User Guide 4 1 XR 56 201 5 4 Configuration...
Page 94: ...4 2 XR 56 201 5 Configuration 03 18 Configuration...
Page 108: ...4 16 XR 56 201 5 Configuration 03 18 Configuration...
Page 120: ...4 28 XR 56 201 5 Configuration 03 18 Configuration...
Page 121: ...Ultra XR User Guide 5 1 XR 56 201 5 5 Connections...
Page 122: ...5 2 XR 56 201 5 Connections 03 18 Connections...
Page 141: ...Ultra XR User Guide A 1 XR 56 201 5 A Glossary...
Page 142: ...A 2 XR 56 201 5 Glossary 03 18 Glossary...
Page 150: ...A 10 XR 56 201 5 Glossary 03 18 Glossary...
Page 151: ...Ultra XR User Guide B 1 XR 56 201 5 B Installation...
Page 152: ...B 2 XR 56 201 5 Installation 03 18 Installation...
Page 158: ...B 8 XR 56 201 5 Installation 03 18 Installation...
Page 162: ...B 12 XR 56 201 5 Installation 03 18 Installation...
Page 169: ...Ultra XR User Guide C 1 XR 56 201 5 Ultra XR User Guide C 1 XR 56 201 5 C Applications...
Page 170: ...C 2 XR 56 201 5 Applications 03 18 Applications...
Page 176: ...C 8 XR 56 201 5 Applications 03 18 Applications...
Page 184: ...C 16 XR 56 201 5 Applications 03 18 Applications...


