Reproduction of part or all of the contents of this document in any form is expressly prohibited other than for individual use only. All text, images and labels are property of Nimax Gmbh.
Instruction Manual
Omegon® LRF 600 rangefinder
Congratulations on the purchase of the new Omegon® LRF 600 rangefinder. The
Omegon® LRF 600 rangefinder is used for measuring distances from 5 up to 600
metres using an invisible laser beam.
1. Included Accessories
Pulse strap and soft pouch. Battery is NOT included.
2. Getting Started
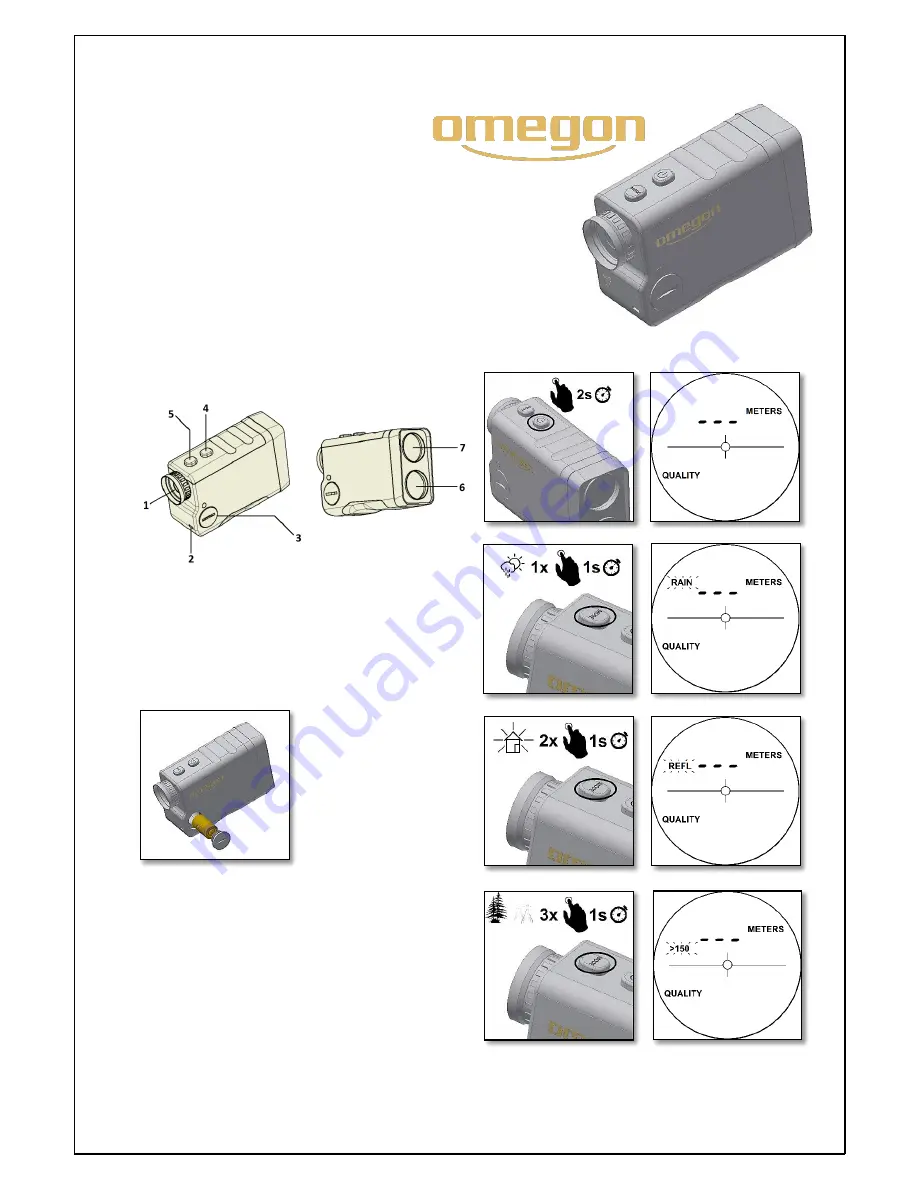
Take some time to identify the product’s parts.
1- Eyepiece;
2- Strap slit;
3- Battery cap/Battery compartment (1x CR2 Battery);
4- ON push button; Unit selection (metres/yards);
5- MODE push button; Measure type selector.
3. How to use the Omegon® LRF 600 rangefinder
3.1. How it works and limitations.
An invisible laser beam (905nm) is pointed to the target being
measured. The laser beam is reflected and the travel time
indicates the distance between observer and target. The
measurement is accurate up to 1 metre. The minimum
measuring distance is 5
metres, while the
maximum is 600 metres.
The target should be able
to reflect the laser beam.
The darker the target the
dimmer is the reflects
laser beam, with black
being the worst colour a
red reflecting surface the
best colour. The laser
beam angle is also
important. The laser beam
should be hitting the
target at 90 deg. (perpendicular to the laser beam) steep angles
provide limited readings. Sunny days interfere with the
readings and the beam range, overcast sky allows accurate
measurements. Rainy or foggy days reduce the reading range.
3.2. Using the
Omegon® LRF 600 rangefinder
Release the threaded battery cap, use a coin to rotate it. Insert
the CR2 battery and make sure that the positive side points out.
Place the battery cap back and retighten it. Press the ON push
button (figure 3) for 2 seconds.
Figure 1.
Figure 2. Press On to Power-up.
Figure 3.Press ON.
Figure 5.
Figure 5. Press mode 1x.
Figure 6. REFL flickers.
Figure 2.
Figure 7. Press Mode 2x
Figure 8. RAIN flickers.
Figure 4. Reticule is visible.
Figure 9. Press MODE 3x.
Figure 10. >150 flickers.


