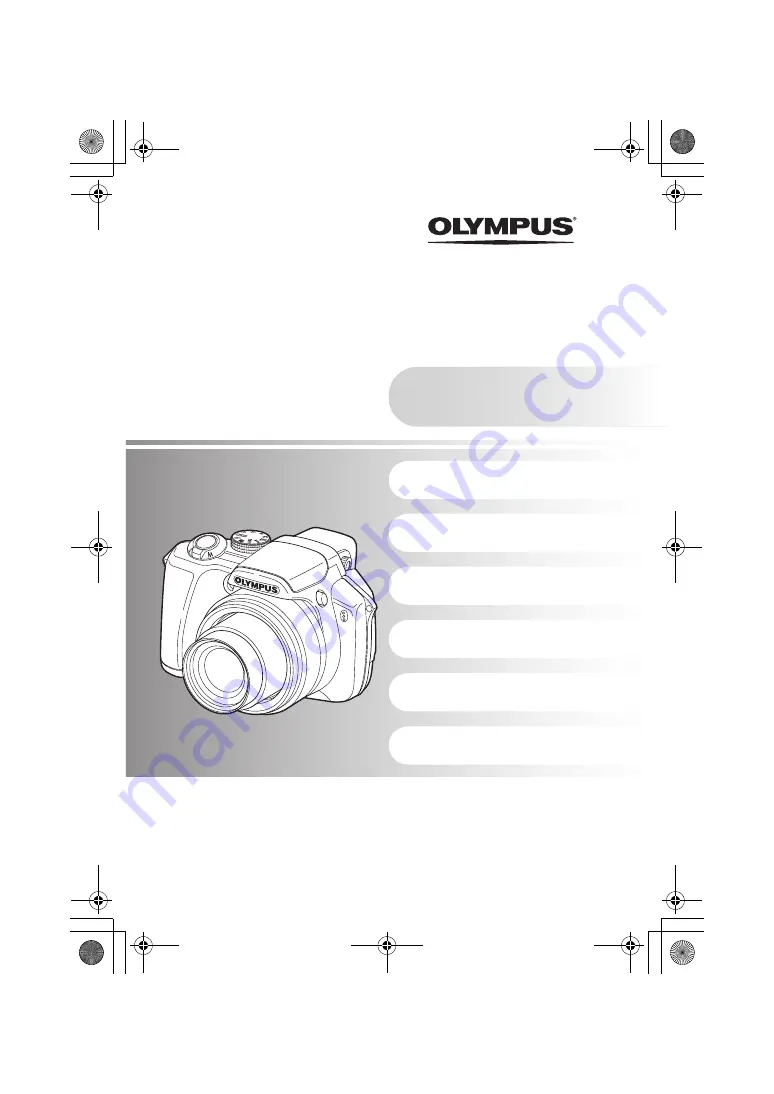
background image

Instruction
Manual

Menu operations

Button operations

Printing pictures

Using OLYMPUS Master

Getting to know your  
camera better

Appendix

DIGITAL CAMERA

Quick Start Guide

This manual will help you  
get started using your  
camera right away.

SP-560UZ

Thank you for purchasing an Olympus digital camera. Before you start to use your new camera, please 
read these instructions carefully to enjoy optimum performance and a longer service life. Keep this manual 
in a safe place for future reference.

We recommend that you take test shots to get accustomed to your camera before taking important photographs.

In the interest of continually improving products, Olympus reserves the right to update or modify information  
contained in this manual.

The screen and camera illustrations shown in this manual were produced during the development  
stages and may differ from the actual product.

d4355_e_unified_forU-Print_00_bookfile.book  Page 1  Thursday, July 12, 2007  11:01 AM

Summary of Contents for SP-560

Page 1: ...lly to enjoy optimum performance and a longer service life Keep this manual in a safe place for future reference We recommend that you take test shots to get accustomed to your camera before taking important photographs In the interest of continually improving products Olympus reserves the right to update or modify information contained in this manual The screen and camera illustrations shown in t...

Page 2: ... settings Printing pictures P 48 Learn how to print pictures you have taken Using OLYMPUS Master P 55 Learn how to transfer pictures to a computer and save them Getting to know your camera better P 62 Find out more about your camera and learn what to do when you have a question regarding operations Appendix P 77 Read about convenient functions and safety precautions on how to use your camera more ...

Page 3: ...p Strap rings Lens Cap Lens Cap String AA Batteries four USB cable AV Cable OLYMPUS Master 2 CD ROM Items not shown Instruction Manual this manual warranty card Contents may vary depending on purchase location Attach the strap and the lens cap Strap Eyelet Insert it all the way in Tilt the strap rings in such a way so that the strap rings can go through the strap eyelet d4355_e_unified_forU Print_...

Page 4: ...strap tight so that it does not come loose a Load batteries into the camera Attach the strap to the other eyelet in the same manner Preparing the camera d4355_e_unified_forU Print_00_bookfile book Page 4 Thursday July 12 2007 11 01 AM ...

Page 5: ...taking pictures without the card pictures will be stored in the internal memory For details on the card please refer to The card P 78 3 1 Card cover 2 Notch Contact area Insert the card straight in Insert the card until it clicks into place To remove the card push it all the way in release it slowly and remove d4355_e_unified_forU Print_00_bookfile book Page 5 Thursday July 12 2007 11 01 AM ...

Page 6: ...changes the shutter speed for shooting pictures M This function allows you to change the aperture and shutter speed manually r This function allows you to set each shooting function manually and use as your original shooting mode s This function allows you to shoot pictures by selecting a scene according to the shooting condition g This function allows you to set the target items by following the ...

Page 7: ...ad are indicated with 124 3 in this manual About the date and time setting screen MENU CANCEL X Y M D Y M D Y M D T I M E Y M D T I M E Y M D Year Month Day Exits a setting Minute Date formats Y M D M D Y D M Y Hour CANCEL MENU 2007 2007 X Y M D T I M E Y M D T I M E Y M D Y M D 1 F button 2Y button 3 button d4355_e_unified_forU Print_00_bookfile book Page 7 Thursday July 12 2007 11 01 AM ...

Page 8: ... After all items have been set press the o button For precise time setting press the o button as the time signal strikes 00 seconds 2007 2007 12 12 CANCEL MENU X Y M D T I M E Y M D T I M E Y M D Y M D 2007 2007 12 12 26 26 CANCEL MENU X Y M D T I M E Y M D T I M E Y M D Y M D CANCEL MENU OK SET 2007 2007 12 12 26 26 12 12 30 30 X Y M D T I M E Y M D T I M E Y M D Y M D CANCEL MENU OK SET 2007 200...

Page 9: ...omplete Horizontal grip Vertical grip Shutter button Pressed Halfway Place this mark over your subject The number of remaining still pictures is displayed The green lamp indicates the focus and exposure are locked Pressed Completely Shutter button The card access lamp blinks Adjusting the viewfinder s focus using the diopter Diopter adjustment dial u button d4355_e_unified_forU Print_00_bookfile b...

Page 10: ...e S button c Press the 1 F button to select YES and press the o button to erase the picture Arrow pad Next Picture Prev Picture Mode Dial Erase pictures OK SET MENU BACK YES NO E R A S E I N 3 button 4 button S button OK SET MENU BACK YES NO E R A S E 1 F button o button d4355_e_unified_forU Print_00_bookfile book Page 10 Thursday July 12 2007 11 01 AM ...

Page 11: ... for the brightness of the subject Settings in the CAMERA MENU such as WB and ISO Sensitivity can be changed 1 o button Turning the camera on and off Power on Shooting Mode Monitor turns on Lens extends Before turning the camera on in shooting mode remove the lens cap Playback mode Monitor turns on 2 Mode dial Switching between shooting and playback modes h Shooting pictures with full automatic se...

Page 12: ...ets the shutter speed slower When the correct exposure cannot be obtained the shutter speed is displayed in red o Sets the settings M Changing the aperture value and shutter speed for shooting pictures Exposure differential When this range has been exceeded 3 0EV the exposure differential is displayed in red Aperture value 4 Increases the aperture value 3 Decreases the aperture value Shutter speed...

Page 13: ...inal mode for shooting pictures s Shoot pictures by selecting a scene according to the situation g Follow the shooting guide for setting This function allows you to set the target items by following the shooting guide displayed on the screen Press m to display the shooting guide again To change the setting without using the shooting guide set the shooting mode to another one Functions set using th...

Page 14: ...tial Playback Press the m again to return to the first frame Select the pictures the have the s displayed and press o to play back automatically Sequential Pictures Auto Playback This function is only available for pictures taken with this model When the first frame is displayed perform the next operation to configure the settings to all the sequential pictures 0 y PRINT ORDER ERASE To configure s...

Page 15: ...back Pull the lever toward T to incrementally enlarge the picture up to 10 times the original size Push the lever toward W to reduce the size Use the arrow pad during close up playback to scroll around the picture Press o to return to the single frame playback Index display Use the arrow pad to select a picture for playback and press o to play back the single frame of the picture selected Calendar...

Page 16: ...exposure shooting settings or the shooting mode Each time you press the button focus is locked and canceled alternately If the zoom is operated after engaging the AF lock the picture may be out of focus Engage the AF lock after operating the zoom z Locking the exposure AE lock Assign the AE lock function to h so that the meter reading is saved by pressing h and the exposure is locked B AE lock mar...

Page 17: ...displays Press DISP E to change the display in the following order It cannot be switched when the mode dial is set to g 1 Not displayed in case of n 2 Not displayed if it is set to OFF in the menu g u Displaying the histogram P 46 FRAME ASSIST Displaying the frame assist Determining the type of frame assist P 46 6 button Flash pop up 7 u button Monitor Viewfinder 8 m button MENU 9 DISP E button Ch...

Page 18: ... press the S Once erased pictures cannot be restored Check each picture before erasing to avoid accidentally erasing pictures you want to keep g 0 Protecting pictures P 39 Use the arrow pad to select scenes playback picture and the items on the menus Shooting mode Viewing pictures The last picture taken is displayed on the monitor Press q in shooting mode Press q again or press the shutter button ...

Page 19: ...set for the zoom out angle to your subject Super macro mode Allows you to shoot from as close as 1 cm 0 39 in to your subject d 1 F button Changing picture brightness Exposure compensation Press 1 F in shooting mode set using 4 3 then press o Adjustable from 2 0 EV to 2 0 EV 3 Brighten 4 Darken Activate the setting contents e 3 button Flash shooting AUTO Auto flash The flash fires automatically in...

Page 20: ...re P 25 ISO Changing the ISO sensitivity P 26 DRIVE Continuous shooting P 27 METERING Changing the area for measuring the brightness of a subject P 28 f 2Y button Self timer shooting YOFF Cancel the self timer Y12 SEC After the setting press the shutter button completely The self timer lamp lights for approximately 10 seconds then starts blinking After blinking for approximately 2 seconds the pict...

Page 21: ...Operation guide BACK a Returns to the previous menu EXIT a Exits the menu Press 124 3 to select a setting SET f Sets the selected item Mode Dial m button Arrow pad o button SCN OK MENU SET EXIT SCN SCN SETUP SETUP SETUP SILENT SILENT MODE MODE SILENT MODE RESET RESET IMAGE IMAGE QUALITY QUALITY IMAGE QUALITY RESET SCN CAMERA CAMERA MENU MENU SCN CAMERA MENU OK SET MENU BACK 1 2 3 4 5 CAMERA MENU W...

Page 22: ... QFLASH R still pictures PANORAMA 1 SHARPNESS CONTRAST SATURATION NOISE REDUCT TIMELAPSE 1 conversion lens R movies 1 An OLYMPUS xD Picture Card is required SCN OK MENU SET EXIT SCN SCN SETUP SETUP SETUP SILENT SILENT MODE MODE SILENT MODE RESET RESET IMAGE IMAGE QUALITY QUALITY IMAGE QUALITY RESET SCN CAMERA CAMERA MENU MENU SCN CAMERA MENU OK SET MENU BACK 1 2 3 4 5 CAMERA MENU WB AUTO ISO AUTO ...

Page 23: ...for performing computer image processing such as contrast adjustment and red eye correction 3 2 3264x2176 HQ 3264x2448 Standard compression 3 2 3264x2176 SQ1 2 2560x1920 Low compression High quality Standard compression Standard This is useful for printing on full size paper This is useful for computer editing such as rotating or adding text to a picture 2304x1728 2048x1536 SQ2 2 1600x1200 Low com...

Page 24: ...E PORTRAIT SPORT NIGHT SCENE 1 NIGHT PORTRAIT 1 INDOOR CANDLE SELF PORTRAIT AVAILABLE LIGHT SUNSET FIREWORKS 1 CUISINE BEHIND GLASS DOCUMENTS AUCTION 2 SHOOT SELECT1 2 SHOOT SELECT2 3 SMILE SHOT BEACH SNOW UNDER WATER WIDE1 4 UNDER WATER WIDE2 4 5 UNDER WATER MACRO 4 QUICK SHUTTER g functions back to default settings Function Factory default setting Ref Page Flash AUTO P 19 OFF P 19 Y YOFF P 20 F ...

Page 25: ...gh the pictures Pictures with R are erased Select the pictures to be erased Press o to add or erase R to a picture to be deleted 4 CAMERA MENU WB Adjusting the color of a picture AUTO The white balance is adjusted automatically for natural color regardless of the light source PRESET Selects the white balance according to the light source 5 Sunny day For shooting under a clear sky 3 Cloudy day For ...

Page 26: ...ly adjusted according to the conditions of the subject HIGH ISO AUTO This function has a higher sensitivity compared to AUTO and stabilizes the blur caused by a moving subject or camera movement when taking pictures 50 100 200 400 800 1600 3200 6400 A low value lowers the sensitivity for daylight shooting of clear sharp pictures The higher the value the better the camera s light sensitivity and ab...

Page 27: ...data with few pixels are not converted to multiple pixels there is no loss of image quality IMAGE QUALITY is limited to below 2048x1536 DRIVE Continuous shooting o Shoots 1 frame at a time when the shutter button is pressed j Focus and exposure are locked at the first frame The sequential shooting speed varies depending on the setting of image quality c Pictures can be taken at a faster speed than...

Page 28: ...k area is metered Recommended for taking a picture against strong backlight 4 Meters the brightness over a wide area with emphasis on the center of the screen This method is used when you do not want to allow surrounding light to affect the picture AF MODE Changing the focusing area FACE DETECT When a face is being detected in the screen the camera will focus on the face A frame is displayed at th...

Page 29: ...ctures while keeping the subject in focus OFF Press the shutter button halfway to focus ON Fulltime AF keeps the subject in front of the lens in focus at all times without having to press the shutter button halfway The focusing time is reduced so you will not miss snapshot opportunities Also the subject is automatically kept in focus during movie recording AF PREDICT Shooting pictures with the foc...

Page 30: ...ar by showing the tail lights streaming backwards The slower the shutter speed the better the effects turn out If the shutter speed is faster than 1 200 the flash fires automatically with the front curtain QFLASH Setting to use an external flash IN Allows you to take pictures using the built in flash SLAVE When using a commercially available slave flash that is synchronized with the camera flash t...

Page 31: ...anorama shooting Panorama shooting is possible for up to 10 pictures A warning mark g is displayed after 10 pictures are taken PANORAMA Creating a panoramic picture Adjusting the white balance compensation The white balance can be adjusted in 7 increments in both the BLUE and RED directions Press o after setting is complete 1 Each press makes the color more blue 2 Each press makes the color more r...

Page 32: ...on Use this setting when you want to edit images on a computer SATURATION Adjusting the saturation of the image 1 Toward Colors become stronger 2 Toward Colors become weaker NOISE REDUCT Reducing the noise during long exposures OFF Noise is not reduced Noise may be conspicuous at slow shutter speeds ON Noise is reduced Shooting time takes twice as long as usual Shooting is not available during noi...

Page 33: ...FULLTIME AF is set to ON when R movies is set to ON the sound of operating lens may be recorded This function allows you to turn off operational sounds that occur during shooting and playback warning beeps shutter sounds etc TIMELAPSE Shooting pictures automatically as defined by set conditions OFF Timelapse shooting is deactivated ON Timelapse shooting is activated When setting the timelapse shoo...

Page 34: ...GM to ON or OFF Select the transition effect between pictures from TYPE BGM ON OFF TYPE NORMAL SCROLL FADER SLIDE ZOOM DOWN ZOOM UP CHECKER BOARD BLINDS SWIVEL RANDOM q OK MENU SET EXIT P PRINT PRINT ORDER ORDER PRINT ORDER SETUP SETUP SETUP SILENT SILENT MODE MODE SILENT MODE ERASE ERASE ERASE CALENDAR CALENDAR CALENDAR SLIDE SLIDE SHOW SHOW SLIDE SHOW EDIT EDIT EDIT PLAYBACK PLAYBACK MENU MENU P...

Page 35: ... and press o to play back the movie Playing time Total recording time 1 Increases the volume 2 Reduces the volume 3 Each time you press the button the playback speed changes in the following order 2 20 and 1 4 Plays the movie in reverse Each time you press the button the playback speed changes in the following order 1 2 20 and back to 1 1 Displays the first frame 2 Displays the last frame 3 Displa...

Page 36: ...Items that can be set with RAW DATA EDIT Available only when the picture is taken with WB set to V 3 PERFECT FIX Continuous shooting Select the item to be corrected with 12 and press o Select the picture with 4 3 and press o ALL Lighting fix and red eye fix are activated together LIGHTING FIX Only the dark areas of an image are corrected Underexposed areas caused by taking pictures against backlig...

Page 37: ...k and white 2 SEPIA This changes the pictures to sepia 3 SATURATION HARD This increases the saturation of the picture 4 SATURATION SOFT This slightly increases the saturation of the picture FRAME Add a frame to your picture Select a frame with 4 3 and press o Select the picture to be synthesized with the frame with 4 3 and press o Press 12 to turn the picture 90 degrees clockwise or 90 degrees cou...

Page 38: ...d press o LAYOUT Creating an index layout of pictures ALL IMAGES All pictures in the internal memory or the card are added to the layout CALENDAR A monthly calendar appears and the pictures you want to make layout are selected by the date SEL IMAGE Pictures that you want to make layout are specified one by one Press 4 3 to select a layout and press o Select the type of layout picture and press o S...

Page 39: ...ad to select the first frame of the part you want to keep and press o In the same manner select the last frame of the part you want to keep and press o MOVIE INDEX Capturing a still image from the movie Use 4 3 to select a movie and press o Use the arrow pad to select the frame to capture and press o 6 PRINT ORDER Making print reservations DPOF 7 PLAYBACK MENU 0 Protecting pictures OFF ON Protecte...

Page 40: ...r of displayed index frames Press o Movie playback begins from the selected frame R Adding sound to still pictures YES NO Sound is recorded for about 4 seconds Use 4 3 to select a picture and use 12 to select YES to record The BUSY bar will be temporarily displayed 8 ERASE Erase selected pictures Erase all pictures SEL IMAGE Selecting images to erase Use the arrow pad to select a picture and press...

Page 41: ...a language for on screen display Available languages vary depending on the area where you purchased this camera You can add other languages to your camera with the provided OLYMPUS Master software SETUP menus Shooting mode SETUP MEMORY FORMAT FORMAT 1 BACKUP 1 W PW ON SETUP 2 BEEP 2 8 2 SHUTTER SOUND 2 VOLUME 2 REC VIEW 3 MENU DISPLAY FILE NAME PIXEL MAPPING s X DUALTIME ALARM CLOCK VIDEO OUT FRAM...

Page 42: ...n OFF No sound 1 LOW HIGH 2 LOW HIGH VOLUME Adjusting the volume during playback OFF No sound 1 2 3 4 5 Press 12 to adjust the volume You can select OFF or adjust in 5 steps from 1 5 REC VIEW Viewing pictures immediately OFF The picture being recorded is not displayed This is useful when you want to prepare for your next shot while the previous picture is being recorded ON The picture being record...

Page 43: ...ing pictures to allow the pixel mapping function to perform properly If you turn the camera off during pixel mapping start again Select PIXEL MAPPING When START is displayed press o MENU DISPLAY Displaying menu display on the monitor LCD ONLY This always displays the menu on the monitor CURRENT This displays the menu on the viewfinder when the viewfinder is used and on the monitor when the monitor...

Page 44: ... X Setting the date and time Y M D Year Month Day Hour Minute Date formats Y M D M D Y D M Y m Exits a setting DUALTIME Setting the date and time in another time zone OFF Switches to the date and time set in X Pictures are recorded with the date and time set in X ON Switches to the date and time set in DUALTIME When setting the dual time select ON and then set the time Pictures are recorded with t...

Page 45: ... off when SNOOZE is set to OFF Checking the alarm settings While the camera is off press DISP E to display the set alarm time and the current time for 3 seconds ALARM CLOCK Setting alarms OFF No alarm is set or alarm is canceled ONE TIME Alarm is activated once After the alarm goes off the setting is canceled DAILY Alarm is activated daily at the set time Select ONE TIME or DAILY and set the alarm...

Page 46: ...EO OUT Playing back pictures on a TV NTSC PAL NTSC North America Taiwan Korea Japan PAL European countries China FRAME ASSIST Displaying the frame assist Determining the type of frame assist OFF w x u Displaying the histogram OFF ON DIRECT es on a TV Connect to the TV s video input yellow and audio input white terminals AV cable provided Connector cover Settings on the camera Press o in playback m...

Page 47: ... in feet and inches CUSTOM BUTTON Assigning functions to the custom buttons Select the function to be registered with 12 and press o g Functions that can be assigned to My Mode custom button P 72 shooting related functions OK SET MENU BACK 2 1 4 3 5 S E T U P ALARM CLOCK VIDEO OUT FRAME ASSIST u MY MODE SETUP CURRENT RESET CUSTOM OK MY MODE SETUP SET CANCEL SET SET CURRENT SETTING SET CURRENT SETT...

Page 48: ...ed on the settings screens P 50 P 51 pictures are printed according to these settings Refer to the printer s instruction manual for its standard settings or contact the printer manufacturer 1 Display the picture you want to print out on the monitor in the playback mode 2 Turn the printer on and plug the USB cable provided into the camera s multi connector and the printer s USB port The EASY PRINT ...

Page 49: ...ed 4 Disconnect the USB cable from the camera 5 Disconnect the USB cable from the printer You can use EASY PRINT even when the camera is turned off or in shooting mode With the camera turned off or in shooting mode connect the USB cable The selection screen for the USB connection is displayed Select EASY PRINT g EASY PRINT Step 3 P 49 CUSTOM PRINT Step 2 P 50 PC CUSTOM PRINT EASY PRINT START OK PR...

Page 50: ... pictures according to the print reservation data on the card If no print reservations have been made this option is not available g Print settings DPOF P 52 Setting the print paper SIZE Choose from the available paper sizes on your printer BORDERLESS Select with or without borders In MULTI PRINT mode you cannot print with a border OFF The picture is printed inside a blank frame ON The picture is ...

Page 51: ...ted for the displayed picture Setting the number of prints and data to be printed x Sets the number of prints You can select up to 10 prints DATE If you select WITH pictures are printed with the date FILE NAME If you select WITH pictures are printed with the file name P Use the arrow pad or the zoom lever to adjust trimming size and position and press o The trimmed picture is printed OK PRINT SING...

Page 52: ...ter For more details refer to the printer s instruction manual A PC card adapter may also be necessary Note DPOF reservations set by another device cannot be changed by this camera Make changes using the original device If a card contains DPOF reservations set by another device entering reservations using this camera may overwrite the previous reservations You can make DPOF print reservations for ...

Page 53: ... pad or the zoom lever to adjust trimming size and position and press o 4 When you finish making print reservations press o 5 Select the date and time print setting and press o 6 Select SET and press o Single frame reservation NO The pictures are printed without the date and time DATE The selected pictures are printed with the shooting date TIME The selected pictures are printed with the shooting ...

Page 54: ...Select KEEP and press o 4 Press 4 3 to select the picture with the print reservations you want to cancel and press 2 to decrease the number of prints to 0 Repeat Step 4 to cancel print reservations for other pictures 5 When you are finished canceling print reservations press o 6 Select the date and time setting and press o The setting is applied to the remaining pictures with print reservations 7 ...

Page 55: ...PUS Master Prepare the following items before starting USB cable OLYMPUS Master 2 CD ROM PC satisfying the operating environment P 56 Download images from the camera or other media View images and movies You can run a slideshow and play back sound Manage images Manage images in an album or folder Downloaded images are automatically sorted by date allowing you to search for images quickly Edit imag...

Page 56: ... the trash icon before performing the following operations Failure to do so could result in unstable computer operation and the need to reboot Disconnect the cable connecting the camera to the computer Turn off the camera Open the camera s battery compartment cover card cover Install the OLYMPUS Master software OS Windows 2000 Professional XP Home Edition XP Professional Vista CPU Pentium III 500 ...

Page 57: ...to install select Custom The installation begins The screen confirming that setup is completed is displayed Click Close Next the screen confirming whether to install OLYMPUS muvee theaterPack Trial Version is displayed To install this software click Install Macintosh 1 Insert the CD ROM into the CD ROM drive The CD ROM window is displayed If the CD ROM window is not displayed double click the CD R...

Page 58: ...tomatically so close this application and start OLYMPUS Master Note The camera functions are disabled while the camera is connected to a computer Connecting the camera to a computer via a USB hub may cause unstable operation In this case do not use a hub but connect the camera directly to the computer Images cannot be transferred to your computer with OLYMPUS Master if PC is selected in Step 3 3 i...

Page 59: ...d images are displayed in the browse window To disconnect the camera 1 Make sure that the card access lamp has stopped blinking 2 Make the following preparations for disconnecting the USB cable Windows 1 Click the Unplug or Eject Hardware icon in the system tray 2 Click the message that is displayed 3 When a message is displayed saying that the hardware can be ejected safely click OK Macintosh 1 T...

Page 60: ...wse window To view a movie 1 Double click the movie thumbnail that you want to see in the browse window OLYMPUS Master switches to the edit window and the first frame of the movie is displayed 2 To play back the movie click Play at the bottom of the screen This camera is compatible with USB mass storage You can connect the camera to your computer using the USB cable provided with the camera to dow...

Page 61: ...cally The monitor turns on and the selection screen for the USB connection is displayed 4 Select PC and press o 5 In the browse window select Camera then Update Camera Add Display Language The confirmation window for updating is displayed 6 Click OK The updating the camera window is displayed 7 Click Add Language in the updating camera display The Add Display Language of Camera window is displayed...

Page 62: ...tomatically turns off the lens retracts and the monitor turns off Press the o to turn the camera on The mode dial is set to q This is the playback mode for displaying pictures on the monitor Set the mode dial to a shooting mode The mode dial is set to g No pictures can be taken when the shooting guide is being displayed Take a picture after making the settings following the shooting guide or turn ...

Page 63: ...hout batteries for approximately 3 days In addition if the batteries are inserted in the camera for a short period the date and time settings will be returned to the factory default settings more quickly Before taking important pictures check that the date and time settings are correct There are several ways to focus depending on the subject When the subject is not in the center of the frame Place...

Page 64: ...Flash off Increase the ISO setting g ISO Changing the ISO sensitivity P 26 There are several factors that can cause the picture to appear grainy Using the digital zoom to take close up pictures With the digital zoom part of the image is cropped and enlarged The greater the magnification the grainier the picture appears g DIGITAL ZOOM Zooming in on your subject P 28 Increasing the ISO sensitivity W...

Page 65: ...taken based on the brightness of the subject in the AF target mark area without being affected by the light in the background g METERING Changing the area for measuring the brightness of a subject P 28 Set the flash to Fill in flash to activate fill in flash You can shoot a subject against backlight without the face of the subject appearing dark Fill in flash is effective for shooting against back...

Page 66: ...4 4 85 86 SHQ 3264x2448 12 12 253 255 3264x2176 13 13 284 286 HQ 3264x2448 23 23 492 499 3264x2176 26 26 551 561 SQ1 2560x1920 HIGH 19 19 404 410 NORMAL 36 37 770 789 2304x1728 HIGH 23 23 492 499 NORMAL 43 45 927 954 2048x1536 HIGH 29 29 615 627 NORMAL 54 56 1142 1184 SQ2 1600x1200 HIGH 45 46 954 984 NORMAL 82 86 1728 1827 1280x960 HIGH 65 68 1390 1453 NORMAL 112 121 2369 2558 1024x768 HIGH 94 101...

Page 67: ...ssed and FLASH Some functions cannot be used when there is no card in the camera PANORAMA PRINT ORDER FORMAT BACKUP Using a new card Lamp indicators Lamp Status Self timer lamp When set to Y12 SEC The lamp lights for approximately 10 seconds blinks for approximately 2 seconds and then the picture is taken When set to Y2 SEC The lamp blinks for approximately 2 seconds and then the picture is taken ...

Page 68: ...nd TIMELAPSE shootings When the mode dial is set to h or s the settings return to default except for IMAGE QUALITY and IMAGE STABILIZER g RESET Change the shooting functions back to default settings P 24 The monitor may be difficult to see and the exposure difficult to confirm when shooting under bright light Press DISP E repeatedly to display the histogram Set the exposure so that the graph is co...

Page 69: ...mory or on the card g R Adding sound to still pictures P 40 The size of the picture displayed on a computer screen changes depending on the computer settings When the monitor setting is 1024x768 and you are using Internet Explorer to view a picture with an image size of 2048x1536 at 100 the entire picture cannot be viewed without scrolling There are several ways you can view the entire picture on ...

Page 70: ...d it cannot be played back on this camera Use image processing software to view the picture on a computer If that cannot be done the image file is damaged r THE IMAGE CANNOT BE EDITED If pictures taken by other cameras are selected they cannot be edited Use image processing software to edit the pictures CARD COVER OPEN The card cover is open Close the card cover g BATTERY EMPTY The battery is empt...

Page 71: ...ove the jammed paper SETTINGS CHANGED The printer s paper tray has been removed or the printer has been operated while changing settings on the camera Do not operate the printer while changing settings on the camera PRINT ERROR There is a problem with the printer and or camera Turn off the camera and printer Check the printer and remedy any problems before turning the power on again r CANNOT PRINT...

Page 72: ...2 9 IMAGE STABILIZER 9 9 default P 16 AE LOCK 9 P 16 AF LOCK 9 P 16 AF LOCK AE LOCK 9 P 16 IMAGE QUALITY 9 9 P 23 WB 9 P 25 ISO 9 P 26 DRIVE 9 P 27 FINE ZOOM 9 9 P 27 DIGITAL ZOOM 9 9 P 28 METERING 9 P 28 AF MODE 9 9 P 28 FOCUS MODE 9 9 P 29 FULLTIME AF 9 9 P 29 AF PREDICT 9 9 P 29 AF ILLUMINAT 9 P 29 w 9 P 30 SYNCRO 9 9 P 30 QFLASH 9 9 P 30 R still pictures 9 9 P 30 PANORAMA 9 P 31 9 P 31 SHARPNE...

Page 73: ...W is not available 3 AUTO and HIGH ISO AUTO are not available 4 BKT is not available Functions available in shooting modes and scene modes Shooting mode Function h P A S M s n Ref Page Flash mode AUTO 9 9 9 P 19 9 9 9 P 19 9 9 9 9 9 P 19 H 9 9 9 9 9 P 19 SLOW 9 9 9 P 19 9 9 9 9 9 P 19 F 9 9 9 9 9 9 P 19 Aperture value 9 9 P 11 Shutter speed 9 9 P 12 9 9 9 9 9 9 P 19 9 9 9 9 9 9 P 19 Y 9 9 9 9 9 9 ...

Page 74: ...NORAMA 9 P 31 9 9 9 9 9 9 P 31 SHARPNESS 9 9 9 9 9 9 P 32 CONTRAST 9 9 9 9 9 9 P 32 SATURATION 9 9 9 9 9 9 P 32 NOISE REDUCT 9 9 9 9 6 P 32 TIMELAPSE 9 9 9 9 P 33 1 conversion lens 9 9 9 9 9 P 33 R movies 9 P 33 Scene i j N V Z a F D G U W c R S X P Ref Page Function Y 9 9 9 9 9 9 9 9 P 20 Flash mode 9 9 9 9 P 19 9 9 9 P 19 9 9 9 P 19 Optical zoom 9 9 9 9 9 9 9 AE LOCK 9 9 9 9 9 9 9 9 P 16 AF LOCK...

Page 75: ...9 FULLTIME AF 9 9 9 9 9 9 9 P 29 AF PREDICT 9 9 9 9 9 9 9 P 29 AF ILLUMINAT 9 9 9 9 9 9 P 29 w 9 9 9 9 P 30 SYNCRO 9 9 9 9 P 30 QFLASH 9 9 9 9 P 30 R still pictures 9 9 9 9 9 9 9 9 P 30 PANORAMA 9 9 9 9 9 9 9 9 P 31 NOISE REDUCT 5 5 P 32 TIMELAPSE 9 9 9 9 9 9 9 9 P 33 1 conversion lens 9 9 9 9 9 9 9 9 P 33 Scene d i e f k l H l r Ref Page Function Y 9 9 9 9 9 9 9 9 P 20 Flash mode 9 6 9 9 7 9 8 9 ...

Page 76: ...is is fixed at d 18 FACE DETECT is not available 19 This is fixed at FACE DETECT Scene d i e f k l H l r Ref Page Function IMAGE QUALITY 9 1 10 9 2 9 1 9 1 9 1 9 1 9 11 9 11 12 P 23 ISO 9 9 9 P 26 DRIVE 9 7 13 14 15 9 16 9 16 9 16 9 17 9 P 27 FINE ZOOM 9 9 9 9 9 9 7 P 27 DIGITAL ZOOM 9 9 9 9 9 9 7 P 28 AF MODE 9 9 9 9 18 9 9 18 9 19 9 P 28 FOCUS MODE 9 9 9 P 29 FULLTIME AF 9 9 9 9 9 9 5 9 P 29 AF ...

Page 77: ... wipe gently with a lens cleaner Note Do not use strong solvents such as benzene or alcohol or chemically treated cloth Mold may form on the lens surface if the lens is left dirty When storing the camera for extended periods remove the battery AC adapter and card and keep in a cool dry place that is well ventilated Periodically insert the battery and test the camera functions Note Avoid leaving th...

Page 78: ... extended period of time The camera is connected to a computer or printer Battery life varies depending on the type of battery manufacturer shooting conditions etc Similarly the camera may turn off without displaying the battery level warning or may display the battery level warning more quickly Pictures can be recorded on the optional card The internal memory and card are the camera s media for r...

Page 79: ...onnect or disconnect the AC adapter or the multi adapter while the camera is turned on Doing so could affect the camera s internal settings or functions Be sure to read the instruction manual for the AC adapter The AC adapter can be used in most home electrical sources within the range of 100 V to 240 V AC 50 60Hz around the world However depending on the country or area you are in the AC wall out...

Page 80: ...ING Do not use the camera near flammable or explosive gases Do not use the flash and LED on people infants small children etc at close range You must be at least 1 m 3 ft away from the faces of your subjects Firing the flash too close to the subject s eyes could cause a momentary loss of vision SAFETY PRECAUTIONS General Precautions Handling the Camera CAUTION TO REDUCE THE RISK OF ELECTRICAL SHOC...

Page 81: ... camera in cold temperatures Be careful with the strap Be careful with the strap when you carry the camera It could easily catch on stray objects and cause serious damage DANGER Use only the Olympus brand NiMH batteries and proper fitting charger Never heat or incinerate batteries Take precautions when carrying or storing batteries to prevent them from coming into contact with any metal objects su...

Page 82: ...ounted on a tripod adjust the position of the camera with the tripod head Do not twist the camera Do not touch electric contacts on cameras Do not leave the camera pointed directly at the sun This may cause lens or shutter curtain damage color failure ghosting on the CCD or may possibly cause fires Do not push or pull severely on the lens Before storing the camera for a long period remove the batt...

Page 83: ...the LCD monitor may take a long time to turn on or its color may change temporarily When using the camera in extremely cold places it is a good idea to occasionally place it in a warm place An LCD monitor exhibiting poor performance due to low temperatures will recover in normal temperatures The LCD used for the monitor is made with high precision technology However black spots or bright spots of ...

Page 84: ...is equipment does cause harmful interference to radio or television reception which can be determined by turning the equipment off and on the user is encouraged to try to correct the interference by one or more of the following measures Adjust or relocate the receiving antenna Increase the distance between the camera and receiver Connect the equipment to an outlet on a circuit different from that ...

Page 85: ... trademark All other company and product names are registered trademarks and or trademarks of their respective owners The standards for camera file systems referred to in this manual are the Design Rule for Camera File System DCF standards stipulated by the Japan Electronics and Information Technology Industries Association JEITA Trademarks d4355_e_unified_forU Print_00_bookfile book Page 85 Thurs...

Page 86: ...l ESP metering spot metering center weighted metering Shutter speed 15 to 1 2000 sec During bulb Max 8 minutes Aperture F2 8 to F8 0 Shooting range 0 1 m 3 94 in to W 1 2 m 47 24 in to T normal macro mode 0 01 m 0 39 in to super macro mode Monitor 2 5 TFT color LCD display 230 000 pixels Flash charge time Approx 7 sec for full flash discharge at room temperature using a new fully charged battery C...

Page 87: ...r P 9 m button P 17 Monitor P 44 P 88 Tripod Socket Battery Compartment Cover P 4 Battery Compartment Lock P 4 Arrow Pad P 18 o button OK FUNC P 20 f S button Shadow Adjustment Technology Erase P 18 u button Monitor Viewfinder P 17 Card access lamp P 9 P 59 P 67 Strap Eyelet P 3 Strap Eyelet DC IN jack P 79 Connector Cover P 46 P 48 P 58 Multi connector P 46 P 48 P 58 Microphone Speaker Diopter ad...

Page 88: ...P 31 8 ISO ISO 100 ISO 800 ISO 3200 etc P 26 9 Macro mode Super macro mode Manual focus AF predict MF P 19 P 29 P 29 10 Drive j c d g i 7 P 27 11 Spot metering n 4 P 28 12 AE lock B P 16 13 Flash mode H etc P 19 14 Flash intensity control w 2 0 2 0 P 30 15 Saturation 6 5 5 P 32 16 Contrast J 5 5 P 32 17 Sharpness N 5 5 P 32 18 Sound record R P 40 19 Dual time l P 44 20 Memory gauge a b c d Maximum...

Page 89: ... mode RAW SHQ HQ SQ1 SQ2 16 9 P 23 29 AF target mark P 9 P 28 30 Image size 3264x2448 2560x1920 640x480 etc P 23 31 Conversion lens 1 P 33 32 Alarm k P 45 33 Number of storable still pictures Recording length 4 00 36 P 66 34 Current memory IN Pictures are recorded to the internal memory xD Pictures are recorded to the card P 79 Item Indications Ref Page d4355_e_unified_forU Print_00_bookfile book ...

Page 90: ... P 39 6 Silent mode j P 33 7 Aperture value F2 8 to F8 0 P 12 8 Shutter speed 15 1 2 1 60 1 2000 etc P 12 9 Record mode RAW SHQ HQ SQ1 SQ2 16 9 P 23 10 Image size 3264x2448 2560x1920 640x480 etc P 23 11 Exposure compensation 2 0 2 0 P 19 12 White balance WB AUTO 5 3 1 w y V P 25 13 ISO ISO 100 ISO 800 ISO 3200 etc P 26 14 Date and time 07 12 26 12 30 P 7 P 44 15 File number M100 0004 P 52 16 Frame...

Page 91: ...12 AREA 28 Arrow pad 18 AUCTION i 24 AUTO full automatic h 6 11 AUTO ISO 26 AUTO shooting mode h 11 AUTO white balance WB AUTO 25 Auto bracketing BKT 27 Auto focus 64 Auto flash 19 AV cable 3 46 AVAILABLE LIGHT c 24 B BACKUP 41 Batteries 78 BEACH Z 24 BEEP 42 BEHIND GLASS P 24 BKT 27 Bracket shooting 27 C CALENDAR 36 CALENDAR edit 38 CALENDAR playback 15 36 CAMERA MENU 22 25 CANDLE W 24 Card 78 Ca...

Page 92: ...ill in flash 19 FINE ZOOM 27 FIREWORKS X 24 Flash 19 Flash intensity control w 30 Flash mode 19 Flash off 19 FLASH Q 30 Fluorescent lamp 1 2 3 w x y 25 Focus 9 14 64 Focus lock 14 FOCUS MODE 29 FORMAT 41 FRAME 37 FRAME ASSIST w x 46 Front curtain SYNC1 30 FULLTIME AF 29 G Green lamp 9 14 67 g 6 13 H HIGH ISO AUTO 26 High speed sequential shooting1 c 27 High speed sequential shooting2 d 27 Histogra...

Page 93: ... MY MODE r 13 MY MODE SETUP My1 2 3 4 47 N NIGHT SCENE G 24 NIGHT PORTRAIT U 24 Noise reduction O 32 NTSC 46 Number of prints x 51 Number of storage still picture 66 O OLYMPUS Master 55 One touch WB V 25 Optical zoom 15 P PAL 46 PANORAMA 31 PC 58 PERFECT FIX 36 PictBridge 48 Picture rotation y 39 PIXEL MAPPING 43 PLAYBACK MENU 34 39 Playback mode 11 14 17 Playback on a TV 46 Playing time 35 PORTRA...

Page 94: ...mode 6 11 18 SHQ 23 66 68 Shutter button 9 14 Shutter priority mode S 6 12 SHUTTER SOUND 42 Shutter speed 12 SILENT MODE j 33 Single frame reservation 53 Single frame shooting o 27 SLAVE 30 SLIDESHOW 34 SMILE SHOTl 24 25 SNOW a 24 SPORT C 24 SPOT AF MODE 28 Spot metering 5 28 SQ1 23 66 68 SQ2 23 66 68 STANDARD 48 Sunny day 5 25 SUNSET S 24 Super macro mode 19 SYNCRO 30 T TIMELAPSE L 33 Top menu 21...

Page 95: ...EN 95 Zoom lever 15 d4355_e_unified_forU Print_00_bookfile book Page 95 Thursday July 12 2007 11 01 AM ...

Page 96: ...96 EN Memo d4355_e_unified_forU Print_00_bookfile book Page 96 Friday July 13 2007 10 09 AM ...

Page 97: ...EN 97 Memo d4355_e_unified_forU Print_00_bookfile book Page 97 Friday July 13 2007 10 09 AM ...

Page 98: ...98 EN Memo d4355_e_unified_forU Print_00_bookfile book Page 98 Friday July 13 2007 10 09 AM ...

Page 99: ...EN 99 Memo d4355_e_unified_forU Print_00_bookfile book Page 99 Friday July 13 2007 10 09 AM ...

Page 100: ...P 560UZ Advanced Manual P 30 Q FLASH Setting to use an external flash 4 Press button Flash pop up to raise the built in flash 5 Select a flash mode Red eye reduction flash is not possible in RC mode 6 After shooting preparations are completed take some test shots to check the flash operation and images 7 Begin shooting while checking the charging completed indications of the camera and flash Note ...

Page 101: ...Printed in Japan VS264801 1AG6P1P3694 d4355_e_unified_forU Print_00_bookfile book Page 96 Tuesday July 17 2007 10 40 AM ...

Reviews: