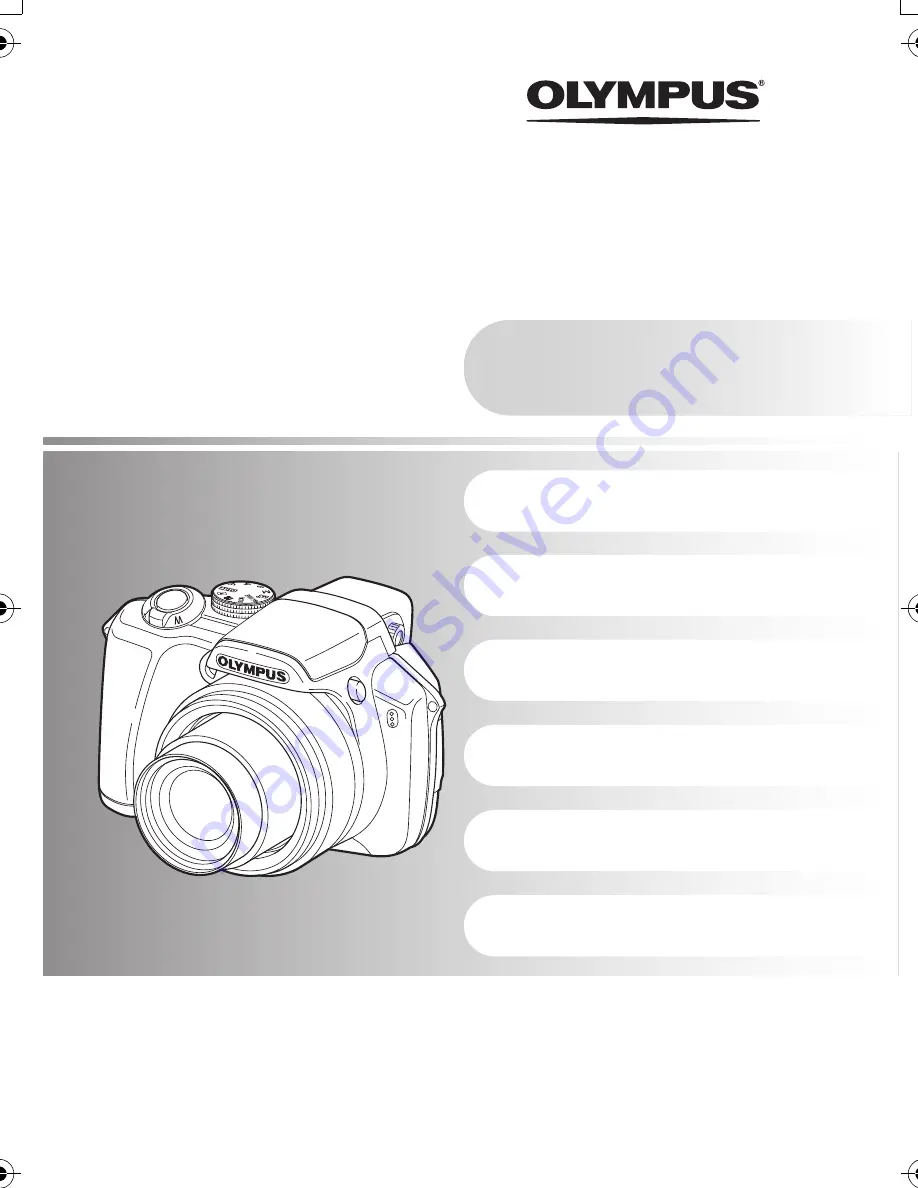
background image

Instruction
Manual

Menu operations

Button operations

Printing pictures

Using OLYMPUS Master

Getting to know your  
camera better

Appendix

DIGITAL CAMERA

Quick Start Guide

This manual will help you  
get started using your  
camera right away.

SP-550UZ

Thank you for purchasing an Olympus digital camera. Before you start to use your new camera, please 
read these instructions carefully to enjoy optimum performance and a longer service life. Keep this manual 
in a safe place for future reference.

We recommend that you take test shots to get accustomed to your camera before taking important photographs.

In the interest of continually improving products, Olympus reserves the right to update or modify information  
contained in this manual.

The screen and camera illustrations shown in this manual were produced during the development  
stages and may differ from the actual product.

d4321_e_unifild_Print_00_bookfile.book  Page 1  Tuesday, December 19, 2006  11:20 AM

Summary of Contents for SP-550UZ

Page 1: ...ra please read these instructions carefully to enjoy optimum performance and a longer service life Keep this manual in a safe place for future reference We recommend that you take test shots to get ac...

Page 2: ...ngs Printing pictures P 46 Learn how to print pictures you have taken Using OLYMPUS Master P 53 Learn how to transfer pictures to a computer and save them Getting to know your camera better P 61 Find...

Page 3: ...ings provided ide Digital Camera Strap Strap rings Lens Cap Lens Cap String AA Batteries four USB cable AV Cable OLYMPUS Master CD ROM Items not shown Instruction Manual this manual warranty card Cont...

Page 4: ...This camera allows you to take pictures without using an optional xD Picture Card hereinafter called the card For details on inserting the card please refer to Inserting and removing the card P 78 At...

Page 5: ...ws you to change the aperture manually S This function changes the shutter speed for shooting pictures M This function allows you to change the aperture and shutter speed manually r This function allo...

Page 6: ...utton and the 2Y button to select M About the date and time setting screen MENU CANCEL X Y M D Y M D Y M D T I M E Y M D T I M E Y M D Year Month Day Exits a setting Minute Date formats Y M D M D Y D...

Page 7: ...he 1 F button and the 2Y button to select Y M D j After all items have been set press the o button For precise time setting press the o button as the time signal strikes 00 seconds 2007 2007 08 08 26...

Page 8: ...e AF target mark clearly adjustment is complete Horizontal grip Vertical grip Shutter button Pressed Halfway Place this mark over your subject The number of remaining still pictures is displayed The g...

Page 9: ...the picture you want to erase b Press the S button c Press the 1 F button to select YES and press the o button to erase the picture Arrow pad Next Picture Prev Picture Mode Dial Erase pictures OK SET...

Page 10: ...ically sets the optimum aperture value and shutter speed for the brightness of the subject 1 o button Turning the camera on and off Power on Shooting Mode Monitor turns on Lens extends Before turning...

Page 11: ...e aperture value Shutter speed 1 Sets the shutter speed faster 2 Sets the shutter speed slower When the correct exposure cannot be obtained the aperture value is displayed in red o Sets the settings M...

Page 12: ...l cause the camera s internal temperature to rise and the camera may stop operation automatically Remove the battery and allow the camera to cool down for some time before you begin shooting again Or...

Page 13: ...ovies Set the mode dial to n and press the shutter button halfway to lock the focus and then press the shutter button completely to start recording Press the shutter button again to stop recording Sho...

Page 14: ...ned to My Mode custom button P 71 5 h button Shooting with digital image stabilization Close up playback Pull the lever toward T to incrementally enlarge the picture up to 10 times the original size P...

Page 15: ...emory If the zoom is operated after engaging the AF lock the picture may be out of focus Engage the AF lock after operating the zoom Locking the exposure AE lock Assign the AE lock function to h so th...

Page 16: ...in playback mode and press the S Once erased pictures cannot be restored Check each picture before erasing to avoid accidentally erasing pictures you want to keep g 0 Protecting pictures P 37 9 DISP E...

Page 17: ...g pictures Printing pictures c 4 button Shooting pictures close to the subject OFF Macro mode is deactivated Macro mode Allows you to shoot from as close as 10 cm 3 94 in when the zoom is set for the...

Page 18: ...he color of a picture P 23 ISO Changing the ISO sensitivity P 24 DRIVE Continuous shooting P 25 METERING Changing the area for measuring the brightness of a subject P 25 f 2Y button Self timer shootin...

Page 19: ...vigate the menus About the menus Operation guide BACK a Returns to the previous menu EXIT a Exits the menu Press 124 3 to select a setting SET f Sets the selected item Mode Dial m button Arrow pad o b...

Page 20: ...IMAGE STABILIZER w SYNCRO QFLASH R still pictures PANORAMA 1 SHARPNESS CONTRAST SATURATION NOISE REDUCT TIMELAPSE 1 conversion lens R movies 1 An OLYMPUS xD Picture Card is required SCN OK MENU SET EX...

Page 21: ...mages on full size paper For 3072x2304 This is useful for ordering prints from a photo store For 3 2 3072x2048 This is useful for performing computer image processing such as contrast adjustment and r...

Page 22: ...GLASS DOCUMENTS AUCTION SHOOT SELECT1 2 SHOOT SELECT2 3 BEACH SNOW UNDER WATER WIDE1 4 UNDER WATER WIDE2 4 5 UNDER WATER MACRO 4 lt settings Function Factory default setting Ref Page Flash AUTO P 17 O...

Page 23: ...rough the pictures Pictures with R are erased Select the pictures to be erased 4 CAMERA MENU WB Adjusting the color of a picture AUTO The white balance is adjusted automatically for natural color rega...

Page 24: ...ance setting then press o ISO Changing the ISO sensitivity AUTO Sensitivity is automatically adjusted according to the conditions of the subject HIGH ISO AUTO This function has a higher sensitivity co...

Page 25: ...quential shooting speed varies depending on the setting of image quality c Pictures can be taken at a faster speed than normal sequential shooting d 15fps Sequential shooting at a speed of 15 frames s...

Page 26: ...of the mark hold down o again FINE ZOOM Zooming in on your subject without reducing image quality OFF ON DIGITAL ZOOM Zooming in on your subject OFF ON AF MODE Changing the focusing area iESP The cam...

Page 27: ...yed in red on the monitor To adjust the focus hold down o again FULLTIME AF Shooting pictures while keeping the subject in focus OFF Press the shutter button halfway to focus ON Fulltime AF keeps the...

Page 28: ...nteresting effects in your picture such as expressing the movement of a car by showing the tail lights streaming backwards The slower the shutter speed the better the effects turn out If the shutter s...

Page 29: ...in the frame overlap with the next shot Press o to exit panorama shooting Panorama shooting is possible for up to 10 pictures A warning mark g is displayed after 10 pictures are taken PANORAMA Creatin...

Page 30: ...e light and dark areas become less defined giving the image a softer impression Use this setting when you want to edit images on a computer SATURATION Adjusting the saturation of the image 1 Toward Co...

Page 31: ...clearly When R movies is set to ON IMAGE STABILIZER is not available If FULLTIME AF is set to ON when R movies is set to ON the sound of operating lens may be recorded This function allows you to tur...

Page 32: ...ve is selected 1 SLIDESHOW Playing back pictures automatically Set music BGM to ON or OFF Select the transition effect between pictures from TYPE BGM ON OFF TYPE NORMAL SCROLL FADER SLIDE ZOOM DOWN ZO...

Page 33: ...ress o to play back the movie Another option is to select a picture with the movie icon A in the playback mode and press o to play back the movie Playing time Total recording time 1 Increases the volu...

Page 34: ...a new file This changes the picture to black and white and saves it as a new file This changes the picture to sepia and saves it as a new file 5 EDIT RAW DATA EDIT Editing the pictures recorded in ra...

Page 35: ...se Use the arrow pad and the zoom lever to adjust the position and size of the picture and press o Set the color of the title with the arrow pad and press o CALENDAR Create a calendar print with your...

Page 36: ...URATION Change the vividness of the picture Select the picture with 4 3 and press o Adjust the vividness with 12 and press o INDEX Making an index picture from a movie Use 4 3 to select a movie and pr...

Page 37: ...with 4 3 and rotate it by selecting 90 0 or 90 with 12 You can rotate several frames in succession MOVIE INDEX Capturing a still image from the movie Use 4 3 to select a movie and press o Use the arro...

Page 38: ...ame Push or pull the zoom lever to change the number of displayed index frames Press o Movie playback begins from the selected frame R Adding sound to still pictures YES NO Sound is recorded for about...

Page 39: ...is not empty before starting the copy or use the AC adapter You can select a language for on screen display Available languages vary depending on the area where you purchased this camera You can add o...

Page 40: ...ture registered with SCREEN SETUP is displayed SCREEN SETUP Registering a picture as the startup screen BEEP Adjusting the volume of beep when button is pressed OFF No sound 1 LOW HIGH 2 LOW HIGH 8 Ad...

Page 41: ...is displayed press o FILE NAME Resetting the file names of pictures RESET This method is useful when grouping files on separate cards The file number and folder number are reset every time a new card...

Page 42: ...e 24 hour format X Setting the date and time Y M D Year Month Day Hour Minute Date formats Y M D M D Y D M Y m Exits a setting DUALTIME Setting the date and time in another time zone OFF Switches to t...

Page 43: ...no operation the alarm stops automatically and the camera turns off when SNOOZE is set to OFF Checking the alarm settings While the camera is off press DISP E to display the set alarm time and the cu...

Page 44: ...n the picture VIDEO OUT Playing back pictures on a TV NTSC PAL NTSC North America Taiwan Korea Japan PAL European countries China FRAME ASSIST Displaying the frame assist Determining the type of frame...

Page 45: ...to save in my mode and press 3 or o Change setting of the item and press o g Functions that can be assigned to My Mode custom button P 71 m ft Setting the measurement unit during manual focus m Displa...

Page 46: ...dard print settings If STANDARD is selected on the settings screens P 48 P 49 pictures are printed according to these settings Refer to the printer s instruction manual for its standard settings or co...

Page 47: ...ith the picture selection screen displayed 4 Disconnect the USB cable from the camera 5 Disconnect the USB cable from the printer You can use EASY PRINT even when the camera is turned off or in shooti...

Page 48: ...emory or the card PRINT ORDER Prints the pictures according to the print reservation data on the card If no print reservations have been made this option is not available g Print settings DPOF P 50 Se...

Page 49: ...the number of prints and data to be printed for the displayed picture Setting the number of prints and data to be printed x Sets the number of prints You can select up to 10 prints DATE If you select...

Page 50: ...t reservation data without using a computer For more details refer to the printer s instruction manual A PC card adapter may also be necessary Note DPOF reservations set by another device cannot be ch...

Page 51: ...display the trimming line Use the arrow pad or the zoom lever to adjust trimming size and position and press o 4 When you finish making print reservations press o 5 Select the date and time print set...

Page 52: ...selected picture 2 Select and press o 3 Select KEEP and press o 4 Press 4 3 to select the picture with the print reservations you want to cancel and press 2 to decrease the number of prints to 0 Repea...

Page 53: ...mputer gP 58 Using OLYMPUS Master What is OLYMPUS Master Prepare the following items before starting USB cable OLYMPUS Master 2 CD ROM Computer equipped with a USB port Download images from the camera...

Page 54: ...e sure to remove the media drag drop onto the trash icon before performing the following operations Failure to do so could result in unstable computer operation and the need to reboot Disconnect the c...

Page 55: ...nstructions When the OLYMPUS Master licensing agreement is displayed read the agreement and click Yes to proceed with the installation 4 When the user information screen is displayed enter your Name s...

Page 56: ...ster 1 Make sure the camera is turned off The monitor is off The lens is retracted 2 Connect the multi connector on the camera to the USB port on the computer using the provided USB cable Refer to you...

Page 57: ...LYMPUS Master 2 icon in the OLYMPUS Master 2 folder The browse window is displayed When OLYMPUS Master is started up for the first time after installation the OLYMPUS Master initial setting screen and...

Page 58: ...ct icon when the Untitled or NO_NAME icon on the desktop is dragged Drag and drop it on the eject icon 3 Disconnect the USB cable from the camera Note Windows When you click Unplug or Eject Hardware a...

Page 59: ...to your computer Note If your computer is running Windows 98SE you will need to install the USB driver Before connecting the camera to your computer with the USB cable double click the files from the...

Page 60: ...hen Update Camera Add Display Language The confirmation window for updating is displayed 6 Click OK The updating the camera window is displayed 7 Click Add Language in the updating camera display The...

Page 61: ...e taking a picture If the camera is left for 12 minutes it automatically turns off the lens retracts and the monitor turns off Press the o to turn the camera on The mode dial is set to q This is the p...

Page 62: ...n if the batteries are inserted in the camera for a short period the date and time settings will be returned to the factory default settings more quickly Before taking important pictures check that th...

Page 63: ...off Set the camera to h mode g h button Shooting with digital image stabilization P 14 Increase the ISO setting g ISO Changing the ISO sensitivity P 24 There are several factors that can cause the pic...

Page 64: ...ou can shoot a subject against backlight without the face of the subject appearing dark Fill in flash is effective for shooting against backlight and under fluorescent and other artificial lighting g...

Page 65: ...25 HQ 3072x2304 10 10 275 280 3072x2048 11 12 307 313 SQ1 2560x1920 HIGH 7 7 203 206 NORMAL 15 16 409 420 2304x1728 HIGH 7 8 206 208 NORMAL 19 19 499 515 2048x1536 HIGH 8 8 218 221 NORMAL 24 25 626 65...

Page 66: ...ard in the camera PANORAMA PRINT ORDER FORMAT BACKUP Lamp indicators Lamp Status Self timer lamp When set to Y12 SEC The lamp lights for approximately 10 seconds blinks for approximately 2 seconds and...

Page 67: ...fter the power is turned off except for the settings of Y PANORAMA and TIMELAPSE shootings When the mode dial is set to h or s the settings return to default except for IMAGE QUALITY and IMAGE STABILI...

Page 68: ...s not possible to erase the sound In this case make a re recording with silence Sound recording is not possible if there is insufficient space in the internal memory or on the card g R Adding sound to...

Page 69: ...OR There is a problem with the selected picture and it cannot be played back on this camera Use image processing software to view the picture on a computer If that cannot be done the image file is dam...

Page 70: ...he printer JAMMED The paper is jammed Remove the jammed paper SETTINGS CHANGED The printer s paper tray has been removed or the printer has been operated while changing settings on the camera Do not o...

Page 71: ...TTER 9 P 11 FLASH MODE 9 P 17 9 P 17 Y 9 P 18 MONITOR u 1 9 P 15 ZOOM 2 9 P 13 IMAGE STABILIZER 9 9 default P 14 AE LOCK 9 P 15 AF LOCK 9 P 15 IMAGE QUALITY 9 9 P 21 WB 9 P 23 ISO 9 P 24 DRIVE 9 P 25...

Page 72: ...are indicated with an For details refer to Functions with restrictions in shooting scenes P 74 Modes and shooting functions Functions available in shooting modes and scene modes Shooting mode Functio...

Page 73: ...le 5 This is fixed at ON during bulb shooting QFLASH 9 R still pictures 9 PANORAMA 9 9 SHARPNESS 9 CONTRAST 9 SATURATION 9 NOISE REDUCT 9 9 5 TIMELAPSE 9 1 conversion lens 9 9 R movies 9 MEMORY FORMAT...

Page 74: ...D G U W c R S X Function Flash mode 9 9 9 9 9 9 Optical zoom 9 9 IMAGE QUALITY 9 1 9 2 9 1 DRIVE 9 3 9 3 FINE ZOOM 9 9 DIGITAL ZOOM 9 9 AF MODE 9 FOCUS MODE 9 FULLTIME AF 9 AF PREDICT 9 AF ILLUMINAT 9...

Page 75: ...7 This is fixed at Macro mode 8 IMAGE QUALITY is fixed at 640x480 in SQ2 9 This is fixed at BKT 10 This is fixed at c 11 This is fixed at e Scene P d i e f k l H Function Flash mode 9 5 9 9 6 9 7 9 7...

Page 76: ...f the lens with a commercial blower then wipe gently with a lens cleaner Note Do not use strong solvents such as benzene or alcohol or chemically treated cloth Mold may form on the lens surface if the...

Page 77: ...lization Set FULLTIME AF to ON The monitor is left on for an extended period of time The camera is connected to a computer or printer Battery life varies depending on the type of battery manufacturer...

Page 78: ...n off the camera 2 Open the card cover Inserting the card 3 Orientate the card and insert it into the card slot as shown in the illustration Insert the card straight in Insert the card until it clicks...

Page 79: ...of time Do not use any other AC adapter with this camera Note Do not remove or load the battery or connect or disconnect the AC adapter or the multi adapter while the camera is turned on Doing so cou...

Page 80: ...es heat including stereo amplifiers WARNING Do not use the camera near flammable or explosive gases Do not use the flash and LED on people infants small children etc at close range You must be at leas...

Page 81: ...f possible wear gloves when handling the camera in cold temperatures Be careful with the strap Be careful with the strap when you carry the camera It could easily catch on stray objects and cause seri...

Page 82: ...es In wet places such as bathrooms or in the rain When using products with weatherproof designs read their manuals as well In places prone to strong vibrations Never drop the camera or subject it to s...

Page 83: ...upply of extra batteries The recommended batteries may be difficult to obtain while traveling Please recycle batteries to help save our planet s resources When you throw away dead batteries be sure to...

Page 84: ...information contained therein Olympus reserves the right to alter the features and contents of this publication or software without obligation or advance notice Radio and Television Interference Chang...

Page 85: ...o the dealer where the product was purchased or any other Olympus service station within the business area of Olympus Imaging Europa GmbH as stipulated on the website http www olympus com During the o...

Page 86: ...or replacing the product Any liability for indirect or consequential loss or damage of any kind incurred or suffered by the customer due to a defect of the product and in particular any loss or damage...

Page 87: ...mm camera Photometric system Digital ESP metering spot metering center weighted metering Shutter speed 15 to 1 2000 sec During bulb Max 8 minutes Aperture F2 8 to F8 0 Shooting range 0 1 m 3 94 in to...

Page 88: ...on Flash Popup P 15 DISP E button P 16 Viewfinder P 8 m button P 15 Monitor P 41 P 89 Tripod Socket Battery Compartment Cover P 4 Battery Compartment Lock P 4 Arrow Pad P 17 o button OK FUNC P 18 S bu...

Page 89: ...nce 5 3 1 w y V P 23 7 White balance compensation B1 B7 R1 R7 P 29 8 ISO ISO 100 ISO 800 ISO 3200 etc P 24 9 Macro mode Super macro mode Manual focus AF predict MF P 17 P 27 P 27 10 Drive j c d g e 7...

Page 90: ...xposure compensation 2 0 2 0 P 17 27 Record mode RAW SHQ HQ SQ1 SQ2 16 9 P 21 28 AF target mark P 8 P 26 29 Image size 3072x2304 2560x1920 640x480 etc P 21 30 Conversion lens 1 P 31 31 Alarm k P 43 32...

Page 91: ...5 Protect 9 P 37 6 Silent mode f P 31 7 Aperture value F2 8 to F8 0 P 11 8 Shutter speed 15 to 1 2000 BULB P 11 9 Record mode RAW SHQ HQ SQ1 SQ2 16 9 P 21 10 Image size 3072x2304 2560x1920 640x480 et...

Page 92: ...8 All frame reservation U 52 Aperture priority mode A 5 11 AREA 26 Arrow pad 17 AUCTION i 22 AUTO full automatic h 5 10 AUTO ISO 24 AUTO shooting mode h 10 AUTO white balance WB AUTO 23 Auto bracketin...

Page 93: ...ME 41 49 Fill in flash 17 FINE ZOOM 26 FIREWORKS X 22 Flash 17 Flash intensity control w 28 Flash mode 17 Flash off 17 FLASH Q 28 Fluorescent lamp 1 2 3 w x y 23 Focus 8 13 63 Focus lock 13 FOCUS MODE...

Page 94: ...12 MY MODE SETUP My1 2 3 4 45 N NIGHT SCENE G 22 NIGHT PORTRAIT U 22 Noise reduction O 30 NTSC 44 Number of prints x 49 Number of storage still picture 65 O OLYMPUS Master 53 One touch WB V 23 Optical...

Page 95: ...ode 5 10 SHQ 21 65 67 Shutter button 8 13 Shutter priority mode S 5 11 SHUTTER SOUND 40 Shutter speed 11 SILENT MODE f 31 Single frame reservation 51 Single frame shooting o 25 SLAVE 28 SLIDESHOW 32 S...

Page 96: ...96 EN Memo...

Page 97: ...EN 97 Memo...

Page 98: ...98 EN Memo...

Page 99: ...EN 99 Memo...

Page 100: ...Printed in Japan VH940701 1AG6P1P3345...

Reviews: