background image

Table of Contents 

Quick task index 

1.

Preparation 

2.

Shooting 

3.

Playback 

4.

Menu functions 

5.

Connecting the camera to a 
smartphone 

6.

Connecting the camera to a 
computer and a printer 

7.

Cautions 

8.

Information 

9.

SAFETY PRECAUTIONS 

  Thank you for purchasing an Olympus digital camera. Before you start to use your new camera, 

please read these instructions carefully to enjoy optimum performance and a longer service life. 
Keep this manual in a safe place for future reference.

  We recommend that you take test shots to get accustomed to your camera before taking important 

photographs.

  The screen and camera illustrations shown in this manual were produced during the development 

stages and may differ from the actual product.

  If there are additions and/or modifications of functions due to firmware update for the camera, the 

contents will differ. For the latest information, please visit the Olympus website.

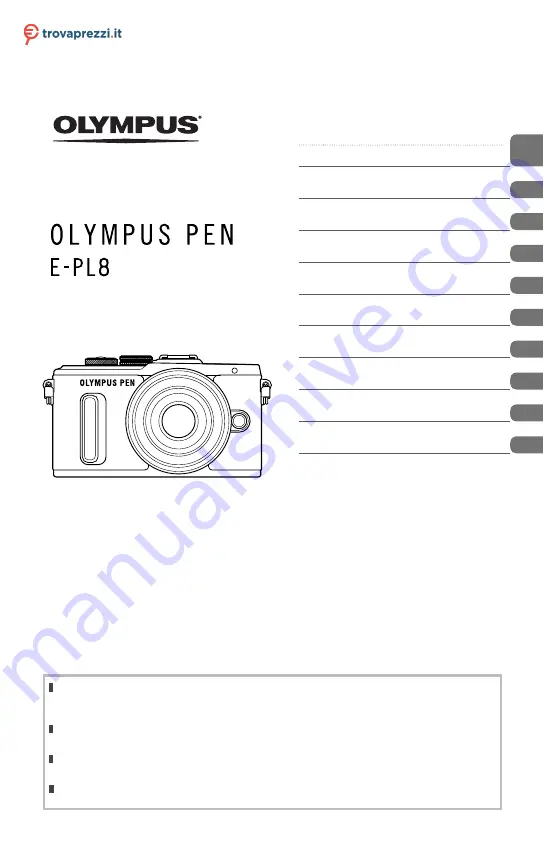
Instruction Manual

DIGITAL CAMERA


Model No.: IM001

Questo manuale d’istruzione è fornito da trovaprezzi.it. Scopri tutte le offerte per 

Olympus PEN E-PL8 Corpo

o cerca il tuo prodotto tra le 

migliori offerte di Fotocamere Digitali

Summary of Contents for PEN E-PL8

Page 1: ...erence We recommend that you take test shots to get accustomed to your camera before taking important photographs The screen and camera illustrations shown in this manual were produced during the deve...

Page 2: ...when any flash is used by or near children Do not leave flash unattended while in use Care must be taken as burns can occur from touching hot parts Do not operate if the flash has been dropped or dama...

Page 3: ...speed S shutter priority mode 32 Choosing aperture and shutter speed M manual mode 33 Shooting with long exposure time BULB TIME 33 Live composite photography dark and light field composite 34 Shooti...

Page 4: ...Selected Share Order Selected 70 Audio recording 70 Adding still pictures to My Clips Add to My Clips 70 Using the touch screen 71 Selecting and protecting images 71 Menu functions 72 Basic menu opera...

Page 5: ...rates 106 Accessory Port Menu 107 Using OLYMPUS PENPAL 107 A OLYMPUS PENPAL Share 108 B OLYMPUS PENPAL Album 109 C Electronic Viewfinder 109 Connecting the camera to a smartphone 110 Connecting to a s...

Page 6: ...control flash photography 127 Other external flash units 128 Electronic Viewfinder VF 4 129 Principal Accessories 129 System chart 130 Cleaning and storing the camera 132 Cleaning the camera 132 Stora...

Page 7: ...eworks 24 Taking pictures of stars and trajectories of light Live composite photography 34 Adjusting the brightness of highlights and shadows Exposure compensation 45 Taking photos without the flash I...

Page 8: ...ing subject C AF 49 Creating a short movie by combining movie scenes Clips 39 Reducing image noise mottling Noise Reduct 91 Optimizing the monitor Adjusting the monitor contrast Monitor brightness adj...

Page 9: ...ansferring images to a smartphone Transferring images to a smartphone 112 Adding location data to images Adding location data to images 113 Camera Settings g Synchronizing the date and time Setting th...

Page 10: ...ody cap before attaching the lens 8 Hot shoe cover 9 Stereo microphone P 62 70 86 0 Self timer lamp AF illuminator P 54 P 88 a Lens release button P 15 b Lens lock pin c Tripod socket d Battery card c...

Page 11: ...button P 44 72 1 Speaker 2 Monitor P 18 42 44 64 71 3 Accessory port P 107 143 4 Hot shoe P 127 5 Fn G button P 98 P 40 67 6 U button P 38 48 7 R Movie H button P 36 98 P 70 8 MENU button P 72 9 INFO...

Page 12: ...purchased the camera Camera Body cap Strap USB cable CB USB6 CD ROM Instruction manual Computer software Flash FL LM1 Lithium ion battery BLS 50 Lithium ion charger BCS 5 Flash case Instruction manual...

Page 13: ...ing the battery card compartment cover Battery card compartment lock Battery card compartment cover 1 2 3 Loading the battery Direction indicating mark Removing the battery Turn off the camera before...

Page 14: ...e g Usable cards P 124 Terminal area 1 2 Turn off the camera before loading or removing the battery or card Do not forcibly insert a damaged or deformed card Doing so may damage the card slot 3 Closin...

Page 15: ...clockwise until you hear it click direction indicated by arrow 3 3 Make sure the camera is turned off when attaching or removing the lens Do not press the lens release button Do not touch internal po...

Page 16: ...mera ready to shoot Displayed for about ten seconds after the camera is turned on green Low battery blinks red Charge the battery Camera sleep operation If no operations are performed for a minute the...

Page 17: ...Use FG on the arrow pad to select d and press I Select X and press I X W j 0 k 0 2 1 Setup Menu English 0 5sec Wi Fi Settings c Menu Display Firmware Rec View Back Set d tab 3 Set the date and time U...

Page 18: ...ration direction Focal length Internal temperature warning m P 137 c Flash P 58 blinks charging in progress lights up charging completed d AF confirmation mark P 21 e Image stabilizer P 53 f Art filte...

Page 19: ...0 250 F5 6 P 0 0 0 0 L N S ISAUTO S ISAUTO ISO A 200 Wi Fi F FHD Image only 01 02 03 01 02 03 38 38 250 250 F5 6 0 0 0 0 L N S ISAUTO S ISAUTO ISO A 200 Wi Fi F FHD Histogram display Display a histogr...

Page 20: ...odes For how to use the various shooting modes see the following A P 22 SCN P 24 ART P 26 J P 28 P P 30 A P 31 S P 32 M P 33 n P 36 1 Rotate the mode dial to choose a mode 2 Set up the camera and deci...

Page 21: ...t in focus P 134 4 Release the shutter Press the shutter button all the way fully The shutter sounds and the picture is taken The shot image will be displayed on the monitor You can focus and take pic...

Page 22: ...ckground blurring 1 Set the mode dial to A 2 Shoot 3 To change the shooting settings touch the tab to display the live guides Touch a guide item to display the slider of the level bar 250 250 F5 6 01...

Page 23: ...may appear grainy at some live guide setting levels Changes to live guide setting levels may not be visible in the monitor Frame rates drop when Blurred Motion is selected The flash cannot be used wi...

Page 24: ...rlight Q Candle T 3D Photo G Night Scene R Sunset J Panning U Night Portrait T Documents G Children s Panorama P 25 2 Shoot To choose a different setting press z to display the scene menu To maximize...

Page 25: ...have installed the supplied computer software you can use it to join pictures together to form a panorama g Connecting the camera to a computer and a printer P 116 1 Select Panorama in SCN and press z...

Page 26: ...s Process I II Creates an image that expresses a surreal atmosphere Cross Process II creates an image that emphasizes magenta Gentle Sepia Creates a high quality image by drawing out shadows and softe...

Page 27: ...03 38 38 L N 0 0 0 0 ISO 400 S ISAUTO S ISAUTO Wi Fi FHD F To maximize the benefits of the art filters some of the shooting function settings are disabled If RAW is currently selected for image qualit...

Page 28: ...ts and aspect ratios changed from the original PHOTO STORY The number of images and arrangement of image regions can be altered for each theme of the PHOTO STORY You can change the frame color and fra...

Page 29: ...d as JPEG and the images in the frames as RAW RAW images are saved in 4 3 From among the AF Mode S AF MF and S AF MF can be set Also the AF target is fixed to a single central point The metering mode...

Page 30: ...t is too dark Use the flash 4000 4000 F22 F22 The subject is too bright The metered range of the camera is exceeded A commercially available ND filter for adjusting the amount of light is required The...

Page 31: ...ISAUTO S ISAUTO Wi Fi FHD F After pressing the F button F you can also use FG to choose the aperture Setting the aperture value Decreasing aperture value Increasing aperture value F2 8 F4 0 F5 6 F8 0...

Page 32: ...Fi FHD F After pressing the F button F you can also use FG to choose the shutter speed Setting the shutter speed Slower shutter speed Faster shutter speed 60 15 30 60 125 250 4000 The aperture value d...

Page 33: ...e rises in the image pickup device or image pickup device internal drive circuit causing current to be generated in those sections of the image pickup device that are not normally exposed to light Thi...

Page 34: ...the MENU button 3 Press the shutter button once to prepare for shooting You can shoot when a message that indicates preparations are complete is displayed in the monitor 4 Press the shutter button Liv...

Page 35: ...An AF target will be displayed Use the slider to choose the size of the frame Touch S to turn off the display of the AF target 14 14 10 10 7 7 5x 5x 250 250 F5 6 ISO A 200 S ISAUTO S ISAUTO Off 2 Use...

Page 36: ...rticular this phenomenon becomes more noticeable when using a long focal length If the camera is used for extended periods the temperature of the image pickup device will rise and noise and colored fo...

Page 37: ...transition between scenes M Old Film Randomly apply damage and dust like noise similar to old movies U Multi Echo Apply an after image effect After images will appear behind moving objects T One Shot...

Page 38: ...vie recording P 95 you cannot take photographs while using other movie effects than Movie Tele converter e Portrait and Diorama cannot be used at the same time as Art Fade The sound of touch operation...

Page 39: ...o start shooting The recording ends automatically when the preset shooting time has elapsed and a screen for checking the recorded movie is displayed Press the z button to save your clip and begin sho...

Page 40: ...ect an item using FG and press the z button Play My Clips Plays back the files in My Clips in order starting from the beginning Play Movie When a movie file has been selected you can control playback...

Page 41: ...My Clips and a maximum of 99 cuts per clip The maximum values may vary depending on the file size and length of My Clips You cannot add movies other than clips to My Clips You can also work with My Cl...

Page 42: ...n While recording a clip touch R again to extend the recording time up to a maximum of 16 seconds A One Touch e Portrait Turning this on makes skin look smooth and translucent D One Touch Custom Self...

Page 43: ...onitor You can also shoot by touching the subject displayed in the monitor or by pressing the shutter button You can shoot by operating the camera with a smartphone g Shooting remotely with a smartpho...

Page 44: ...vailable settings Image stabilizer P 53 Picture mode P 61 Scene mode P 24 Art filter mode P 26 White balance P 52 Sequential shooting Self timer P 54 Aspect ratio P 56 Record mode P 57 n mode P 37 Fla...

Page 45: ...values to make pictures brighter negative values to make pictures darker Exposure can be adjusted by 5 0EV Negative No compensation 0 Positive Exposure compensation is not available in A M or SCN mod...

Page 46: ...tal Tele converter Image Aspect and group target settings Using small target and group target Setting AF target You can change the target selection method and target size You can also select Face prio...

Page 47: ...ill be indicated by a white border 5 Press the shutter button halfway to focus When the camera focuses on the face in the white border the border will turn green If the camera is able to detect the su...

Page 48: ...e button was pressed the zoom frame will be displayed at the current focus position Use FGHI to position the zoom frame Press the INFO button and use FG to choose the zoom ratio 5 7 10 14 2 Press and...

Page 49: ...cked at the first time Even if the subject moves or you change the composition of the picture the camera continues trying to focus When using a Four Thirds system lens this setting will change to S AF...

Page 50: ...rs exposure in 324 areas of the frame and optimizes exposure for the current scene or if an option other than OFF is selected for I Face Priority portrait subject This mode is recommended for general...

Page 51: ...ng conditions 1 Press the z button to display the live control and select the ISO sensitivity item using FG AUTO AUTO P i i ISO AUTO ISO ISO ISO AUTO AUTO AUTO R R AUTO AUTO AUTO AUTO ISO A 200 ISO A...

Page 52: ...ance AUTO k Used for most light conditions when there is a white portion framed on the monitor Use this mode for general use Preset white balance 5 5300K For shooting outdoors on a clear day or to cap...

Page 53: ...unt of camera shake that can occur when shooting in low light situations or shooting with high magnification The image stabilizer starts when you press the shutter button halfway 1 Press the z button...

Page 54: ...lization switch of the lens When you do not use the image stabilizer set both of the functions on the camera and the lens to off Sequential shooting using the self timer Keep the shutter button presse...

Page 55: ...y Frame AF is set to On each frame is automatically focused before shooting To cancel the activated self timer press G When you are using S no confirmation image is displayed during shooting The image...

Page 56: ...uch as for processing on PC use on website etc 1 Press z to display the live control and select the image quality mode item for still images using FG L F 4 3 P WB AUTO WB WB WB AUTO AUTO AUTO S ISAUTO...

Page 57: ...ips press the INFO button and change settings using the control dial P Record mode Application Settings you can change FHD Full HD Normal 1 Switches to clips shooting P 39 Shooting time FHD F Full HD...

Page 58: ...in place 2 1 UNLOCK switch Hot shoe cover Connector cover Removing the flash unit Press the UNLOCK switch while removing the flash unit 2 1 UNLOCK switch 2 Raise the flash head Lower the flash head wh...

Page 59: ...ULL 1 4 etc Manual For users who prefer manual operation If you press the INFO button you can use the dial to adjust the flash level In Red eye reduction flash after the pre flashes it takes about 1 s...

Page 60: ...External flash units can be used to prevent vignetting To prevent photographs from being overexposed select mode A or M and choose a high f number or reduce ISO sensitivity Adjusting flash output flas...

Page 61: ...d colors j Natural Produces natural colors Z Muted Produces flat tones a Portrait Produces beautiful skin tones J Monochrome Produces black and white tone K Custom Select one picture mode set the para...

Page 62: ...P S AF S AF j M ISON M ISON Program Auto Shooting mode 2 Use HI to choose a shooting mode and press the z button P Optimal aperture is set automatically according to the brightness of the subject You...

Page 63: ...2 Stabilization is not possible when the camera shake is excessive When the inside of the camera becomes hot shooting is automatically stopped to protect the camera With some art filters C AF operati...

Page 64: ...0 15 100 0015 10 10 4 3 L N 3D 3D Wi Fi f 0 a 4 1 5 7 89 c d e 2 3 6 b Overall display F5 6 F5 6 1 0 1 0 G 4 G 4 A 4 A 4 Adobe Adobe Natural Natural ISO 400 ISO 400 250 250 2 0 2 0 45mm 45mm 1 8 4608...

Page 65: ...Shutter speed P 30 33 l Aperture value P 30 33 m Focal length n Flash compensation value P 60 o White balance compensation p Color space P 93 q Picture mode P 61 r Compression rate P 106 s Pixel coun...

Page 66: ...e Movie Control dial P Single frame playback Previous t Next s Close up playback You can display the next frame or the previous frame during close up playback Index My Clips calendar playback Highligh...

Page 67: ...4 5 6 7 c 11 24 MOV FHD c 12 12 MOV FHD 2016 04 01 c 11 23 MOV FHD 12 30 G U G U G U My Clips playback 1 1 If one or more My Clips have been created it will be displayed here P 39 Viewing still image...

Page 68: ...to execute Slide Interval Choose the length of time each slide is displayed from 2 to 10 seconds Movie Interval Select Full to include full length movie clips in the slideshow Short to include only t...

Page 69: ...onnect the camera to the computer Protecting images Protect images from accidental deletion Display an image you wish to protect and press z to display the playback menu Select 0 and press z and then...

Page 70: ...the H button again to cancel the selection Press z to display the menu and then select from 0 Erase Selected or Share Order Selected This function is also available in single frame playback 2016 04 01...

Page 71: ...ger up to view the next page down to view the previous page Use Q or R to choose the number of images displayed Tap R several times to return to single frame playback S Viewing images Tap an image to...

Page 72: ...converter Off Press z to confirm the setting Operation guide Press the MENU button to go back one screen Tab A guide is displayed for about 2 seconds after you select an option Press the INFO button t...

Page 73: ...must be formatted with this camera before first use or after being used with other cameras or computers All data stored on the card including protected images is erased when the card is formatted When...

Page 74: ...just settings in order to save 2 Select Reset Myset in W Shooting Menu 1 3 Select the desired destination Myset1 Myset4 and press I Selecting Set saves current settings overwriting the settings curren...

Page 75: ...image into detailed regions and adjusts the brightness separately for each region This is effective for images with areas of large contrast in which the whites appear too bright or the blacks appear...

Page 76: ...can change the JPEG image size and compression ratio combination and X and W pixel counts K Set Pixel Count g Combinations of movie image sizes and compression rates P 106 You can change the shooting...

Page 77: ...u 2 Off Off Off Off Off 2 Select YC custom and press I 3 Use FG to select the item and press I Use FG to select the setting and press z Number of Frames Sets the number of frames to be shot Y Timer Se...

Page 78: ...used at the same time as time lapse shooting You cannot shoot during bracket shooting if there is not enough space on the camera s memory card for the selected number of frames You can switch the brac...

Page 79: ...KT A G 3f 0 7EV 3f 0 3EV 3f 1 0EV Off Bracketing Back Set ISO BKT ISO bracketing The camera varies the sensitivity over three shots while keeping the shutter speed and aperture fixed The modification...

Page 80: ...eting is performed Select the number of images and the exposure difference HDR imaging processing is not performed 5F 2 0EV 7F 2 0EV 3F 3 0EV 5F 3 0EV 3 Shoot When you press the shutter button the cam...

Page 81: ...a guide to framing the next shot Tips To overlay 3 or more frames Select RAW for K and use the Overlay option to make repeated multiple exposures For more information on overlaying RAW images g Image...

Page 82: ...shooting interval is set to 1 minute 31 seconds or longer the monitor and camera power will turn off after 1 minute 10 seconds before shooting the power will automatically turn on again When the monit...

Page 83: ...ooting menus 4 Wireless remote control flash photography You can take wireless flash photographs using the built in flash and a special flash with a remote control function g Wireless remote control f...

Page 84: ...z 3 Use HI to select the image to be edited and press z RAW Data Edit is displayed if the picture is a RAW image JPEG Edit if it is a JPEG image If the image was recorded in RAW JPEG format both RAW D...

Page 85: ...er than 4 3 standard are converted to the closest image file size e Portrait Makes skin look smooth and translucent You may not be able to compensate depending on the image if face detection fails 5 W...

Page 86: ...d in Step 3 the overlay will be displayed RAW RAW RAW RAW RAW RAW RAW Image Overlay Back Set 5 Adjust gain Use HI to select an image and use FG to adjust gain Gain can be adjusted in the range 0 1 2 0...

Page 87: ...al Back Set Rec View Choose whether pictures are displayed immediately after shooting and for how long This is useful for making a brief check of the picture you have just taken Pressing the shutter b...

Page 88: ...ock 97 Reset Lens When set to Off the focus position of the lens is not reset even when the power is turned off When set to On the focus of power zoom lenses is also reset Bulb Time Focusing You can c...

Page 89: ...t in focus This option can be set separately for S AF P 49 and C AF P 49 modes Rls Priority C j L fps Choose the frame advance rates for S and T Figures are the approximate maximums 54 j H fps j Image...

Page 90: ...x y X or x to display a grid on the monitor Picture Mode Settings Display only the selected picture mode when a picture mode is selected Histogram Settings Highlight Choose the lower bound for the hi...

Page 91: ...en set to Off you can turn off the beep sound that is emitted when the focus locks by pressing the shutter button USB Mode Choose a mode for connecting the camera to a computer or printer Choose Auto...

Page 92: ...e display interval during shooting Some restrictions apply The frequency drops at high ISO sensitivities Choose Off to disable the display Tap the monitor or press the shutter button halfway to refres...

Page 93: ...ccording to the type of lens Compensation is not available for teleconverters or extension tubes Noise may be visible at the edges of photographs taken at high ISO sensitivities WB Set the white balan...

Page 94: ...les are named by editing the portion of the filename highlighted below in gray sRGB Pmdd0000 jpg Pmdd Adobe RGB _mdd0000 jpg mdd Priority Set Choose the default selection Yes or No for confirmation di...

Page 95: ...automatically regulated when the volume picked up by the microphone is louder than normal Wind Noise Reduction Reduce wind noise during recording Movie Effect Choose On to enable movie effects in n mo...

Page 96: ...ning is displayed 16 Level Adjust You can calibrate the angle of the level gauge Reset Resets adjusted values to the default settings Adjust Sets the current camera orientation as the 0 position Touch...

Page 97: ...ocked Locked mode3 Locked S AF MF Assist MENU c R MF Assist This is a focus assist function for MF When the focus ring is rotated the edge of the subject is enhanced or a portion of the screen display...

Page 98: ...balance The camera measures white balance when the button is pressed P 53 P AF area Choose the AF target P Home Pressing the button selects the AF target position saved with P Set Home P 88 Press the...

Page 99: ...am and highlight shadow display are not available AF Stop Stops autofocus j Y Choose a sequential shooting or self timer option Choose a flash mode HDR Switches to HDR shooting with the saved settings...

Page 100: ...utton when connecting via an AV cable For details on changing the input source of the TV refer to the TV s instruction manual Depending on the TV s settings the displayed images and information may be...

Page 101: ...that supports HDMI control g HDMI P 90 You can operate the camera by following the operation guide displayed on the TV During single frame playback you can display or hide the information display by...

Page 102: ...r control panel P 103 Live guide z Change Color Saturation A INFO INFO 250 250 F5 6 i NORM ISO AUTO AUTO WB AUTO 4 3 01 02 03 01 02 03 1023 1023 WB LV super control panel P 103 WB AUTO WB WB WB AUTO A...

Page 103: ...d f e b 5 3 4 Settings that can be modified using LV super control panel 1 Currently selected option 2 ISO sensitivity P 51 3 Flash mode P 58 4 Flash compensation value P 60 5 Sequential shooting Self...

Page 104: ...ain control screen switch off Live control in KControl Settings P 90 You can now use the z button to display the LV super control panel 3 Tap the desired item The item will be highlighted 250 250 F5 6...

Page 105: ...on during playback You can also choose to not show displays that appear at the default setting Highlight Shadow display Light box display Histogram display 16 15 15 Shadow Highlight 15 10 10 Light box...

Page 106: ...27 28 29 30 1 2 3 4 5 6 7 1 If one or more My Clips have been created it will be displayed here P 39 Shutter speeds when the flash fires automatically MENU c W X Sync Slow Limit You can set shutter sp...

Page 107: ...The camera searches for and displays Bluetooth devices in range 3 Select the destination and press z The image will be uploaded to the receiving device If prompted to provide a PIN code enter 0000 an...

Page 108: ...and edit the current name in the rename dialog Creating albums Your favorite JPEG pictures can be resized and copied to an OLYMPUS PENPAL 1 Display the picture you wish to copy full frame and press z...

Page 109: ...al pictures that can be stored at Size 2 Medium 108 Album Mem Setup All Erase Delete all pictures in the album Format Album Format the album 108 Picture Copy Size Choose the size at which images are c...

Page 110: ...ireless LAN function read Using the wireless LAN function P 150 If using the wireless LAN function in a country outside the region where the camera was purchased there is a risk that the camera will n...

Page 111: ...Share End Wi Fi SSID E PL8 P 00000001 Password 11223344 3 3 3 Start OI Share on your smartphone and read the QR code displayed on the camera monitor Connection will be performed automatically When you...

Page 112: ...are and tap the Image Transfer button The images in the camera are displayed in a list 3 Select the pictures you want to transfer and tap the Save button When saving is completed you can turn off the...

Page 113: ...o synchronize the time You can use the phone or other apps while the GPS log is saving Do not terminate OI Share 2 When shooting is complete turn off the switch on the Add Location button Saving the G...

Page 114: ...ings and press I 3 Select the wireless LAN connection method and press z Private Connect to one smartphone connects automatically using the settings after the initial connection One Time Connect to mu...

Page 115: ...1 Select Wi Fi Settings in the d Setup Menu and press z 2 Select Reset share Order and press I 3 Select Yes and press z Initializing wireless LAN settings Initializes content of Wi Fi Settings 1 Selec...

Page 116: ...ting you to choose a host If it is not select Auto for USB Mode P 91 in the camera custom menus Copying pictures to a computer The following operating systems are compatible with the USB connection Wi...

Page 117: ...er and then viewing editing and managing the photographs and movies you have shot on your camera You can also download OLYMPUS Viewer 3 from http support olympus imaging com ov3download You must enter...

Page 118: ...h 1 Insert the supplied CD ROM in a CD ROM drive The disk contents should automatically be displayed in the Finder If they are not double click the CD ROM icon on the desktop Double click the Setup ic...

Page 119: ...ustom menus 2 Use FG to select Print One Moment will be displayed followed by a print mode selection dialog If the screen is not displayed after a few minutes disconnect the USB cable and start again...

Page 120: ...setting varies with the type of printer If only the printer s STANDARD setting is available you cannot change the setting Size Sets the paper size that the printer supports Borderless Selects whether...

Page 121: ...Cancel and press z Note that any changes to the print order will be lost to cancel printing and return to the previous step where you can make changes to the current print order press MENU Print reser...

Page 122: ...rint orders cannot include 3D photos RAW images or movies Removing all or selected pictures from the print order You can reset all print reservation data or just the data for selected pictures 1 Press...

Page 123: ...tery using the provided charger before use The normal charging time using the provided charger is approximately 3 hours 30 minutes estimated Do not attempt to use chargers not specifically designated...

Page 124: ...even after formatting the card or deleting the data When discarding destroy the card to prevent leakage of personal information Use the Eye Fi card in compliance with the laws and regulations of the...

Page 125: ...F 1600 1200 1 2 7 Approx 1 3 5425 XF 1 4 Approx 0 9 7875 XN 1 8 Approx 0 5 15258 XB 1 12 Approx 0 4 20344 WSF 1280 960 1 2 7 Approx 0 9 8137 WF 1 4 Approx 0 6 11625 WN 1 8 Approx 0 3 22193 WB 1 12 App...

Page 126: ...h the lens in dusty places Do not point the lens attached to the camera toward the sun This may cause the camera to malfunction or even ignite due to the magnifying effect of sunlight focusing through...

Page 127: ...MANUAL FP TTL AUTO FP MANUAL GN36 85mm 1 GN20 24mm 1 FL 300R TTL AUTO MANUAL GN20 28mm 1 FL 14 TTL AUTO AUTO MANUAL GN14 28mm 1 RF 11 TTL AUTO MANUAL GN11 TF 22 GN22 1 The focal length of the lens th...

Page 128: ...hree remote flash units Remote flash units cannot be used for second curtain slow synchronization or anti shock exposures longer than 4 seconds If the subject is too close to the camera the control fl...

Page 129: ...n on automatically when viewed in certain situations such as when wearing glasses or under strong sunlight Switch manually Principal Accessories Remote cable RM UC1 Use when the slightest camera movem...

Page 130: ...discontinued 2 For compatible lens refer to the Olympus Official Web Site 3 The OLYMPUS PENPAL can be used only in the region in which it was purchased Depending on the areas the usage may infringe th...

Page 131: ...KO DIGITAL ED 14 150mm f4 0 5 6 II M ZUIKO DIGITAL ED 40 150mm f4 0 5 6 R M ZUIKO DIGITAL ED 40 150mm f2 8 PRO M ZUIKO DIGITAL ED 75 300mm f4 8 6 7 II M ZUIKO DIGITAL ED 300mm f4 0 IS PRO Teleconverte...

Page 132: ...eplace the front and rear lens caps before putting the lens away Clean the camera after use Do not store with insect repellent Cleaning and checking the image pickup device This camera incorporates a...

Page 133: ...nitor or taking continuous shots wait for at least one minute before using the pixel mapping function to ensure that it operates correctly 1 Select Pixel Mapping in c Custom Menu P 96 tab b 2 Press I...

Page 134: ...n off automatically The flash is charging On the monitor the mark blinks when charging is in progress Wait for the blinking to stop then press the shutter button Unable to focus The camera cannot focu...

Page 135: ...e correct Set functions are restored to their factory default settings When you rotate the mode dial or turn off the power in a shooting mode other than P A S or M functions with changes made to their...

Page 136: ...fore erasing download important images to a PC Clean the contact area of the card with a dry cloth Clean Card Format Card Setup Set Card cannot be read Card may not have been formatted Select Clean Ca...

Page 137: ...The printer has run out of ink Replace the ink cartridge in the printer Jammed The paper is jammed Remove the jammed paper Settings Changed The printer s paper cassette has been removed or the printer...

Page 138: ...l 61 K Still Picture YN 56 Movie MOVnFHD F 57 Image Aspect 4 3 56 Digital Tele converter Off 76 X j Y o 54 77 Image Stabilizer Still Picture S I S Auto 53 Movie Movie I S On Bracketing Off 78 AE BKT 3...

Page 139: ...e Overlay 86 Print Order 121 Reset Protect 86 Connection to Smartphone 111 d Setup Menu Tab Function Default 1 2 3 g d X 17 W 87 i j 0 k 0 Vivid 87 Rec View 0 5sec 87 Wi Fi Settings Wi Fi Connect Sett...

Page 140: ...Face Priority K AF Area Pointer On S Button Dial Button Function FFunction L 98 UFunction U RFunction RREC IFunction GFunction j Y nFunction Direct Function lFunction AF Stop Dial Function P F 89 A FN...

Page 141: ...All On Histogram Settings Highlight 255 Shadow 0 Mode Guide On Live View Boost Off Frame Rate Normal Art LV Mode mode1 Flicker reduction Auto LV Close Up Mode mode2 91 zLock Off qClose Up Mode mode1 P...

Page 142: ...ecord Erase Quick Erase Off 94 RAW JPEG Erase RAW JPEG File Name Reset Edit Filename Off Priority Set No dpi Settings 350dpi Copyright Settings Copyright Info Off Artist Name Copyright Name Z Movie nM...

Page 143: ...t 107 108 Address Book Address List 108 Search Timer 30sec New Pairing My OLYMPUS PENPAL 109 Picture Send Size Size 1 Small B OLYMPUS PENPAL Album Copy All 109 Reset Protect Album Mem Usage Album Mem...

Page 144: ...le touch screen Total no of pixels Approx 1 040 000 dots aspect ratio 3 2 Shutter Product type Computerized focal plane shutter Shutter speed 1 4000 60 sec bulb photography time photography Auto focus...

Page 145: ...s set to Off Self timer Operation time 12 sec 2 sec Customized Energy saving function Switch to sleep mode 1 minute Power OFF 5 minutes This function can be customized Flash Flash control mode TTL AUT...

Page 146: ...Approx 35 5 mm W 12 8 mm H 55 mm D 1 4 0 5 2 2 Weight Approx 46 g 0 1 Ib Lithium ion charger Model No BCS 5 Rated input AC 100V 240V 50 60Hz Rated output DC 8 35V 400mA Charging time Approx 3 hours 30...

Page 147: ...t a metal object into the product Cleaning Always unplug this product from the wall outlet before cleaning Use only a damp cloth for cleaning Never use any type of liquid or aerosol cleaner or any typ...

Page 148: ...throoms or in the rain In places prone to strong vibrations The camera uses a lithium ion battery specified by Olympus Charge the battery with the specified charger Do not use any other chargers Never...

Page 149: ...stributor or service center Do not try to remove the card by force Be careful with the strap when you carry the camera It could easily catch on stray objects and cause serious damage Before transporti...

Page 150: ...of the characteristics the unevenness of the color or brightness may also be found depending on the angle but this is due to the structure of the monitor This is not a malfunction Legal and Other Not...

Page 151: ...nges or modifications not expressly approved by the party responsible for compliance could void the user s authority to operate the equipment This transmitter must not be co located or operated in con...

Page 152: ...r s sole remedy hereunder Repair or replacement of a Product shall not extend the warranty period provided herein unless required by law Except where prohibited by law the customer is liable and shall...

Page 153: ...NTRACT TORT INCLUDING NEGLIGENCE AND STRICT PRODUCT LIABILITY OR OTHERWISE IN NO EVENT SHALL OLYMPUS BE LIABLE FOR ANY INDIRECT INCIDENTAL CONSEQUENTIAL OR SPECIAL DAMAGES OF ANY KIND INCLUDING WITHOU...

Page 154: ...troyed in transit When service is completed the Product will be returned to you postage prepaid PRIVACY Any information provided by you to process your warranty claim shall be kept confidential and wi...

Page 155: ...Olympus authorized service station 5 This Warranty does not cover the following and you will be required to pay a repair charge even for defects occurring within the warranty period referred to above...

Page 156: ...ociation JEITA All other company and product names are registered trademarks and or trademarks of their respective owners THIS PRODUCT IS LICENSED UNDER THE AVC PATENT PORTFOLIO LICENSE FOR THE PERSON...

Page 157: ...rity mode 31 Accessory Port Menu 107 Address Book 108 AEL AFL 97 AEL Metering 92 AE Lock 18 97 98 AF Area P 46 AF illuminator 88 AF Mode 49 88 AF Tracking 49 Album Mem Usage 109 All 93 Anti Shock 92 A...

Page 158: ...s Mode AF mode 49 Focus Ring 88 Format Card setup 73 Full time AF 88 G Grainy Film 26 61 H Half Way Rls With IS 89 HDMI 90 HDR 80 High Dynamic Range HDR 80 Highlight Shadow Control 50 Histogram Displa...

Page 159: ...ngs 90 Pixel Count 93 Pixel Mapping 133 Playback 66 Movie Playback 66 69 Still Image Playback 66 67 Playback Menu 84 Preview 98 Preview Lock 91 Print 119 Print reservation 121 Priority Set 94 Program...

Page 160: ...ot AF Zoom frame AF 48 T Test Picture 98 Time Lapse Movie 82 Time Lapse Shooting 82 Time Photography 33 Touch AF 35 Touch Screen Settings 96 TV 100 U USB Mode 91 V Video Out 90 Volume Adjustment 68 W...

Page 161: ......

Page 162: ...WD128701 date of issue 2016 02...

Reviews: