35
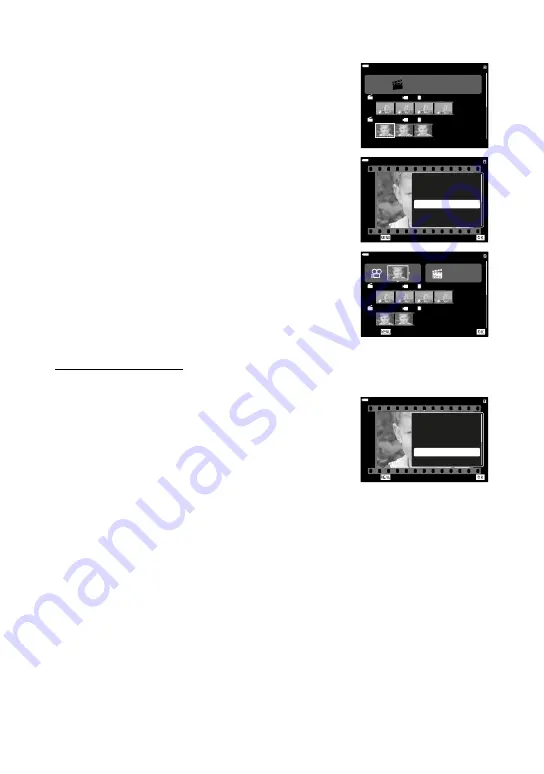
Removing Clips from My Clips Albums
1
Use the arrow pad to highlight a clip and
press the
Q
button.
100
%
2
1
M y C l i p s
F
MOV FHD 30p
F
MOV FHD 30p
00:28
00:12
2
Use the up and down arrow buttons to
highlight
[Rearrange Order]
and press the
Q
button.
• A dialog will be displayed where you can choose
the clip order.
100
%
Export My Clips
Play Movie
Play My Clips
Rearrange Order
Preset Destination
Delete My Clips
Back
Set
Movie
3
Use the arrow pad to move a clip into the
n
area and press the
Q
button.
• The clip will be removed from
“
My Clips
”
.
100
%
2
1
F
MOV FHD 30p
F
MOV FHD 30p
00:28
00:12
Back
Set
Remove from My Clips.
Preset Destination
Choose the
“
My Clips
”
album to which new clips will be recorded.
1
Use the arrow pad to highlight the
“
My
Clips
”
to which new clips will be recorded
and press the
Q
button.
2
Use the up and down arrow buttons to high-
light
[Preset Destination]
and press the
Q
button.
• A confirmation dialog will be displayed.
100
%
Export My Clips
Play Movie
Play My Clips
Rearrange Order
Preset Destination
Delete My Clips
Back
Set
Movie
3
Press the
Q
button.
• All new clips will be recorded to the selected
“
My Clips
”
album.
• Clips with
[Movie Resolution]
,
[Bit Rate]
, or
[Frame Rate]
settings that
differ from those of the clips in the selected album will either be recorded
to a new album or to an album of clips with matching settings.
Summary of Contents for E-M1 MARK II
Page 55: ...WD388701 date of issue 2017 09...


