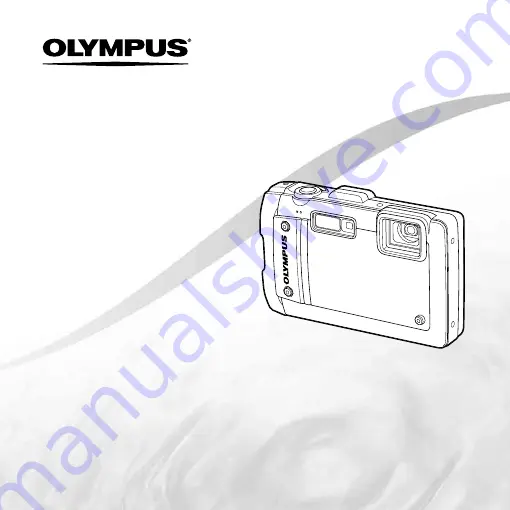
background image

Instruction Manual

TG-810

TG-805

DIGITAL CAMERA

  Thank you for purchasing an Olympus digital camera. Before you start to use your new camera, please read these 

instructions carefully to enjoy optimum performance and a longer service life. Keep this manual in a safe place for 
future reference.

  We recommend that you take test shots to get accustomed to your camera before taking important photographs.

  In the interest of continually improving products, Olympus reserves the right to update or modify information 

contained in this manual.

  The screen and camera illustrations shown in this manual were produced during the development stages and may 

differ from the actual product. Unless otherwise speci

fi

 ed, the explanation about these illustrations is provided for 

TG-810.

Summary of Contents for DIGITAL CAMERA TG-805

Page 1: ...ference We recommend that you take test shots to get accustomed to your camera before taking important photographs In the interest of continually improving products Olympus reserves the right to updat...

Page 2: ...p 3 Step 5 Printing Direct printing PictBridge p 59 Print Reservations DPOF p 61 or Digital camera Strap Lithium Ion Battery LI 50B USB cable CB USB8 AV cable CB AV3 USB AC adapter F 2AC OLYMPUS Setup...

Page 3: ...ect Buttons Frequently used functions can be accessed using the direct buttons Shutter button p 21 63 Zoom buttons p 22 25 Movie record button p 21 q button switching between shooting and playback p 2...

Page 4: ...guides displayed at the bottom of the screen indicate that the m button A button or zoom buttons can be used MENU OK Sel Image Erase Cancel 5 30 5 30 Operation guide OK Set Compression Normal Shadow...

Page 5: ...function menu is used to choose the shooting mode and provides access to frequently used shooting settings 14M 4 4 0 0 0 0 AUTO WB AUTO WB AUTO ISO AUTO ISO Program Auto Program Auto P P 3D 3D NORM T...

Page 6: ...e 14M OK Set 1 2 3 1 2 MENU Exit Reset Reset Digital Zoom Off Digital Zoom Off Compression Normal Shadow Adjust Auto AF Mode ESP Face iESP ESP Image Size 14M MENU OK Set Back 1 2 3 1 2 Reset Reset Dig...

Page 7: ...lizer p 42 Rec View p 42 Pic Orientation p 42 Icon Guide p 43 Remote Flash p 44 Date Stamp p 43 a A Movie menu Image Size p 40 Image Quality p 40 IS Movie Mode p 42 R Movie sound recording p 43 14M 4...

Page 8: ...p 50 2 s Settings 2 Sound Settings p 51 File Name p 51 Pixel Mapping p 52 s Monitor p 52 TV Out p 52 Power Save p 54 l Language p 54 3 t Settings 3 X Date time p 55 World Time p 55 Data Repair p 55 Ma...

Page 9: ...connector cover lock p 14 2 LOCK knob p 14 3 HDMI micro connector p 53 4 Multi connector p 15 17 53 59 5 Battery card connector cover p 14 15 17 53 73 6 Battery lock knob p 14 7 Lens p 68 8 Self timer...

Page 10: ...p 21 23 50 6 E button camera guide menu guide p 27 7 m button p 4 6 8 Shutter button p 21 63 9 Indicator lamp p 14 17 10 Zoom buttons p 22 25 11 Strap eyelet p 10 12 Joystick p 4 INFO changing informa...

Page 11: ...nsation p 36 8 White balance p 37 9 ISO p 37 10 Drive p 38 11 Recording with sound movies p 43 12 World time p 55 13 Date stamp p 43 14 Direction information 15 GPS icon 1 2 16 Image stabilization sti...

Page 12: ...27 3 Print reservation number of prints p 61 p 60 4 Protect p 48 5 Adding sound p 43 46 6 Atmospheric hydraulic pressure p 56 7 Current memory p 70 8 Frame number total number of images still images...

Page 13: ...e 6 Update status 7 Electronic compass 8 Landmark information position 9 Landmark transition cursor 10 Landmark name To display the screen To display the screen Press and hold F down until the screen...

Page 14: ...onnector cover When using the camera firmly close the battery card connector cover lock and LOCK knob Slide the battery lock knob in the direction of the arrow to unlock and then remove the battery Ch...

Page 15: ...er Windows Vista Windows 7 from the start menu Double click the CD ROM OLYMPUS Setup icon to open the OLYMPUS Setup window and then double click Launcher exe If a User Account Control dialog is displa...

Page 16: ...vies RAM 512 MB or more 1 GB or more recommended 1 GB or more required for movies 2 GB or more recommended Free Hard Drive Space 1 GB or more Monitor Settings 1024 768 pixels or more Minimum 65 536 co...

Page 17: ...ned to be used for charging and playback Make sure that shooting is not being used while the USB AC adapter is connected to the camera Example USB AC adapter with an AC Example USB AC adapter with an...

Page 18: ...aved to image file names date prints and other data You can also choose the language for the menus and messages displayed in the monitor 1 Press the n button to turn on the camera The date and time se...

Page 19: ...types of card Using an SD SDHC SDXC memory card or Eye Fi card commercially available p 69 The camera can shoot and store images using its internal memory without using an SD SDHC SDXC memory card or...

Page 20: ...fingers etc Shooting with the optimum aperture value and shutter speed P mode In this mode automatic shooting settings are activated while also allowing changes to a wide range of other shooting menu...

Page 21: ...subject When the camera focuses on the subject the exposure is locked shutter speed and aperture value are displayed and the AF target mark changes to green The camera was unable to focus if the AF t...

Page 22: ...ected for Digital Zoom Image size Zoom bar 14M Optical zoom range Other Image zoomed and cropped 1 On selected for Digital Zoom Image size Zoom bar 14M Digital zoom range Other Image zoomed and croppe...

Page 23: ...played shooting information changes in the order shown below each time the button is pressed Shooting mode display p 11 14M 4 4 P P 0 0 0 0 AUTO WB AUTO WB AUTO ISO AUTO ISO 14M 4 4 NORM P P 0 0 0 0 A...

Page 24: ...pause playback During pause fast forward or reverse press the A button to restart playback Fast forward Press I to fast forward Press I again to increase the fast forward speed Rewind Press H to rewi...

Page 25: ...e photo surfing cannot be displayed even by pressing the W zoom button Photo Surfing p 45 Erasing images during playback Single image erase 1 Display the image you want to erase and press G D OK Erase...

Page 26: ...h time the button is pressed 11 02 26 11 02 26 00 00 4 30 4 30 4 30 4 30 1 1000 F3 9 2 0 AUTO WB P FILE 100 0004 11 02 26 00 00 10 10 3D 3D 10 10 3D 3D 00 00 NORM 14M 100 ISO Shinjuku ku Tokyo Japan 0...

Page 27: ...setting method see Connection via HDMI cable p 53 2 Use FG to select 3D Show and then press the A button 3 Use HI to select the 3D image to play back and then press the A button MENU OK Set Slideshow...

Page 28: ...mation is shown about recommended functions and basic operating methods for the camera Search by keyword Search from the camera keyword History Searches can be performed from the search history 2 Use...

Page 29: ...not be selected 1 Set the shooting mode to M The icon changes depending on the scene that the camera automatically selects 4 4 14M 00 34 00 34 In some cases the camera may not select the desired shoot...

Page 30: ...nt information about water and shock resistant features p 72 To lock the focus distance for To lock the focus distance for underwater shoots AF lock underwater shoots AF lock When T Snapshot k Wide1 o...

Page 31: ...shooting mode to p NORM Panorama Panorama 0 0 0 0 AUTO WB AUTO WB AUTO AUTO 2M 4 4 MENU MENU 3D 3D 2 Press G to go to the submenu 3 Use HI to select the desired mode and then press the A button to set...

Page 32: ...Save Cancel To combine only two pictures press the A button before taking a third frame 4 Repeat Step 3 to take a third frame After the third frame is taken the camera automatically processes the fra...

Page 33: ...photographs so that they overlap with the image in the monitor 3 Repeat Step 2 until the number of desired frames is taken and then press the A button or m button when finished Panorama shooting is po...

Page 34: ...the first frame 2 Overlap the subject with the image that is faintly displayed in the monitor The picture is taken automatically Taking pictures with Manual Taking pictures with Manual 1 Press the shu...

Page 35: ...lave Using Shooting Functions Using Shooting Functions Remote Control and Slave are not displayed when Remote Flash p 44 is set to Off Shooting closeups Macro shooting This function enables the camera...

Page 36: ...links for approx 2 seconds and then the picture is taken Y 2 sec The self timer lamp blinks for approx 2 seconds then the picture is taken Option Description Auto Release 1 When your pet cat or dog tu...

Page 37: ...ct the ISO setting option in the shooting function menu P P 0 0 0 0 AUTO WB AUTO WB 200 ISO 200 ISO 100 ISO ISO 100 1 400 F3 9 1 400 400 ISO 400 ISO ISO 200 ISO 200 MENU MENU F3 9 2 Use HI to select t...

Page 38: ...o Redeye In addition when set to W the flash is fixed to Flash Off When set to W Image Size is limited to 3 or lower and the ISO sensitivity is fixed to ISO Auto Using the LED illuminator In a dark lo...

Page 39: ...o the default settings Reset Restoring the shooting functions to the default settings Reset I Shooting menu 1 X Reset Submenu 2 Application Yes Restores the following menu functions to the default set...

Page 40: ...table for playing pictures on a widescreen TV and for printing on A3 or 11 17 16 9F 1920 1080 Suitable for playing pictures on a widescreen TV and for printing on A5 or 5 7 Compression Fine Shooting a...

Page 41: ...me subjects the frame may not appear or may take some time to appear 2 If the frame blinks in red the camera cannot focus Try refocusing on the subject To focus on a moving subject To focus on a movin...

Page 42: ...to Off There may be a noise coming from inside the camera when the shutter button is pressed with Image Stabilizer still images set to On Images may not be stabilized if camera shake is too severe Wh...

Page 43: ...enu icon is selected position the cursor on the icon for a while to display the explanation Icon guide 14M 4 4 0 0 0 0 AUTO WB AUTO WB AUTO ISO AUTO ISO P P 3D 3D Functions can be changed manually Pro...

Page 44: ...he instruction manual for the special external flash 1 Set the wireless flash based on the guidelines below Wireless flash setup range guidelines The setup range varies depending on the ambient enviro...

Page 45: ...transition effect used between slides Start Starts the slideshow 1 The Collection that has been created with the ib PC software and imported back from a computer can play back During a slideshow press...

Page 46: ...r use in e mail attachments and other applications E 320 240 1 Use HI to select an image 2 Use FG to select an image size and press the A button The resized image is saved as a separate image Cropping...

Page 47: ...ng process may lower the image resolution Retouching red eyes in flash shooting Retouching red eyes in flash shooting Redeye Fix Redeye Fix q Playback menu X Edit X Redeye Fix 1 Use HI to select an im...

Page 48: ...press the m button to erase the selected images 4 Use FG to select Yes and press the A button The images with a R mark are erased To erase all images All Erase To erase all images All Erase 1 Use FG...

Page 49: ...Off This camera does not support the Eye Fi card s Endless mode Erasing data completely Erasing data completely Memory Format Format Memory Format Format r Settings 1 X Memory Format Format Before fo...

Page 50: ...oper operation is not guaranteed in the following cases Computers with USB ports installed using an expansion card etc Computers without a factory installed OS and home built computers Turning on the...

Page 51: ...pictures File Name s Settings 2 X File Name Month 1 to C A October B November C December Day 01 to 31 Pmdd Folder name Folder name File name DCIM 100OLYMP 999OLYMP Pmdd0001 jpg Pmdd9999 jpg Automatic...

Page 52: ...ction at the same time Adjusting the brightness of the monitor Adjusting the brightness of the monitor s s s Settings 2 X s To adjust the monitor brightness To adjust the monitor brightness 1 Use FG t...

Page 53: ...and camera When set to 1080i 1080i format takes priority for HDMI output However if this setting does not match the input setting of the TV the signal format is changed first to 720p and then to 480p...

Page 54: ...e camera Operate by following the operation guide that is displayed on the TV With some TVs operations cannot be performed with the TV remote control even though the operation guide is displayed on th...

Page 55: ...3 Application Home Alternate x The time in the home time zone the time zone selected for x in submenu 2 y The time in the travel destination time zone the time zone selected for y in submenu 2 x 1 Se...

Page 56: ...titude water depth and press the A button to set Calibrate OK Set MENU Exit 1200 m 1200 m Operating the camera by tapping the Operating the camera by tapping the body Tap Control body Tap Control t Se...

Page 57: ...nly for the a Snow mode When tapping the camera s top To adjust the tap control To adjust the tap control 1 Select Calibrate in Submenu 2 and press the A button 2 Select the part to adjust with FG and...

Page 58: ...camera s power is off so the battery power will continue to be consumed Submenu 2 Submenu 3 Application GPS On When the GPS function is going to be used Off When the GPS function is not going to be us...

Page 59: ...the printer s instruction manual For details on the available paper types loading paper and installing ink cassettes refer to the printer s instruction manual Printing images at the printer s standard...

Page 60: ...on Submenu 4 Application Off On 1 The image is printed with a border around it Off The image is printed to fill the entire paper On The number of images per sheet varies depending on the printer The n...

Page 61: ...Press the m button while Do Not Remove USB Cable is displayed 2 Select Cancel using FG and then press the A button 11Press the m button 12When the message Remove USB Cable is displayed disconnect the...

Page 62: ...ne print each of all images on the card U 1 Follow Steps 1 and 2 in p 62 2 Use FG to select U and press the A button 3 Follow Steps 5 and 6 in Resetting all print reservation data 1 Follow Steps 1 and...

Page 63: ...ures With prolonged camera use the internal temperature may increase resulting in automatic shutdown If this occurs remove the battery from the camera and wait until the camera has sufficiently cooled...

Page 64: ...he image on a computer If the image still cannot be viewed the image file is corrupted Error message Corrective action The Image Cannot Be Edited Problem with selected image Use photo retouch software...

Page 65: ...igh contrast at the same distance as the subject compose the shot and take the picture Subjects with low contrast When extremely bright objects appear in the center of the screen Object with no vertic...

Page 66: ...of white subjects such as snow results in images that are darker than the actual subject Use the exposure compensation to adjust in the positive direction to express whites as they appear When taking...

Page 67: ...g images in the internal memory and card Remove the card and display the images in internal memory Inserting the battery p 14 Inserting an SD SDHC SDXC memory card or Eye Fi card commercially availabl...

Page 68: ...There is a risk of explosion if the battery is replaced with the incorrect battery type Dispose of the used battery following the instructions p 82 Power consumption by the camera varies depending on...

Page 69: ...rently and the charger and USB AC adapter may require a plug adapter to match the wall outlet For details ask at your local electrical shop or travel agent Do not use travel voltage converters as they...

Page 70: ...02 26 00 00 00 00 4 30 4 30 4 4 P P 0 0 0 0 AUTO WB AUTO WB AUTO ISO AUTO ISO 14M 00 34 00 34 Current memory indicator Playback mode Shooting mode Even if Memory Format Format Erase Sel Image or All E...

Page 71: ...cording to the shooting conditions and memory cards used The figures in the table below are the number of the storable pictures when using the internal memory formatted Memory Format Format p 49 Still...

Page 72: ...ditionally warrant all defective operation or cosmetic damage Cosmetic damage such as scratches and dents are not covered under the warranty As with any electronic device proper care and maintenance a...

Page 73: ...water for a long time Prolonged exposure to water will cause damage to the camera s appearance and or deteriorate water resistance In order to preserve the water resistant feature as with any underwat...

Page 74: ...e changing circumstances sources used and the nature of collecting comprehensive geographic data any of which may lead to incorrect results No Warranty This Data is provided to you as is and you agree...

Page 75: ...ADDRESS 425 West Randolph Street Chicago Illinois 60606 This Data is a commercial item as defined in FAR 2 101 and is subject to the End User Terms under which this Data was provided 2010 NAVTEQ All...

Page 76: ...ABIA Republic of Turkey TURKEY State of Kuwait KUWAIT State of Qatar QATAR Sultanate of Oman OMAN United Arab Emirates UAE Federal Republic of Nigeria NIGERIA Kingdom of Lesotho LESOTHO Country or reg...

Page 77: ...Cameroon CAMEROON Republic of Cape Verde CAPE VERDE Republic of Chad CHAD Republic of Congo CONGO REPUBLIC OF THE Country or regions Screen display Republic of Cote d Ivoire COTE D IVOIRE IVORY COAST...

Page 78: ...U Types of lands marks Natural landmarks Natural topography Ports and harbors Government and public offices Prefectural government offices Town halls and city halls Town and village offices Embassies...

Page 79: ...lstra Corporation Limited GM Holden Limited Intelematics Australia Pty Ltd Sentinel Content Pty Limited and Continental Pty Ltd Austria Bundesamt f r Eich und Vermessungswesen Croatia Cyprus Estonia L...

Page 80: ...is product only to the power source described on the product label Lightning If a lightning storm occurs while using a USB AC adapter remove it from the wall outlet immediately Foreign Objects To avoi...

Page 81: ...in any way solder etc If battery fluid gets into your eyes flush your eyes immediately with clear cold running water and seek medical attention immediately Always store batteries out of the reach of...

Page 82: ...cycle batteries to help save our planet s resources When you throw away dead batteries be sure to cover their terminals and always observe local laws and regulations LCD Monitor LCD Monitor Do not pus...

Page 83: ...se the distance between the camera and receiver Connect the equipment to an outlet on a circuit different from that to which the receiver is connected Consult your dealer or an experienced radio TV te...

Page 84: ...orized service personnel unless repair by others is made with the written consent of Olympus c defects or damage to the Products resulting from wear tear misuse abuse negligence sand liquids impact im...

Page 85: ...that sold you the Product or ship it postage prepaid and insured to any of our Olympus Service Centers When returning Products for service your package should include the following 1 Sales receipt sh...

Page 86: ...fect or damage that occurs due to transport a fall shock etc after purchase of the product Any defect or damage that occurs due to fire earthquake flood damage thunderbolt other natural disasters envi...

Page 87: ...e inside of the product casing When this Warranty Certificate is not returned with the product When any alterations whatsoever are made to the Warranty Certificate regarding the year month and date of...

Page 88: ...ademark of Eye Fi Inc All other company and product names are registered trademarks and or trademarks of their respective owners The standards for camera file systems referred to in this manual are th...

Page 89: ...T macro mode 0 03 m 0 1 ft to 0 6 m 2 0 ft f 6 7 fixed super macro mode Monitor 3 0 TFT color LCD display 920 000 dots Connector DC IN jack USB connector A V OUT jack Multi connector HDMI micro conne...

Page 90: ...Operating environment Temperature 0 C to 40 C 32 F to 104 F operation 20 C to 60 C 4 F to 140 F storage Design and specifications subject to change without notice Using in low temperatures Using in lo...

Page 91: ......

Page 92: ...VR402801...

Reviews: