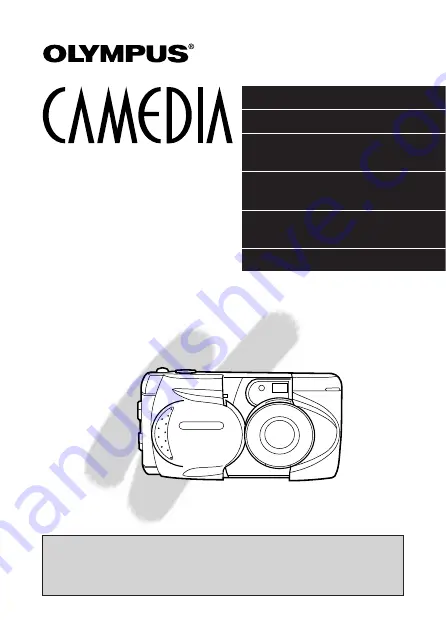
background image

PREPARATIONS

TAKING PICTURES

DISPLAYING PICTURES 
ON THE LCD MONITOR

STORING DATA FOR 
PRINTING PICTURES

USING A PERSONAL
COMPUTER

MISCELLANEOUS

n

Before using your camera, read this manual carefully to ensure correct
use.

n

We recommend that you take test shots to get accustomed to your
camera before taking important photographs.

INSTRUCTIONS

D-460ZOOM

DIGITAL CAMERA

Summary of Contents for CAMEDIA D-460ZOOM

Page 1: ...R PRINTING PICTURES USING A PERSONAL COMPUTER MISCELLANEOUS n Before using your camera read this manual carefully to ensure correct use n We recommend that you take test shots to get accustomed to you...

Page 2: ...ERSONNEL RISK OF ELECTRIC SHOCK DO NOT OPEN CAUTION The lightning flash with the arrowhead symbol within an equilateral triangle is intended to alert the user to the presence of uninsulated dangerous...

Page 3: ...ese attachments 7 Water and Moisture Do not use this product near water for example near a bath tub kitchen sink or laundry tub in a wet basement near a swimming pool or rain 8 Accessories Do not plac...

Page 4: ...ghtning For added protection for this product when used with an optional AC adapter during a lightning storm or when it is left unattended and unused for long periods of time unplug it from the wall o...

Page 5: ...duct to its normal operation d If the product has been dropped or damaged in any way e When the product exhibits a distinct change in performance this indicates a need for service 17 Replacement Parts...

Page 6: ...e equipment off and on the user is encouraged to try to correct the interference by one or more of the following measures Reorient or relocate the receiving antenna Increase the distance between the c...

Page 7: ...s and product names are registered Legal and other notices All contents of this publication are subject to change without notice Although the contents of this publication have been carefully checked t...

Page 8: ...OLYMPUS BRAND NiMH BATTERIES AND CHARGER 2 DO NOT LOAD OR USE BATTERIES WITH THEIR TERMINALS UPSIDE DOWN DO NOT LOAD BATTERIES FORCEFULLY 3 DO NOT MODIFY OR DISASSEMBLE BATTERIES OR CONNECT THEM TO TH...

Page 9: ...ITE DIRECTION TO THAT SHOWN IN THESE INSTRUCTIONS DO NOT USE BATTERIES IF THEIR BODY IS NOT COVERED BY THE INSULATING SHEET OR IF THE SHEET IS TORN AS IT MAY CAUSE FLUID LEAK FIRE OR INJURY DO NOT USE...

Page 10: ...RGE NiMH BATTERIES BEFORE USING THEM FOR THE FIRST TIME OR AFTER NOT USING THEM FOR A LONG TIME 6 KEEP BATTERIES UNLOADED WHEN NOT IN USE FOR A LONG TIME AS IT MAY CAUSE FLUID LEAK OR HEAT GENERATION...

Page 11: ...T THE STRAP AROUND HIS OR HER NECK THIS COULD CAUSE STRANGULATION OR CHOKING THE CHILD MIGHT SWALLOW BATTERIES OR SMALL ATTACHMENTS IF THIS HAPPENS CONTACT A PHYSICIAN IMMEDIATELY THE CHILD MIGHT ACTI...

Page 12: ...ty extreme variations of temperature and humidity sand or dust excessive moisture or vibrations e g in a car nDo not use or store the camera near a heater cooler or humidifier or near a fire magnetic...

Page 13: ...ormal temperatures n Sweat oil etc can prevent a battery s terminals from making electrical contact To avoid this wipe both terminals before loading the battery n Keep spare batteries on hand when goi...

Page 14: ...artMedia 28 Adjusting the date and time 29 Learning the basics 31 Turning on the power 31 Checking the card 32 Checking the batteries 33 Checking the number of storable pictures 34 Holding the camera...

Page 15: ...le mode 58 Selftimer 59 Quick focus 60 Record menu 62 Exposure compensation 63 Spot metering mode 65 Selecting the recording mode 67 White balance 69 ISO 71 Sequence mode 73 Panorama mode 75 Sharpness...

Page 16: ...MPUTER 109 Computer system requirements 110 Installing provided software 111 Connecting to a personal computer 112 Using a personal computer 113 Transferring data from SmartMedia 114 PC Card Adapter 1...

Page 17: ...flex cameras n A removable SmartMedia SSFDC memory card with Panorama function is provided n With the provided Video output connector pictures can be viewed on a TV P 90 n In addition to an optical vi...

Page 18: ...18...

Page 19: ...1 PREPARATION OLYMPUS DIGITAL CAMERA...

Page 20: ...ial cable Instructions Warranty card Static free case Index labels 2 pieces Software CD containing software Camera Strap CR V3 lithium battery pack 2 pieces SmartMedia SSFDC 8MB Instructions Write pro...

Page 21: ...er P 51 Shutter release button P 36 Lens Card compartment cover P 28 Computer connector RS 232C P 112 Video output connector P 90 AC adapter connector P 27 Flash P 52 CAMERA Control panel P 23 Lens ba...

Page 22: ...lever bottom P 25 VIEWFINDER DISPLAY Green lamp P 42 Autofocus mark P 42 Backlighting correction mark P 54 LCD monitor ON OFF button P 31 Flash mode button P 53 Erase button P 89 Selftimer button P 5...

Page 23: ...ing mode P 65 White balance P 69 Sequential shooting P 73 Flash mode P 52 Exposure compensation P 63 Card error P 131 Card function P 75 Battery check P 33 Recording mode P 67 Number of storable pictu...

Page 24: ...rap to the strap hole on the camera Caution Attach the strap correctly as shown so that the camera does not fall off If the strap is attached incorrectly and the camera comes loose and falls off Olymp...

Page 25: ...amera Make sure that the camera power is off Slide open the battery compartment cover Insert the new batteries correctly as shown and close the battery compartment cover tightly When using Olympus CR...

Page 26: ...e settings will reset to the default Read BATTERY HANDLING on page 8 13 These batteries cannot be used Batteries whose body is not covered by the insulating sheet at all Batteries whose terminal is fl...

Page 27: ...0V power source NEVER connect or disconnect the AC adapter with wet hands If the cord of the AC adapter is hot smells like smoke or is emitting smoke unplug it immediately and contact your nearest aut...

Page 28: ...lready formatted Non Olympus brand cards must be formatted by the camera When using a special function SmartMedia card optional insert it in the same way Caution NEVER open the card cover eject the ca...

Page 29: ...use the Menu Press the top bottom arrows on the Jog dial to select MODE SETUP then press the right arrow Select the date order using the top bottom arrows on the Jog dial Press the right arrow on the...

Page 30: ...the OK button when the clock hits 00 seconds If the Menu button is pressed before the OK button the setting and Menu mode will be canceled 6 5 Caution The adjusted date will be canceled when the came...

Page 31: ...the Display mode p 83 99 press the LCD monitor ON OFF button with the lens barrier closed 2 1 Note NEVER open the card cover eject the card remove the batteries or pull the plug while the camera is in...

Page 32: ...martMedia card in the camera the card is protected The Card error indicator on the control panel and the Green lamp blink When the card needs to be formatted The Card error indicator on the control pa...

Page 33: ...e dead and should be replaced immediately Note When taking pictures on a special occasion on a trip or in cold temperatures keep spare batteries handy When the camera is being operated on batteries th...

Page 34: ...er or storable pictures Note Because the amount of data used varies depending on the subject more fewer pictures than the number shown may be photographed The number of storable pictures may not be re...

Page 35: ...ur elbows at your sides to prevent the camera from moving When holding the camera vertically hold the camera with its flash positioned at the top Proper Proper Improper Note Do not subject the lens to...

Page 36: ...locked Check the working distance p 50 Press the Shutter release button fully to release the shutter and take the picture The camera emits a beep sound when the shutter is released The Green lamp blin...

Page 37: ...to display the Menu Press the top bottom arrows on the Jog dial to select the item to adjust Press the right arrow on the Jog dial to display further selections 3 2 1 1 3 2 To move the cursor vertica...

Page 38: ...cel the Menu 6 5 4 Note In the Record mode you can take pictures without pressing the OK button The adjustment will be valid until the Menu is canceled Press the Menu button without pressing the OK bu...

Page 39: ...lens barrier against the lens Close the lens barrier all the way The power goes off Close the flash In the Display mode press the LCD monitor ON OFF button to turn it off 5 4 3 2 1 Note The recorded i...

Page 40: ...40...

Page 41: ...2 TAKING PICTURES OLYMPUS DIGITAL CAMERA...

Page 42: ...button halfway to lock the focus and exposure The Green lamp next to the viewfinder lights Press the Shutter release button fully to take the picture When the Green lamp stops blinking after about 2 4...

Page 43: ...r eject the card remove the batteries or pull the plug while the camera is in operation It may destroy the data in the card Note Printed images will be slightly larger compared with what you see in th...

Page 44: ...itor ON OFF button to turn on the LCD monitor Press the button again to turn off the monitor Aim the camera by looking at the subject through the LCD monitor Take the picture in the same way as you wo...

Page 45: ...t is viewed diagonally in the camera the edges may appear zigzagged on the LCD monitor This is not a malfunction it will be less noticeable in Display mode A strip of light may appear on the top botto...

Page 46: ...ure you have just taken When the lens barrier is open quickly press the LCD monitor ON OFF button twice The LCD monitor will display the last picture taken p 84 To return to the Record mode press the...

Page 47: ...led focus lock Position your subject within the autofocus marks and press the Shutter release button halfway The Green lamp next to the viewfinder lights Recompose the picture while keeping the Shutte...

Page 48: ...pens try the procedure below or use Quick focus p 60 1Subjects with low contrast Lock the focus on an object that is at the same distance from the camera as the subject then aim at the subject to take...

Page 49: ...e picture p 47 4Subjects at different distances Lock the focus on an object that is at the same distance from the camera as the subject then aim at the subject to take the picture p 47 5Fast moving su...

Page 50: ...ly with Telephoto shooting Take pictures at a distance between 8 Subjects closer than 8 may turn out to be out of focus and incorrectly exposed Using the LCD monitor as a viewfinder makes it easy to t...

Page 51: ...Wide angle with the 3X zoom lever Press the lever to T to choose Telephoto shooting Press the lever to W to choose Wide angle shooting Note When used with the 2X Digital Tele mode you can take an app...

Page 52: ...he flash before use or to select a flash mode Press the Shutter release button halfway when the Orange lamp goes off When the Orange lamp stays lit the flash is charged Press the Shutter all the way t...

Page 53: ...l In Flash p 55 Fires regardless of available light Slow Shutter Synchronization For taking photographs Flash p 55 of night views Red Eye Reducing Flash For taking photographs of Slow Shutter Synchron...

Page 54: ...EDUCING FLASH This mode significantly reduces the phenomenon of red eye Backlighting correction mark Viewfinder Control panel Note The camera emits pre flashes before the regular flash It takes about...

Page 55: ...UTTER SYNCHRONIZATION FLASH The flash will fire automatically during the first half of a slow shutter speed s release duration It is especially great for taking photographs of night views Control pane...

Page 56: ...Use this mode in situations where flash photography is not desired or is prohibited or in twilight night scenes Control panel Note Since the shutter speed is slow the use of a tripod is recommended t...

Page 57: ...e appears on the control panel Take a picture Shooting Range Approx 8 31 3 2 1 Control panel Note When using the flash in the Macro mode the flash may not have the proper effect Confirm the result usi...

Page 58: ...ress the Macro Digital Tele button twice to turn on the LCD monitor in the Digital Tele mode Press the bottom arrow on the Jog dial for 2X magnification Press the top arrow on the Jog dial to return t...

Page 59: ...as well Aim at your subject and press the Shutter release button The shutter will be released about 12 seconds after the Shutter release button is pressed The Selftimer signal lights for 10 sec and b...

Page 60: ...ier Press the Shutter release button halfway while pressing the top or bottom arrow on the Jog dial depending on the distance to the subject Press the top arrow to set it to infinity Press the bottom...

Page 61: ...ressing the Shutter release button halfway Quick focus will be canceled after a picture is taken Out of flash working range 2 5ft 3 3ft 5 6ft 15ft16 4ft T W T W 2 5ft 3 3ft 5 6ft 15ft16 4ft 8 5ft 13ft...

Page 62: ...65 Recording mode For selecting the recording mode selection p 67 White balance For presetting the white balance p 69 ISO For setting the sensitivity p 71 Drive For using the Sequence mode p 73 Card...

Page 63: ...y the screen shown Press the top bottom arrows on the Jog dial to select and press the right arrow Make an adjustment using the top bottom arrows on the Jog dial Press the OK button to save the settin...

Page 64: ...aken out p 82 Although the brightness of the LCD monitor can be changed with the exposure compensation it may not appear to change when the subject is mostly dark In such a case display the recorded p...

Page 65: ...s marks Open the lens barrier and press the Menu button to display the screen shown Press the top bottom arrows on the Jog dial to select and press the right arrow Select SPOT using the top bottom arr...

Page 66: ...the Menu appears on the control panel If the Menu button is pressed before the OK button the setting and Menu mode will be canceled Take a picture 5 4 Control panel Note The setting will remain if HOL...

Page 67: ...n Press the top bottom arrows on the Jog dial to select and press the right arrow Select the recording mode using the top bottom arrows on the Jog dial 3 2 1 SELECTING THE RECORDING MODE 1 3 2 4 1 2 1...

Page 68: ...lution Compression SHQ 1280 x 960 Minimal JPEG No TIFF larger file size HQ 1280 x 960 Standard SQ SQ HIGH 640 x 480 Standard Low Note The number of storable pictures varies according to the recording...

Page 69: ...t light Open the lens barrier and press the Menu button to display the screen shown Press the top bottom arrows on the Jog dial to select and press the right arrow Select the white balance using the t...

Page 70: ...ode will be canceled WB appears on the control panel when a setting other than AUTO is selected 4 Control panel Note Select AUTO in normal situations The Preset white balance may not work under specia...

Page 71: ...pen the lens barrier and press the Menu button to display the screen shown Press the top bottom arrows on the Jog dial to select and press the right arrow Select the sensitivity using the top bottom a...

Page 72: ...SO cont Note The sensitivity scale is based on the one used for picture film but the numbers are for reference only When AUTO is selected the ISO is automatically set high in low light situations when...

Page 73: ...n the lens barrier and press the Menu button to display the screen shown Press the top bottom arrows on the Jog dial to select and press the right arrow Select SEQUENCE using the top bottom arrows on...

Page 74: ...han expected The Sequence mode will be canceled when the power is turned off It will take approx 10 seconds to record the pictures taken 74 SEQUENCE MODE cont Press the OK button to save the setting P...

Page 75: ...ss the right arrow Select the connecting direction right left up down using the Jog dial Take pictures by overlapping the edges of the images A maximum of 10 images can be connected 4 3 2 1 Overlap th...

Page 76: ...nce are determined by the first picture do not shoot overly bright dark subjects such as the sun in the first frame Use of the SQ mode is recommended to save memory Panorama images must be assembled o...

Page 77: ...Select the sharpness using the top bottom arrows on the Jog dial Press the OK button to save the setting Press again to cancel the Menu If the Menu button is pressed before the OK button the setting...

Page 78: ...number and folder number will be reset every time a card is inserted in the camera AUTO FILE When AUTO FILE is selected the same folder number and a continuing number from the last file number of the...

Page 79: ...g dial Press the OK button to save the setting Press again to cancel the Menu If the Menu button is pressed before the OK button the setting and Menu mode will be canceled 4 3 FILE 2 1 Note For conven...

Page 80: ...sed the file numbers will continue from the larger number When the maximum file number 9999 is reached the number of storable pictures becomes 0 even if the card is not full yet and no more pictures c...

Page 81: ...row Select ON or OFF using the top bottom arrows on the Jog dial Press the OK button to save the setting Press again to cancel the Menu If the Menu button is pressed before the OK button the setting a...

Page 82: ...u mode will be canceled With RESET selected the settings of the following items will be canceled and reset to the default when the power is turned off Flash modes other than Red Eye reducing flash p 5...

Page 83: ...3 DISPLAYING PICTURES ON THE LCD MONITOR OLYMPUS DIGITAL CAMERA...

Page 84: ...ontrol panel If Card format is necessary the camera automatically enters the Card format mode p 96 The last picture taken Frame number Recording mode and Battery check indicator will appear on the LCD...

Page 85: ...g picture 10 frame jump using the Jog dial With each press of the bottom arrow you can view the picture 10 frames ahead With each press of the top arrow you can view the picture 10 frames behind 4 4 N...

Page 86: ...he Jog dial to select succeeding pictures Press the left arrow on the Jog dial to select preceding pictures Press the bottom arrow on the Jog dial to select the succeeding group of pictures Press the...

Page 87: ...OFF button and display the picture you want to enlarge With each press of the Zoom lever toward T the picture is enlarged 1 5X 2X 2 5X and 3X Pressing the Zoom lever toward W returns to 1X Use the Jog...

Page 88: ...t button again while the picture is displayed Protection setting canceling are also available in the Index Display mode p 86 3 2 1 PROTECTION Note The protected picture will not be deleted with All Fr...

Page 89: ...Frame erase It may take a while to perform One Frame erase when Card Print has been set for the card 3 2 1 ONE FRAME ERASE 1 2 3 END OK SET YES NO Caution Never open the card cover eject the card rem...

Page 90: ...using the Jog dial 4 3 2 1 Note The LCD monitor turns off automatically when connected to a TV Refer to your TV VCR instruction manual for information about displaying video images The picture may ap...

Page 91: ...e show display p 92 File No display For displaying the file No p 93 Function card mode N A Card setup For performing All Frame erase p 94 or Card format p 96 Date set For adjusting the date and time p...

Page 92: ...rox 15 sec to move to the next frame When FAST is selected it will take approx 2 sec to move to the next frame Slide Show is also available in the Index Display mode p 86 If the Menu button is pressed...

Page 93: ...the top bottom arrows on the Jog dial Press the OK button to save the setting Press again to cancel the Menu If the Menu button is pressed before the OK button the setting and Menu mode will be cancel...

Page 94: ...to display the screen shown Press the top bottom arrows on the Jog dial to select and press the right arrow Select using the Jog dial If the Menu button is pressed before the OK button the setting and...

Page 95: ...l Frame erase is also available in the Index Display mode p 86 6 95 Caution Be careful not to erase important picture data by mistake as it cannot be retrieved Never open the card cover eject the card...

Page 96: ...to display the screen shown Press the top bottom arrows on the Jog dial to select and press the right arrow Select using the Jog dial If the Menu button is pressed before the OK button the setting and...

Page 97: ...amera Be careful not to erase important data when formatting a recorded card Formatting will not be engaged when the write protect adhesive seal is placed on the card Non Olympus brand cards or cards...

Page 98: ...and press the right arrow Select the number using the top bottom arrows on the Jog dial Press the OK button to save the setting Press again to cancel the Menu If the Menu button is pressed before the...

Page 99: ...and press the right arrow Select the brightness using the top bottom arrows on the Jog dial Adjust to lighten the display and adjust to darken it Press the OK button to save the setting Press again to...

Page 100: ...100...

Page 101: ...4 STORING DATA FOR PRINTING PICTURES OLYMPUS DIGITAL CAMERA You can print the recorded images using a photo printer Prints can also be made at a lab that supports the Digital Print Order Format system...

Page 102: ...or optional FlashPath Floppydisk Adapter or PC Card Adapter you can transfer the recorded images to a personal computer and make prints Digital Print Order Format system The Digital Print Order Format...

Page 103: ...ve For storing data for pictures to be printed p 105 Store printing data in the card and make prints using a printer or a lab that supports the Digital Print Order Format system CARD PRINT MENU You ca...

Page 104: ...essed while the setting is being entered it will be canceled and the next setting menu will appear If the LCD monitor ON OFF button is pressed while the setting is being entered it will be canceled an...

Page 105: ...wn Select 1 frame or all frame using the Jog dial Select RESET to cancel all of the selections If the Print button is pressed while the setting is being entered it will be canceled Press the OK button...

Page 106: ...r or the lab used It may take a while to store data in the card CARD PRINT cont With 1 frame select another picture using the Jog dial until all the selections are made If the LCD monitor ON OFF butto...

Page 107: ...Mirror print Function card compatible Template card Read the P 330N P 330 instructions for details 107 PRINTING WITH THE P 330N P 330 Note You can reserve pictures to be printed on the camera p 105 Th...

Page 108: ...108...

Page 109: ...OLYMPUS DIGITAL CAMERA 5 USING A PERSONAL COMPUTER...

Page 110: ...24MB RAM 45MB available HD space Standard RS 232C interface D SUB 9 pin connector Monitor with thousands of colors 640 x 480 screen resolution Apple Macintosh PowerPC 601 or later Mac OS 7 6 1 9 CD RO...

Page 111: ...vantage of a wide range of functions including download display storage and panorama your Olympus digital camera comes with software applications and CAMEDIA Master For installation and operation plea...

Page 112: ...serial port on your computer and then connect the RS 232C PC serial cable Turn off AppleTalk if connected to the printer port The Macintosh conversion connector allows you to connect your camera to a...

Page 113: ...the camera s Computer connector Turn on the personal computer Open the lens barrier on the camera to turn it on Start CAMEDIA Master on the computer 7 6 5 4 3 2 1 Note Do not connect when the power o...

Page 114: ...erred to a personal computer equipped with a 3 5 FDD using the optional FlashPath Floppydisk Adapter SmartMedia READER WRITER The picture data in the SmartMedia can be directly transferred to a person...

Page 115: ...ING IMAGES STORED IN THE CARD ON YOUR COMPUTER You can view images stored in a SmartMedia card via CAMEDIA Master Start CAMEDIA Master on the computer Click on My Camera A thumbnail index of stored im...

Page 116: ...DIA Master on the computer Select Camera Download All Images on the menu bar The computer will start transferring images from the camera to the computer 2 1 Note You can view images using software suc...

Page 117: ...MAKING DARK IMAGES BRIGHT Some images may come out darker than expected You can try taking pictures again right after shooting but may often miss the right moment for a good picture This is where CAM...

Page 118: ...GES Backlight sometimes makes the whole image blurry and an object which stands before the subject may be out of focus Use CAMEDIA Master Sharpen when this happens to sharpen the whole image However y...

Page 119: ...n it This will display the selected image Select Image Filter Sharpen on the menu bar Specify the degree of sharpness either by sliding the slide bar or inputting a value from 1 to 9 while comparing O...

Page 120: ...SING IMAGES WITH TEMPLATES You can easily compose images with templates in CAMEDIA Master Place the cursor on the image you want to compose and double click on it This will display the selected image...

Page 121: ...and click on Apply This will display the preview image When you are happy with the sample image click on OK The composed image will be displayed There are a lot of functions for editing images in add...

Page 122: ...122...

Page 123: ...OLYMPUS DIGITAL CAMERA 6 MISCELLANEOUS...

Page 124: ...ord the date on the image data A Date adjustment is not made when the camera is shipped You can adjust the date either from the camera or from the computer p 29 The adjusted date will be canceled when...

Page 125: ...the back of the eye Red eye varies depending on the individual and the shooting conditions such as ambient lighting Use of the Red Eye Reducing Pre Flash mode significantly reduces this phenomenon P 5...

Page 126: ...s not finished charging or the previous picture is being written into the card Remove your finger from the Shutter release button and wait until the Orange lamp or the Green lamp stops blinking P 42 5...

Page 127: ...There is no picture in the card NO PICTURE appears on the LCD monitor P 84 3 There is a problem with the card See the Error code chart P 131 4 The camera is connected to a TV The LCD monitor turns off...

Page 128: ...r s autofocus mark was not positioned on the subject Position the autofocus frame on the subject or use the focus lock P 42 47 3 The lens is dirty Clean the lens with a soft dry cloth 4 The mode was n...

Page 129: ...mode because of the fast shutter speed especially in dark places P 73 The picture is too bright 1 The flash was set to the Fill In Flash mode Set the flash mode to one other than Fill In Flash P 53 2...

Page 130: ...30 SYSTEM CHART A variety of capabilities are available when connected to optional equipment Printer P 330N P 330 TV Personal computer MO drive SmartMedia FlashPath PC card adapter AC adapter Camera T...

Page 131: ...puter and free up space in the SmartMedia A write protect adhesive seal is placed on the card or the card is for Display mode only The camera cannot enter Record Erase or Card format mode The camera c...

Page 132: ...ontact your nearest service center In cold conditions the display backlight may be slow to come on or may change color suddenly To avoid this keep the camera warm when using in cold temperatures Backl...

Page 133: ...ILITY OF THE PICTURE DATA Images taken by this camera may not be properly displayed with other Olympus digital cameras Images taken by other Olympus digital cameras may not be properly displayed with...

Page 134: ...CD solid state image pickup 1 310 000 pixels gross Recording image 1280 x 960 pixels HQ SHQ TIFF modes 640 x 480 pixels SQ mode White balance Full auto TTL Preset daylight overcast tungsten light fluo...

Page 135: ...t Red Eye Reducing Flash Off no flash Fill In Flash forced activation Slow Shutter Synchronization Flash Red Eye Reducing Flash Slow Shutter Synchronization Flash Autofocus TTL system autofocus Contra...

Page 136: ...eries Two CR V3 lithium battery packs can also be used Olympus brand recommended Do not use manganese batteries Exclusive AC adapter optional Dimensions 5 W x 2 6 H x 2 1 D Weight 9 5 oz without batte...

Page 137: ...137...

Page 138: ...support Tel 1 888 553 4448 www olympusamerica com distec olympus com OLYMPUS OPTICAL CO EUROPA GMBH Premises Goods delivery Wendenstra e 14 16 20097 Hamburg Germany Tel 040 237730 Letters Postfach 10...

Reviews: