Olympus 550WP - Stylus Digital Camera, Basic Manual
The Olympus 550WP-Stylus Digital Camera is a compact and user-friendly device designed for capturing stunning photos and videos. With its impressive specifications and waterproof capability, this camera is perfect for any adventurer. Ensure you get the most out of your camera by downloading the free user manual from manualshive.com.
Share
Download


Reviews:
No comments
Related manuals for 550WP - Stylus Digital Camera

D595 - 5MP Digital Camera
Brand: Olympus Pages: 156

DMCGF2 - DIGITAL CAMERA-ADV FEATURES
Brand: Panasonic Pages: 112

sharpVISION
Brand: IDT Pages: 33

QDSP-208C
Brand: Quanmax Pages: 38

ViviCam F127
Brand: Vivitar Pages: 64

GST-894i
Brand: Orion Technology Pages: 4

PhotoM@il-X
Brand: NextBase Pages: 58

IDPF-700
Brand: iCES Pages: 8

Album K13
Brand: Joy Pages: 14

ANPVC 1210D
Brand: Q.VITEC Pages: 28

EASYSHARE P730m
Brand: Kodak Pages: 52

MX-U100
Brand: Datalogic Pages: 64

Enrollment Kiosk
Brand: EVERI Pages: 2

Record III
Brand: AGFA Pages: 18

Vielzweck
Brand: Ihagee Pages: 44

FE 360 - Digital Camera - Compact
Brand: Olympus Pages: 62
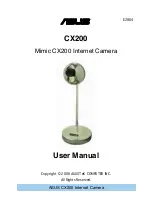
Mimic Internet Camera CX200
Brand: Asus Pages: 94

VR System
Brand: Live Planet Pages: 41


