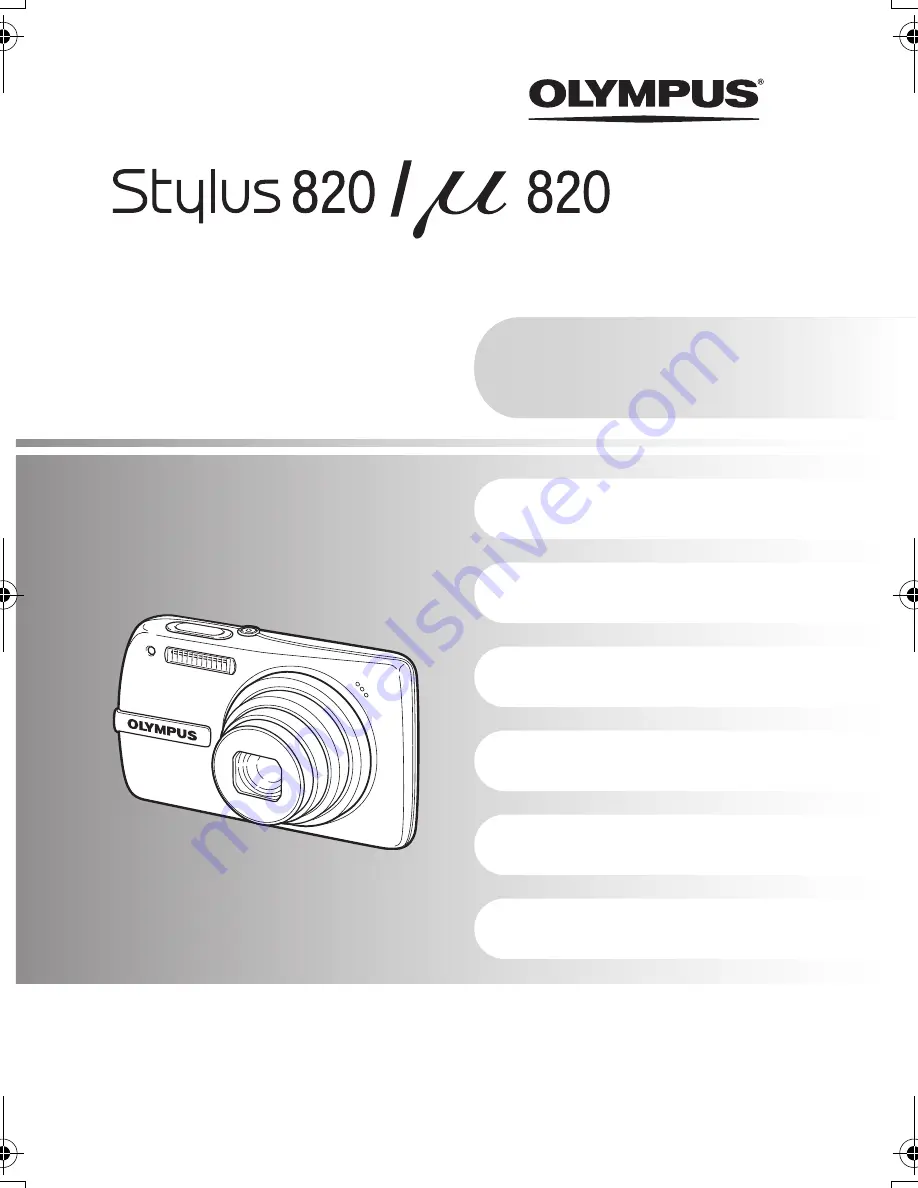
background image

DIGITAL CAMERA

Instruction 

Manual

Getting to know your 

camera better

Quick Start Guide

Get started using your 
camera right away.

Button operations

Menu operations

Printing pictures

Using OLYMPUS Master

(

Thank you for purchasing an Olympus digital camera. Before you start to use your new camera, please 
read these instructions carefully to enjoy optimum performance and a longer service life. Keep this manual 
in a safe place for future reference.

(

We recommend that you take test shots to get accustomed to your camera before taking important 
photographs.

(

In the interest of continually improving products, Olympus reserves the right to update or modify 
information contained in this manual.

(

The screen and camera illustrations shown in this manual were produced during the development stages 
and may differ from the actual product.

Appendix

d4350_e_0000_7.book  Page 1  Wednesday, June 20, 2007  8:16 PM

Summary of Contents for 226065 - Stylus 820 Digital Camera

Page 1: ...uctions carefully to enjoy optimum performance and a longer service life Keep this manual in a safe place for future reference We recommend that you take test shots to get accustomed to your camera before taking important photographs In the interest of continually improving products Olympus reserves the right to update or modify information contained in this manual The screen and camera illustrati...

Page 2: ...more about camera operations and how to take better pictures Read about convenient functions and safety precautions on how to use your camera more effectively Learn about the menus that control the functions and settings for basic operation Button operations Menu operations Printing pictures Getting to know your camera better Appendix P 11 P 19 P 39 P 53 P 64 Using OLYMPUS Master P 45 Quick Start ...

Page 3: ... does not come loose Digital Camera Strap LI 42B Lithium Ion Battery LI 40C Battery Charger USB Cable AV Cable OLYMPUS Master 2 Software CD ROM Items not shown Instruction Manual this manual warranty card Contents may vary depending on purchase location Attach the strap Quick Start Guide ...

Page 4: ...t Power Cable Battery Charger Lithium Ion Battery Battery lock knob 2 1 3 Insert the battery by putting in the marked side first with the marks toward the battery lock knob If you insert the battery incorrectly you will not be able to remove it Do not use force Contact authorized distributors service centers Damage to the battery exterior scratches etc may produce heat or an explosion To remove th...

Page 5: ... If you shoot pictures with this camera without using an xD Picture Card the pictures will be recorded in the internal memory For details on the card please refer to The card P 66 Notch Orient the card as shown and insert the card straight in until it clicks into place To remove the card push the card all the way in release slowly grasp the card then remove 4 5 6 ...

Page 6: ...mera shake when taking pictures s This function allows you to shoot pictures by selecting a scene according to the shooting condition g This function allows you to set the target items by following the shooting guide displayed on the screen When the date and time have not yet been set this screen will appear When viewing pictures playback mode When shooting movies shooting mode When shooting still...

Page 7: ...e 1F button and the 2Y button to select M d Press the 3 button About the date and time setting screen Y M D Year Month Day Exits a setting Minute Date formats Y M D M D Y D M Y Hour MENU CANCEL X Y M D Y M D Y M D T I M E T I M E 2Y Button 1F Button MENU X CANCEL Y M D Y M D Y Y M D D T I M E T I M E 3 Button MENU X CANCEL Y M D Y M D Y Y M D D T I M E T I M E 12 12 ...

Page 8: ...s the 3 button i Press the 1F button and the 2Y button to select Y M D j After all items have been set press the e button For precise time setting press the e button as the time signal strikes 00 seconds MENU X CANCEL Y M D Y M D Y Y M D D T I M E T I M E 12 12 OK MENU X CANCEL SET Y M D Y M D Y Y M D D T I M E T I M E 12 12 OK MENU X CANCEL SET Y M D Y M D Y Y M D D T I M E T I M E 12 12 e Button...

Page 9: ...way When the focus and exposure are locked the green lamp lights up and the shutter speed and aperture value are displayed Place this mark over your subject The number of storable still pictures is displayed P HQ HQ 3264 3264 2448 2448 IN IN 4 4 1 1000 1 1000 F5 6 F5 6 Pressed completely Shutter Button The card access lamp blinks ...

Page 10: ... to erase b Press the f S button c Press the 1F button to select YES and press the e button to erase the picture 12 30 12 30 07 12 26 07 12 26 100 0001 100 0001 1 HQ HQ IN IN Arrow Pad Next Picture Prev Picture Mode Dial o Button Erase pictures f S Button OK SET MENU BACK YES NO I N ERASE 1F Button e Button OK SET MENU BACK YES NO ERASE ...

Page 11: ... button to shoot a picture If the green lamp blinks the focus is not adjusted properly Try locking the focus again Recording movies Set the mode dial to n and press the shutter button halfway to lock the focus and then press the shutter button completely to start recording Press the shutter button again to stop recording o button Turning the camera on and off Power on Shooting mode Lens extends Mo...

Page 12: ...ng guide will change to the default setting by pressing m or changing the mode using the mode dial Shoot pictures by comparing previews of different effects Select one of the 1 Shoot w effects preview options from the SHOOTING GUIDE menu to preview a live multi frame window on the monitor showing four different levels of the selected shooting effect You can use the four preview frames to compare a...

Page 13: ... To stop or resume scrolling in the original magnification press e To exit panorama playback press m g PANORAMA Taking and combining panoramic pictures P 22 The still pictures registered in My Favorite are displayed Press the arrow pad to view other pictures Use the zoom button to switch among close up playback and index display Press m during My Favorite playback to display the top menu and then ...

Page 14: ...dial to K Other functions you can set with the function menu g WB Adjusting the color of a picture P 25 ISO Changing the ISO sensitivity P 25 DRIVE Using sequential continuous shooting P 26 ESP n Changing the area for measuring the brightness of a subject P 26 Displays the top menu YES NO Arrow pad 1243 e button OK FUNC P AUTO Shooting pictures with automatic settings P Program auto The camera aut...

Page 15: ...reduce the size Use the arrow pad during close up playback to scroll around the picture Press e to return to single frame playback Index display Use the arrow pad to select a picture for playback and press e to play back the single frame of the picture selected Calendar display Use the arrow pad to select the date and press e or T on the zoom button to display the pictures on the date selected Sin...

Page 16: ...in super macro mode 1F button Changing picture brightness Exposure compensation 3 button Flash shooting AUTO Auto flash The flash fires automatically in low light or backlight conditions Red eye reduction flash This emits pre flashes to reduce the occurrence of red eye in your pictures Fill in flash The flash fires regardless of the available light Flash off The flash does not fire 2Y button Self ...

Page 17: ...cannot detect a face When SHADOW ADJ ON is selected the following setting restrictions apply ESP n is fixed at ESP AF MODE is fixed at FACE DETECT PANORAMA is not available When DRIVE is set to W this function activates only for the first shot In some cases it takes some time to display a detection frame In playback mode select the picture you want to erase and press S Once erased pictures cannot ...

Page 18: ...information display on the LCD monitor d n R W 2 0 2 0 l k IN IN 4 4 HQ HQ 3264 3264 2448 2448 ISO ISO 1600 1600 P P ISO ISO 1600 1600 n W HQ HQ 3264 3264 2448 2448 2 0 2 0 k IN IN 4 4 R l 12 30 12 30 07 12 26 07 12 26 100 0004 100 0004 4 HQ HQ IN IN ISO 400 ISO 400 12 30 12 30 07 12 26 07 12 26 100 0004 100 0004 4 2 0 2 0 1 1000 1000 F5 6 F5 6 HQ HQ 3264 3264 2448 2448 IN IN ISO 400 ISO 400 12 30...

Page 19: ... bottom of the monitor Follow these guides to navigate the menus About the menus Operation guide e button Arrow pad 1243 m button OK MENU SETUP SETUP IMAGE QUALITY IMAGE QUALITY RESET RESET CAMERA MENU CAMERA MENU SILENT MODE SILENT MODE EXIT SET PANORAMA PANORAMA OK SET MENU BACK 1 2 CAMERA MENU WB AUTO ISO AUTO DIGITAL ZOOM FINE ZOOM DRIVE o OFF OFF Top menu in still picture shooting mode OK MEN...

Page 20: ...or e 4 Use the arrow pad 12 to select FACE DETECT iESP or SPOT and press e The menu item is set and the previous menu is displayed Press m repeatedly to exit the menu To cancel changes and continue menu operation press m before pressing e Using the menus OK MENU SETUP SETUP IMAGE QUALITY IMAGE QUALITY RESET RESET CAMERA MENU CAMERA MENU SILENT MODE SILENT MODE EXIT SET PANORAMA PANORAMA OK SET MEN...

Page 21: ...16 5 11 7 in A4 11 7 8 5 in size prints This is useful for computer editing such as rotating or adding text to a picture 2304 1728 2048 1536 SQ2 1600 1200 Standard compression This is useful for postcard sized 6 4 in prints This is useful for viewing pictures on a computer 1280 960 1024 768 This is useful for sending as e mail attachments 640 480 Low compression 16 9 1920 1080 Standard compression...

Page 22: ... Y YOFF P 16 OFF P 16 Shadow Adjustment Technology OFF P 17 Information Display Normal Display P 18 IMAGE QUALITY HQ P 21 PANORAMA COMBINE IN CAMERA 1 P 22 s PORTRAIT P 24 WB AUTO P 25 ISO AUTO P 25 DRIVE o P 26 FINE ZOOM OFF P 26 DIGITAL ZOOM OFF P 26 ESP n ESP P 26 AF MODE SPOT P 27 R OFF P 27 DIS MOVIE MODE OFF P 27 PANORAMA Taking and combining panoramic pictures COMBINE IN CAMERA1 Automatical...

Page 23: ...automatically After the current subject appears on the monitor take the third picture in the same manner as the second one After the third picture is taken the pictures are automatically combined and then the combined picture is displayed To combine only two pictures press e before shooting the third picture 2nd 3rd Target mark Pointer Connects pictures from left to right 1st Connects pictures fro...

Page 24: ...plays sample images as well as a description of the shooting situation for which it is designed It can be set only when the mode dial is set to s g Mode dial Switching between shooting and playback modes P 12 By switching to another scene mode most settings will be changed to the default settings of each scene mode 1 When the subject is dark noise reduction is automatically activated This approxim...

Page 25: ...ource 5 Sunny day For shooting under a clear sky 3 Cloudy day For shooting under a cloudy sky 1 Tungsten light For shooting under tungsten lighting w Fluorescent lamp 1 For shooting under daylight fluorescent lighting This type of lamp is mainly used in homes x Fluorescent lamp 2 For shooting under a neutral white fluorescent lamp This type of lamp is mainly used in desk lamps y Fluorescent lamp 3...

Page 26: ...tion when combined with optical zoom Optical Zoom Digital Zoom maximum 28 This function is not available with Fine Zoom activated DRIVE Using sequential continuous shooting o Shoots 1 frame at a time when the shutter button is pressed W Focus and exposure are locked at the first frame The sequential shooting speed varies depending on the image quality setting FINE ZOOM Zooming in on your subject w...

Page 27: ...ie with the camera physically stabilized If not the movie you are capturing may shake along with the subject This function allows you to turn off operational sounds that occur during shooting and playback warning beeps shutter sounds etc AF MODE Changing the focusing area FACE DETECT The camera searches a face within the frame and focus on it iESP The camera determines which subject within the scr...

Page 28: ...ovies 5 EDIT OK MENU MOVIE PLAY MOVIE PLAY EDIT EDIT ERASE ERASE SETUP SETUP PLAYBACK MENU PLAYBACK MENU PRINT ORDER PRINT ORDER SILENT MODE SILENT MODE EXIT SET PERFECT FIX PERFECT FIX ADD FAVORITE ADD FAVORITE OK MENU SLIDE SHOW SLIDE SHOW EDIT EDIT ERASE ERASE PRINT ORDER PRINT ORDER SILENT MODE SILENT MODE EXIT SET PERFECT FIX PERFECT FIX ADD FAVORITE ADD FAVORITE SETUP SETUP PLAYBACK MENU PLA...

Page 29: ...IX Correcting pictures ALL Digital image stabilization edit lighting fix and redeye fix are activated together DIS EDIT Retouches unanticipated blurry images LIGHTING FIX The underexposed areas of an image are brightened REDEYE FIX Corrects a subject with red eye 12 30 12 30 07 12 26 07 12 26 100 0004 100 0004 00 00 00 36 00 00 00 36 IN IN 1 Increases the volume 2 Reduces the volume 3 Each time yo...

Page 30: ...f a picture and saves it as a new file Crop a picture and save the cropped picture as a new picture Use 43 to select a picture to be cropped and press e Use the arrow pad and zoom button to adjust the position and size of the area selection box and press e This function lets you change the coloring of the picture and save it as a new picture Select the picture with 43 and press e Select your desir...

Page 31: ...ion lets you select a calendar format integrate the calendar with a picture and save it as a new file Select the picture with 43 and press e Select the calendar with 43 and press e Press 12 to turn the picture 90 degrees clockwise or 90 degrees counterclockwise Set the date of the calendar and press e Use 43 to select a layout pattern and press e Select the image selection method and press e Selec...

Page 32: ...om a movie and saves them as a new picture INDEX containing thumbnails of each frame Use 43 to select a movie and press e Use the arrow pad to select the first frame and press e Select the last frame in the same way and press e Select a part of the movie you wish to save overwrite the original file with it or save it as a new file Select NEW FILE or OVERWRITE and press e Use the arrow pad to selec...

Page 33: ...several frames in succession Sound is recorded for about 4 seconds Select a picture with 43 and use 12 to select YES to begin recording The BUSY bar will be temporarily displayed Protected pictures cannot be erased Cancel protection before erasing protected pictures Once erased pictures cannot be restored Check each picture before erasing to avoid accidentally erasing pictures you want to keep Whe...

Page 34: ... Copying data does not erase the pictures in the internal memory It takes some time to back up data Check that the battery is charged before starting the copy or use the AC adapter SEL IMAGE Erase by selecting the single frame ALL ERASE Erase all the pictures in the internal memory or the card SETUP menus MEMORY FORMAT FORMAT Formatting the internal memory or card BACKUP Copying pictures in the in...

Page 35: ...W ON SETUP Setting the startup screen and volume SCREEN OFF No picture is displayed 1 2 MY FAVORITE VOLUME OFF No sound LOW HIGH MENU THEME Setting the menu screen color and background NORMAL BLUE BLACK PINK MY FAVORITE BEEP Adjusting the volume of the beep when buttons are pressed OFF No sound LOW HIGH 8 Adjusting the volume of the camera warning sound OFF No sound LOW HIGH SHUTTER SOUND Selectin...

Page 36: ...mes of pictures RESET This method is useful when grouping files on separate cards The file number and folder number are reset every time a new card is inserted in the camera The folder number returns to No 100 and the file number returns to No 0001 AUTO This method is useful when you want to manage all your files with sequential numbers Even if a new card is inserted the folder number and file num...

Page 37: ...or alarm sounds and volume DUALTIME Setting the date and time for another time zone OFF Switches to the date and time set in X Pictures are recorded with the date and time set in X ON Switches to the date and time set in DUALTIME When setting the dual time select ON and then set the time Pictures are recorded with the date and time set in DUALTIME ALARM CLOCK Setting alarms OFF No alarm is set or ...

Page 38: ...ecting the camera to the TV NTSC North America Taiwan Korea Japan PAL European countries China Playing back pictures on a TV Turn off the camera and the TV before connecting When no operation has been performed for approximately 10 seconds while in shooting mode the monitor automatically shuts off Pressing the zoom button or other buttons restores the camera from power save mode VIDEO OUT Playing ...

Page 39: ...s If STANDARD is selected on the settings screens P 41 pictures are printed according to these settings Refer to the printer s instruction manual for its standard settings or contact the printer manufacturer 1 In playback mode display the picture you want to print out on the monitor 2 Turn the printer on and plug the USB cable provided with the camera into the multi connector of the camera and the...

Page 40: ...ps 1 and 2 on P 39 to display the screen for Step 3 above and then press e 2 Select CUSTOM PRINT and press e 3 Follow the operation guide to adjust print settings You can use EASY PRINT even when the camera is turned off or in shooting mode With the camera turned off or in shooting mode connect the USB cable The selection screen for the USB connection is displayed Select EASY PRINT g EASY PRINT St...

Page 41: ...DERLESS BORDERLESS I N SIZE BORDERLESS STANDARD STANDARD SIZE Choose from the available paper sizes on your printer BORDERLESS Select with or without borders In MULTI PRINT mode you cannot print with a border OFF The picture is printed inside a blank frame ON The picture is printed filling the entire page PICS SHEET Available in MULTI PRINT mode only The number of prints that can be printed vary d...

Page 42: ...m digital cameras Pictures with print reservations can be printed using the following procedures Printing using a DPOF compatible photo store You can print the pictures using the print reservation data Printing using a DPOF compatible printer Printing is possible directly from a card containing print reservation data without using a computer For more details refer to the printer s instruction manu...

Page 43: ...he playback mode and display the top menu 2 Select PRINT ORDER and press e 3 Press 43 to select the frames for print reservations and then press 12 to set the number of prints You cannot make print reservations for pictures with A Repeat Step 3 to make print reservations for other pictures Cropping a picture Use zoom button to display the trimming frame Use the arrow pad and zoom button to adjust ...

Page 44: ...d press e To reset the print reservation data for all the pictures 2 Select or U and press e 3 Select RESET and press e To reset the print reservation data for a selected picture 2 Select and press e 3 Select KEEP and press e 4 Press 43 to select the picture with the print reservations you want to cancel and press 2 to decrease the number of prints to 0 Repeat Step 4 to cancel print reservations f...

Page 45: ...gP 50 Using OLYMPUS Master What is OLYMPUS Master Prepare the following items before starting Computer that meets the operating environment P 46 OLYMPUSMaster2 CD ROM USB cable Download images from the camera or other media View images and movies You can run a slideshow and play back sound Manage images Manage images in an album or folder Downloaded images are automatically sorted by date allowing...

Page 46: ...are not guaranteed when using an added USB port or IEEE 1394 port To install the software you must log on as a user with administrators privileges Macintosh OS Mac OS X v10 3 or later CPU Power PC G3 500 MHz or later Intel Core Solo Duo 1 5 GHz or later RAM 256 MB or more Hard disk capacity 500 MB or more Monitor 1 024 768 pixels or more 32 000 colors or more 16 77 million colors or more recommend...

Page 47: ...instructions When the OLYMPUS Master licensing agreement is displayed read the agreement and click Yes to proceed with the installation 4 When the user information screen is displayed enter your Name select your Region and click Next 5 When the setup type selection screen is displayed click Install To select the components to install select Custom The installation begins The screen confirming that...

Page 48: ...llation The screen confirming that installation is completed is displayed You must restart your computer before using OLYMPUS Master 1 Make sure the camera is turned off The monitor is off The lens is retracted 2 Connect the multi connector on the camera to the USB port on the computer using the provided USB cable Refer to your computer s instruction manual to locate the position of the USB port T...

Page 49: ...LYMPUS Master if PC is selected in Step 3 3 is pressed and MTP is selected Windows 1 Double click the OLYMPUS Master 2 icon on the desktop Macintosh 1 Double click the OLYMPUS Master 2 icon in the OLYMPUS Master 2 folder The browse window is displayed When OLYMPUS Master is started up for the first time after installation the OLYMPUS Master initial setting screen and user registration screen are d...

Page 50: ...played 3 When a message is displayed saying that the hardware can be ejected safely click OK Macintosh 1 The trash icon changes to the eject icon when the Untitled or NO_NAME icon on the desktop is dragged Drag and drop it on the eject icon 3 Disconnect the USB cable from the camera Note Windows When you click Unplug or Eject Hardware a warning message may be displayed Make sure that image data is...

Page 51: ...rage You can connect the camera to your computer using the USB cable provided with the camera to download and save images without using OLYMPUS Master The following environment is required to use the USB cable to connect the camera to your computer Windows Windows 2000 Professional XP Home Edition XP Professional Vista Macintosh Mac OS X v10 3 or later Note If your computer is running Windows Vist...

Page 52: ...then Update Camera Add Display Language The confirmation window for updating is displayed 6 Click OK The updating the camera window is displayed 7 Click Add Language in the updating camera display The Add Display Language of Camera window is displayed 8 Click and select a language 9 Click Add The new language is downloaded to your camera Please do not remove any cable or the battery while the came...

Page 53: ...off Press o to turn the camera on The mode dial is set to q or P This is the playback mode for displaying pictures on the monitor Set the mode dial to a shooting mode The mode dial is in the position of g No pictures can be taken when the shooting guide is being displayed Take pictures after selecting your desired shooting effect in the shooting guide or set it to a setting other than g in shootin...

Page 54: ...nce away as the subject you want to shoot and lock the focus by pressing the shutter button halfway Then recompose your picture and press the shutter button completely as the subject enters the frame Under certain types of conditions it is difficult to focus using auto focus The green lamp on the monitor lights allowing you to check if the focus is locked In these cases focus focus lock on an obje...

Page 55: ...ing at high sensitivity while suppressing noise however increasing the ISO sensitivity can result in some noise depending on the shooting conditions g ISO Changing the ISO sensitivity P 25 The reason why there are sometimes differences between the actual colors and the colors recorded in a picture is related to the light source illuminating the subject WB is the function that helps the camera dete...

Page 56: ...ng against backlight and under fluorescent and other artificial lighting g 3 button Flash shooting P 16 Selecting a exposure value with 1F is useful in shooting a subject against backlight g 1F button Changing picture brightness Exposure compensation P 16 When AF MODE is set to FACE DETECT the camera determines the exposure by metering a face and the face in the picture taken will appear brighter ...

Page 57: ...rnal memory Using a 1 GB card With sound Without sound With sound Without sound SHQ 3264 2448 12 12 253 255 HQ 3264 2448 23 23 492 499 SQ1 2560 1920 38 39 820 841 2304 1728 47 48 999 1031 2048 1536 59 61 1254 1305 SQ2 1600 1200 92 97 1938 2063 1280 960 138 151 2907 3198 1024 768 202 233 4264 4920 640 480 233 276 4920 5814 16 9 1920 1080 66 69 1390 1453 Image quality Image size Continuous recording...

Page 58: ...7 in To edit and process images on a computer SHQ or HQ To print A3 16 5 11 7 in A4 11 7 8 5 in size images SQ1 To print postcard size images To send as an e mail attachment or post on a web site SQ2 To express the broadness of a subject such as landscapes To view pictures on a wide screen television 16 9 g IMAGE QUALITY Changing the image quality P 21 Lamp indicators Lamp Status Self timer lamp T...

Page 59: ... card capacity is insufficient the image was extracted from a movie the image was shot with another camera or the image was already fixed with Digital Image Stabilization Edit Depending on the picture the red eye may not be fixed Also parts except the eye may be fixed When a card has been inserted in the camera the picture in the internal memory cannot be played back Pull out the card before opera...

Page 60: ...pictures Viewing pictures on a computer Viewing the entire picture on a computer screen When you get an error message on the camera Monitor indication Possible cause Corrective action q CARD ERROR There is a problem with the card This card cannot be used Insert a new card q WRITE PROTECT Writing to the card is prohibited The recorded image has been protected read only on a computer Download the im...

Page 61: ...nd connect it again correctly NO PAPER There is no paper in the printer Load some paper in the printer NO INK The printer has run out of ink Replace the ink cartridge in the printer JAMMED The paper is jammed Remove the jammed paper SETTINGS CHANGED The printer s paper tray has been removed or the printer has been operated while changing settings on the camera Do not operate the printer while chan...

Page 62: ... movie recording Set DIGITAL ZOOM to ON to enable the zoom function for shooting Functions available in shooting modes and scene modes Shooting mode K h s n Ref Page Function P AUTO Optical zoom 9 9 9 9 P 15 F 9 9 9 9 9 P 16 9 9 9 P 16 Y 9 9 9 9 P 16 9 9 9 9 P 16 Shadow Adjustment Technology 9 9 9 9 P 17 IMAGE QUALITY 9 9 9 9 P 21 PANORAMA 9 9 P 22 WB 9 9 9 9 P 25 ISO 9 P 25 DRIVE 9 9 P 26 FINE ZO...

Page 63: ...ble s B C N K F D G U W c R S X V P d i e f S Ref Page Function Optical zoom 9 9 9 9 9 9 9 9 9 9 9 9 P 15 9 9 9 9 9 9 1 9 2 P 16 Y 9 9 9 9 9 9 9 9 9 9 P 16 9 9 3 9 3 9 9 3 9 3 9 9 9 9 9 P 16 Shadow Adjustment Technology 9 9 9 9 9 9 9 9 9 P 17 IMAGE QUALITY 9 9 9 9 4 9 9 9 9 9 5 9 4 9 7 9 4 P 21 PANORAMA 9 6 9 6 9 6 9 6 9 6 9 6 9 6 9 6 9 6 P 22 FINE ZOOM 9 9 9 9 9 9 9 9 9 P 26 DIGITAL ZOOM 9 9 9 9 ...

Page 64: ...s where chemical products are handled since this may result in corrosion This camera uses one Olympus lithium ion battery LI 42B or LI 40B No other type of batteries can be used Power consumption by the camera varies depending on which functions are used During the conditions described below power is consumed continuously and the battery becomes exhausted quickly The zoom is used repeatedly The sh...

Page 65: ...230 50 C BF Guatemala 120 60 A Italy 220 50 C Honduras 110 60 A Luxemburg 230 50 C Jamaica 110 50 A Netherlands 230 50 C Mexico 120 127 60 A Norway 230 50 C Nicaragua 120 240 60 A Poland 220 50 C Panama 110 220 60 A Portugal 230 50 C Romania 220 50 C South America Russia 220 50 C Countries Regions Voltage Frequency Hz Plug type Slovak 220 50 C Argentina 220 50 C BF O Spain 127 230 50 C Brazil 127 ...

Page 66: ...ransferred from the camera enters the card Compatible cards xD Picture Card 16MB 2GB Type H M Standard Using the internal memory or card You can confirm on the monitor whether the internal memory or card is being used during shooting and playback operations Note Do not open the battery card compartment cover while the card access lamp is blinking as this indicates that data is being read or writte...

Page 67: ...water When the camera exterior gets wet turning the camera on or off or zooming in or out impairs its weatherproof performance Immediately wipe the camera off to remove water droplets before its use if it gets wet Olympus will not assume any responsibility for malfunction of the camera caused by water getting inside as a result of misuse by the user The camera is weatherproof and is not damaged by...

Page 68: ...object into the product Heat Never use or store this product near any heat source such as a radiator heat register stove or any type of equipment or appliance that generates heat including stereo amplifiers General Precautions CAUTION TO REDUCE THE RISK OF ELECTRICAL SHOCK DO NOT REMOVE COVER OR BACK NO USER SERVICEABLE PARTS INSIDE REFER SERVICING TO QUALIFIED OLYMPUS SERVICE PERSONNEL An exclama...

Page 69: ...riorate and in some circumstances cause the camera to catch fire Do not use the charger or AC adapter if it is covered such as a blanket This could cause overheating resulting in fire Handle the camera with care to avoid getting a low temperature burn When the camera contains metal parts overheating can result in a low temperature burn Pay attention to the following When used for a long period the...

Page 70: ...ther abnormality The battery may become hot during prolonged use To avoid minor burns do not remove it immediately after using the camera Always unload the battery from the camera before storing the camera for a long period To protect the high precision technology contained in this product never leave the camera in the places listed below no matter if in use or storage Places where temperatures an...

Page 71: ...e angle at which you are viewing the monitor the spot may not be uniform in color and brightness This is not a malfunction Olympus makes no representations or warranties regarding any damages or benefit expected by using this unit lawfully or any request from a third person which are caused by the inappropriate use of this product Olympus makes no representations or warranties regarding any damage...

Page 72: ... be used to connect the camera to USB enabled personal computers PC Any unauthorized changes or modifications to this equipment would void the user s authority to operate IBM is a registered trademark of International Business Machines Corporation Microsoft and Windows are registered trademarks of Microsoft Corporation Macintosh is a trademark of Apple Inc xD Picture Card is a trademark All other ...

Page 73: ...ting range 0 7 m 2 3 ft to W T normal 0 2 m 0 7 ft to W 0 6 m 2 0 ft to T macro mode 0 03 m 1 2 in to 0 7 m 2 3 ft W only super macro mode Monitor 2 7 TFT color LCD display 230 000 pixels Flash charge time Approx 4 sec for full flash discharge at room temperature using a new fully charged battery Outer connectors Multi connector DC IN jack USB connector A V OUT jack Automatic calendar system 2000 ...

Page 74: ... F operation 20 C to 35 C 4 F to 95 F storage Dimensions 31 5 39 5 6 mm 1 2 1 5 0 2 in Weight Approx 15 g 0 5 oz Battery charger LI 40C Power requirements AC 100 to 240 V 50 to 60 Hz 3 2 VA 100 V to 5 0 VA 240 V Output DC 4 2 V 200 mA Charging time Approx 5 hrs Operating environment Temperature 0 C to 40 C 32 F to 104 F operation 20 C to 60 C 4 F to 140 F storage Dimensions 62 23 90 mm 2 4 0 9 3 5...

Page 75: ...stment Technology Erase P 10 17 Arrow Pad 1243 P 14 e Button P 14 Strap Eyelet P 3 Battery Card Compartment Cover P 4 Tripod Socket Connector Cover P 38 39 48 Multi Connector P 38 39 48 Monitor P 36 76 m Button P 14 Microphone P 27 Speaker o Button P 6 11 Card Access Lamp P 50 58 66 Mode Dial P 6 10 12 q button Playback Print P 17 g E Button P 18 ...

Page 76: ...21 13 AF target mark P 9 27 14 Number of storable still pictures Remaining recording time 4 00 36 P 57 15 Memory gauge a b c d maximum reached P 53 16 Current memory IN Recording pictures to the internal memory xD Recording pictures to the card P 66 17 Sound record R P 27 18 Dualtime l P 37 19 Alarm k P 37 20 Flash mode P 16 21 Exposure compensation 2 0 2 0 P 16 22 Aperture value F5 6 F4 0 etc P 9...

Page 77: ...ite balance WB AUTO 5 3 1 w y P 25 11 Exposure compensation 2 0 2 0 P 16 12 Image size 3264 2448 2560 1920 640 480 etc P 21 13 Image quality SHQ HQ SQ1 SQ2 16 9 SQ P 21 14 Protect 9 P 33 15 Sound record H P 33 16 Print reservation Number of prints Movie 10 n P 43 P 28 17 Current memory IN Playing back the picture in the internal memory xD Playing back the picture in the card P 66 Item Indication R...

Page 78: ...y day 3 25 COLOR EDIT 30 Compression 21 Connector cover 38 39 48 Continuous recording time 57 Cropping pictures P 30 41 43 CUSTOM PRINT 40 D Date and time X 7 36 DIGITAL ZOOM 26 Direct printing 39 DIS EDIT 29 DIS MOVIE MODE 27 Display language W 35 DPOF 42 DRIVE 26 DUALTIME l 37 E EASY PRINT 39 EDIT 30 EDIT movies 32 ERASE 33 Erase 10 17 Error message 60 ESP 26 ESP n 26 EV 16 Exposure 16 Exposure ...

Page 79: ...ly 9 11 Press halfway 9 11 PRINT ORDER 32 41 Print settings 42 Printing pictures 39 Protect 0 33 PW ON SETUP 35 R REC VIEW 35 Recording movies n 11 Recording sound with still pictures R 27 REDEYE FIX 29 Red eye reduction flash 16 RESET 22 Resizing Q 30 S s Scene 6 12 24 SEL IMAGE 34 Self timer lamp 16 58 Self timer Y 11 16 SETUP menus 34 SHOOT SELECT1 2 ef 25 Shooting mode 11 15 18 34 Shooting sti...

Page 80: ...80 EN ...

Page 81: ...EN 81 ...

Page 82: ...82 EN ...

Page 83: ...EN 83 ...

Page 84: ...Printed in Japan 1AG6P1P3581 VS228701 ...

Reviews: