background image

Technical Data

G

29

Technical Data

The wireless alarm systems in the Protect 6XXX-Series operate within the frequency band
specially reserved for security technology in the 868 MHz frequency range. This ensures
that interference to the wireless alarm system by other consumer products, such as baby
monitors, is ruled out. However, it cannot be ruled out that the radio transmission suffers
intermittent or continuous interference due to defective components of other electrical or
electronic products, such as ventilators and antenna amplifiers. In addition, radio transmis­
sion can be disturbed by external sources with malicious intent.

Outdoor Siren

Weight:

228 g (without batteries)

. . . . . . . . . . . . . . . . . . . .

Dimensions (WxHxD):

(172 x 105 x 31) mm

. . . . . . . . .

Frequency:

868 MHz

. . . . . . . . . . . . . . . . .

Batteries:

3 AAA alkaline

. . . . . . . . . . . . . . . . . .

Power adapter plug:

6 V

AC

, 500 mA

. . . . . . . . . . .

Number of sensors:

32

. . . . . . . . . . .

Remote Control

Weight:

24 g

. . . . . . . . . . . . . . . . . . . .

Dimensions (WxHxD):

(40 x 60 x 14.5) mm

. . . . . . . . .

Frequency:

868 MHz

. . . . . . . . . . . . . . . . .

Battery:

Lithium CR2430 3 V

. . . . . . . . . . . . . . . . . . .

Technical Modifications

This instruction manual serves purely for information purposes. Its content is not part of any
contract for sale.

All the data relates to nominal values. The equipment and options described may differ
from country to country according to national requirements.

Summary of Contents for Protect 6 Series

Page 1: ...R Wireless Alarm System Protect 6571 Operating Manual 24 07 2014 en en...

Page 2: ...Olympia Business Systems Vertriebs GmbH Zum Kraftwerk 1 45527 Hattingen...

Page 3: ...cons 9 Overview of LEDs 10 Function Assignment to Buttons Remote Control 10 Menu Structure 11 Configuration 13 General Information 13 Selecting the Language 13 Entry Code 13 Setting the Date Time 14 I...

Page 4: ...Sensors 24 Deregistering Sensors 24 System Extension 24 Changing the Batteries 25 Remote Control 25 Outdoor Siren 25 Regular Maintenance and Service 26 Outdoor Siren 26 Information on Disposal 26 Tech...

Page 5: ...anual will help prevent application errors and at the same time ensure you can exploit all the technical options provided by the wireless alarm system to the full Disclaimer of Liability We cannot gua...

Page 6: ...in the event of a low battery charge status base unit and all registered sensors Power failure backup in the base unit Base unit has a remote control facility Upgradable for operation with max 32 sens...

Page 7: ...t In case of doubt do not complete assembly and installation work yourself Never open the equipment Never use the device when it is wet or in the vicinity of a bathtub shower or such Repairs to defect...

Page 8: ...terference because this reduces the transmission range Examples of sources of interference Metallic objects Source of electrical interference Radiators Loudspeaker systems Mirrors Motors Concrete stee...

Page 9: ...s or gas pipes NOTE Also pay attention to water pipes 1 At the installation location insert two screws in the wall 100 mm apart and aligned horizontally It may be necessary to drill the holes first an...

Page 10: ...unit is activated regardless of whether the alarm system is armed or disarmed The emergency call number is dialled first then up to 10 stored phone numbers in succession A voice message re quests the...

Page 11: ...on Silent mode If an alarm is triggered no acoustic alarm internal telephone dialling unit activated Alarm mode If an alarm is triggered an acoustic alarm is issued internal telephone dialling unit ac...

Page 12: ...up Disarmed mode Lights up Off Off Off Function Assignment to Buttons Remote Control Key Function Emergency call or panic function can be optionally configured on the base unit Alarm mode On burglary...

Page 13: ...ce Record Remote 1 Voice Record Register Search Open Sensor01 Voice Record Remote 1 Voice Record Trigger Delay Duration Delay 0 240S Trigger Tone On Off Arming Delay Delay 0 240S Flood Smoke Standard...

Page 14: ...Menu Structure G 14 Key Tone Key Tone On Key Tone Off Contrast Contrast 1 5 Language Deutsch Espa ol Nederlands Dansk Portugu s English Fran ais Date Time 01 01 2010 00 00 Alarm period Time 1 10Min...

Page 15: ...the button briefly to move one menu level back If no button is pressed for a period of 10 seconds the menu is automatically closed and the key lock activated Selecting the Language There is a range o...

Page 16: ...o record an individual messages for each respective sensor 1 Enter the Entry Code Confirm it by pressing 2 The menu is opened by pressing the Menu button briefly 3 Select the Review menu option Confir...

Page 17: ...tact person in the event an alarm is triggered If for example you only save two phone numbers and both are engaged when the alarm call is sent the dialling cycle soon comes to an end NOTE Do not forge...

Page 18: ...does not initiate a function within 24 seconds the next phone number is automatically dialled Silent mode is deactivated by pressing the button on the remote control entering your Entry Code on the b...

Page 19: ...o set the required delay time 6 Confirm it by pressing the button The system returns to the previous menu level 7 Select the Trigger Tone menu option Confirm it by pressing 8 Use the and buttons to se...

Page 20: ...s possible to switch the key tone feature for the base unit on and off 1 Enter the Entry Code Confirm it by pressing 2 The menu is opened by pressing the Menu button briefly 3 Select the Key Tone menu...

Page 21: ...Smoke Detectors You can set up the base unit so that flood and smoke detectors trigger an alarm when the base unit is disarmed 1 Enter the Entry Code Confirm it by pressing 2 The menu is opened by pr...

Page 22: ...telephone dialling unit is activated 2 At Home mode When At Home mode is active and an alarm is triggered only an acoustic alarm signal is issued 3 Silent mode When Silent mode is active and an alarm...

Page 23: ...ows are closed Base unit 1 Enter the Entry Code Confirm it by pressing 2 Press the button Remote control 1 Press the button Silent Mode NOTE When you leave your apartment or house you can acti vate Si...

Page 24: ...es the call executes a function within 24 seconds refer to Activating the Internal Telephone Dialling Unit with OGM function and ends the call Remote Access Via Telephone The wireless alarm system can...

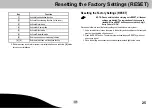
Page 25: ...phone Resetting the Factory Settings RESET NOTE Please note that when carrying out a RESET all the user settings are deleted The registration of the sensors is retained After a RESET has been executed...

Page 26: ...necessary Confirm it by pressing 6 Voice Record appears in the display Press to retain the standard message or press to record an individual message 7 Confirm it by pressing NOTE If you do not confirm...

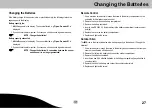
Page 27: ...ision screwdriver to loosen the screw in the battery compartment on the underside of the wireless remote control 2 Remove the cover from the battery compartment 3 Remove the battery contained 4 Insert...

Page 28: ...obliges you to dispose of consumable goods appropriately This serves to protect both persons and the environment The adjacent symbols indicates that electrical and electronic apparatus as well as bat...

Page 29: ...such as ventilators and antenna amplifiers In addition radio transmis sion can be disturbed by external sources with malicious intent Outdoor Siren Weight 228 g without batteries Dimensions WxHxD 172...

Page 30: ...already set up If you want to change this predefined PIN code please refer to Chapter Configuration in this operating instruction manual Keep this operating manual in a safe place away from the wirel...

Reviews: