2NC/2NF/2NG/2NN/3P7/3P8/3P9-2
1-3-101
Setting: T2 time out
The T2 time-out time decides the following.
From CFR signal output to image data reception
From image data reception to the next signal reception
In ECM, from RNR signal detection to the next signal reception
1. Change the setting using the right/left arrow keys.
Description
Setting range
Initial setting
T2 time-out time
1 to 255
69
2. Press the start key. The value is set.
Setting: Ta time out
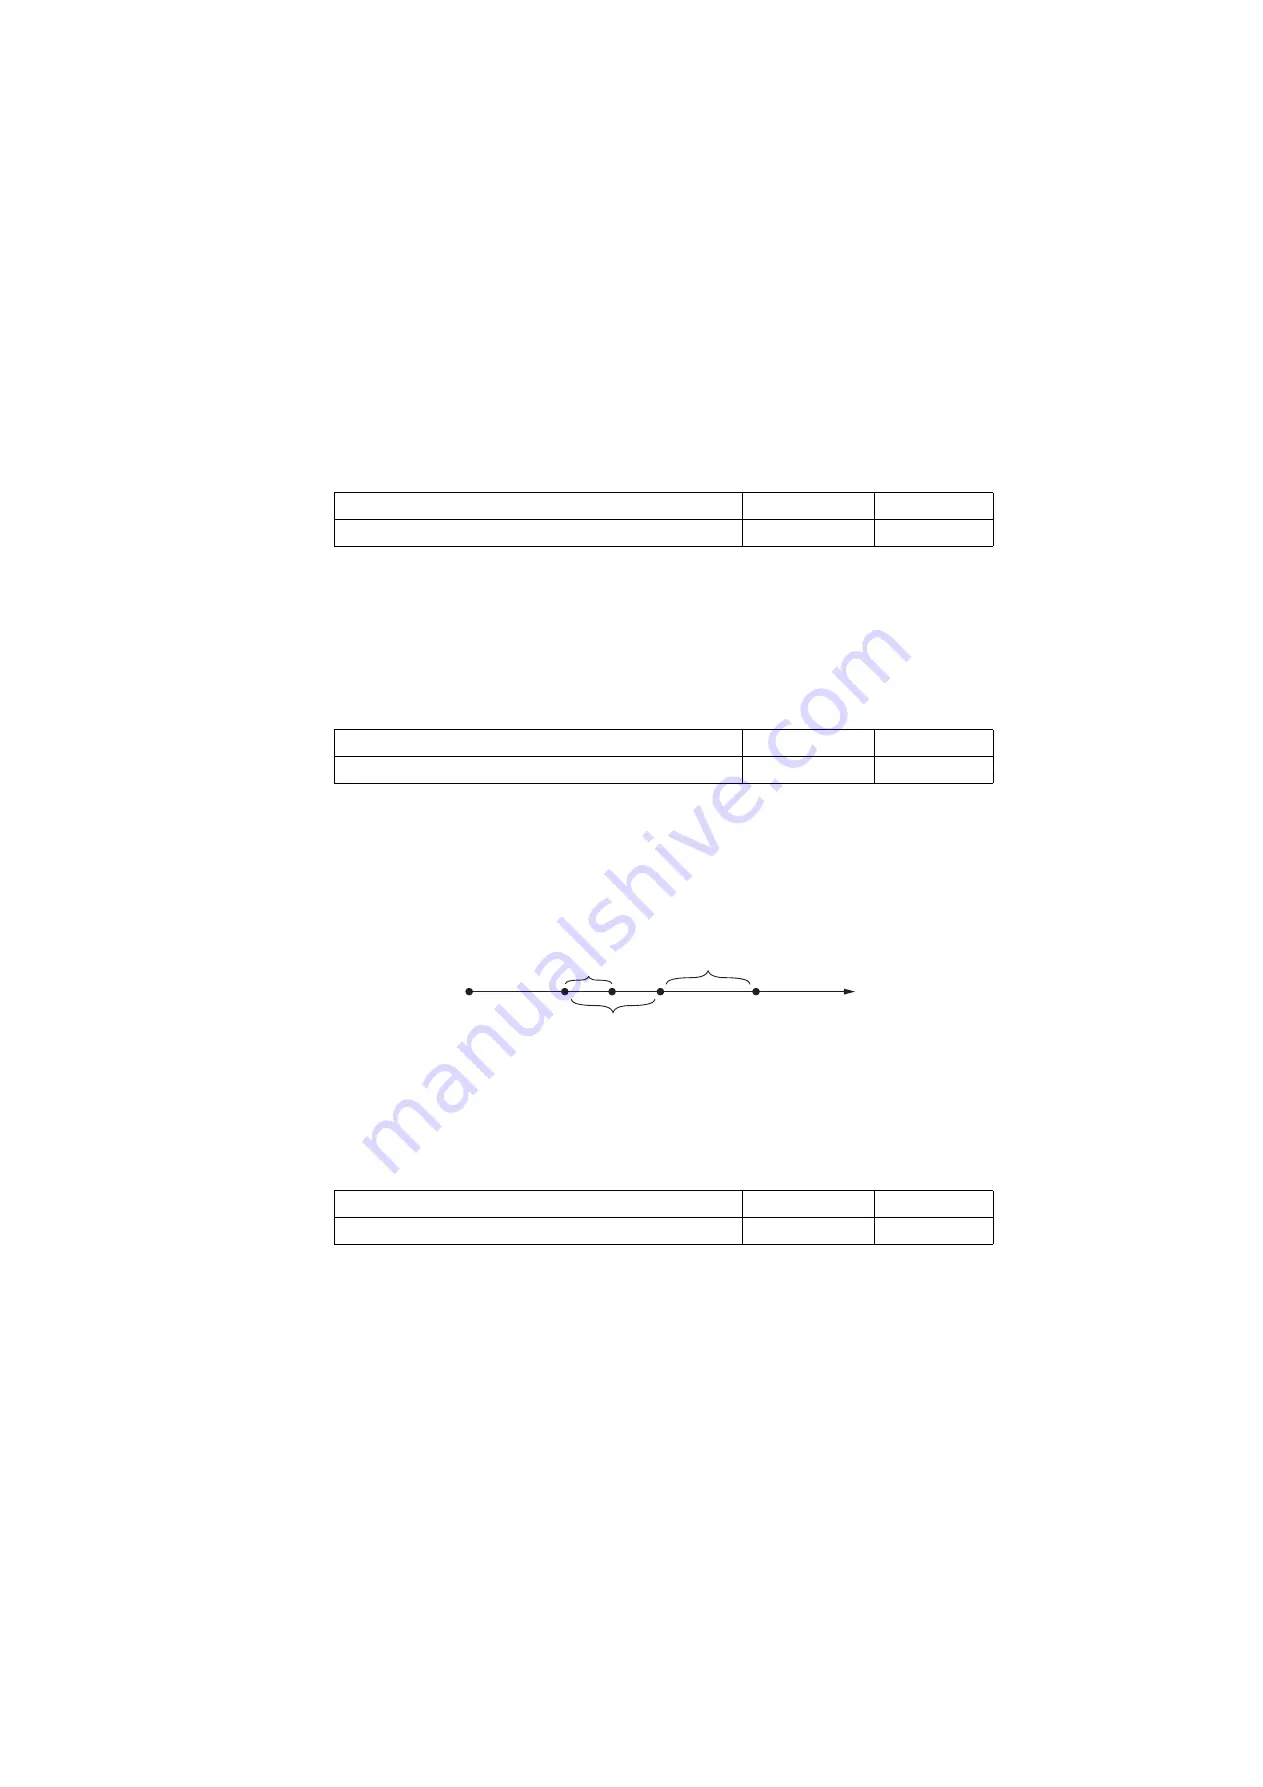
In the fax/telephone auto select mode, sets the time to continue ringing an operator through the
connected telephone after receiving a call as a fax machine (see figure 1-3-19). A fax signal is
received within the Ta set time, or the fax mode is selected automatically when the time elapses. In
fax/telephone auto select mode, change the setting when fax reception is unsuccessful or a tele-
phone fails to receive a call.
1. Change the setting using the right/left arrow keys.
Description
Setting range
Initial setting
Ta time-out time
1 to 255
30
2. Press the start key. The value is set.
Figure 1-3-19 Ta/Tb1/Tb1-3-192 time-out time
Setting: Tb1 time out
In the fax/telephone auto select mode, sets the time to start sending the ring back tone after
receiving a call as a fax machine (see figure 1-3-19). In fax/telephone auto select mode, change
the setting when fax reception is unsuccessful or a telephone fails to receive a call.
1. Change the setting using the right/left arrow keys.
Description
Setting range
Initial setting
Tb1 time-out time
1 to 255
20
2. Press the start key. The value is set.
Ta
Tb2
Tb1
Ring detection
Line connection
as a fax machine
Rings
Ring back tone send start
Start of fax reception
Summary of Contents for d-Copia 1801MF Plus
Page 6: ...This page is intentionally left blank...
Page 12: ...This page is intentionally left blank...
Page 18: ...2NC 2NF 2NG 2NN 3P7 3P8 3P9 This page is intentionally left blank...
Page 54: ...2NC 2NF 2NG 2NN 3P7 3P8 3P9 1 2 24 This page is intentionally left blank...
Page 172: ...2NC 2NF 2NG 2NN 3P7 3P8 3P9 1 3 118 This page is intentionally left blank...
Page 282: ...2NC 2NF 2NG 2NN 3P7 3P8 3P9 1 4 110 This page is intentionally left blank...
Page 440: ...2NC 2NF 2NG 2NN 3P7 3P8 3P9 2 3 4 This page is intentionally left blank...
Page 449: ...Installation Guide DP 480 Document processor Installation Guide...
Page 452: ...2 3 4 5 6 A...
Page 453: ...3 7 8 9 B C C...
Page 454: ...4 10...
Page 467: ...PF 480 300 sheet Paper feeder Installation Guide...
Page 470: ...2 5 6 4 3 B M3x8 B M3x8 B M3x8 B M3x8 1 2...
Page 471: ...3 9 10 8 7 1 2...
Page 472: ...4 13 12 11 1 2 C...
Page 473: ...5 15 14 E D D E D D E D D E D D...
Page 476: ...DU 480 duplex unit Installation Guide...
Page 478: ...1 2 3 1 A B M3x8...
Page 479: ...2 6 7 5 4 A A B M3x8...
Page 483: ...IB 33 Network interface kit Installation Guide...
Page 484: ...2 3 1 IB 33 2013 7 303PB56710 01 A B...
Page 485: ...6 7 5 4 2013 7 303PB56710 01 B YC2007 A...
Page 486: ...FAX System X Installation Guide...
Page 489: ...2 5 4 3 2 B M3x8 A YC 2003...
Page 490: ...3 8 9 7 6 C G G 8 9 7 6 C...
Page 491: ...4 11 10 12 13 D D E...


