d-Color MF350/250/201Plus
4-5
Installation using the Add Printer wizard
4
4.1.2
Network connection (SMB)
When using the SMB printing, specify the port by specifying the printer during the printer driver installation
process. Printers can be specified either by searching printers on the network, or by entering the printer
name.
TCP/IP setting for this machine
Specify the IP address in the TCP/IP Setting screen of this machine.
!
Detail
For details on specifying the IP address of this machine, refer to the User manual – Network
Administrator.
2
Note
When using the IPv6 protocol, the Direct Hosting Setting on the machine must be enabled. For details,
refer to the User manual – Network Administrator.
SMB setting for this machine
In "Print Setting" in the SMB Setting screen of this machine, specify the NetBIOS name, print service name,
and workgroup.
!
Detail
For details on the SMB settings of this machine, refer to the User manual – Network Administrator.
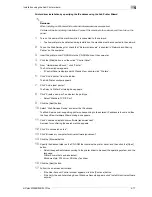
Printer driver installation by specifying printers using the Add Printer Wizard
2
Reminder
When installing on Windows XP or Server 2003, administrator permissions are required.
1
Insert the printer driver CD-ROM into the CD-ROM drive of the computer.
2
Click the [Start] button, and then click "Printers and Faxes".
–
If "Printers and Faxes" does not appear in the Start menu, open Control Panel from the Start menu,
select "Printers and Other Hardware", and then click "Printers and Faxes".
3
For Windows XP, click "Add a printer" on the "Printer Tasks" menu.
For Windows Server 2003, double-click the "Add Printer" icon.
The Add Printer Wizard starts.
4
Click the [Next] button.
5
Select "Local printer attached to this computer", and then click the [Next] button.
–
Clear the "Automatically detect and install my Plug and Play printer" check box.
The Select a Printer Port dialog box appears.
6
Click "Create a new port", and select "Local Port" for "Type of port:"
7
In the "Enter a port name" box, enter "\\NetBIOS name\print service name".
–
Enter the same NetBIOS name and print service name those appear in "Print Setting" in the SMB
Setting screen of this machine.
8
Click the [OK] button.
The Add Printer Wizard appears.
9
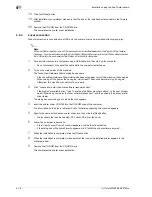
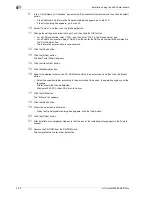
Click the [Have Disk] button.
Summary of Contents for D-color MF 250 Plus
Page 8: ...Content 8 d Color MF350 250 201Plus...
Page 9: ...1 Introduction...
Page 10: ......
Page 15: ...2 Overview of printer functions...
Page 16: ......
Page 24: ...2 Overview of printer functions 2 10 d Color MF350 250 201Plus...
Page 25: ...3 Precautions for installation...
Page 26: ......
Page 31: ...4 Installation using the Add Printer wizard...
Page 32: ......
Page 58: ...4 Installation using the Add Printer wizard 4 28 d Color MF350 250 201Plus...
Page 59: ...5 Installation on Macintosh computers...
Page 60: ......
Page 72: ...5 Installation on Macintosh computers 5 14 d Color MF350 250 201Plus...
Page 73: ...6 Installation to use NetWare...
Page 74: ......
Page 76: ...6 Installation to use NetWare 6 4 d Color MF350 250 201Plus...
Page 77: ...7 Uninstalling the printer driver...
Page 78: ......
Page 81: ...8 Print functions of the PCL PS drivers for Windows...
Page 82: ......
Page 104: ...8 Print functions of the PCL PS drivers for Windows 8 24 d Color MF350 250 201Plus...
Page 105: ...9 Print function of Mac OS X...
Page 106: ......
Page 128: ...9 Print function of Mac OS X 9 24 d Color MF350 250 201Plus...
Page 129: ...10 Print function of Mac OS 9 2...
Page 130: ......
Page 139: ...11 Function detail description...
Page 140: ......
Page 180: ...11 Function detail description 11 42 d Color MF350 250 201Plus...
Page 181: ...12 Settings on the control panel...
Page 182: ......
Page 224: ...12 Settings on the control panel 12 44 d Color MF350 250 201Plus...
Page 225: ...13 Web Connection...
Page 226: ......
Page 249: ...d Color MF350 250 201Plus 13 25 Web Connection 13 13 4 6 Network...
Page 251: ...14 Troubleshooting...
Page 252: ......
Page 257: ...15 Appendix...
Page 258: ......
Page 261: ...d Color MF350 250 201Plus 15 5 Appendix 15 15 2 Configuration page GENERIC 35C 4...
Page 262: ...15 Appendix 15 6 d Color MF350 250 201Plus 15 3 Font list 15 3 1 PCL Font List GENERIC 35C 4...
Page 263: ...d Color MF350 250 201Plus 15 7 Appendix 15 15 3 2 PS Font List GENERIC 35C 4...
Page 264: ...15 Appendix 15 8 d Color MF350 250 201Plus 15 3 3 Demo page...
Page 271: ...16 Index...
Page 272: ......


