background image

1

2

3

4

Deutsch

SICHERHEITSVORKERUNGEN

ACHTUNG - Bei richtiger Anwendung ist die Kettensäge ein

schnelles, bequemes und wirkungsvolles Arbeitsgerät; falls Sie

sie falsch oder ohne die nötige Vorsicht einsetzen, kann sie zu

einer Gefahr werden. Beachten Sie bitte daher unbedingt die

Sicherheitsvorschriften die Sie nachstehend in der

Betriebsanleitung finden, damit ihre Arbeit immer angenehm

und sicher ist.
ACHTUNG: Das Zündsystem Ihres Geräts erzeugt ein

elektromagnetisches Feld geringer Starke. Dieses Feld kann

unter Umständen Herzschrittmacher beeinflussen. Um die

Gefahr ernster oder gar tödlicher Unfalle zu reduzieren, sollten

Personen mit Herzschrittmachern vor Benutzung dieser

Maschine ihren Arzt und den Hersteller des

Herzschrittmachers zu Rate ziehen.
ACHTUNG! – Nationale Verordnungen können den Gebrauch

des Geräts einschränken.

1 - Die Kettensäge dar f nur von geschultem Personal verwendet

werden. Unerfahrene Benutzer müssen sich vor dem

Arbeitseinsatz mit dem Gerät vertraut machen und dessen

Gebrauch üben.

2 - Die Kettensäge darf nur von erwachsenen Personen in

Körperlich gutem Zustand benutzt werden, denen die

Bedienungsanleitung geläufig ist.

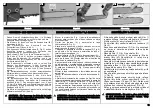
3 - Die Kettensäge nur in gesundem und ausgeruhtem Zustand

gebrauchen nicht unter dem Einfluß von Alkohol, Drogen oder

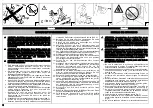
Medikamenten (Abb. 1).

4 - Keine Schals, Armreifen oder andere Kleidungsstücke tragen,

die von der Maschine oder der Kette erfaßt werden können.

Verwenden Sie anliegende Schutzkleidung (siehe Seite 11).

5 - Stets rutschfestes Schuhwerk sowie Handschuhe, Schutzbrille,

Lärmschutz und Helm tragen (siehe Seite 11).

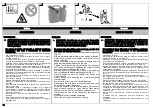
6 - Wahrend des Anlassens und des Betriebes der Kettensäge

sollten andere Personen sich nicht innerhalb des

Arbeitsbereiches aufhalten (Abb. 2).

7 - Beginnen Sie nicht mit dem Schneiden, bevor der

Arbeitsbereich nicht vollkommen sauber und frei von

Hindernissen ist. Schneiden Sie nicht in der Nähe von

elektrischen Kabeln.

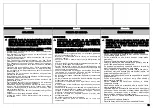
8 - Schneiden Sie immer in stabiler und sicherer Stellung (Abb. 3).

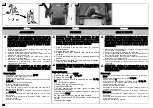
9 - Achten Sie auf gute Abzugsmöglichkeiten der Abgase.

Benutzen Sie das Gerät nicht in der Nähe von explosiven oder

brennbaren Stoffen oder in geschlossenen Räumen (Abb. 4).

10 - Berühren Sie die Kette nicht und unternehmen Sie keine

Wartungsarbeiten, wenn der Motor in Betrieb ist.

11 - Rüsten Sie den Abtrieb der Kettensäge nur mit den

Originalgeräten des Herstellers aus.

12 - Sämtliche Schilder mit den Gefahrensymbolen und

Sicherheitszeichen müssen sich in einwandfreiem Zustand

befinden. Bei Beschädigung oder Unleserlichkeit müssen sie

rechtzeitig ersetzt werden (siehe Seite 4).

13 - Das Gerät darf ausschließlich für die in der Betriebsanleitung

angegebenen Zwecke verwendet werden (siehe seite 33).

14 - Die Maschine nicht mit laufendem Motor liegen lassen.

15 - Kontrollieren Sie die Kettensäge täglich, um sicherzustellen,

daß sowohl die Sicherheits-sowie auch alle anderen

Vorrichtungen korrekt funktionieren.

16 - Folgen Sie bei den Wartungsarbeiten stets unseren

Anweisungen.

17 - Arbeiten se nicht mit beschädigter, fehlerhaft reparierter, falsch

montierter oder willkürlich abgeänderter Kettensäge.

Entfernen, beschädigen oder ändern Sie nie die

Schutzvorrichtungen. Nur Schwerter von der in der Tabelle

angegebenen Länge benutzen.

18 - Nehmen Sie nie alleine Reparaturen oder Arbeiten vor, die

nicht zur normalen Wartung gehören. Wenden Sie sich

ausschließlich an spezialisierte Vertragswerkstätten.

19 - Benutzen Sie die Kettensage nie ohne den Kettenradschutz.

20 - Sollte es notwendig sein die Kettensäge aus dem Verkehr zu

ziehen, händigen Sie sie ihrem Vertragshändler aus, der für

die entsprechende Aufbewahrung sorgt.

21 - Lassen Sie die Kettensäge nur von Personen benutzen, die

das Gerät richtig bedienen können. Geben Sie den Benutzern

der Kettensäge stets die Gebrauchsanweisung, die vor

Arbeitsbeginn gelesen werden sollte.

22 - Wenden Sie sich für weitere Auskünfte stets an Ihren

Fachhändler.

23 - Bewahren Sie dieses Handbuch sorgfältig auf und lesen Sie es

vor jeder Inbetriebnahme der Maschine.

24 - Der Besitzer bzw. Bediener ist in jedem Fall für die Unfälle

oder Risiken gegenüber Dritten oder deren Besitz

verantwortlich.

Español

NORMAS DE SEGURIDAD

ATENCIÓN - La motosierra, si se emplea bien, es un

instrumento de trabajo cómodo y eficaz; si se usa

incorrectamente o sin las debidas precauciones puede

convertirse en un instrumento peligroso. Para que su trabajo

sea siempre agradable y seguro, respete escrupulosamente

las normas de seguridad indicadas a continuación en el

presente manual.
ATENCIÓN: El sistema de encendido de su unidad produce

un campo electromagnético de muy baja intensidad. Este

campo puede interferir con algunos marcapasos. Para

reducir el riesgo de lesiones graves o mortales, las personas

con marcapasos deberían consultar a su médico y al

fabricante del marcapasos antes de utilizar esta máquina.
¡ATENCION! – El uso de la máquina puede estar limitado

por reglamentos nacionales.

1 - No use la motosierra si no conoce perfectamente las

intrucciones para su empleo. El operador deberá ejercitarse

antes de utilizar la máquina por primera vez.

2 - La motosierra debe de ser usada sólo por personas adultas,

en buenas condiciones fisicas y con conocimiento de las

normas de uso.

3 - No usar la motosierra en condiciones de fatiga fisica o se

encuentre bajo el efecto de alcohol, drogas o medicación

(Fig. 1).

4 - No llevar bufandas, brazaletes o cualquier prenda que pueda

engancharse en la máquina o en la cadena. Usar vestidos

adherentes con proteccion anticorte (vea Pag. 11).

5 - Usar zapatos protectivos antideslizantes, guantes, gafas,

auriculares y casco de protección (vea Pag. 11).

6 - No permitir que otras personas permanezcan en el radio de

acción de la motosierra durante el arranque o el corte (Fig. 2).

7 - No iniciar el corte hasta que el área de trabajo no esté

completamente limpia y despejada. No se deben de efectuar

cortes en las cercanias de cables eléctricos.

8 - Cortar siempre en posición estable y segura (Fig. 3).

9 - Usar la motosierra sólo en lugares bien ventilados, no usar

en atmósfera explosiva, inflamable o en ambientes cerrados

(Fig. 4).

10 - No tocar la cadena o efectuar el mantenimiento cuando el

8

Summary of Contents for GS 650

Page 1: ...LE DI USO E MANUTENZIONE GB OPERETOR S INTRUCTION BOOK F MANUEL D UTILISATION ET D ENTRETIEN D BEDIENUNGSANLEITUNG E MANUAL DE INSTRUCCIONES SK NÁVOD NA POUŽITIE A ÚDRŽBU Mod 50250170A Ott 2017 GS 650 63 4 cm3 ...

Page 2: ...e subject to change without notice by the manufacturer GB INTRODUCTION TRADUCTION DES INSTRUCTIONS ORIGINALES Pour un emploi correct de la tronçonneuse et pour éviter les accidents ne commencez pas le travail sans avoir d abord lu attentivement le manuel Vous trouverez les descriptions du fonctionnement des divers composants et les instructions pour les contrôles nécessaires et pour l entretien N ...

Page 3: ...NIQUES 44 DECLARATION DE CONFORMITÈ 50 TABLEAU D ENTRETIEN 54 RÉSOLUTION DES PROBLÈMES 60 CERTIFICAT DE GARANTIE 65 F INHALT EINLEITUNG 2 ERLÄUTERUNG DER SYMBOLE UND SICHERHEITSHINWEISE 4 BAUTEILE DER KETTENSÄGE 5 SICHERHEITSVORKERUNGEN 8 SCHWERT UND KETTENMONTAGE 13 ANLASSEN 15 MOTOR ABSTELLEN 25 GEBRAUCH 27 WARTUNG 35 LÄNGERUNG 43 TECHNISCHE ANGABEN 45 KONFORMITATS ERKLARUNG 50 WARTUNGSTABELLE 5...

Page 4: ...ucciones 2 Llevar casco gafas y auriculares de protección 3 Tipo de máquina MOTOSIERRA 4 Nivel de potencia acústica garantizado 5 Número de serie 6 Marcha CE de conformidad 7 Año de fabricación E 1 Lire le manuel avant d utiliser cette machine 2 Porter casque visière et protège parapluies 3 Type de machine TRONÇONNEUSE 4 Niveau de puissance acoustique garanti 5 Numéro de série 6 Label CE de confor...

Page 5: ...r screw 16 Front handle 17 Rear handle GB COMPONENTES DE LA MOTOSIERRA 1 Palanca cebador 2 Palanca del acelerador 3 Palanca de tope del acelerador 4 Tornillo regulación carburador 5 Palanca freno inercial 6 Silenciador 7 Cadena 8 Barra 9 Tapa filtro 10 Interruptor de masa 11 Tapón depósito combustible 12 Empuñadura 13 Tapón depósito aceite 14 Válvula de descompressión 15 Tornillo lateral para tens...

Page 6: ...ata mal montata o modificata arbitrariamente Non togliere o danneggiare o rendere inefficace alcun dispositivo di sicurezza Utilizzare solo barre della lunghezza indicata in tabella 18 Non effettuare mai da soli operazioni o riparazioni che non siano di normale manutenzione Rivolgersi soltanto ad officine specializzate ed autorizzate 19 Non mettere in moto la motosega priva del carter copricatena ...

Page 7: ...ur le terrain 2 La tronçonneuse ne doit être utilisée que par des adultes en bonnes conditions physiques et ayant pris connaissance 3 N utilisez pas la tronçonneuse si vous êtes physiquement fatigué ou sous l influence de l alcool de drogues ou de médicaments Fig 1 4 Ne portez pas d écharpe de bracelets ou d autres objets qui pourraient se prendre dans la machine ou dans la chaîne Utilisez des vêt...

Page 8: ...beiten se nicht mit beschädigter fehlerhaft reparierter falsch montierter oder willkürlich abgeänderter Kettensäge Entfernen beschädigen oder ändern Sie nie die Schutzvorrichtungen Nur Schwerter von der in der Tabelle angegebenen Länge benutzen 18 Nehmen Sie nie alleine Reparaturen oder Arbeiten vor die nicht zur normalen Wartung gehören Wenden Sie sich ausschließlich an spezialisierte Vertragswer...

Page 9: ...e skôr ako ste boli poučení o jej špecifickom používaní Začiatočníci by si mali pred prácou obsluhu stroja vyskúšať 2 Motorová píla musí byť používaná len dospelými osobami v dobrej fyzickej kondícii a so znalosťou pravidiel na použitie 3 Nepoužívajte motorovú pílu ak ste unavený alebo pod vplyvom alkoholu drog alebo liekov 4 Pri práci nepoužívajte voľne vlajúce šatky náramky alebo iné veci ktoré ...

Page 10: ...tacle Wear adherent anti cut clothing Oleo Mac anti cut jackets Fig 1 dungarees Fig 2 and leggings are the ideal Do not wear clothes scarves ties or bracelets that can stuck into woods or twigs Tie up and protect long hair example with foulards cap helmets etc Safety shoes or boots having skid proof sole and anti piercing insert Fig 4 5 Wear protective helmet Fig 3A in places where there can be fa...

Page 11: ...función de protección y ser cómoda Utilizar ropa adherente y a prueba de cortes La chaqueta Fig 1 el peto Fig 2 y las polainas de protección Oleo Mac son ideales No llevar ropa bufandas corbatas o adornos que puedan ser atrapados por la madera o la maleza Recogerse el cabello largo y cubrirse por ejemplo con un pañuelo una gorra o un casco Utilizar zapatos o botas de seguridad con suela antidesliz...

Page 12: ...Put down the chain cover inserting it into its housing and keeping it pressed against the bar screw on the chain tightener screw L Fig 5 so that the pawl D Fig 3 goes into the hole G of the bar Fit the chain cover and the relative nuts without tightening them Tension the chain by means of the tensioning screw L Fig 5 Hold the tip of the guide bar up and tighten the chain cover nuts securely Fig 7 ...

Page 13: ... dentro el piñón E y en la guía de la barra M Prestar atención al sentido de rotación de la cadena Fig 6 Apoyen la cubierta cubre cadena introduciéndola en su alojamiento y manteniéndola presionada contra la barra atornillen el tornillo tensor de la cadena L Fig 5 para que el trinquete D Fig 3 entre en el orificio G de la barra Montar la tapa cubrecadena y las relativas tuercas sin apretarlas Tens...

Page 14: ... Tighten fuel cap securely after refueling Unit vibration can cause an improperly tightened fuel cap to loosen or come off and spill quantities of fuel Wipe spilled fuel from the unit Move 3 metre away from refuelling site before starting engine Fig 11 Never attempt to burn off spilled fuel under any circumstances Do not smoke while handling fuel or while operating the chainsaw Store fuel in a coo...

Page 15: ...el llenado Aflojar el tapón del combustible lentamente para aliviar la presión y evitar fugas de combustible Apretar firmemente el tapón de combustible después del llenado Las vibraciones pueden causar un aflojamiento del tapón y fugas de combustible Secar el combustible de las fugas de la unidad Desplazar la máquina a 3 metros de distancia del sitio de llenado antes de poner el motor en marcha Fi...

Page 16: ...ing the Oleo Mac PROSINT 2 and EUROSINT 2 Fig 20 or an equivalent high quality engine oil JASO specification FD or ISO specification L EGD CAUTION DO NOT USE AUTOMOTIVE OIL OR 2 CYCLE OUTBOARD OIL CAUTION Match your fuel purchases to your consumption don t buy more than you will use in one or two months Store gasoline in a tightly closed container in a cool dry place CAUTION For the mixture never ...

Page 17: ...UROSINT 2 Fig 20 o un aceite para motor de alta calidad equivalente especificaciones JASO FD o ISO L EGD PRECAUCIÓN NO UTILIZAR ACEITE PARA VEHÍCULOS O ACEITE PARA MOTORES FUERA DE BORDA DE 2 TIEMPOS PRECAUCIÓN Comprar sólo la cantidad de combustible necesaria en base al consumo no comprar más de lo que se utilizará en uno o dos meses Conservar la gasolina en un recipiente cerrado herméticamente e...

Page 18: ...ng the chain must not turn Otherwise contact an Authorized Service Center to carry out a check and fix the problem When the chainsaw is running grip the front handle firmly with your left hand and the back handle with your right hand Fig 26 Check that all parts of the body are kept away from the chain and muffler Over exposure to vibrations can result in bloodvessel or nerve injury to persons suff...

Page 19: ...Antes de arrancar el motor asegurarse que la cadena no esté en contacto con un cuerpo extraño Con el motor al mínimo la cadena no debe girar De lo contrario en contacto con un Centro de Servicio Autorizado para llevar a cabo un control y solucionar el problema Con el motor en movimiento sujetar siempre fuertemente la empuñadura anterior con la mano izquierda y la posterior con la mano derecha Fig ...

Page 20: ... tighten Wipe up any fuel spillage WARNING Check for fuel leaks if any are found correct before use Contact a Servicing Dealer if necessary Engine is Flooded Set the on off switch to STOP Release the cover clips 1 Fig 31 Remove the cover 2 Engage a suitable tool in the spark plug boot 3 Fig 32 Pry off the spark plug boot Unscrew and dry off the spark plug Open the throttle wide Pull the starter ro...

Page 21: ...ame 4 Antes de volver a poner el tapón del combustible limpiar e inspeccionar la junta 5 Colocar inmediatamente el tapón y apretarlo a mano Eliminar todo eventual residuo de combustible ATENCIÓN comprobar que no haya fugas de combustible si las hay eliminarlas antes del uso Si es necesario contactar con el servicio de asistencia del revendedor Motor ahogado Ajuste el interruptor de activación desa...

Page 22: ...the base of the rear handle Fig 36 Pull the starter cord a few times until the first kick over of the engine is heard Move the choke lever C Fig 37 to the intermediate position 2 Pull the starter cord to start the engine Once the engine is going release the chain brake and wait for a few seconds Then accelerate with the throttle B Fig 38 to fire the half throttle blocking device Release the brake ...

Page 23: ... y no choque contra cuerpos extraños Antes de arrancar el motor compruebe que la cadena no toca ningún objeto No arranque nunca la motosierra cuando la barra guía se encuentre en un corte Sujetar firmemente con la mano izquierda la empuñadura anterior y colocar el pie derecho sobre la base de la empuñadura posterior Fig 36 Tirar de la cuerda de arranque varias veces hasta conseguir el primer estal...

Page 24: ...ig 43 Stop the engine and adjust the chain tension Start the saw again and make a few cuts in a trunk to heat up the chain Stop the engine allow the chain to cool and adjust again Repeat this process until the chain retains proper tension Do not touch the ground with the chain WARNING Never touch the chain while the motor is running ICE DEVICE SYSTEM In the event of temperatures below 0 C move the...

Page 25: ...2 Arrancar el motor durante algunos minutos a velocidad moderada controlando el regular funcionamiento de la bomba de aceite Fig 43 Parar el motor y regular la tensión de la cadena Arrancar el motor efectuando algunos cortes en un tronco Parar de nuevo el motor y recontrolar la tensión de la cadena Repetir la operación hasta que la cadena haya alcanzado su alargamiento máximo No tocar el terreno c...

Page 26: ...52 manual operation or automatically by inertia when the protection is pushed forward Fig 53 in the event of sudden kickback inertial operation The chain brake is released by pulling the lever towards the operator Fig 54 CHECKING BRAKE OPERATION At machine inspection prior to each job check the operating condition of the brake following the steps below 1 Start the engine and grasp the handle secur...

Page 27: ...ases del trabajo Viene activado con el consiguiente bloqueo instantáneo de la cadena cuando la mano del operador hace presión sobre la palanca Fig 52 accionamento manual o bien automáticamente por inercia cuando la protección viene empujada hacia adelante Fig 53 en caso de rebote al improviso accionamento inertial El freno cadena se desbloquea tirando de la palanca hacia el operador Fig 54 CONTROL...

Page 28: ... Clear the work area before beginning to cut Prepare the widest possible path of retreat for when the tree falls Fig 57 Cut off any branches at the bottom of the trunk up to a height of about 2 metres Make a 90 degree notch on the face of the tree in the direction it will fall The depth of the notch should never exceed 1 4 of the diameter of the trunk 1 Fig 58 About 10 cm 4 higher up the trunk mak...

Page 29: ...aturas demasiado rígidas o elevadas Asegúrese de que no hay ramas secas que pueden caer ABATIMIENTO Para derribar y seccionar un árbol se debe sacar ventaja del trinquete utilizándolo como eje Estudiar bien el árbol y el terreno circunstante antes de empezar a cortar Liberar la zona de trabajo Prepararse una amplia posibilidad de retroceso para el momento en que el árbol iniciará la caida Fig 57 Q...

Page 30: ...o not use the upper edge of the tip of the guide bar to cross cut otherwise you might risk a kickback BUCKING When bucking up the trunk to desired lengths there is one basic rule to follow Look to see where the trunk is supported and determine which way the two halves will fall when cut 1 If the trunk is supported at both ends first make a small cut at the top 1 Fig 62 then complete the cut from t...

Page 31: ...ho según la posición de la rama que se debe cortar Fig 61 4 En el caso de ramas bajo tensión buscar una posición segura para protegerse del posible golpe de látigo Iniciar siempre el corte por la parte opuesta a la doblez ATENCION No use el borde superior de la punta de la barra cuando debe desramar corre el riesgo de recibir un contragolpe CORTE Antes de cortar el tronco controlar cómo está apoya...

Page 32: ...e before setting the chainsaw down Be particularly cautious and alert when wearing ear protectors as these can restrict your ability to hear sounds indicating danger shouts signals warnings etc Be extremely careful when working on slopes or uneven surfaces Do not cut above chest height as a saw held higher is difficult to control against kickback forces Do not cut from a ladder this is extremely d...

Page 33: ...ndo la visibilidad y la luz sean suficientes para ver claramente Detener el motor antes de apoyar la motosierra Prestar atención especialmente cuando se estén utilizando dispositivos de protección que pueden limitar la capacidad de oír sonidos que indican riesgos avisos señales advertencias etc Tener mucho cuidado al trabajar en pendiente o sobre terrenos irregulares No corte con la motosierra por...

Page 34: ... cutters have been sharpened you need to check the height of the depth gauges and if necessary lower them using the flat file and template supplied optional then round off the front corner Fig 67 WARNING Proper adjustment of the depth gauge is as important as proper sharpening of the chain GUIDE BAR The guide bars provided with a sprocket at their tip must be lubricated with grease using a lubrica...

Page 35: ...sma anchura y longitud ATENCIÓN La cadena debe ser afilada cada vez que se observe que las virutas son de dimensiones muy reducidas como el normal aserrín Cada 3 4 afilados es necesario controlar y eventualmente limar el delimitador de profundidad sirviéndose de la lima plana y de la lima suministrada como opcional seguidamente se deberá redondear el ángulo anterior Fig 67 ATENCIÓN La correcta reg...

Page 36: ...pressed air to keep the cooling louvers of the starter assembly free and clean ENGINE DECOMPRESSION VALVE Clean the cylinder fins Fig 76 with compressed air or a brush periodically Dangerous overheating of engine may occur due to impurities on the cylinder Check the base of the decompression valve clean away any residues which could cause the valve to stay open SPARK PLUG Clean the spark plug and ...

Page 37: ...a cadena está en movimiento ATENCIÓN No emplee nunca aceite recuperado GRUPO DE ARRANQUE Mantener libres y limpios los orificios de refrigeración del carter del conjunto de arranque con pincel o aire comprimido MOTOR VALVULA DE DESCOMPRESSIÓN Limpiar periódicamente las aletas del cilindro con un pincel o con aire comprimido Fig 76 La acumulación de impurezas sobre el cilindro puede provocar recale...

Page 38: ...d in order to ensure a good safety margin between idle running and clutch engagement Screw L must be adjusted so that the engine promptly responds to sharp accelerations and gives good idle operation Screw H must be adjusted so that the engine gives maximum power during the cutting phase WARNING Weather conditions and altitude may affect carburation Do not allow anyone to stay close to the chainsa...

Page 39: ...regularse de media vuelta El campo de regulación de media vuelta para los tornillos L y H se establece en fábrica y no se puede modificar ATENCIÓN No fuerce los tornillos fuera del campo de regulación permitido El tornillo del régimen mínimo T ha sido regulado para que haya un buen margen de seguridad entre el régimen del mínimo y el régimen del embrague El tornillo L se debe regular de manera tal...

Page 40: ...ith normal use WARNING Any maintenance operations not specifically dealt with in this manual must be carried out by an authorised service centre To ensure that your chainsaw continues to function correctly use only ORIGINAL REPLACEMENT PARTS Any unauthorized changes and or use of non original replacement parts may result in serious injury or death to the operator or third parties Français ENTRETIE...

Page 41: ...s normal ATENCIÓN Todas las operaciones de mantenimiento no indicadas en este manual deben ser realizadas por un taller autorizado Para garantizar un funcionamiento correcto y constante del la motosierra es preciso utilizar exclusivamente RECAMBIOS ORIGINALES Eventuales modificaciones no autorizadas y o el uso de accesorios no originales pueden causar lesiones graves o mortales al operador o a ter...

Page 42: ...n a dry place preferably not in direct contact with the ground away from heat sources and the tanks empty The procedures for returning the machine to service following winter storage are the same as for starting up during everyday use page 14 22 DEMOLITION AND DISPOSAL Most materials used for the chainsaw manufacturing are recyclable metals steel aluminium and brass can be delivered to recycling s...

Page 43: ...letas del cilindro Fig 90 Conservar la máquina con los depósitos vacíos en un ambiente seco en lo posible sin contacto con el suelo y lejos de fuentes de calor Para volver a utilizar la máquina después de la pausa invernal es suficiente realizar las mismas operaciones que para la puesta en marcha habitual pág 15 23 DESGUACE Y DESECHO DEL EQUIPO Muchos de los materiales utilizados para realizar la ...

Page 44: ...none No of pinion teeth Nombre de dents du pignon 7 Velocità della catena al 133 della velocità di massima potenza del motore Chain speed at 133 of maximum engine power speed Vitesse de la chaîne à 133 du régime du moteur maximum 24 0 m s Peso senza barra e catena Weight without bar and chain Poids sans guide et chaîne 6 3 kg Capacità serbatoio carburante Fuel tank capacity Capacité du réservoir à...

Page 45: ...der Zähne am Ritzel Número dientes piñón Počet zubov reťazky 7 Kettengeschwindigkeit bei 133 der maximalen Motorleistung Velocidad de la cadena al 133 del régimen del motor máximo Rýchlosť reťaze pri 133 maximálnej výkonnej rýchlosti motora 24 0 m s Gewicht ohne Schwert Peso sin barra y sin cadena Hmotnosť bez lišty a reťaze 6 3 kg Inhalt Kraftstofftank Capacidad del depósito de combustible Objem ...

Page 46: ...lizzare esclusivamente le combinazioni barra catena raccomandate e attenersi alle istruzioni per l affilatura ATTENZIONE The risk of kickback is greater when using a combination bar chain wrong Use only the combination bar chain recommended and follow the instructions for sharpening WARNING Le risque de contre coup kickback augmente si l association barre chaîne n est pas correcte Utilisez exclusi...

Page 47: ...rwenden Sie ausschließlich die empfohlenen Schienen Kettenkombination und befolgen Sie stets die Anweisungen zum Schärfen ACHTUNG El riesgo de contragolpe kickback es mayor en caso de combinación barra cadena errónea Utilizar exclusivamente las combinaciones barra cadena recomendadas y atenerse a las instrucciones de afilado ATENCION Riziko spätného nárazu kickback je vyššie v prípade nesprávnej k...

Page 48: ...ca garantita Guaranteed sound power level Niveau puissance acoustique assuré LwA 2000 14 EC EN22868 EN ISO3744 115 0 dB A Livello di vibrazione Vibration level Niveau de vibration EN11681 1 EN22867 EN 12096 5 3 sx 5 3 dx m s Incertezza Uncertainty Incertitude EN 12096 1 7 m s I Valori medi ponderati 1 3 minimo 1 3 pieno carico 1 3 velocità max a vuoto GB Weighted average values 1 3 minimum rpm 1 3...

Page 49: ...egel Nivel potencia acústica garantizado Zaručená hladina akustického výkonu LwA 2000 14 EC EN22868 EN ISO3744 115 0 dB A Vibrationspegel Nivel de vibracion Úroveň vibrácií EN11681 1 EN22867 EN 12096 5 3 sx 5 3 dx m s Unsicherheit Incertidumbre Tolerancia EN 12096 1 7 m s D Mittelwerte 1 3 Leerlauf 1 3 voll beladen 1 3 max Geschwindigkeit unbeladen E Valores medios ponderados 1 3 mínimo 1 3 plena ...

Page 50: ...ĕtĕzové pily 2 Marca Tipo 2 Trademark Type 2 Marque Type 2 Marke Typ 2 Marca Tipo 2 Ochranná známka Typ OLEO MAC GS 650 3 identificazione di serie 3 serial identification 3 identification de série 3 Serien Identifizierung 3 identificación de serie 3 Identifikácia série 995 XXX 0001 995 XXX 9999 è conforme alle prescrizioni della direttiva complies with the requirements established by directive est...

Page 51: ...onformidad Bol dodržaný postup hodnotenia Annex V 2000 14 EC Livello di potenza acustica misurato Measured sound power level Niveau de puissance acoustique mesuré Schallleistungspegel gemessen Nivel de potencia acústica medido Nameraná úroveň zvukového výkonu 112 0 dB A Livello di potenza acustica garantita Guaranteed sound power level Niveau de puissance acoustique garanti Garantierter akustische...

Page 52: ... profondità di passata X Ispezionare danni e usura X X Pulire scanalatura e condotto olio X Ruotare lubrificare rocchetto e sbavare X Sostituire X Ispezionare danni e usura X Sostituire X Ispezionare danni e usura X Sostituire X Ispezionare danni e usura X X Sostituire X Ispezionare e riserrare X Pulire X Sostituire X Pulire X Ispezionare danni e usura X Sostituire X Controllare il minimo la caten...

Page 53: ...ct Damage and Wear X X Clean Bar groove and Oil Passages X Rotate Lubricate Sprocket Nose and Deburr X Replace X Inspect Damage and Wear X Replace X Inspect Damage and Wear X Replace X Inspect Damage and Wear X X Replace X Inspect Retighten X Clean X Replace X Clean X Inspect Damage and Wear X Replace X Check Idle Chain must not rotate at Idle X X Check Electrode Gap X Replace X Inspect Damage and...

Page 54: ...re X X Nettoyer la cannelure et le conduit de l huile X Tourner lubrifier le pignon et ébarber X Remplacer X Vérifier dommages et niveau d usure X Remplacer X Vérifier dommages et niveau d usure X Remplacer X Vérifier dommages et niveau d usure X X Remplacer X Vérifier et resserrer X Nettoyer X Remplacer X Nettoyer X Vérifier dommages et niveau d usure X Remplacer X Contrôler le ralenti la chaîne ...

Page 55: ...spektionen Schäden und Verschleiß X X Nut und Ölleitung reinigen X Drehen Rolle schmieren und entgraten X Austauschen X Inspektionen Schäden und Verschleiß X Austauschen X Inspektionen Schäden und Verschleiß X Austauschen X Inspektionen Schäden und Verschleiß X X Austauschen X Überprüfen und nachziehen X Reinigen X Austauschen X Reinigen X Inspektionen Schäden und Verschleiß X Austauschen X Leerla...

Page 56: ...l acanalado y el conducto de aceite X Girar lubricar el carrete y desbarbar X Sustituir X Inspeccionar daños y desgaste X Sustituir X Inspeccionar daños y desgaste X Sustituir X Inspeccionar daños y desgaste X X Sustituir X Inspeccionar y apretar X Limpiar X Sustituir X Limpiar X Inspeccionar daños y desgaste X Sustituir X Controlar el mínimo la cadena no debe girar al mínimo X X Controlar la dist...

Page 57: ...vanie X X Vyčistiť drážky a prívod oleja X Otočiť namazať kotúč a rozotrieť X Vymeniť X Skontrolovať poškodenie a opotrebovanie X Vymeniť X Skontrolovať poškodenie a opotrebovanie X Vymeniť X Skontrolovať poškodenie a opotrebovanie X X Vymeniť X Skontrolovať a utiahnuť X Vyčistiť X Vymeniť X Vyčistiť X Skontrolovať poškodenie a opotrebovanie X Vymeniť X Skontrolovať minimálne otáčky pri minimálnyc...

Page 58: ...attare un Centro Assistenza Autorizzato per regolare il carburatore Il motore si avvia gira e accelera ma non tiene il minimo Il carburatore deve essere regolato Regolare la vite del minimo T Fig 84 pag 39 in senso orario per aumentare la velocità vedere capitolo Manutenzione carburatore Barra e catena si scaldano e fumano durante il funzionamento 1 Serbatoio olio catena vuoto 2 Tensionamento cate...

Page 59: ...lean per instruction in Maintenance Air Filter Section 3 Contact a Servicing Dealer for carburetor adjustment Engine starts runs and accelerates but will not idle Carburetor requires adjustment Turn idle speed screw T Fig 84 pag 39 clockwise to increase idle speed See Operation Carburetor Adjustment Bar and Chain Running Hot and Smoking 1 Chain oil tank empty 2 Chain tension too tight 3 Oiler func...

Page 60: ...ler le carburateur Le moteur démarre tourne et accélère mais ne tient pas le ralenti Régler le carburateur Régler la vis du ralenti T Fig 84 page 39 en la tournant dans le sens des aiguilles d une montre pour augmenter la vitesse voir chapitre Entretien carburateur Barre et chaîne se réchauffent et fument durant l utilisation 1 Réservoir d huile de la chaîne vide 2 Chaîne trop tendue 3 Système de ...

Page 61: ...zin und geeignetes Motor für 2 Takt Motoren verwenden 2 Reinigen siehe Anleitungen im Kapitel Wartung des Luftfilters 3 Vergaser bei einer autor isier ten Kundendienststelle einstellen lassen Der Motor startet dreht und beschleunigt hält aber die Leerlaufdrehzahl nicht Der Vergaser muss eingestellt werden Die Leerlaufschraube T Abb 84 Seite 39 im Uhrzeigersinn drehen um die Drehzahl zu erhöhen sie...

Page 62: ...r el carburador El motor arranca gira y acelera pero no mantiene el mínimo Es necesario regular el carburador Regular el tornillo del mínimo T Fig 84 pág 39 en sentido horario para aumentar la velocidad consultar el capítulo Mantenimiento del carburador La barra y la cadena se calientan y emiten humo durante el funcionamiento 1 Depósito de aceite de la cadena vacío 2 Cadena demasiado tensa 3 Malfu...

Page 63: ...zduchového filtra 3 Zavolajte autorizovaný servis aby vám nastavili karburátor Motor sa naštartuje otáča sa a zrýchľuje ale pri minime zhasne Treba nastaviť karburátor Nastavte skrutku minima T Obr 84 str 39 smerom vpravo na dosiahnutie vyššej rýchlosti pozrite kapitolu Údržba karburátora Lišta a reťaz sa počas používania ohrejú a dymia 1 Prázdna nádržka na olej reťaze 2 Príliš napnutá reťaz 3 Por...

Page 64: ...Nota 64 ...

Page 65: ... original spare parts and accessories have been fitted work has been done on the machine by unauthorised personnel 5 The warranty does not cover consumables or parts subject to normal wear 6 The warranty does not cover work to update or improve the machine 7 The warranty does not cover any preparation or servicing work required during the warranty period 8 Damage incurred during transport must be ...

Page 66: ...e timbrado por el vendedor 4 La garantía pierde su validez en los siguientes casos Falta evidente de mantenimiento Uso incorrecto o manipulación del producto Uso de lubricantes o combustibles inadecuados Uso de piezas de recambio o accesorios no originales Intervenciones efectuadas por parte de personal no autorizado 5 La garantía no incluye ni los materiales consumibles ni las piezas sujetas a un...

Page 67: ...Nota 67 ...

Page 68: ...e D ACHTUNG Dieses Anweisungsheft muß das Gerät während seiner gesamten Lebensdauer begleiten E ATENCIÓN Este manual debe acompañar a la máquina durante toda su vida útil SK UPOZORNENIE Tento návod musí sprevádzať prístroj po celú dobu jej životnosti OLEO MAC it s an Emak S p A trademark 42011 Bagnolo in Piano RE Italy www myoleomac com www youtube com MyOleoMac www facebook com OleoMacItalia www ...

Reviews: