18 / 34
5.2.2 Performing a 3D Ground Scan
After all parameters have been adjusted, the Rover UC App is ready to start the first scan line. Go to
your starting point of the first scan line and press the Trigger on the Probe.
Impulse Mode Automatic and Field Length Options
If you have selected the Impulse Mode Automatic
, just keep walking until you have reached the end
of the first scan line.
If you have set an individual
Field Length
, the App will stop automatically after reaching the
selected field length.
If you have selected
Field Length Auto
, press the Trigger at the end of the first scan line.
Then go to the starting point of the next scan line and press the Trigger again. The device will stop
automatically at the end of all following scan lines of this measurement.
Impulse Mode Manual and Field Length Auto
If you have selected the Impulse Mode Manual
, you have to release each single impulse manually
one by one by pushing the Trigger on the Probe. This mode requires
Field Length Auto
.
First, press the Trigger to start your measurement. Then, take a step forward and press the Trigger
again to measure the next impulse. Continue in this way until you have reached the end of the first
scan line. Press
to finish the first scan line.
Go to the starting point of your next scan line and push the Trigger again. Go another step forward
and repeat this in the same way like you recorded the first scan line. The App will signalize automa-
tically the end of the following scan lines.
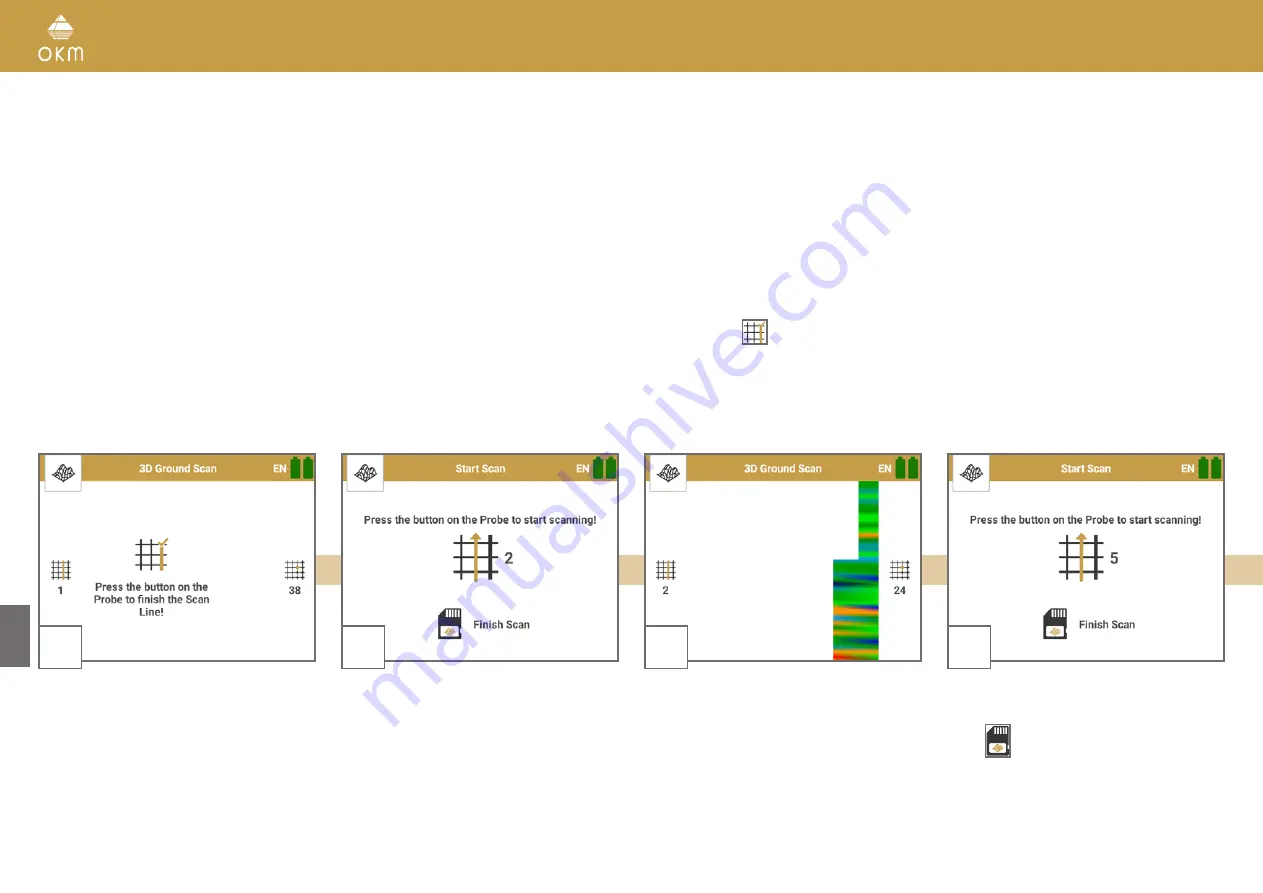
1
As soon as you press the Trigger on the probe,
the detector will record scan values.
The display will indicate the number of the cur-
rent scan line (left) and the number of mea-
sured impulses per scan line (right).
2
Go to the starting point of the next scan line
and press the Trigger to start measuring.
Walk until you reach the end of the scan line.
3
The scan image will be generated during the
measurement. This will help you to follow your
progress while measuring.
The first scan lines may look rather incorrect.
The inconsistent scan image will stabilize in
the course of the measurement.
4
Perform as many scan lines as you like
by repeating Step 2.
Press
Finish Scan
to finish your scan.
Summary of Contents for Rover UC
Page 12: ...12 34 ASSEMBLY PREPARATION...


