


- 114 -
4. Print
3
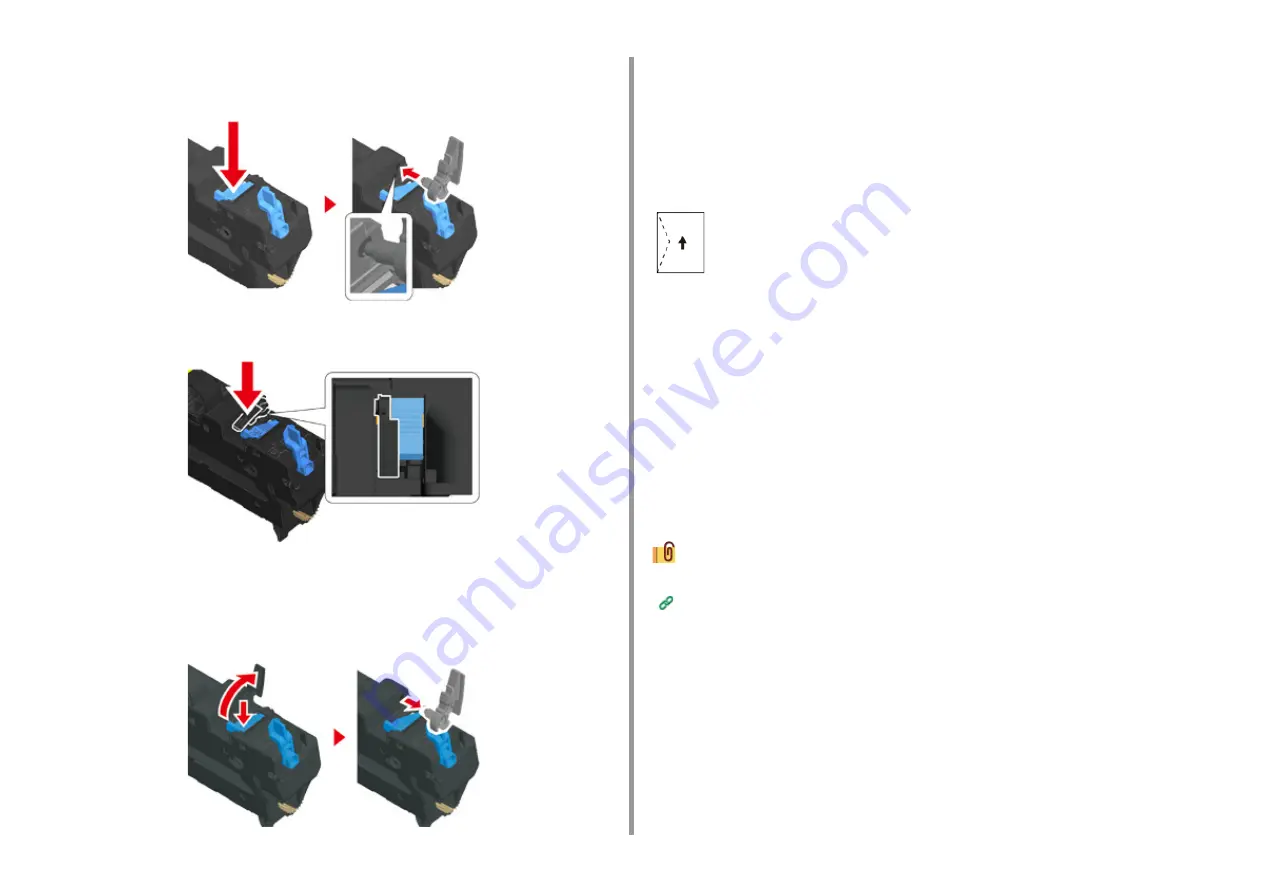
Attach the envelope lever to the fuser unit.
Press the jam release lever, and then insert the envelope lever into the nearby hole.
Push the lever to lock.
4
Replace the fuser unit to the machine.
For details, see "Replacing the Fuser Unit".
When all the envelopes are printed, press the release lever and remove the envelope
lever from the fuser unit, and then attach to the MP tray.
Loading Envelopes
When printing on envelopes, change the paper size setting, and use the MP tray and rear
output tray.
1
Load envelopes until their edges touch the paper feed entrance with the print
side up.
2
Open the rear output tray.
3
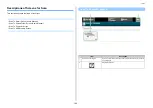
Press [Device Settings] on the touch panel.
4
Press [Paper Setup].
5
Press [MP Tray].
6
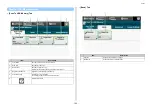
Press [Paper Size].
7
Press the size of envelopes you use.
8
Press [Back] until the home screen is displayed.
Available envelope types.
Loading Paper (User's Manual)
For Windows PCL Printer Driver
1
Open the file to print.
2
Select [Print] from the [File] menu.
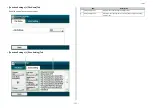
3
Click [Preferences].
4
Select the envelope size from [Size] on the [Setup] tab.
Com-9, Com-10, DL, C5, Monarch
Summary of Contents for MC573
Page 1: ...MC573 ES5473 MFP Advanced Manual...
Page 18: ...18 1 Basic Operations 7 Select a volume level...
Page 31: ...2 Copy Useful Functions For a Better Finish Color Settings Advanced Copy Settings...
Page 141: ...141 4 Print 5 Press Color Menu 6 Press Adjust Registration 7 Press Yes...
Page 489: ...489 11 Utility Software Storage Manager plug in Create or edit a file to download to a device...
Page 507: ...46532802EE Rev2...


