


190
Maintenance
Print Head Window
Continuing to use this machine with a dirty print head window can cause print
quality problems.
Clearing the Print Head Window
1
With the main screen displayed, press the arrow key to display the PRINTER
MODE screen.
2
Press the down arrow key to select T/C CHANGE and then press the Enter
key.
3
Press the down arrow key to select P/H CLEAN MODE and then press the
Enter
key.
"
It is not possible to exit P/H CLEAN MODE before the operation is fin-
ished (even if the Stop/Reset key is pressed).
If the machine has incorrectly been switched to P/H CLEAN MODE,
perform steps 4 through 7, then steps 11 through 16 (skipping steps 8
through 10) to exit P/H CLEAN MODE mode.
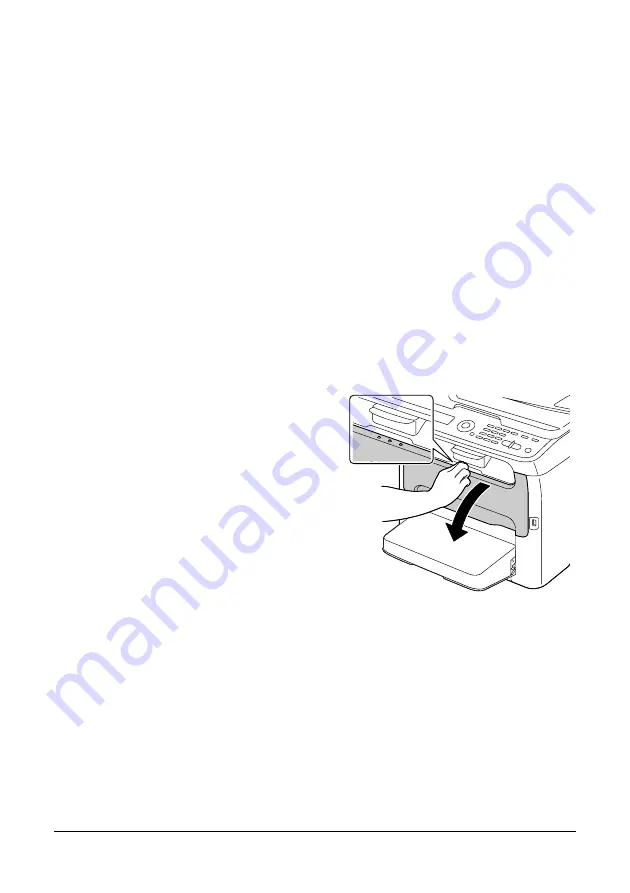
4
Open the front cover.
"
Before opening the front
cover, open Tray 1 if it is not
already open.
Summary of Contents for MC160N
Page 1: ...User Guide Print Copy Scan Modes 59320401 my okidata com MC160n MFP...
Page 9: ...1Introduction...
Page 21: ...1Control Panel and Configuration Menu...
Page 40: ...40 Control Panel and Configuration Menu FAX RX OPERATION REPORTING SCAN SETTING...
Page 76: ...2Media Handling...
Page 91: ...91 Media Handling 6 Reattach the lid to Tray 2 7 Reinsert Tray 2 into the machine...
Page 101: ...2Using the Printer Driver...
Page 108: ...3Using the Copier...
Page 121: ...4Using the Scanner...
Page 150: ...150 Using the Scanner...
Page 151: ...5Replacing Consumables...
Page 174: ...174 Replacing Consumables...
Page 175: ...6Maintenance...
Page 199: ...7Troubleshooting...
Page 213: ...213 Troubleshooting Note Do not touch the wires and flat cable shown in the illustration...
Page 217: ...217 Troubleshooting 7 Load the media in Tray 2 and attach the lid 8 Reinsert Tray 2...
Page 218: ...218 Troubleshooting 9 Open and close the scanner unit to clear the missfeed message...
Page 222: ...222 Troubleshooting 3 Close the duplex cover...
Page 247: ...3Installing Accessories...
Page 260: ...Appendix...


