background image

Configuring the Network Settings

- 67 -

Setup

1

7

Select [

Enter

] and then press  .

8

Press the   and then enter the 

information in B-1.

9

Select [

Enter

] and then press  .

10

Press the   and then select a protocol 

for receiving e-mail for the machine, and 

then press  .

- If you want your machine to receive e-mail from 

the POP3 server, select [

POP3

]. Proceed to step 

11.

- If you want your machine to receive e-mail 

without using a mail server, select [

SMTP

]. 

Proceed to step 13.

- If you do not want your machine to receive e-mail, 

select [

Disable

]. Proceed to step 13.

11

Press the   and then enter the 

information in B-3.

12

Select [

Enter

] and then press  . 

13

Press the   and then select an 

authentication method based on the 

information in B-4. Then, press  .

- If B-4 is "Do not authenticate", select [

Do not 

authenticate

]. Proceed to step 24.

- If B-4 is "SMTP", select [

SMTP Auth

]. Proceed to 

step 14.

- If B-4 is "POP", select [

POP Before SMTP

]. 

Proceed to step 18.

14

Press the   and then enter the 

information in B-5. 

15

Select [

Enter

] and then press  .

16

Press the   and then enter the 

information in B-6.

17

Select [

Enter

] and then press  .

Proceed to step 24.

18

Press the   and then enter the 

information in B-3.

19

Select [

Enter

] and then press  .

20

Press the   and then enter the 

information in B-7.

21

Select [

Enter

] and then press  .

22

Press the   and then enter the 

information in B-8.

23

Select [

Enter

] and then press  .

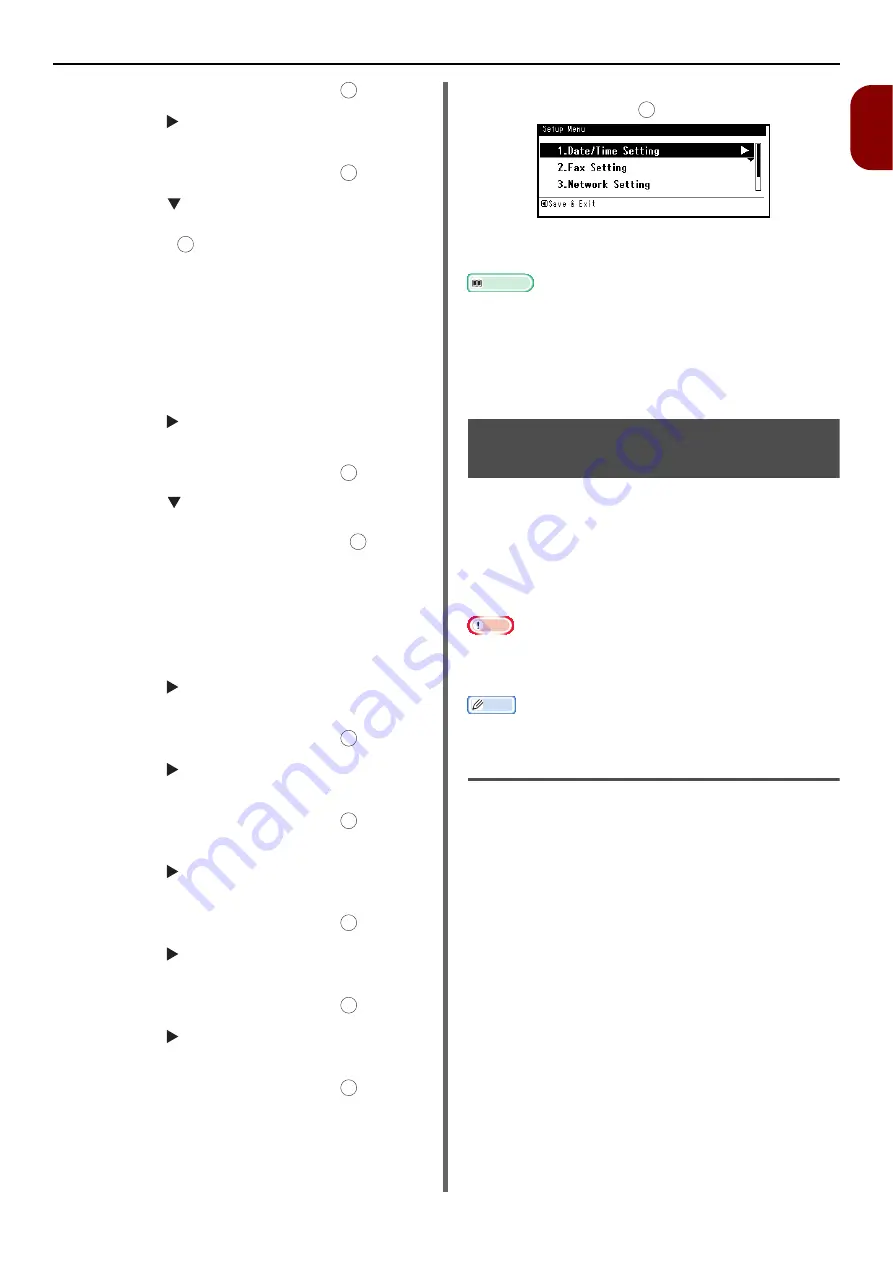
24

When the setup menu screen is 

displayed, press  .

The setup for Scan To E-mail, Scan To Fax Server 
and Internet Fax is complete.

Reference

For details on how to use Scan To E-mail, refer to 

"Scan to 

E-mail" P. 107

.

For details on how to use Scan To Fax Server, refer to  

"Basic Procedure for Scan To Fax Server" P. 96

.

For details on how to use Internet Fax, refer to 

"Basic 

Procedure for Internet Faxing" P. 98

.

Setting Up Scan To Network 
PC

The Scan To Network PC function enables you to 

send and save scanned images to the "shared 

folder" of a computer on the network. To use this 

function, register your machine on the computer 

as a user and create a shared folder, and then 

create a profile on your machine to register the 

settings for the computer.

Note

Before starting the setup, get permission from the network 
administrator to create a shared folder on the computer by 
following the procedure below.

Memo

The CIFS protocol is used in this procedure.

Checking the Name of the Computer

Check the name of the computer following the 

procedure below, and fill in C-1 of the Setup 

Information Form.

For Windows 7, Windows Server 

2008 R2, Windows Server 2008 

and Vista

1

Click [

Start

] and select [

Control 

Panel

].

2

Select [

System and Security

].

For Windows Server 2008 and Windows Vista, 

select [

System and Maintenance

].

OK

OK

OK

OK

OK

OK

OK

OK

OK

OK

OK

Summary of Contents for MB451wMFP

Page 1: ...contains cautions on how to use this product safely Before you use this product please make sure that you read this manual This manual supports the following models MB441 MB451 MB451w MB461 MB471 MB4...

Page 2: ...ny of the above 2011 Oki Data Corporation OKI is a registered trademark of Oki Electric Industry Company Ltd Energy Star is a trademark of the United States Environmental Protection Agency Microsoft W...

Page 3: ...Seek medical attention Spillages should be treated with cold water and soap to help reduce risk of staining skin or clothing MANUFACTURER Oki Data Corporation 4 11 22 Shibaura Minato ku Tokyo 108 855...

Page 4: ...cted in User s Manual Doing so may cause electric shock and or fire leading to personal injury Unplug the power cord and contact with a customer service center if the machine is dropped or the cover i...

Page 5: ...RE IS PROVIDED BY THE INSTITUTE AND CONTRIBUTORS AS IS AND ANY EXPRESS OR IMPLIED WARRANTIES INCLUDING BUT NOT LIMITED TO THE IMPLIED WARRANTIES OF MERCHANTABILITY AND FITNESS FOR A PARTICULAR PURPOSE...

Page 6: ...Your Machine 17 Unpacking Your Machine 17 Turning On and Off Your Machine 19 Installing Options 22 Operator Panel 25 Default Screen 26 Entering Text Using the Operator Panel 26 Loading Paper and Docum...

Page 7: ...Operation 78 Starting a Copy Job 78 Canceling a Copy Job in Progress 78 Configuring Copy Settings 79 Changing the Scan Size Scan Size 79 Changing the Paper Tray Paper Feed 79 Changing Image Orientatio...

Page 8: ...p Number 94 Registering and Editing 94 Deleting 94 One Touch Key Pad 95 Register all telephone numbers 95 Registering the Machine 95 Basic Procedure for Scan To Fax Server 96 Transmitting Data to Fax...

Page 9: ...Printer 118 Printing from a Computer 118 Printing 118 Canceling a Print Job 120 Printing From USB Memory 121 Starting a Print Job 121 Configuring Print Settings 122 Canceling a Print Job 123 6 User Au...

Page 10: ...Issues 159 Feeding Issues 162 Machine Issues 163 When the Power Goes Out 166 8 Maintenance 167 Replacing Consumable Items 167 Replacing Toner Cartridges 168 Cleaning Your Machine 172 Cleaning the Sur...

Page 11: ...information on operations Please ensure you read these Memo Indicates important information on operations Please ensure you read these Reference Indicates where to look when you want to know more deta...

Page 12: ...oft Windows 7 operating system Windows 7 Microsoft Windows Vista operating system Windows Vista Microsoft Windows Server 2008 operating system Windows Server 2008 Microsoft Windows XP operating system...

Page 13: ...rter toner cartridges are installed in the image drum which is installed in the machine before shipment Software DVD ROM AC cord Telephone connector cover The Telephone Connector Cover is installed on...

Page 14: ...tory etc Do not install near inflammable solutions such as alcohol and thinner Do not install in places easily accessible to small child Do not install in an unstable place the shaky stand leaning pla...

Page 15: ...2 installed Names of Components 20cm 193cm 20cm 50cm 100cm 83cm 50cm 96cm 50cm 110cm No Name 1 Auto document feeder ADF cover 2 Document tray 3 Scanner unit 4 Document glass cover 5 Operator panel 6...

Page 16: ...e 18 Faceup stacker 19 AC power socket 20 Air vents 21 LINE connection for MB451 MB451w MB471 MB471w MB491 ES4191 MFP only 22 TEL connection for MB451 MB451w MB471 MB471w MB491 ES4191 MFP only 16 13 1...

Page 17: ...the time of shipping the machine Please keep it as you will need it should you wish to transport the machine at some point in the future 1 Remove your machine from the box and remove cushioning mater...

Page 18: ...or close the scanner 10 Open the scanner unit 11 Remove the protection tapes and remove desiccants and films 12 Press the top cover open button 8 and open the top cover 13 Lift the image drum from pri...

Page 19: ...not connect with the ground of a water pipe a gas pipe and a telephone wire or lightning rod without fail Make sure to connect with the ground terminal before connecting the power cord to the power su...

Page 20: ...turns off automatically appears in the operator panel and power switch indicator blinks every 1 second Then the machine turns off automatically and power switch indicator goes out Note Turn the power...

Page 21: ...sleep mode is set to 30 minutes You can change the time interval by pressing the SETTING key on the operator panel and then selecting Admin Setup Management Power Save Sleep Time Returning to the Sta...

Page 22: ...B471 MB471w MB491 ES4161 MFP ES4191 MFP only Install an optional second tray unit tray 2 when you want to increase the paper capacity of your machine After installation you need to configure the print...

Page 23: ...rinters 2 Right click the OKI MB491 icon and select Printer properties If you have installed multiple printer drivers select Printer properties OKI MB491 PCL or OKI MB491 PCL XPS 3 Select the Device O...

Page 24: ...ng procedure uses Mac OS X 10 4 11 as an example Depending on an OS the description may be different 1 From Go select Utilities and then double click Printer Setup Utility 2 Select the name of your ma...

Page 25: ...s menu screen Flashes turns on if there is a status item to be displayed 7 SETTING key Displays the equipment setting menu screen 8 REDIAL HELP key for MB451 MB451w MB471 MB471w MB491 ES4191 MFP HELP...

Page 26: ...haracters are entered 14 RIGHT key Proceeds to the next screen Shifts the highlighted selection to the right while an item is selected or characters are entered 15 OK key Confirms the highlighted item...

Page 27: ...the numbers labeled on each key as well as the other characters by pressing the keys repeatedly 1 Press a key on the ten key pad until the character you want appears in the text file 2 Repeat step 1 u...

Page 28: ...creen keyboard is displayed CTRL mode Pressing the CTRL key enables you to enter symbols The following screen keyboard is displayed Note When the QWERTY keyboard cover is open the numerical keypad can...

Page 29: ...o 8 5 inches wide and 148 to 355 6 mm 5 83 to 14 inches long 2 Tray 2 can contain paper 148 to 216 mm 5 83 to 8 5 inches wide and 210 to 355 6 mm 8 27 to 14 inches long 3 The MP Tray MB451 MB451w MB47...

Page 30: ...pes should be folded Com 9 98 4 x 225 4 3 875 x 8 875 Com 10 104 8 x 241 3 4 125 x 9 5 DL 110 x 220 4 33 x 8 66 C5 162 x 229 6 4 x 9 Index card Index card 76 2 x 127 0 3 x 5 Label A4 210 x 297 0 1 0 2...

Page 31: ...roll pressure fusing used in this type of printer Window envelopes are not suitable Labels Labels should also be of the type recommended for use in copiers and laser printers in which the base carrier...

Page 32: ...l 13 5 Legal 14 Executive Statement 16K 184 x 260 mm 16K 195 x 270 mm 16K 197 x 273 mm Custom 250 sheets when paper weight is 80 g m2 Light 60 to 63 g m2 16 to 17 lb Medium Light 64 to 74 g m2 18 to 1...

Page 33: ...MB471w MB491 ES4191 MFP A4 A5 B5 A6 Letter Legal 13 Legal 13 5 Legal 14 Executive Statement 16K 184 x 260 mm 16K 195 x 270 mm 16K 197 x 273 mm Custom Com 9 Envelope Com 10 Envelope Monarch Envelope D...

Page 34: ...e 3 6 Push the paper tray until it stops Register the loaded paper on your machine Proceed to Configuring the Tray Settings P 36 Loading Paper on the MP Tray MB451 MB451w MB471 MB471w MB491 ES4191 MFP...

Page 35: ...in the MP tray load them face up with the orientation as stated below Your envelopes Monarch Com 9 Com 10 DL and C5 are loaded with the flap folded and the flap should come to the right side to the fe...

Page 36: ...e top screen is displayed Registering Custom Sizes To load custom size paper you need to register the width and length of the paper before printing The range of the sizes you can set differs according...

Page 37: ...eup stacker is not available in duplex printing 1 Pull the faceup stacker on the rear side of the machine and open it toward you 2 Unfold the faceup stacker Documents You can use the auto document fee...

Page 38: ...face up on the ADF If your documents are portrait load them with the top edge of the documents in first If your documents are landscape load them with the left edge of the documents in first 2 Adjust...

Page 39: ...the document glass cover gently Reference Set Document Direction according to the direction of your document to get the output you want The factory default is Portrait Refer to Changing Image Orienta...

Page 40: ...Enter and press 5 Press the to select Fax Setup and then press 6 Press the to select Fax Setting and then press 7 Press the to select Country Code and then press 8 Press the or to select your country...

Page 41: ...nly 1 Plug one end of the Telephone cable into the LINE connection of your machine and the other end into a Public Line Analog Note Connect telephone cable to LINE connection without fail Never connec...

Page 42: ...ing to IP Telephone Plug the Telephone cable connected to the IP telephone into the LINE connection of your machine Remove the telephone connector cover Plug the external telephone s cable into the TE...

Page 43: ...ephone cable connected to a control device including PBX etc into the LINE connection of your machine Memo Set PBX Line to ON Refer to PBX Connecting P 45 Settings for each dialing type The factory de...

Page 44: ...next box press the 9 Press the or to select the current time and then press To move to the next box press the 10 When the setup menu screen is displayed press to complete the setup Specifying Sender I...

Page 45: ...cifying Reception Mode The optimal reception mode differs depending on the environment for your machine Refer to the following description Fax Ready Mode This mode is recommended when you use the mach...

Page 46: ...f Drivers The types of the drivers that can be installed are as follows For Windows For Mac OS X Note Depending on a version of a printer driver Windows or Mac OS X the description may be different Ty...

Page 47: ...Turning Off Your Machine P 20 3 Plug one end of the Ethernet cable into the network interface connection on the back of the machine 4 Plug the other end of the Ethernet cable into the hub Connecting u...

Page 48: ...Please wait for a short time and then retry Configuring automatically using PIN method 1 Log in as the administrator 2 Press the to select Network Menu and then press the 3 Press the to select Network...

Page 49: ...u want to connect to After entering the SSID move the cursor to the Done field and press 8 In the security settings screen select the same security setting as the wireless AP that you want to connect...

Page 50: ...eared c Enter the same KEY as the Pre Shared KEY set for the wireless AP that you want to connect to After entering the Pre Shared KEY move the cursor to the Done field and press Memo After entering t...

Page 51: ...2 Press the to select Network Menu and then press the 3 Press the to select Network Setup and then press the 4 Press the to select Enabling Wired Communications and then press 5 Press the to select Ye...

Page 52: ...f obtaining the IP address automatically press the and select Auto and press Proceed to step 12 8 Enter the IP address and press To move to the next box press the 9 Enter the subnet mask and press To...

Page 53: ...printer driver and fax driver you wish to install and click the Install bunch button Memo By factory default PCL driver Scanner driver and ActKey are selected All drivers and software packages are ins...

Page 54: ...ter and set your machine as a network printer Select the protocol for your network connection from the following EtherTalk Bonjour Note EtherTalk is not supported in Mac OS X 10 6 or later Disable the...

Page 55: ...allation 5 From the Apple menu select System Preferences 6 Click Print Fax 7 Click 8 Click AppleTalk 9 Select the name of your machine and then check that OKI MB491 PS is displayed in Print Using 10 C...

Page 56: ...work Setup and press 8 Press the to select EtherTalk and press 9 Press the to select Enable and press 10 Press the until the top screen is displayed Next install the driver in the computer 1 From the...

Page 57: ...Format for 19 Click OK 20 Remove Software DVD ROM from the computer The installation is complete Using Bonjour For Mac OS X 10 5 to 10 7 Then install the driver in the computer and set the machine as...

Page 58: ...ick to remove your machine from Print Fax and then Redo the procedure from step 8 to 12 14 Close Print Scan For Mac OS X 10 5 and 10 6 Print Fax 15 Remove Software DVD ROM from the computer The instal...

Page 59: ...MAC address 13 Click Add 14 If the Installable Options window is displayed click Continue If you have installed the optional second tray unit before the driver installation configure each item and th...

Page 60: ...B cable into the network interface connection Doing so may damage your machine Installing a Printer and Fax Driver For Windows Note You must be logged in as an administrator to complete this procedure...

Page 61: ...a malfunction 12 Click the Exit button 13 Remove Software DVD ROM from the computer The installation is complete Print a test page to check that the printer driver is successfully installed on the co...

Page 62: ...e For Mac OS X 10 4 0 to 10 4 11 Memo The procedure below uses Mac OS X 10 4 11 as an example Depending on your OS the description may be different 1 Ensure that your machine and the computer are turn...

Page 63: ...Connection is USB and then check that OKI MB491 PS or OKI MB491 PCL is displayed in Print Using 9 Click Add 10 Check that the name of your machine is displayed in Printer List and then close the windo...

Page 64: ...com Up to 80 characters B 2 SMTP server address The address of the server used when sending e mails smtp test com B 3 POP3 server address The address of the server used when receiving e mails pop3 te...

Page 65: ...e page into A 3 Note It is necessary that the gateway address be configured beforehand Also if using an Internet service provider it is necessary that the DNS server be configured If it has not been c...

Page 66: ...s of the machine and enter an e mail address to be used by your machine in B 1 of the Setup Information Form If the e mail address for your machine is specified by the network administrator enter the...

Page 67: ...Enter and then press 22 Press the and then enter the information in B 8 23 Select Enter and then press 24 When the setup menu screen is displayed press The setup for Scan To E mail Scan To Fax Server...

Page 68: ...NS in Detailed Settings 4 Close Sharing Determining the Names of the Items Required for Scan To Network PC Determine the names of the following items and fill in C 2 to C 6 on the Setup Information Fo...

Page 69: ...nded to create a folder in the local drive C drive or D drive not on the desktop My Documents or network drive 11 Right click the folder created in step 10 and select Properties 12 Select the Sharing...

Page 70: ...nter the value of C 2 in the text box and click Next 5 Select Limited and click Create Account 6 Click the icon of the user account created in step 5 7 Select Create a password 8 Enter the value of C...

Page 71: ...5 13 Select Just enable file sharing in Windows Firewall and then click OK 14 Select the Share this folder on the network and Allow network users to change my files check box and then click OK Proceed...

Page 72: ...ge password and Password never expires 5 Click Close 6 Double click User and check that the user created in step 4 is displayed 7 Close the window 8 Create a new folder on the computer with the name e...

Page 73: ...the value in C 3 in both Password and Verify 8 Click Create User for Mac OS X 10 5 and 10 6 Create Account Memo After the dialog box for auto login appears disable the auto login 9 Check that an accou...

Page 74: ...ssword and click OK 23 Click Done 24 Close Sharing Proceed to Creating a Profile for Scan To Network PC P 75 For Mac OS X 10 4 0 to 10 4 11 Memo The following procedure uses Mac OS X 10 4 11 as an exa...

Page 75: ...en you perform Scan To Network PC with the computer 1 Press the the SETTING key on the operator panel 2 Press the to select Profile and then press 3 Press the to select the profile number you want to...

Page 76: ...e setup for Scan To Network PC is complete Reference For details how to use Scan To Network PC refer to Scan to Network PC P 109 Managing Profiles To perform the Scan To Network PC Auto Deliver or Tra...

Page 77: ...uch as the settings and status of your machine Printing Procedure 1 Press the SETTING key on the operator panel 2 Press the to select Reports and press 3 Press the to select Configuration and press 4...

Page 78: ...ten key pad You can enter up 1 to 99 sets If you have entered an incorrect value press the CLEAR key and then enter the correct value 5 Press to start copying Reference For details on how to configur...

Page 79: ...Paper Feed You can select the size of the document to be copied 1 Press the to enter the Change Settings menu 2 Press the to select Paper Feed and then press 3 Press the to select a tray and then pre...

Page 80: ...om ratio using the ten key pad Using Auto By selecting Auto the zoom ratio is automatically determined according to the selected scan size and paper tray Note You can use Auto only when copying on A4...

Page 81: ...Internet faxes as well as for scan functions You can configure faxes from Applied Settings and Internet faxes and scans from Reading Settings Reference For details on the DuplexCopy functions refer to...

Page 82: ...lect Duplex Copy and then press 3 Press the to select the desired value and then press 4 Press the until the start screen is displayed Note You can copy duplex to duplex or duplex to simplex copies on...

Page 83: ...enu 2 Press the to select Image Settings and then press 3 Check that Background Removal is selected and then press 4 Press the or to select the desired value and then press Memo 3 is the standard valu...

Page 84: ...t to 3 minutes as the factory default setting Reference You can change the auto reset time by configuring Admin Setup from the SETTING key For details refer to the User s Manual Advanced Using the RES...

Page 85: ...on the document glass 3 Check that Fax is selected and press to open the fax start screen 4 Check that Add Destination is selected on the start screen and then press 5 Specify a destination You can s...

Page 86: ...ring Flash Orders your PBX Private Branch Exchange to connect you with PSTN Public Switched Telephone Network When inputting enter F Enter Pause and by pressing on the ten key pad When you press you t...

Page 87: ...screen Press the SHIFT key to select the speed dials no 9 to 16 assigned to the one touch key pad Memo You can use the one touch key pad also on the screen that is displayed after pressing the FAX HO...

Page 88: ...appears Adjusting Density Density You can adjust the scan density from 7 levels 1 Press to select Fax Functions on the fax standby screen and then press 2 Press the to select Density and then press 3...

Page 89: ...ess the 6 Press the to select Delete Reserved Tx and then press 7 Press the or select Yes and then press Note When you select a broadcast job the job itself is cancelled Memo The job that is being tra...

Page 90: ...can talk to the sender after receiving faxes Memo If you often receive calls it is recommended that you activate Tel Priority Mode For more detailed information on Tel Priority Mode please refer to Us...

Page 91: ...he default password is aaaaaa 4 Select Enter and then press 5 Press the to select User Install and then press 6 Press the to select DRD Type and then press 7 Press the to select DRD Type and then pres...

Page 92: ...heck that Fax is selected and then press 5 Press the to select a paper tray and then press 6 Press the to select a value and then press When you select ON Prior for a paper tray the tray is used in pr...

Page 93: ...er a name Enter a name up to 24 characters c Select Enter and then press 7 Press the to select Fax Number and then press 8 Enter a phone number Enter a phone number up to 40 digits 9 Select Enter and...

Page 94: ...ct Phone Book and then press 3 Press the to select Group No and then press 4 Press the to select a group number and then press 5 Check that Register is selected and then press When editing registered...

Page 95: ...ion Tool or introducing a new machine register the machine in the Configuration Tool 1 Select Start All Programs Okidata Configuration Tool Configuration Tool 2 Select Register Device from the Tools m...

Page 96: ...E mail and Internet Fax P 65 Transmitting Data to Fax Server 1 Press the FAX HOOK key on the operator panel 2 The original can be set by an automatic document feeder or the document glass 3 Select FAX...

Page 97: ...the transmission history 1 Press the to select Transmission History and then press 2 Press the to select an entry and then press The box is checked You can select multiple entries 3 When you have sele...

Page 98: ...E mail and Internet Fax P 65 Sending an Internet Fax 1 Press the FAX HOOK key on the operator panel 2 Place your document with text face up in the ADF or face down on the document glass 3 Press the to...

Page 99: ...3 When you have selected all the destinations press the 4 Check that Complete is selected and then press 5 Press the to return to the Internet fax start screen Using the Transmission History You can s...

Page 100: ...e selected all the destinations press the 7 Check that Complete is selected and then press 8 Press the to return to the Internet fax start screen For Advanced Search 1 Press the to select LDAP and the...

Page 101: ...ess the to select the destination you want to change and then press The check box is selected You can select multiple addresses 4 When you have selected all the destinations to be changed press the 5...

Page 102: ...nnection in Windows if the equipment IP address is changed please change the settings in Network Configuration For Mac OS X please change settings in network scanner setting tools For details refer to...

Page 103: ...ch MFP is selected select the machine and click Next 11 Set the scanner driver name and click Next 12 Enter the host name IP address and port number and then click Configure 13 Click Next 14 Click Nex...

Page 104: ...y and click Continue if OK 7 Read the license agreement and click Continue 8 Click Agree if you agree 9 Click Install To change the installation location of the driver click Change Install Location 10...

Page 105: ...ey does not work When ActKey is installed Network Configuration is also installed simultaneously Reference For details on how to start a scan job refer to the User s Manual Advanced Installing the Sof...

Page 106: ...ure Memo When you follow the procedure below the WIA is installed automatically as the scanner driver Note Before starting the installation select Network and Sharing Center from the Control Panel and...

Page 107: ...ation by direct input or from the address book groups e mail histories LDAP or one touch key 7 Press or Specifying a Destination You can specify a destination in the following six ways Using the addre...

Page 108: ...Manual Advanced For Simple Search 1 Press the to select LDAP and then press 2 Check that Simple Search is selected and press 3 Enter a keyword to search for a user name on the LDAP server 4 Select Ent...

Page 109: ...hen press 5 Press the to select a profile and then press 6 Press or Scan to USB Memory You can save the scanned document in a USB memory Reference For the specifications of USB memory that you can use...

Page 110: ...ference For details on how to enable the network TWAIN setting refer to the User s Manual Advanced For details on how to install the ActKey utility refer to the User s Manual Advanced For the procedur...

Page 111: ...modes simple scan mode secure scan mode and WSD scan In simple mode the scanning can be started from all computers via USB and Network In secure scan mode the scanning can only be started from the al...

Page 112: ...B or OKI MB4x1_ES41x1_MPS42x Network If you select OKI MB4x1_ES41x1_MPS42x USB proceed to step 10 If you select OKI MB4x1_ES41x1_MPS42x Network and the network scan is the second or more scanning proc...

Page 113: ...Import from File of Adobe Photoshop CS3 to select OKI MB4x1_ES41x1_MPS42x Network The window appears 14 Click a scan button Scanning starts 15 Select Quit Photoshop from Photoshop Secure Scan Mode Fo...

Page 114: ...ck a scan button The document scan starts Memo According to the format scanning by the Document Feeder may fail after the second page For example for Windows FAX and Scan scanning by the Document Feed...

Page 115: ...press 7 Press the to select E mail Address and then press 8 Enter an e mail address up to 80 characters and then press 9 Press Registering From Transmission History You can add e mail addresses to the...

Page 116: ...to select E mail Group and then press 4 Press the to select a group number and then press 5 Press the to select Delete and then press 6 Press the or to select Yes on the confirmation screen and then...

Page 117: ...or domain name and then press 4 Check that Register is selected and then press If editing registered numbers select Edit 5 Check that Destination is selected and then press 6 Enter a destination A des...

Page 118: ...application 2 Configure the print settings on the printer driver screen and start printing The following explains how to configure the paper size the paper source and the media weight on each printer...

Page 119: ...enu select Page Setup 2 Select the printer you want to use from Format For 3 Select a paper size from Paper Size and then click OK 4 From the File menu select Print 5 Select Paper Feed from the panel...

Page 120: ...rce the tray with the designated paper type is automatically selected For details on the automatic selection of trays refer to the User s Manual Advanced If you select the MP tray for a paper source t...

Page 121: ...acters may not be read correctly You can select and print one file in your USB memory at a time Starting a Print Job 1 Insert the USB memory into the USB port on the machine Note Insert the USB memory...

Page 122: ...simplex or 2 sided duplex printouts Note When printing a PRN file setting of double sided printing follows the driver settings at the time of file creation 1 Press the to select Print Setup and then p...

Page 123: ...nd then press 4 Press the to return to the start screen Canceling a Print Job You can cancel a print job from the USB memory by pressing the STOP key on the operator panel Printing will stop while a m...

Page 124: ...a user name and password to each user in advance You can register up to 100 PINs and 100 sets of user name and password If the access control is enabled according to the setting the user must enter t...

Page 125: ...is aaaaaa 4 Select Enter and then press 5 Press the to select Management and then press 6 Press to select System Setup and then press 7 Check that Access Control is selected and then press 8 Press the...

Page 126: ...elect the Tab check box and then click Change 4 Click OK 5 From the File menu select Close 6 Click Start and select Devices and Printers 7 Right click the OKI MB491 icon and select Printer properties...

Page 127: ...an example The items here may differ depending on the application you are using 1 Click Start All Programs Okidata Print Job Accounting Client Change Job Accounting Mode On the User Account Control wi...

Page 128: ...then press 6 Press the to select System Setup and then press 7 Check that Access Control is selected and then press 8 Press the to select User Password and then press 9 Press the to select User Authen...

Page 129: ...2 From the File menu select Print 3 Select the printer driver you want in Select Printer and click Preferences 4 Select the Job Options tab 5 Click User Auth 6 Select the Use User Authentication chec...

Page 130: ...ect Print 3 Select your machine s fax driver in Select Printer and click Preferences 4 On the Setup tab click User Authentication 5 Select the Use User Authentication check box 6 Enter the user name i...

Page 131: ...ly so that it does not tear If the paper tears be sure to remove all of the pieces Note The image drum the green tube is very delicate Handle it carefully Do not expose the image drum to direct sunlig...

Page 132: ...inter insert both projections A of the front end of transcription unit into holders of the printer 8 Insert rear projections located close to both handles of the transcription unit into both mounting...

Page 133: ...n Hold the top end of paper with your hands and carefully pull out the paper If the bottom end of paper is visible hold the paper by your hands and carefully pull out the paper Note Check that there i...

Page 134: ...um complete with toner cartridge ensuring that the pegs 1 2 correctly locate into the slots on each side of the printer 3 Note Check that there is no paper remaining inside the machine Remove the pape...

Page 135: ...to remove all of the pieces 6 Re install the image drum complete with toner cartridge ensuring that the pegs 1 2 correctly locate into the slots on each side of the printer 3 7 Close the top cover 8...

Page 136: ...uments from the document tray 2 Open the ADF cover 3 Hold the jammed document by the top edge and gently pull it out If the edge of the document can been seen under the paper guide 1 lift the paper gu...

Page 137: ...spection is required PU Flash Error Blinks Firmware error has occurred Contact your dealer Inspection is required PU Communication Error Blinks Firmware error has occurred Contact your dealer COLOR To...

Page 138: ...ls to Close Blinks The memory has overflowed If you are performing other tasks simultaneously finish them and try again If this does not work reduce the print resolution 420 Memory Overflow 420 Please...

Page 139: ...eft 547 K 372 380 381 382 389 390 Paper Jam ERRCODE Please open the scanner unit and the top cover Please see Help for details Blinks Paper jam has occurred Remove the jammed paper Error 372 Misfeed f...

Page 140: ...resolved contact your dealer Please call service Scanner unit failed to detect printer unit Blinks An error has occurred between the scanner and printer units Turn the machine off and then on again I...

Page 141: ...etFAX E mailPrint FaxToPrint with communication data saving an error has occurred in the TIFF or JPEG data analysis 409 Please open the top cover 409 Faceup Stacker Error Blinks Because the Face Up st...

Page 142: ...or If the error is not resolved reduce the data to be transmitted as PC Fax Offline Mode Lights up The machine is off line and cannot print received fax data Press the PRINT key on the operator panel...

Page 143: ...rror has occurred Check the network configuration cable connection and status and the server status Please check SMTP settings Please see Help for details to close Blinks An error has occurred while c...

Page 144: ...k configuration cable connection and status and the server status Check the server settings If the username is managed from the domain input Username Domainname on Username settings Server Login faile...

Page 145: ...connected This message will be displayed until the unsupported USB device disconnected Please remove the USB Hub USB Hub is connected Blinks A USB hub has been connected This machine does not support...

Page 146: ...a PDF file with the encryption function enabled When printing an encrypted PDF file open it in your computer and then print it This document restricts printing to a valid owner password to close Ligh...

Page 147: ...sent by a user who is not authorized for printing is deleted Warming up Lights up The machine is warming up or cooling down Wait for a while without turning off the machine This is not a malfunction o...

Page 148: ...y on the operator panel to open the status menu 2 Be sure that System Status is selected and then press 3 Press the to select the item you want to check and then press Checking the Device and Job Stat...

Page 149: ...display screen of the operator panel Error Messages Displayed on the Screen on P 137 or press the HELP key on the operator panel P 137 The interface setting is disabled Check the setting of the inter...

Page 150: ...Click OK Advanced Cause Remedy Reference Using a crossover cable Use a straight cable The machine is turned on before a cable was connected Connect cables before turning on the machine P 47 The hub a...

Page 151: ...alog box select the Printer menu and then clear the check of Use Printer Offline Select the type of driver you want A switch buffer extension cable or USB hub is being used Directly connect the machin...

Page 152: ...nch an installer or utility the User Account Control dialog may appear Click Yes or Continue to run the installer or utility as an administrator If you click No the installer or utility does not start...

Page 153: ...s the machine are the search target When you cannot find a machine specify the IP address of the machine in the Add Printer or Confirm Connections screen Print Super Vision Unable to access the machin...

Page 154: ...age capture the user interface of the TWAIN driver is not displayed Use the user interface of the image capture and then scan data Item Symptom Cause Remedy TWAIN driver Unable to scan by image captur...

Page 155: ...e is loaded and then select ON or ON Prior Is the loaded paper compatible with duplex printing Duplex copying cannot be done without the proper paper size document type or document weight Load the rig...

Page 156: ...Is Mixed Size set to ON Set Mixed Size to OFF Advanced The size of the copied output is different from the size of the original document Is the proper size paper for the document loaded on the paper t...

Page 157: ...e dial line type for your region P 43 Did you load the document correctly Load the document correctly P 38 Did you dial the correct number Dial the correct number Is the recipient s line busy Wait unt...

Page 158: ...lain or Recycled in Media Type for the paper tray used for fax reception Advanced Symptom Point to check Remedy Reference Cannot start scan job Is the machine turned on Hold down the power switch for...

Page 159: ...setting correct Check the DNS server address setting P 65 Is another job running Wait until the other job finishes Is an error occurring Follow the instructions displayed on the display screen of the...

Page 160: ...oller of the ADF are dirty Clean the document glass and paper feed roller P 172 Horizontal lines and spots appear periodically If the interval of lines or spots is about 94 mm 3 7 inches the image dru...

Page 161: ...supported paper The document glass or the document holding pad is dirty Clean the document glass and the document holding pad P 172 The entire page is printed black The machine may be malfunctioning C...

Page 162: ...for the machine P 29 The paper is moist or has a static charge Use paper stored under proper temperature and humidity conditions P 31 The paper is wrinkled folded or curled Use appropriate paper for...

Page 163: ...rect Press the SETTING key and then select Paper Setup tray name Media Type Media Weight Then specify the appropriate values Or specify the heavier weight in Media Weight P 36 The paper is light Use h...

Page 164: ...splay screen is blank The machine is in the sleep mode Check if the POWER SAVE key lights up and press the POWER SAVE key to activate the machine P 20 Print data is not transmitted to the machine The...

Page 165: ...ons Close the applications you are not using It takes a long time to finish printing The processing speed of the computer may be slowing down the print job Use a computer with faster processing speed...

Page 166: ...Time communication started Received number of pages Memo The communication type is printed for manual reception F code polling F code secure reception or F code bulletin board reception Machine s Stat...

Page 167: ...touch the periphery of the label Caution High Temperature which may cause burns Keep the toner cartridge out of reach of young children If young children swallow toner powder seek immediate medical a...

Page 168: ...image drum Firmly press the grooves on the right side of the toner cartridge against the protrusion of the cartridge guide on the right side of the image drum While holding down the toner cartridge to...

Page 169: ...educed by more than half depending on the conditions of printing Note The print quality may deteriorate after the toner cartridge has been unpacked for a year Replace it with a new one Procedure for R...

Page 170: ...e the Image Drum will be displayed and printing will stop A guideline for replacing the image drum is every 25 000 pages or so for A4 sized paper with single sided printing However this number of page...

Page 171: ...lign both guide posts of the image drum with their guide grooves on the printer and gently set the image drum into the printer Turn the lever in the direction shown Note The image drum the green cylin...

Page 172: ...with a soft cloth lightly moistened with water 3 Close the document glass cover Memo If the document glasses surface and the document holding pad get too dirty wipe them with a soft cloth lightly mois...

Page 173: ...eed rollers 1 inside the machine with a soft cloth lightly moistened with water 3 Wipe the paper feed roller 2 on the Tray 4 Push the Tray back into the machine For MP Tray MB451 MB451w MB471 MB471w M...

Page 174: ...ge drum to direct sunlight or very bright interior light approximately more than 1500 lux Even under the normal interior light do not leave it for more than 5 minutes 1 Hold down the power switch for...

Page 175: ...ect sunlight or very bright interior light approximately more than 1500 lux Even under the normal interior light do not leave it for more than 5 minutes 1 Hold down the power switch for about a second...

Page 176: ...e with packing materials 10 Lift your machine and put it in a box Note Use the packing materials attached to your machine when purchased Remove the vinyl tape to secure the image drum and toner cartri...

Page 177: ...SD memory card Resident 4 GB Weight 20 kg including consumables Dimensions 427 W x 425 D x 455 H Power supply N22205A N22206A N22207A N22208A 120VAC 10 50 60Hz 2 N22205B N22206B N22207B N22208B 220V...

Page 178: ...tive Document glass A6 B5 A5 A4 letter executive First copy Time Mono Less than 11 seconds ADF High Speed Less than 11 seconds ADF High Speed Less than 11 seconds ADF High Speed Less than 10 seconds A...

Page 179: ...ce LED Document thickness ADF 60 to 105 g m2 16 to 28 lb Document glass 20 mm ADF document capacity 50 sheets 80 g m2 Scanning area ADF 105 x 148 215 9 x 355 6 mm 4 13 x 5 8 8 5 x 14 inches Document g...

Page 180: ...IF Storage device USB memory Up to 32 GB Not all USB memory products are guaranteed to work Supported file system FAT12 FAT FAT16 FAT32 File format PDF supported Encryption M TIFF RAW G3 G4 compressed...

Page 181: ...Manual Feeder Legal 13 13 5 14 letter executive Statement A4 A5 B5 A6 C5 C6 DL Com 9 Com 10 Monarch 16K 197 x 273 mm 195 x 270mm 184 x 260 mm custom size Duplex Printing Legal 13 13 5 14 letter execut...

Page 182: ...paper edge not applicable to special media such as envelopes Print precision Print beginning 2 mm paper skew 1 mm 100 mm image expansion 1 mm 100 mm 80 g m2 Warm up time From power on Less than 60 sec...

Page 183: ...our Rendezvous SNTP LLTD Web Services Discovery WSD SSL TLS IPSec CIFS SMB Version 1 0 LDAPv3 Kerberos IEEE820 11 b g n Infrastructure Mode WEP WPA TKIP AES WPS PCB WPS PIN Open system authentication...

Page 184: ...ation 540 W Idle 80 W Peak 950 W Sleep mode Less than 3 W Power save mode Less than 14 W Off mode Less than 0 5 W Typical operation 580 W Idle 80 W Peak 950 W Sleep mode Less than 3 W Power save mode...

Page 185: ...Line Line interface RJ11 x 2 Line TEL Document size ADF A4 letter legal 13 13 5 14 Document glass A4 letter Transmission speed Approx 3 seconds page ITU T MMR Normal Stored document memory size 4 MB...

Page 186: ...il server authentication SMTP AUTH POP3 Supported mail server application Lotus Domino Mail Server 5 0 Microsoft Exchange 2000 Server Microsoft Exchange 2003 Server Microsoft Exchange 2007 Server Red...

Page 187: ...4 letter executive Statement A4 A5 B5 A6 C5 C6 DL Com 9 Com 10 Monarch 16K 197 x 273 mm 195 x 270mm 184 x 260 mm custom size Manual Feeder Legal 13 13 5 14 letter executive Statement A4 A5 B5 A6 C5 C6...

Page 188: ...to 27 C Consumables Maintenance Unit Toner cartridges image drum MB441 MB451 MB451w Interface USB 2 0 High Speed Host IF Storage device USB memory Up to 32 GB Not all USB memory products are guarantee...

Page 189: ...0 or later MB441 MB451 MB451w Wireless LAN adapter OkiLAN520w Wireless LAN standard IEEE 802 11b g n conformity 2 4GHz Transfer rate 11n technology Max150Mbps IEEE802 11g Max54Mbps IEEE802 11b Max11Mb...

Page 190: ...ser is encouraged to try to correct the interference by one or more of the following measures Reorient or relocate the receiving antenna Increase the separation between the equipment and receiver Conn...

Page 191: ...artments in which the use of the 2400 2483 5 MHz band is permitted with an EIRP of less than lOOmW indoors and less than 10mW outdoors 01 Ain 02 Aisne 03 Allier 05 Hautes Alpes 08 Ardennes 09 Ari ge 1...

Page 192: ...dio station Do not use OkiLAN520w near a cellular phone TV or Radio A cellular phone TV and radio use a different radio band than our product Generally if they are used near OkiLAN520w it will not cau...

Page 193: ...the below steps using the drivers you want to set check Displays the Property screen For Windows Vista Windows Server 2008 1 Click Start and select Control Panel Printer 2 Right click on the OKI MB491...

Page 194: ...y 82 88 Dial Functions 86 Dial Type 43 Digital Television 42 Direction 80 Document Glass 38 Document Jam 136 Document Type 82 DRD 45 91 Duplex Copies 82 Duplex Printing 32 36 122 Duplex Scanning 38 E...

Page 195: ...ESET LOGOUT Key 25 84 125 128 Resolution Fax 88 S SCAN Key 25 107 109 110 112 Scan Resolution 83 Scan Size 38 79 88 Scan to E mail 107 Scan to Fax Server 96 Scan to Local PC 110 Scan to Network PC 109...

Page 196: ...6 1 814 8009 Website www okihu hu OKI Systems Italia S p A via Milano 11 20084 Lacchiarella MI Tel 39 0 2 900261 Fax 39 0 2 90026344 Website www oki it OKI Printing Solutions Platinium Business Park I...

Page 197: ...Blvd East Unit 1 Mississauga Ontario Canada L4W 4M8 T l 1 800 654 3282 T l c 1 905 238 4427 http WWW OKIPRINTINGSOLUTIONS COM WWW OKIPRINTINGSOLUTIONS COM Oki Data Americas Inc Am rica Latina OTRO 200...

Page 198: ...www okiprintingsolutions com Oki Data Corporation 4 11 22 Shibaura Minato ku Tokyo 108 8551 Japan 44917102EE Rev3...

Reviews: