


4
© 2012 OKI DATA CORPORATION All rights reserved
ES9160 MFP / ES9170 MFP
DISASSEMBLY AND REPLACEMENT
4 - 87
4.9.10
Installation of the fuser unit fuse (service part)
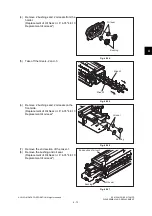
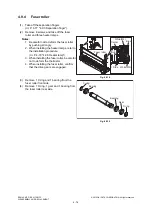
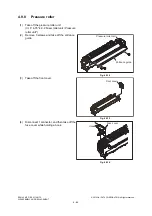
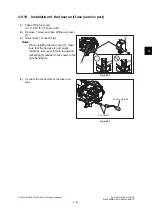
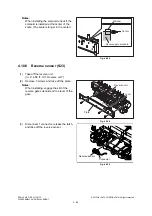
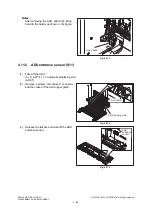
(1)
Take off the fuser unit
(
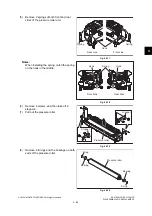
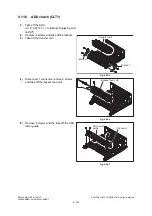
(2)
Remove 1 screw and take off the rear cover
[1].
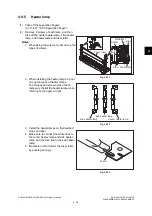
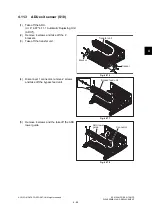
(3)
Disconnect 1 connector [2].
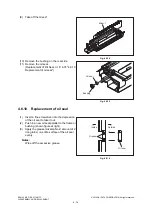
Notes:
•
When installing the rear cover [1], make
sure that the harness is not caught.
•
Install the rear cover [1] with the ground
leaf spring [3] outside of it as shown in the
right-hand figure.
Fig. 4-244
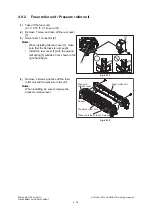
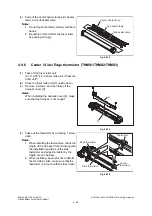
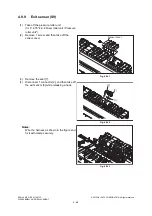
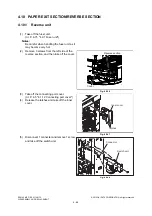
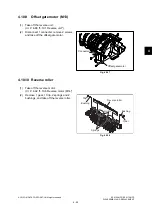
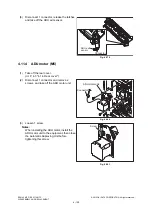
(4)
Connect the connectors of the fuser unit
fuse.
Fig. 4-245
[2]
[1]
[3]
[3]
Fuser unit fuse
Connector
Summary of Contents for ES9160
Page 12: ......
Page 24: ...ES9160 MFP ES9170 MFP 2012 OKI DATA CORPORATION All rights reserved FEATURES 1 2...
Page 308: ...ES9160 MFP ES9170 MFP 2012 OKI DATA CORPORATION All rights reserved SELF DIAGNOSIS MODES 5 56...
Page 832: ...ES9160 MFP ES9170 MFP 2012 OKI DATA CORPORATION All rights reserved REMOTE SERVICE 10 38...
Page 920: ...ES9160 MFP ES9170 MFP 2012 OKI DATA CORPORATION All rights reserved BACKUP FUNCTION 12 12...
Page 1086: ......
Page 1087: ......


