


4
© 2012 OKI DATA CORPORATION All rights reserved
ES9160 MFP / ES9170 MFP
DISASSEMBLY AND REPLACEMENT
4 - 15
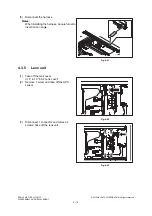
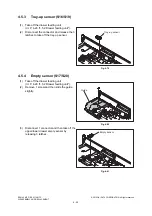
4.3.4
Exposure lamp
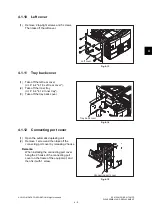
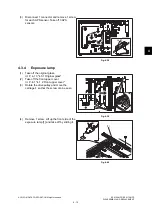
(3)
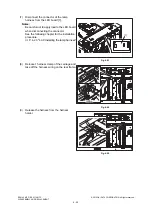
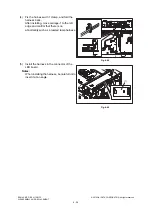
Disconnect 1 connector and remove 1 screw
for each APS sensor. Take off 3 APS
sensors.
Fig. 4-38
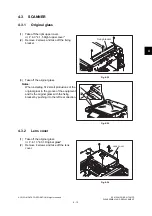
(1)
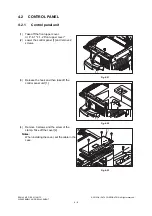
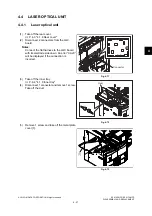
Take off the original glass.
P. 4-13 "4.3.1 Original glass"
(2)
Take off the front upper cover.
P. 4-1 "4.1.2 Front upper cover"
(3)
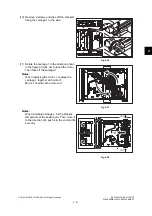
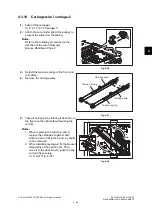
Rotate the drive pulley and move the
carriage-1 so that the screw can be seen.
Fig. 4-39
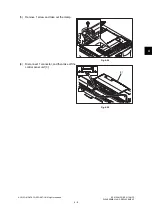
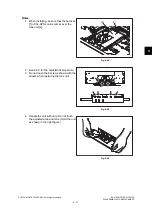
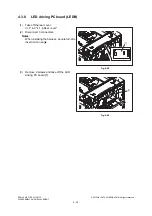
(4)
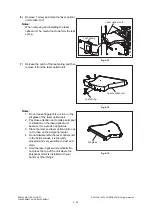
Remove 1 screw. Lift up the front side of the
exposure lamp [1] and take off by sliding it.
Fig. 4-40
Latch
[1]
Summary of Contents for ES9160
Page 12: ......
Page 24: ...ES9160 MFP ES9170 MFP 2012 OKI DATA CORPORATION All rights reserved FEATURES 1 2...
Page 308: ...ES9160 MFP ES9170 MFP 2012 OKI DATA CORPORATION All rights reserved SELF DIAGNOSIS MODES 5 56...
Page 832: ...ES9160 MFP ES9170 MFP 2012 OKI DATA CORPORATION All rights reserved REMOTE SERVICE 10 38...
Page 920: ...ES9160 MFP ES9170 MFP 2012 OKI DATA CORPORATION All rights reserved BACKUP FUNCTION 12 12...
Page 1086: ......
Page 1087: ......


