- 68 -
How to Load the Paper
1
2
4
5
6
3
Registering a Custom Size
(
Undefined Size)
When using custom sizes, configure the width
and length of the paper here.
1
Place the original(s) and paper.
&
Basic Guide
2
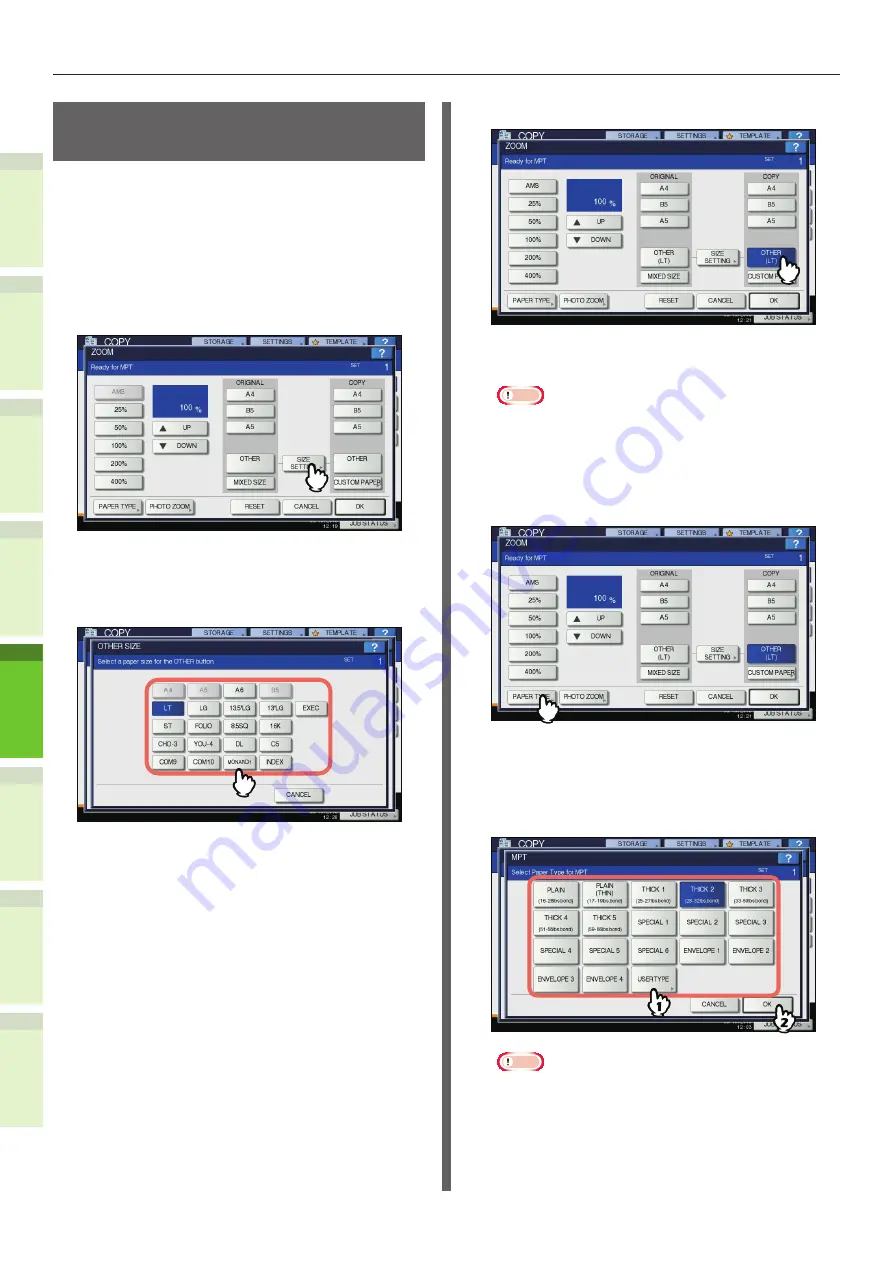
Press [SIZE SETTING] on the touch
panel.
3
Press the button of the same size as
the paper you placed on the multi-
purpose tray.
The selected size will be registered as an “OTHER”
size.
4
Press [OTHER] under “COPY”.
The paper size is now set to the one registered as
“OTHER” size.
Note
•
If the paper size is not selected in this step, copying
may be slowed down.
5
Press [PAPER TYPE] if the paper you
placed on the multi-purpose tray is
other than plain paper.
6
Press the button of the same paper
type as the paper you placed on
the multi-purpose tray. Then press
[OK].
Note
•
If you select a wrong paper type, this could cause a
paper misfeed or significant image trouble.
•
When you select a paper type, you can confirm it
with the icons displayed on the equipment status
indication area. For details, refer to the
Basic Guide
.


