


- 176 -
6. Network
3
Click [View Information].
4
Click [Network].
5
Click [Google Cloud Print].
6
Click [Using Cloud Service].
7
Change settings.
Changing from the Operator Panel
1
Press [Device Settings] on the touch panel.
2
Press [Google Cloud Print].
3
Press [Google Cloud Print Settings].
4
Enter the administrator name and password and press [OK].
The factory default administrator name and password are "admin" and "999999"
respectively.
5
Press [Using Cloud Service].
6
Select the type of settings.
Delete the information about the machine that is registered in Google Cloud Print by
following the procedure below.
1
Check that the machine is connected to a network.
If you delete the information with the machine connected to a network, the registration information on the Google
Cloud Print administrator screen is also deleted at the same time.
The Google Cloud Print administrator screen (https://www.google.com/cloudprint)
2
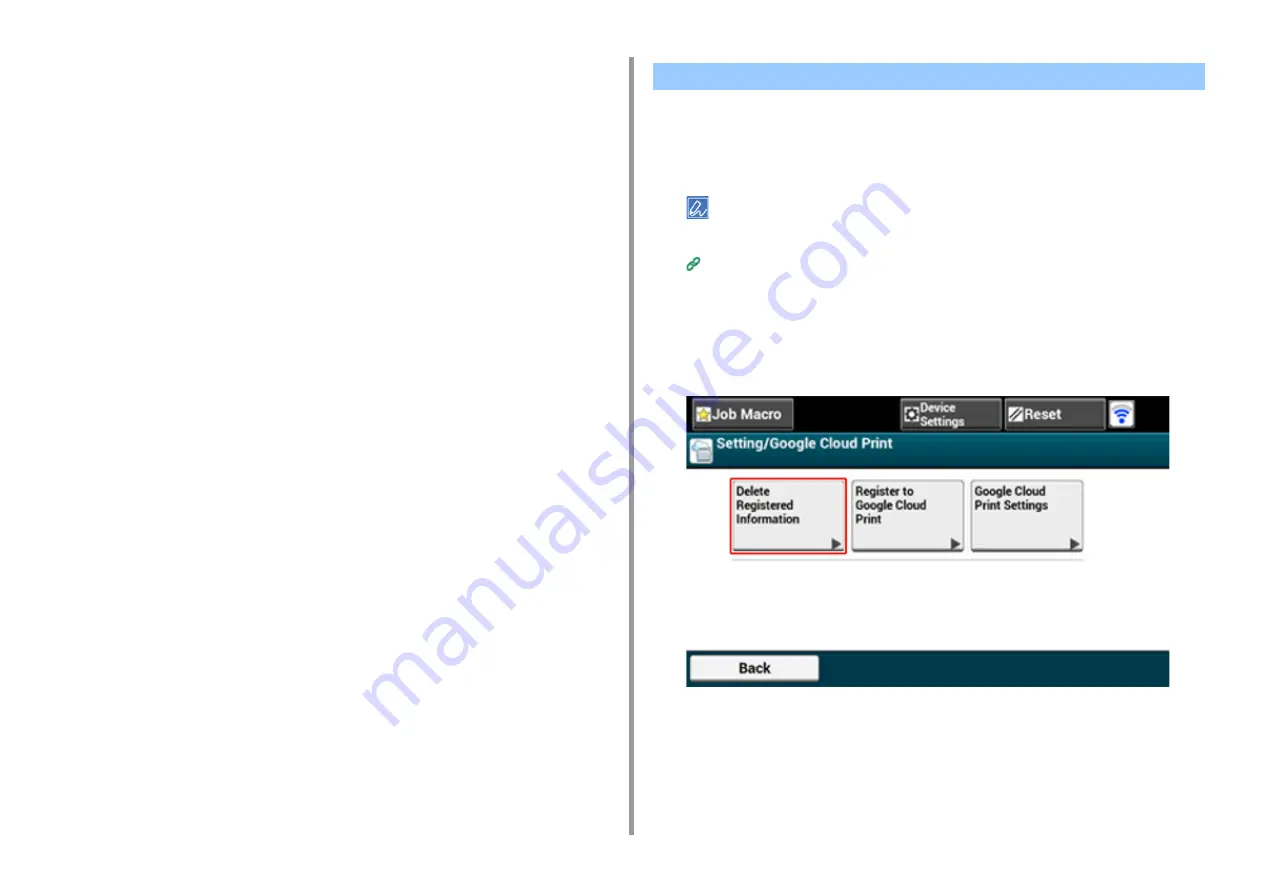
Press [Device Settings] on the touch panel.
3
Press [Google Cloud Print].
4
Press [Delete Registered Information].
5
Enter the administrator name and password and press [OK].
The factory default administrator name and password are "admin" and "999999"
respectively.
Deleting the Registered Information
Summary of Contents for ES5442
Page 1: ...C542 ES5442 Advanced Manual...
Page 14: ...14 1 Basic Operations 3 Draw the sub support...
Page 165: ...165 6 Network 3 Select OKI C542 from Printer 4 Set options 5 Click Print...
Page 239: ...239 7 Utility Software Storage Manager plug in Create or edit a file to download to a device...
Page 255: ...46532502EE Rev4...